
S
Se
er
rv
vi
ic
ce
e
M
Ma
an
nu
ua
al
l
--------------------------------------------Table of Contents-------------------------------------------
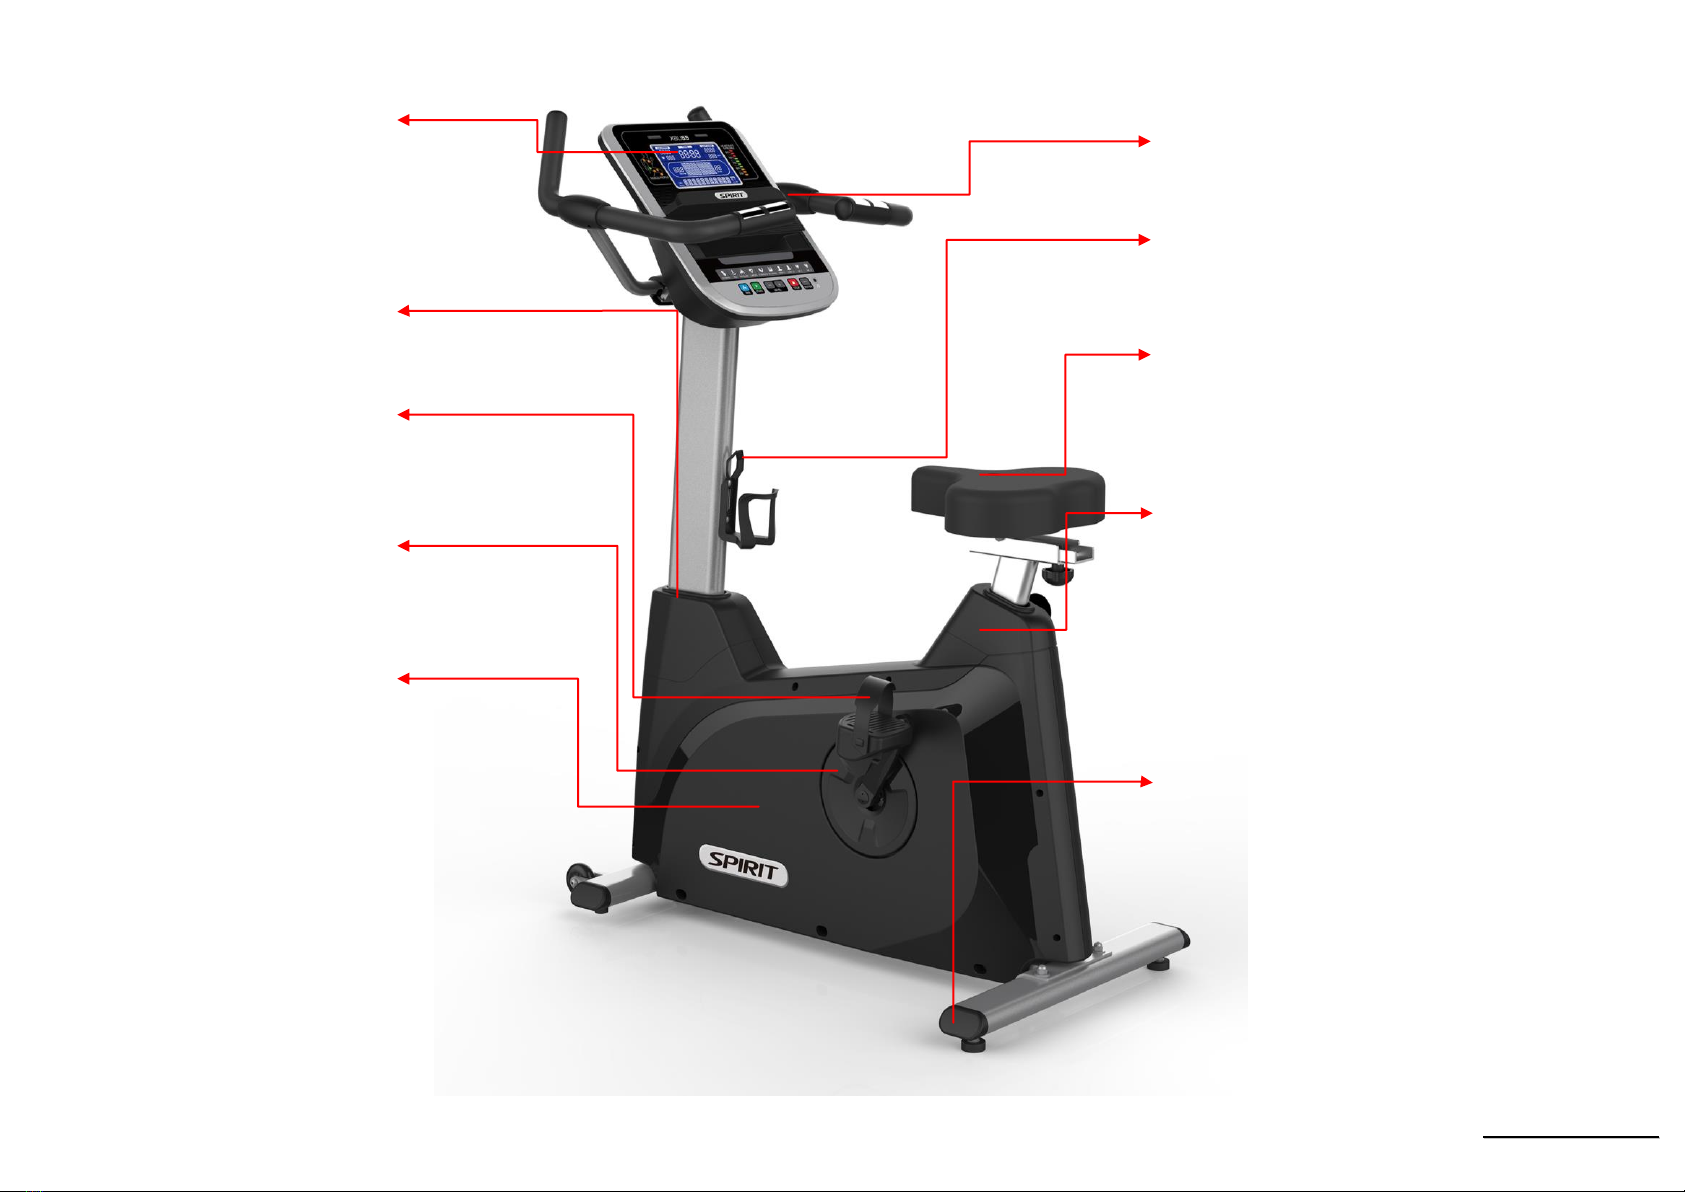
1. XBU55 Outlines
2. Electronic Parts
3. Electrical Configurations
4. Product Operation
5. Unit Block Diagrams
6. Basic Connections and Wiring
7. Product Safety Instructions
8. Error Messages / Troubleshooting
9. Troubleshooting
9-1. Console
9-2. Handle Bar and Console Mast(Take apart the console.)
9-3. Main Frame and Console Mast Cover
9-4. The Seat and Sliding Seat Mount
9-5. Inner Slide
9-6. Crank Arm and Pedal
9-7. Chain Cover (L)(R)
9-8. Handgrip End Cap
9-9. The Belt and Drive Pulley
9-10. Flywheel, Drive Belt and Bearing Housing
9-11. Console and Error Messages
9-12. Noises
9-13. Slipping Belt and Belt falling Off Manuall
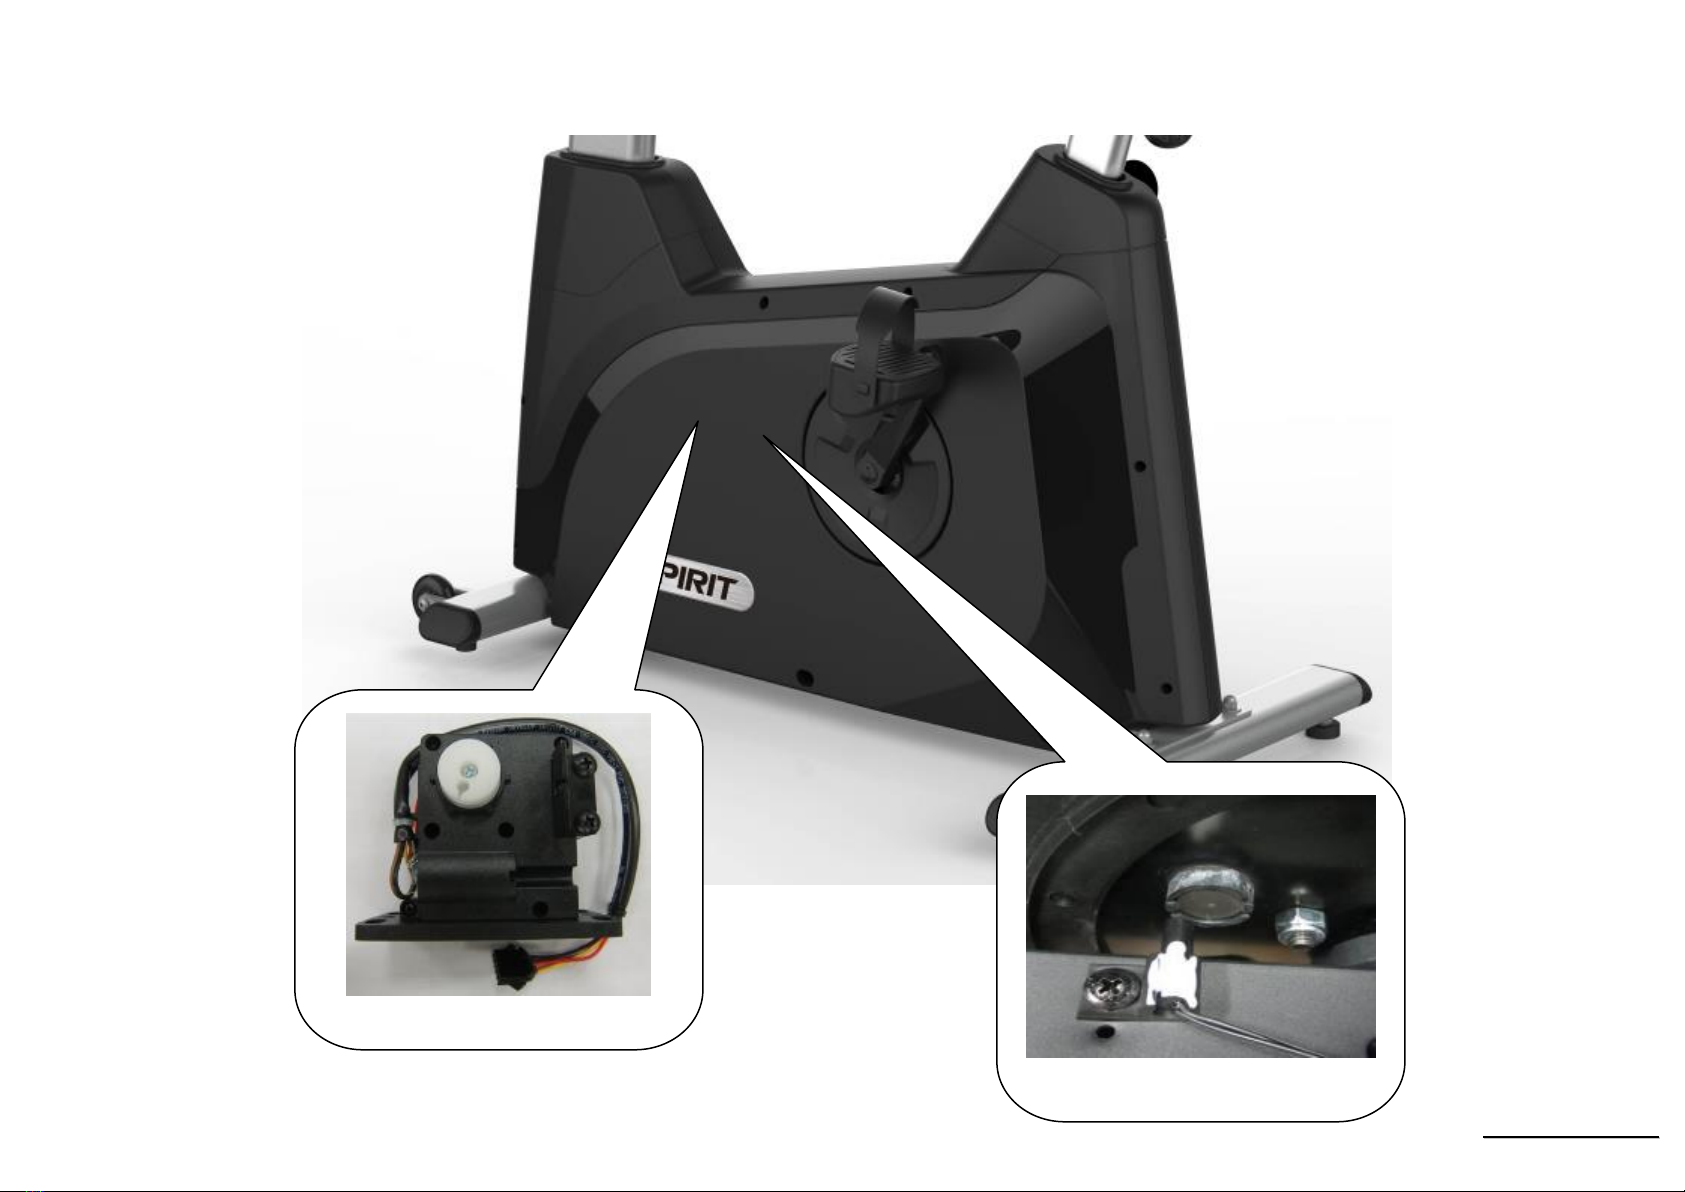
9-14. Flywheel, steel cable and gear motor.
9-15. Other


 Service manual")


