manuals.online logo
Brands
  1. Home
  2. •
  3. Brands
  4. •
  5. Dynex
  6. •
  7. Card Reader
  8. •
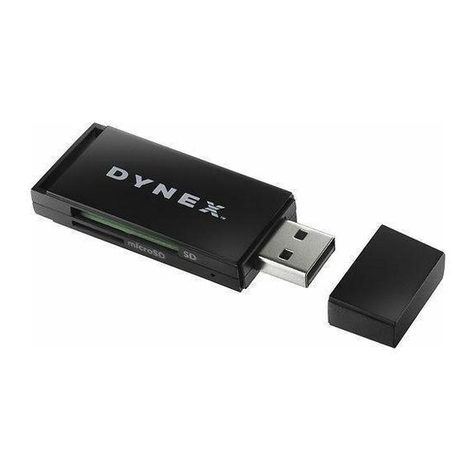
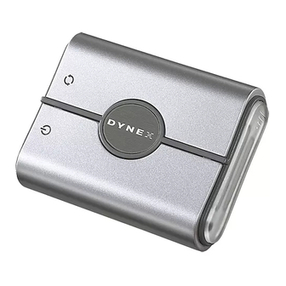
  9. Dynex DX-CRMN1 - Mini Memory Card Reader/Writer User manual

Dynex DX-CRMN1 - Mini Memory Card Reader/Writer User manual

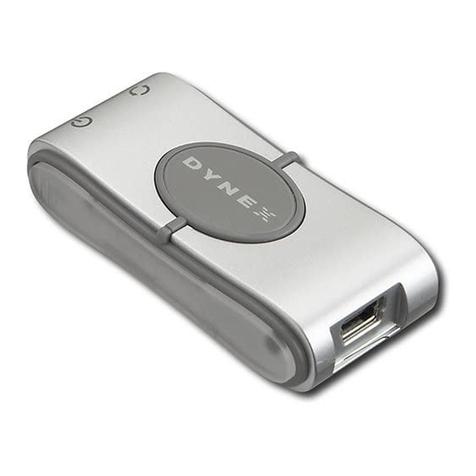
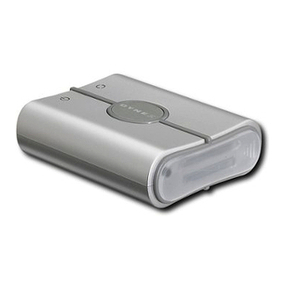
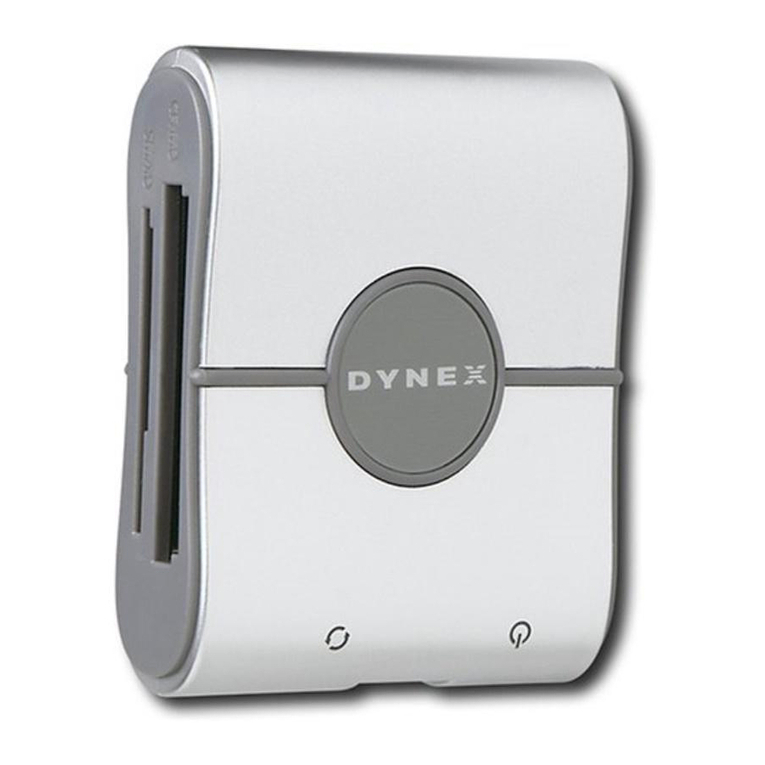
DX-CRMN1 Mini Memory Card
Reader/Writer Quick Setup Guide
Mini lecteur/enregistreur de cartes mémoire
DX-CRMN1 Guide d’installation rapide
Mini lector/grabador de tarjetas de memoria
DX-CRMN1 Guía de instalación rápida
Power LED indicator
DEL d’alimentation
Indicador LED de alimentación
Data LED indicator
DEL de transfert de données
Indicador LED de datos
MicroSD/M2
MicroSD/M2
MicroSD/M2
SD/SDHC/MMC
SD/SDHC/MMC
SD/SDHC/MMC
USB cable jack
Prise pour câble USB
Toma para cable USB
To access a media card using Macintosh OS 10. x or higher:
1Remove the card slot cover from the card reader.
2Insert a card into the appropriate slot. A new drive icon appears on
your desktop.
Caution: Cards must be inserted into the correct slot and in the correct direction.
Failure to do so may result in damage to your card and /or card reader.
3When you have nished working with the les on the memory card, drag
the disc icon to the Trash or click the disc icon and select Eject from the
File Menu.The data LED on the memory card reader turns o.
Caution: Do not remove memory cards while the data LED on the reader is
ashing. Doing so may result in a loss of data or damage to your memory card.
1-year limited warranty
Visit www.dynexproducts.com for details.
For additional information, see the user
guide included on the Utilities and
Documentation CD.
Garantie limitée de 1 ans
Allez sur le site www.dynexproducts.com
pour toute information complémentaire.
Pour toute information complémentaire, voir
le guide de l’utilisateur inclus sur le CD avec
utilitaires et de documentation.
Garantía limitada de 1 años
Visite www.dynexproducts.com para más
información.
Para información adicional, consulte la guía
del usuario en el CD de aplicaciones
y documentación.
SD/SDHC/MMC Slot
Insert Secure Digital High
Capacity (SDHC), Secure
Digital (SD), miniSD, Multi
Media Card (MMC) and
RS-MMC cards into this slot.
MicroSD/M2 Slot
Insert microSD,T-Flash cards,
or Memory Stick Micro (M2)
into this slot with the gold
contact area facing up.
No adapter is required.
Power LED
Lights green when the
card reader is
connected to the
computer.
Data LED
Lights green when a
card is inserted into the
appropriate slot.
The data LED ashes
when data is being
transferred from the card
or written to the card.
Package contents
• Mini Memory Card Reader/Writer
• Mini USB 5-pin cable
• Quick Setup Guide
• Utilities and Documentation CD
System requirements
• Windows 2000, Windows XP, Windows Vista, Windows 7, or Mac OS
10. x or higher.
Connecting the card reader
To connect your card reader, plug the small end of the included USB
cable into the card reader and the other end into an available USB port
on a computer. Your computer automatically installs the correct driver.
New drive icons appear in My Computer/Computer or Windows Explorer.
Using the card reader
To access a media card using Windows:
1 Remove the card slot cover from the card reader.
2Insert a card into the appropriate slot. A new drive icon appears in
My Computer/Computer or Windows Explorer (Windows 7).
Caution: Cards must be inserted into the correct slot and in the correct
direction. Failure to do so may result in damage to your card and/or card reader.
3Open My Computer/Computer or or Windows Explorer, then double-
click the appropriate drive icon to access the data on the memory
card.
4When you have nished working with the les on the memory card,
right-click the memory card reader icon in My Computer/Computer or
Windows Explorer, then select Eject. The data LED on the memory
card reader turns o.
Caution: Do not remove memory cards while the data LED on the reader is
ashing. Doing so may result in a loss of data or damage to your memory card.
11-0402
Fente pour carte
SD/SDHC/MMC
Insérer les cartes Secure
Digital haute capacité (SDHC),
Secure Digital (SD), MiniSD,
Multi Media (MMC) et
RS-MMC dans cette fente.
Fente MicroSD/M2
Insérer les cartes MicroSD,
T-Flash ou Memory Stick
Micro (M2) dans cette fente
avec la zone des contacts or
tournée vers le haut. Aucun
adaptateur n'est nécessaire.
DEL d’alimentation
S’allume en vert
quand le lecteur de
carte est connecté à
l’ordinateur.
DEL de transfert de
données
S’allume en vert quand
la carte est insérée dans
la fente appropriée.
La DEL de transfert de
données clignote
pendant le transfert ou
l’écriture de données
sur la carte.
Ranura para SD/SDHC/MMC
Inserte tarjetas Secure Digital
de alta capacidad (SDHC, por
sus siglas en inglés), Secure
Digital (SD), Mini SD,
MultiMedia (MMC) y RS-MMC
en esta ranura.
Ranura para MicroSD/M2
Inserte tarjetas MicroSD,
T-Flash o Memory Stick Micro
(M2) en esta ranura con el
área de contacto dorada
orientada hacia arriba. No se
requiere un adaptador.
Indicador LED de
encendido
Se ilumina color verde
cuando se conecta el
lector de tarjetas a la
computadora.
Indicador LED de datos
Se ilumina color verde
cuando se inserta una
tarjeta en la ranura
apropiada.
El indicador LED de datos
parpadea cuando se
transere datos desde o
hacia la tarjeta de
memoria.
Contenu de l’emballage
• Mini lecteur/enregistreur de cartes mémoire
• Câble mini USB à 5 broches
• Guide d’installation rapide
• CD avec utilitaires et documentation
Conguration système requise
• Windows 2000, Windows XP, Windows Vista, Windows 7 ou Mac OS 10.x
ou supérieur
Installation du lecteur de cartes
Pour connecter le lecteur de cartes, brancher la petite extrémité du câble
USB fourni sur le lecteur de cartes et l'autre extrémité sur un port USB
disponible d’ordinateur. L'ordinateur installe automatiquement le pilote
nécessaire. De nouvelles icônes de lecteurs s'achent dans la fenêtre du
Poste de travail/Ordinateur ou de l'explorateur Windows (My
Computer/Computer ou Windows Explorer).
Utilisation du lecteur de cartes
Pour accéder à une carte multimédia sous Windows :
1Retirer le couvercle de la fente pour carte du lecteur de cartes.
2Insérer une carte dans la fente appropriée. De nouvelles icônes de lecteurs
s'achent dans la fenêtre du Poste de travail/Ordinateur ou de l'explorateur
Windows [My Computer/Computer ou Windows Explorer] (Windows 7).
Attention : Les cartes doivent être insérées dans la fente appropriée et dans le
bon sens. Si ce n’est pas le cas, la carte et le lecteur pourraient être endommagés.
3Ouvrir la fenêtre Poste de travail/Ordinateur ou de l'explorateur
Windows (My Computer/Computer ou Windows Explorer), puis double-
cliquer sur l'icône du lecteur correspondant pour accéder aux données
de la carte mémoire.
4Quand les travaux sur les chiers de la carte mémoire sont terminés,
cliquer avec le bouton droit de la souris sur l'icône de la carte mémoire
dans la fenêtre Poste de travail/Ordinateur ou de l'explorateur Windows
(My Computer/Computer ou Windows Explorer), puis sur Eject (Éjecter).
La DEL de transfert de données du lecteur de cartes mémoire s’éteint.
Attention : Ne pas retirer les cartes mémoire tant que la DEL de transfert de
données du lecteur clignote. Sinon, une perte de données peut en résulter et la
carte mémoire pourrait être endommagée.
Pour accéder à une carte multimédia sous Macintosh OS 10.x ou supérieur :
1Retirer le couvercle de la fente pour carte du lecteur de cartes.
2Insérer une carte dans la fente appropriée. Une nouvelle icône de disque
s’ache sur le bureau.
Attention : Les cartes doivent être insérées dans la fente appropriée et
dans le bon sens. Si ce n’est pas le cas, la carte et le lecteur pourraient
être endommagés.
3Quand les travaux sur les chiers d’une carte mémoire sont terminés, faire
glisser l’icône du disque dans la Corbeille (Trash) ou cliquer sur l’icône du
disque et sélectionner Eject (Éjecter) du menu Fichier (File Menu). La DEL
de transfert de données du lecteur de cartes mémoire s’éteint.
Attention : Ne pas retirer les cartes mémoire tant que la DEL des données du
lecteur clignote. Sinon, une perte de données peut en résulter et la carte mémoire
pourrait être endommagée.
Contenido del paquete
• Mini lector/grabador de tarjetas de memoria
• Cable mini USB de 5 terminales
• Guía de instalación rápida
• CD de aplicaciones y documentación
Requisitos del sistema
• Windows 2000, Windows XP, Windows Vista, Windows 7 o Mac OS 10.x o
más reciente.
Conexión del lector de tarjetas
Para conectar su lector de tarjetas, conecte el extremo pequeño del cable
USB incluido en su lector de tarjetas y el otro extremo en un puerto USB
disponible de la computadora. Su computadora instalará automática-
mente el controlador adecuado. Iconos nuevos de unidades aparecerán en
Mi PC/Computadora o el Explorador de Windows (My
Computer/Computer o Windows Explorer).
Uso del lector de tarjetas
Para acceder a una tarjeta de medios usando Windows:
1Remueva la cubierta de la ranura para tarjetas del lector de tarjetas.
2Inserte una tarjeta de memoria en la ranura apropiada. Iconos nuevos
de unidades aparecerán en Mi PC/Computadora o el Explorador de
Windows [My Computer/Computer o Windows Explorer] (Windows 7).
Cuidado: las tarjetas se deben insertar en la ranura correcta y en la direcció
correcta. No hacer esto puede resultar en daño a su tarjeta y/o al lector de tarjetas.
3Abra Mi PC/Computadora o el Explorador de Windows
(My Computer/Computer o Windows Explorer) y haga doble clic en el
ícono apropiado para acceder a los datos en la tarjeta de memoria.
4Cuando termine de trabajar con los archivos en la tarjeta de memoria,
haga clic con el botón secundario en el icono de la tarjeta de memoria
en Mi PC/Computadora o el Explorador de Windows (My Computer/
Computer o Windows Explorer) y seleccione Eject (Expulsar).
El indicador LED de transferencia de datos en la tarjeta de memoria se apaga.
Cuidado: no saque las tarjetas de memoria mientras el indicador LED de datos en el
lector está parpadeando. De hacer esto puede resultar en pérdida de información o
en daño a su tarjeta de memoria.
Para acceder a una tarjeta de medios usando Macintosh OS 10.x o
más reciente:
1Remueva la cubierta de la ranura para tarjetas del lector de tarjetas.
2Inserte una tarjeta de memoria en la ranura apropiada. Un icono de
disco nuevo aparecerá en el escritorio. Cuidado: las tarjetas se deben
insertar en la ranura correcta y en la dirección correcta. No hacer esto
puede resultar en daño a su tarjeta y/o al lector de tarjetas.
3Cuando se ha terminado de trabajar con los archivos en la tarjeta de
memoria, arrastre el icono del disco a la papelera (Trash) o haga clic en
el icono de disco y elija Eject (Expulsar) en el menú de archivo (File
Menu). El indicador LED de transferencia de datos en la tarjeta de
memoria se apaga.
Cuidado: no saque las tarjetas de memoria mientras el indicador LED en el lector
está parpadeando. De hacer esto puede resultar en pérdida de información o en
daño a su tarjeta de memoria.

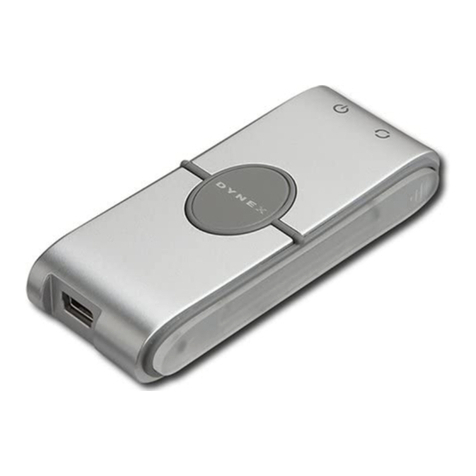
Other manuals for DX-CRMN1 - Mini Memory Card Reader/Writer

2

Other Dynex Card Reader manuals

Dynex DX-CR501 - 5-in1 Memory Card Reader/Writer User manual

Dynex

Dynex DX-CR501 - 5-in1 Memory Card Reader/Writer User manual

Dynex DX-CRCF12 User manual

Dynex

Dynex DX-CRCF12 User manual

Dynex DX-CRDRD Quick start guide

Dynex

Dynex DX-CRDRD Quick start guide

Dynex DX-CRDRD Parts list manual

Dynex

Dynex DX-CRDRD Parts list manual

Dynex DX-CR121 - External USB 2.0 Multiformat Memory Card... User manual

Dynex

Dynex DX-CR121 - External USB 2.0 Multiformat Memory Card... User manual

Dynex DX-CR312 Quick start guide

Dynex

Dynex DX-CR312 Quick start guide

Dynex DX-CR312 Instruction Manual

Dynex

Dynex DX-CR312 Instruction Manual

Dynex DX-CR212 Instruction Manual

Dynex

Dynex DX-CR212 Instruction Manual

Dynex DX-CR112 User manual

Dynex

Dynex DX-CR112 User manual

Dynex DX-CR312 User manual

Dynex

Dynex DX-CR312 User manual

Dynex DX-CR112 Instruction Manual

Dynex

Dynex DX-CR112 Instruction Manual

Dynex DX-CRDRD User manual

Dynex

Dynex DX-CRDRD User manual

Dynex DX-CRD12 - 174; Internal USB 2.0 Multiformat Media Card... User manual

Dynex

Dynex DX-CRD12 - 174; Internal USB 2.0 Multiformat Media Card... User manual

Dynex DX-CRDRD User manual

Dynex

Dynex DX-CRDRD User manual

Dynex DX-CR112 Quick start guide

Dynex

Dynex DX-CR112 Quick start guide

Dynex DX-CR6N1 - USB 2.0 Memory Card Reader User manual

Dynex

Dynex DX-CR6N1 - USB 2.0 Memory Card Reader User manual

Dynex DX-CR112 User manual

Dynex

Dynex DX-CR112 User manual

Dynex DX-CR112 Quick start guide

Dynex

Dynex DX-CR112 Quick start guide

Dynex DX-CR312 User manual

Dynex

Dynex DX-CR312 User manual

Dynex DX-CRMN1 - Mini Memory Card Reader/Writer User manual

Dynex

Dynex DX-CRMN1 - Mini Memory Card Reader/Writer User manual

Dynex DX-CR312 Quick start guide

Dynex

Dynex DX-CR312 Quick start guide

Dynex DX-CRDRD Quick start guide

Dynex

Dynex DX-CRDRD Quick start guide

Dynex DX-CR112 User manual

Dynex

Dynex DX-CR112 User manual

Dynex DX-CR6N1 - USB 2.0 Memory Card Reader User manual

Dynex

Dynex DX-CR6N1 - USB 2.0 Memory Card Reader User manual

Popular Card Reader manuals by other brands

Datalogic XRF410N Series Application note

Datalogic

Datalogic XRF410N Series Application note

Stid L51 INSTALLATION PROCEDURE

Stid

Stid L51 INSTALLATION PROCEDURE

IDTECK STAR RF70 user manual

IDTECK

IDTECK STAR RF70 user manual

Hama 14978 operating instructions

Hama

Hama 14978 operating instructions

Magtek tDynamo Installation and operation manual

Magtek

Magtek tDynamo Installation and operation manual

Conrad 518664 operating instructions

Conrad

Conrad 518664 operating instructions

Gallagher T10 Installation note

Gallagher

Gallagher T10 Installation note

ACS ACR38U PocketMate user manual

ACS

ACS ACR38U PocketMate user manual

Vimar Eikon quick start guide

Vimar

Vimar Eikon quick start guide

Delkin Devices eFilm Reader-19 user manual

Delkin Devices

Delkin Devices eFilm Reader-19 user manual

Targus TGR‐SD20 user manual

Targus

Targus TGR‐SD20 user manual

SIIG JU-CR0012-S1 Quick installation guide

SIIG

SIIG JU-CR0012-S1 Quick installation guide

SpringCard FunkyGate-IP RDR NFC quick start guide

SpringCard

SpringCard FunkyGate-IP RDR NFC quick start guide

BBPOS QB33 instruction manual

BBPOS

BBPOS QB33 instruction manual

HIK VISION DS-K1201MF user manual

HIK VISION

HIK VISION DS-K1201MF user manual

HIK VISION DS-K1102AE user manual

HIK VISION

HIK VISION DS-K1102AE user manual

HIK VISION DS-PT1-WE quick start guide

HIK VISION

HIK VISION DS-PT1-WE quick start guide

HIK VISION DS-K1107MK user manual

HIK VISION

HIK VISION DS-K1107MK user manual

manuals.online logo
manuals.online logoBrands
  • About & Mission
  • Contact us
  • Privacy Policy
  • Terms and Conditions

Copyright 2025 Manuals.Online. All Rights Reserved.