manuals.online logo
Brands
  1. Home
  2. •
  3. Brands
  4. •
  5. Dynex
  6. •
  7. Card Reader
  8. •
  9. Dynex DX-CRDRD User manual

Dynex DX-CRDRD User manual

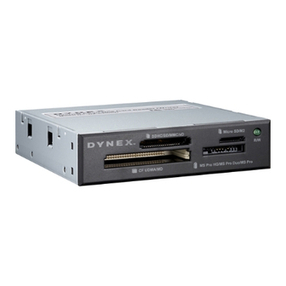
DX-CRDRD
All-in-One Internal Card Reader
Package contents
• Card reader with USB 5-pin cable
• Mounting screws (ISO 3f 4 mm) (4)
• Extra front bezel (1)
• Utility CD (includes AP drivers and User Guide)
• Quick Setup Guide
Minimum system requirements
• IBM-compatible PC
• CD drive
• One available on-board 5-pin USB connector on the computer’s
system board
• One available 3.5-inch drive bay
• Windows® 7, Windows® Vista, Windows® XP, or Windows® 2000
Installing the card reader
Caution: Electrostatic discharge (static electricity) can damage
electronic components. Make sure that you are grounded before you
install your card reader. Turn o your computer, then touch a bare
metal part of your computer, such as the back of the chassis or power
supply, to discharge any static electricity.
To install your card reader:
1Turn o your computer and disconnect the power cord.
2Make sure that you are correctly grounded by touching a bare
metal part of your computer, such as the back of the chassis or
power supply.
3Open your computer’s cover. For more information, see the
documentation that came with your computer.
4If you want the alternate colored bezel,
change it now by pressing the four plastic
clips on each side of the card reader
with a pen or pencil and pulling the
bezel o.
5Snap the new bezel into place.
6Make sure that your computer’s
system board connector is compatible
with your card reader’s USB connector.
QUICK SETUP GUIDE
Pin Wire color Function
P5 No contact No contact
P4 Black/shield Ground
P3 Green D+
P2 White D-
P1 Red Vbus
7Carefully slide your card reader into the empty 3.5" drive bay.
8Secure your card reader to the drive
bay with the four mounting screws
(two screws per side).
9Connect your card reader’s
USB connector to a
compatible USB connector
on your computer’s systemboard.
(See illustration under Step 6.)
10 Make sure that you have removed
any tools or loose screws from inside your computer, then replace
your computer’s cover.
11 Reconnect your computer’s power cord, then turn on your
computer.
Using the card reader
To access a media card:
1Insert a card into the appropriate slot, as shown in the table on the
next page.
Caution: Cards must be inserted into the correct slot and in the
correct direction. Failure to do so may damage your card and card
reader.
2Open My Computer or Windows Explorer, then double-click the
drive icon for the slot you are using.
3To access les and folders on the inserted card, use normal Windows
procedures for opening, copying, pasting, or deleting les and
folders.
4When you have nished working with the les on a memory card,
right-click the memory card icon in My Computer or Windows
Explorer and click Eject. The R/W LED on the memory card reader
turns o when the card is removed.
Caution: Do not remove memory cards while the data
R/W (read/write) LED on the reader is ashing.
Understanding the LED indicator
The R/W LED indicates when a slot is reading from or writing to a card.
• LED o—Your card reader is not being used.
• LED on—A card is inserted in one of the slots.
• LED ashing—Data is being transferred to or from a card.
Plastic clip
Screw Screw
ENGLISH 10-0883
Understanding card slot compatibility Customizing drive icons
To make the media card slots easier to recognize in My Computer or
Windows Explorer, you can customize the drive icons.
To customize the drive icons in Windows:
1Save all les and close all programs.
2Insert the included utility CD into the CD/DVD drive. The driver home
page opens automatically.
3Click Install Driver for Windows.
4Click Next, then follow the on-screen instructions to install the driver.
After the driver installation is complete, the customized Windows drive
icons drive icons appear in My Computer and Windows Explorer when
Windows detects a card in a memory reader slot.
Legal notices
FCC statement
This equipment complies with Part 15 of the FCC Rules. Operation is
subject to the following conditions: (1) This device may not cause
harmful interference, and (2) this device must accept any interference
received, including interference that may cause undesired operation.
Note: This equipment has been tested and found to comply with the
limits for a Class B digital device, pursuant to part 15 of the FCC Rules.
These limits are designed to provide reasonable protection against
harmful interference in a residential installation. This equipment
generates, uses and can radiate radio frequency energy and, if not
installed and used in accordance with the instructions, may cause
harmful interference to radio communications. However, there is no
guarantee that interference will not occur in a particular installation. If
this equipment does cause harmful interference to radio or television
reception, which can be determined by turning the equipment o and
on, the user is encouraged to try to correct the interference by one of
more or the following measures:
• Reorient or relocate the receiving antenna.
• Increase the separation between the equipment and receiver.
• Connect the equipment into an outlet on a circuit dierent from
that to which the receiver is connected.
• Consult the dealer or an experienced radio/TV technician for
help.
One-Year Limited Warranty
Visit www.dynexproducts.com for details.
© 2010 BBY Solutions, Inc. All Rights Reserved.
DYNEX is a trademark of BBY Solutions, Inc. Registered in some countries. All
other products and brand names are trademarks of their respective owners.
CF, UDMA, MD
Insert Compact Flash™ (CF)
type I/II, UDMA, or IBM®
Microdrive cards into this slot.
SD, SDHC, MMC, and xD
Insert Secure Digital (SD or SDHC),
MultiMediaCards (MMC or MMCplus),
and xD picture cards into this slot.
Note: An adapter is required for MiniSD
and RS-MMC cards.
MS Pro HG, MS Pro Duo, and
MS Pro
Insert Memory Stick PRO HG Duo,
Memory Stick PRO Duo, Memory
Stick Duo, Memory Stick PRO, or
Memory Stick cards into this slot.
Micro SD or M2
Insert Micro SDHC, Micro SD, or M2 cards into this slot.
No adapter is required.
Note: The Micro SD slot shares a signal bus with the
SD/MMC slot, so you cannot use both slots at the
same time.
The M2 slot shares a signal bus with the MS slot,
so you cannot use both slots at the same time.
Other manuals for DX-CRDRD

5

Other Dynex Card Reader manuals

Dynex DX-CR312 User manual

Dynex

Dynex DX-CR312 User manual

Dynex DX-CR6N1 - USB 2.0 Memory Card Reader User manual

Dynex

Dynex DX-CR6N1 - USB 2.0 Memory Card Reader User manual

Dynex DX-CRMN1 - Mini Memory Card Reader/Writer User manual

Dynex

Dynex DX-CRMN1 - Mini Memory Card Reader/Writer User manual

Dynex DX-CR112 User manual

Dynex

Dynex DX-CR112 User manual

Dynex DX-CRMN1 - Mini Memory Card Reader/Writer User manual

Dynex

Dynex DX-CRMN1 - Mini Memory Card Reader/Writer User manual

Dynex DX-CRDRD Quick start guide

Dynex

Dynex DX-CRDRD Quick start guide

Dynex DX-CRDRD Parts list manual

Dynex

Dynex DX-CRDRD Parts list manual

Dynex DX-CR312 User manual

Dynex

Dynex DX-CR312 User manual

Dynex DX-CR212 User manual

Dynex

Dynex DX-CR212 User manual

Dynex DX-CRCF12 User manual

Dynex

Dynex DX-CRCF12 User manual

Dynex DX-CR112 User manual

Dynex

Dynex DX-CR112 User manual

Dynex DX-CR6N1 - USB 2.0 Memory Card Reader User manual

Dynex

Dynex DX-CR6N1 - USB 2.0 Memory Card Reader User manual

Dynex DX-CR212 Quick start guide

Dynex

Dynex DX-CR212 Quick start guide

Dynex DX-CR312 Instruction Manual

Dynex

Dynex DX-CR312 Instruction Manual

Dynex DX-CR112 Quick start guide

Dynex

Dynex DX-CR112 Quick start guide

Dynex DX-CRDRD User manual

Dynex

Dynex DX-CRDRD User manual

Dynex DX-CR312 Quick start guide

Dynex

Dynex DX-CR312 Quick start guide

Dynex DX-CR112 User manual

Dynex

Dynex DX-CR112 User manual

Dynex DX-CR212 User manual

Dynex

Dynex DX-CR212 User manual

Dynex DX-CRD12 - 174; Internal USB 2.0 Multiformat Media Card... User manual

Dynex

Dynex DX-CRD12 - 174; Internal USB 2.0 Multiformat Media Card... User manual

Dynex DX-CR212 Instruction Manual

Dynex

Dynex DX-CR212 Instruction Manual

Dynex DX-CR212 Quick start guide

Dynex

Dynex DX-CR212 Quick start guide

Dynex DX-CR501 - 5-in1 Memory Card Reader/Writer User manual

Dynex

Dynex DX-CR501 - 5-in1 Memory Card Reader/Writer User manual

Dynex DX-CRDRD Quick start guide

Dynex

Dynex DX-CRDRD Quick start guide

Popular Card Reader manuals by other brands

TagMaster S1566 installation guide

TagMaster

TagMaster S1566 installation guide

Handpoint HiPlus user guide

Handpoint

Handpoint HiPlus user guide

Invengo XC-RF850 FLW user manual

Invengo

Invengo XC-RF850 FLW user manual

COMSOL UCR-1702 user manual

COMSOL

COMSOL UCR-1702 user manual

Magtek D99875494-51 Reference manual

Magtek

Magtek D99875494-51 Reference manual

iNels WMR2-11 Manual instructions

iNels

iNels WMR2-11 Manual instructions

Magtek 99875388-9 Technical reference manual

Magtek

Magtek 99875388-9 Technical reference manual

WABCO ABS/EBS B-DH A101 user manual

WABCO

WABCO ABS/EBS B-DH A101 user manual

wink haus blueChip Reader BC TI installation manual

wink haus

wink haus blueChip Reader BC TI installation manual

ACS ACR1255U-J1 user manual

ACS

ACS ACR1255U-J1 user manual

StarTech.com 35FCREAD20 instruction manual

StarTech.com

StarTech.com 35FCREAD20 instruction manual

Lexar RW022 user manual

Lexar

Lexar RW022 user manual

Rosslare AY 6255 Series Installation and user manual

Rosslare

Rosslare AY 6255 Series Installation and user manual

AiRide FIDO Mini user manual

AiRide

AiRide FIDO Mini user manual

xpr BIOPROX-MF user manual

xpr

xpr BIOPROX-MF user manual

Datalogic Matrix 120 Reference manual

Datalogic

Datalogic Matrix 120 Reference manual

SanDisk ImageMate CompactFlash brochure

SanDisk

SanDisk ImageMate CompactFlash brochure

Aritech ATS1190 installation manual

Aritech

Aritech ATS1190 installation manual

manuals.online logo
manuals.online logoBrands
  • About & Mission
  • Contact us
  • Privacy Policy
  • Terms and Conditions

Copyright 2025 Manuals.Online. All Rights Reserved.