e-con Systems See3CAM CU51 User manual


See3CAMCU51 User Manual 13-Aug-15
www.e-consystems.com | Subject to change without notice Page 2 of 23
Contents
1Revision History ............................................................................................. 3
2Introduction ................................................................................................... 4
3Scope............................................................................................................ 4
4Product Description ......................................................................................... 4
5Qtcam Application Description .......................................................................... 5
6Pre-Requisites ................................................................................................ 6
6.1 Installation of the See3CAM_CU51and Drivers ............................................. 6
7Launching the Application ................................................................................ 6
8Application Features........................................................................................ 7
8.1 Enumerate and Selection of camera device .................................................... 7
8.2 Still capture............................................................................................. 7
8.3 Video Recording....................................................................................... 8
8.4 Camera Settings ....................................................................................... 9
8.4.1 Image Quality Settings ......................................................................... 9
8.4.1.1 Brightness Control......................................................................... 9
8.4.1.2 Hardware Default ........................................................................ 10
8.4.2 Still Capture Settings.......................................................................... 10
8.4.2.1 Colour space/compression............................................................. 11
8.4.2.2 Output Size ................................................................................ 11
8.4.2.3 Image Location........................................................................... 12
8.4.2.4 Image Format ............................................................................. 12
8.4.3 Video Capture Settings ....................................................................... 13
8.4.3.1 Frame Rate................................................................................. 13
8.4.3.2 Colour space/compression............................................................. 14
8.4.3.3 Output size................................................................................. 14
8.4.3.4 Video Record Format ................................................................... 16
8.4.3.5 Video encoder format................................................................... 16
8.4.3.6 Video Location ........................................................................... 17
8.5 Display Current frame rate achieved........................................................... 18
8.6 Extension Settings .................................................................................. 18
8.6.1 Master Mode .................................................................................... 18
8.6.2 Trigger Mode.................................................................................... 19
8.6.3 Exposure control ............................................................................... 20
8.6.4 Flash Controls................................................................................... 21
8.6.5 Other Options ................................................................................... 21
8.6.5.1 Firmware Version ........................................................................ 21
8.6.5.2 Serial Number............................................................................. 22
9About.......................................................................................................... 22
10 Exit ............................................................................................................ 22
11 Known issues and Limitation........................................................................... 23
12 Conclusion................................................................................................... 23
13 Appendix -1................................................................................................. 23
13.1 Keyboard Shortcuts................................................................................. 23

See3CAMCU51 User Manual 13-Aug-15
www.e-consystems.com | Subject to change without notice Page 3 of 23
1Revision History
Rev No
Date
Major Changes
Edited By
Reviewer Name
1.1
07 Aug 2015
Description heading
revised to Product
Description and
Application Description.
QT
Application
Team
Sarath Natakam
Project Manager
1.0
23 July 2015
Initial Version
QT
Application
Team
Sarath Natakam
Project Manager

See3CAMCU51 User Manual 13-Aug-15
www.e-consystems.com | Subject to change without notice Page 4 of 23
2Introduction
The See3CAM_CU51 is a 5.0 Mega pixel, monochrome, UVC Compliant, USB3.0
SuperSpeed camera from e-con Systems, a leading embedded Product Design Services
Company which specializes in the advanced camera solutions. The See3CAM_CU51 is the
latest member of the See3CAM family of USB3.0 SuperSpeed camera products launched by
e-con.
The See3CAM_CU51 is a 5.0 MP monochrome camera with the S-mount (also
known as M12 board lens) lens holder. The S-mount is one of the most commonly used small
form-factor lens mounts for board cameras. The See3CAM_CU51 is based on the 1/2.5”
MT9P031, monochrome CMOS image sensor from Aptina.
This See3CAM_CU51 is a UVC-compliant USB3.0 SuperSpeed Camera that is also
backward compatible with USB2.0 host ports and does not require any special camera drivers
to be installed in the host PC. The See3CAM_CU51 is also backward compatible with the
USB2.0 High Speed interface, albeit at lower frame rates.
The CMOS sensor is operated in 12bits per pixel mode and the application will
receive the 12bits of greyscale information for every pixel. The application developer gets the
very high resolution 12bpp data for every pixel for performing accurate image processing
functions.
The See3CAM_CU51 is UVC-compliant camera and it does not require any
additional drivers to be installed on the PC. The native UVC drivers of Windows and Linux
Operating Systems shall be compatible with this camera. e-con also provides the sample
application (Qtcam) that demonstrates some of the features of this camera. However, this
camera can be utilized by any webcam supporting application like Skype etc.
3Scope
e-con provides a sample V4L2 application, called Qtcam, along with the
See3CAM_CU51 camera. Qtcam is a V4L2 video viewer and capture software for the linux
UVC driver, but customized to demonstrate some of the features of See3CAM_CU51.
This document describes about the usage of the Qtcam application on Ubuntu
[>=12.04 (LTS)] 32- and 64-bit Linux operating systems. This document also describes about
the special features of Qtcam camera application when it is used with See3CAM_CU51.
4Product Description
The See3CAM_CU51 is a USB 3.0 camera capable of streaming in the following
resolutions with specified frame rates.

See3CAMCU51 User Manual 13-Aug-15
www.e-consystems.com | Subject to change without notice Page 5 of 23
USB mode
Resolution
Frame rates at Y16
format
USB 3.0
2592x1944
1920x1080
1280x720
640x480
14
30
60
120
USB 2.0
2592x1944
1920x1080
1280x720
640x480[binned from
full FOV]
2
5
12
30
It currently supports colour format Y16. It is capable of supporting still capture of
Global shutter images with the required exposure level and the camera can synchronize the
exposure of all the pixels on receiving an external trigger.
The See3CAM_CU51 has two major camera controls namely,
1. Brightness
2. Exposure
There are two operating modes for See3CAM_CU51, they are
1. Master Mode
2. Trigger Mode
5Qtcam Application Description
The Qtcam application is a simple interface for capturing and viewing video from the
devices supported by the Linux UVC driver. This tool also supports extension unit control of
e-con’s See3CAM usb 3.0 webcam products. The features provided in the application are as
follows:
1. Enumerating and listing all USB video devices connected.
2. Changing resolution and colour space/compression for video stream(if different
resolution are supported by the device)
3. Currently configured values of preview which is being shown.
4. User can capture still images and set the path where still images will be saved.
5. Configure UVC Extension Control (if supported by device)
6. Displaying the average frame rate.
All the above listed properties can be configured by attractive and easy to use Graphical User
Interface. The application will run in Ubuntu [>=12.04 (LTS)] 32-bit and 64-bit Linux
Distributions.
e-con provides pre-built binaries for the following Linux Distributions.
1. Ubuntu 12.04 (LTS) 32- and 64-bit
2. Ubuntu 14.04 (LTS) 32- and 64-bit

See3CAMCU51 User Manual 13-Aug-15
www.e-consystems.com | Subject to change without notice Page 6 of 23
6Pre-Requisites
This section describes the high level instructions to install the See3CAM_CU51 on a
PC.
6.1 Installation of the See3CAM_CU51and Drivers
Follow the following steps to initialize the device with the host computer.
1. Connect one end of the USB3.0 cable to the USB3.0 connector provided at the back
of the See3CAM_CU51, and connect other end to the USB 3.0 host controller on the
computer.
2. Once connected, the LED light on the device will glow indicating that
See3CAM_CU51 is powered up and ready to use.
3. As See3CAM_CU51 is a generic USB video class device, Linux will automatically
detect all the drivers and it will be installed. This happens the first time and from the
second time device will be detected automatically by the host PC and will be ready
for use.
7Launching the Application
1. Connect the See3CAM USB 3.0 camera to the Linux Development System.
Launch the Qtcam application from the terminal as shown below,
When application is launched, home screen will look like below one,

See3CAMCU51 User Manual 13-Aug-15
www.e-consystems.com | Subject to change without notice Page 7 of 23
8Application Features
The features that are supported in the current version of Qtcam are briefly described
here. They are as follows:-
1. Enumerate and Selection of camera device
2. Still capture
3. Video recording
4. Camera Settings
4.1 Image Quality Settings
4.2 Still Capture Settings
4.3 Video Capture Settings
5. Extension settings
8.1 Enumerate and Selection of camera device
Application will emulate usb video devices connected to the system. The device
name is displayed in the device connected combo box. User can select any one of the
camera from the combo box and the corresponding preview is displayed in the right hand
side of the side bar.
Note: Preview will not be displayed for the device, if the camera is busy. i.e., camera is
opened by other application like Skype, etc., even two instance of Qtcam application is
selecting the same camera, and then the preview will not be displayed in the second instance
of the Qtcam application.
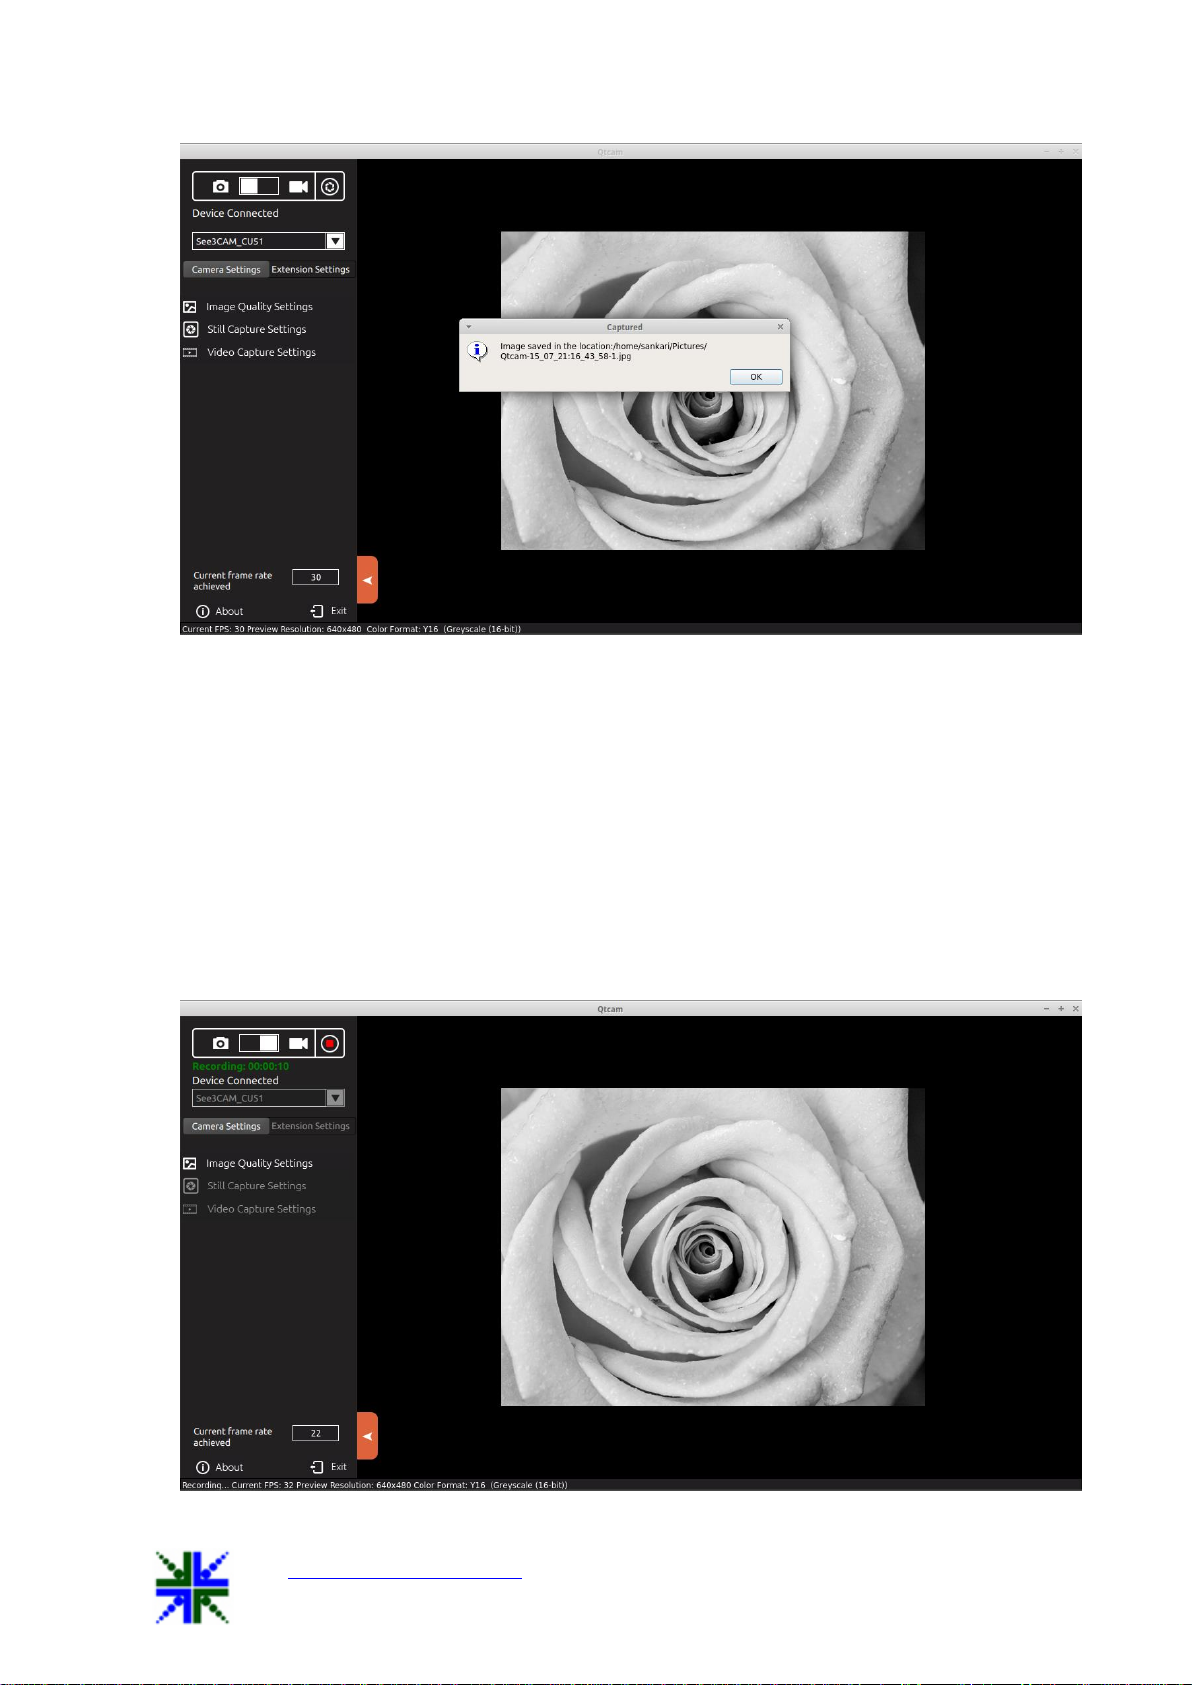
8.2 Still capture
Application by default will start in still capture mode, if the application is in video
mode click the camera icon to switch back to still capture mode, the user can capture the
still image by clicking capture image icon available side bar or by clicking the preview.
The image will be saved in the directory path, selected in the image location
available under the still capture settings menu.
The file name for captured image file is “Qtcam-YY_MM_dd:hh_mm_ss-x”, plus
the image extension format selected. If the extension format is “jpg”, the filename will be
“Qtcam-YY_MM_dd:hh_mm_ss-x.jpg”. [Where YY-Year, MM-Month, dd-day, hh- hour,
mm-min, ss-x denotes image number updated when multiple images are taken within a
second].
See3CAMCU51 User Manual 13-Aug-15
www.e-consystems.com | Subject to change without notice Page 8 of 23
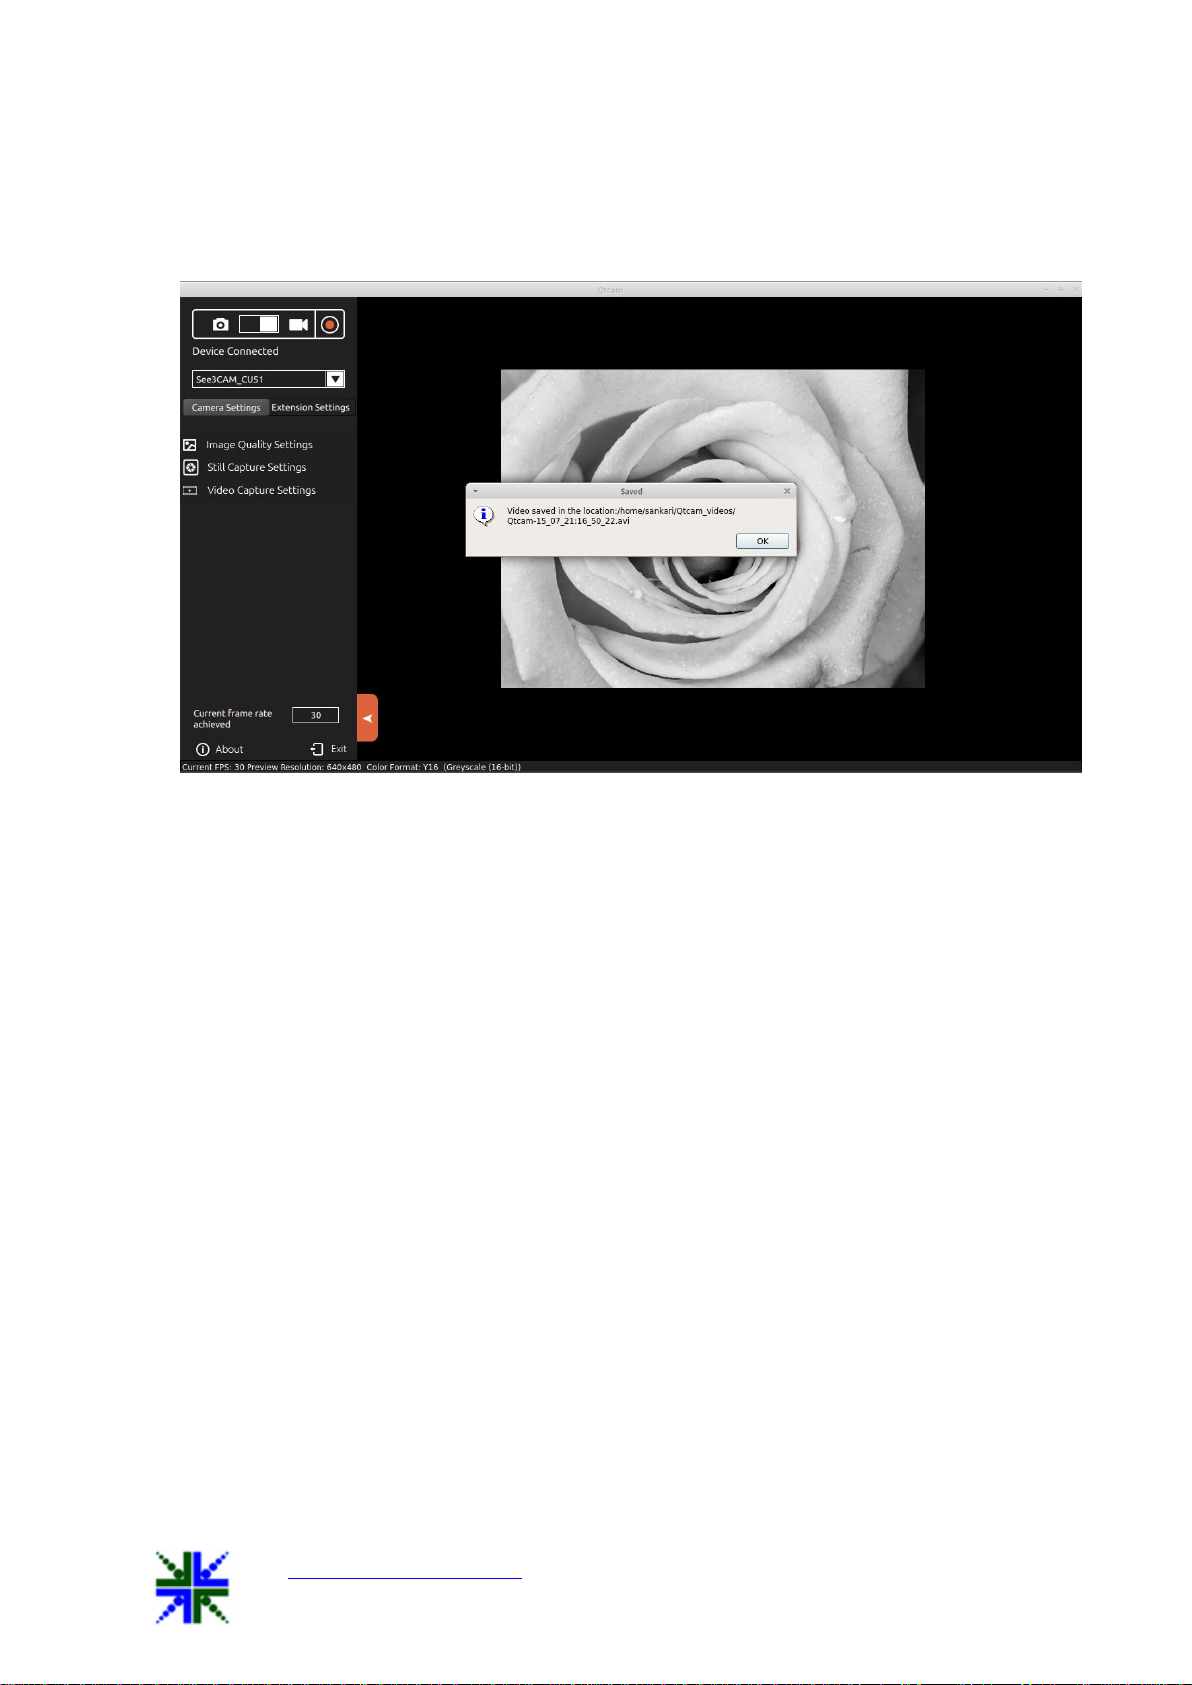
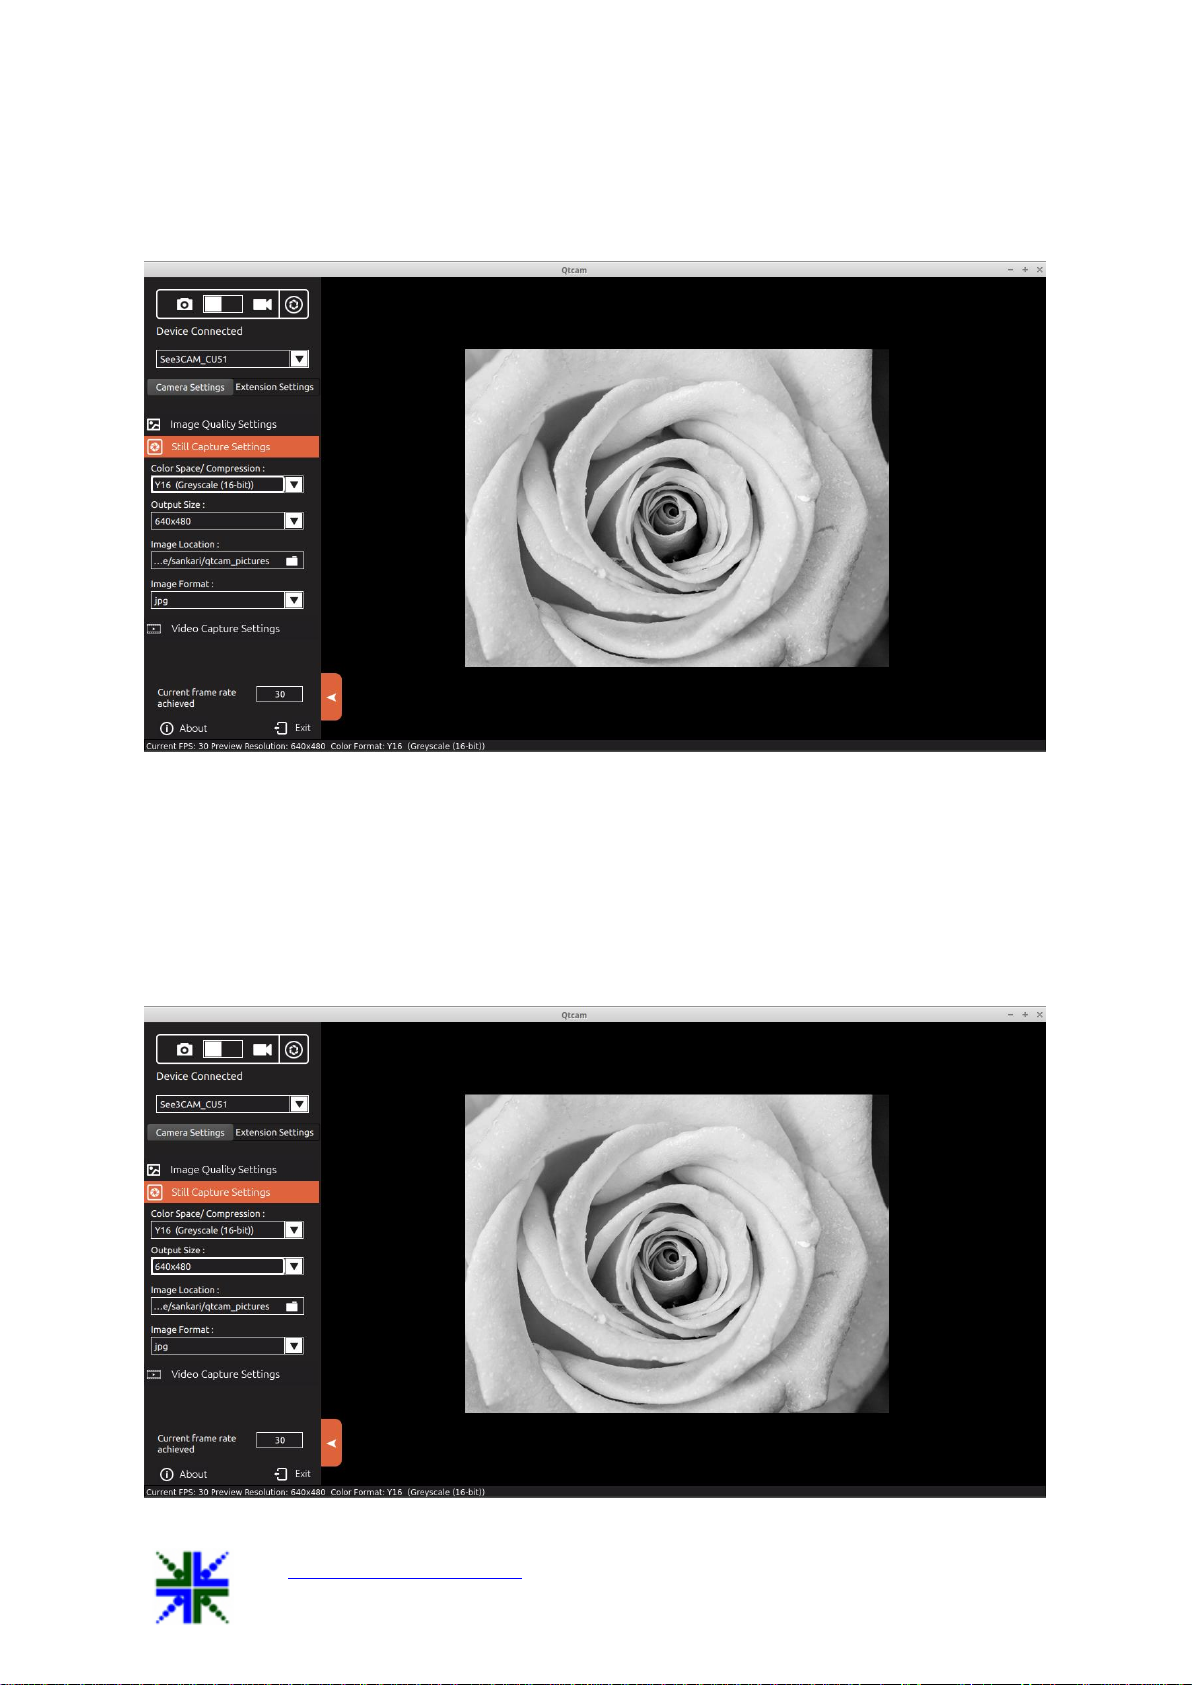
8.3 Video Recording
To record a video, user has to switch the application from capture mode to video
mode by clicking the video icon. Then the user can record a video by selecting record icon
available in the sidebar. The video will be saved in the directory path, selected in the video
location path. The default name for recorded video file is “Qtcam-
YY_MM_dd:hh_mm_ss”, plus the video record extension format. If the extension format is
“avi”, the filename will be “Qtcam-YY_MM_dd:hh_mm_ss.avi”.
See3CAMCU51 User Manual 13-Aug-15
www.e-consystems.com | Subject to change without notice Page 9 of 23
Once the user clicks the video record icon, video recording will begin, to stop
recording click the stop icon which is available in the side bar. During video recording,
user cannot change the preview resolution and camera device.
8.4 Camera Settings
8.4.1 Image Quality Settings
On selecting Image quality settings, a control menu will display camera control
settings. The user can adjust the video preview settings in the Menu tab. Sliders whose labels
are not greyed out can only be configured.
The user can move the slider and configure the preview settings according to their
needs. The value being set will be displayed in the text box based on the position of the slider
marker. As soon as the slider is moved to configure the values the preview’s property will
change at that instance.
8.4.1.1 Brightness Control
The Brightness values can be changed from a minimum value of 1 to 128 by moving
the slider, and the exact changes will be reflected immediately in the preview. This brightness
control increases the brightness of See3CAM_CU51. The Default value is 15.

See3CAMCU51 User Manual 13-Aug-15
www.e-consystems.com | Subject to change without notice Page 10 of 23
8.4.1.2 Hardware Default
This button is helpful to reset the Image Quality Settings menu values to the hardware
default state. Once the user clicked the hardware default button, all the control values and
preview is set to the default mode.
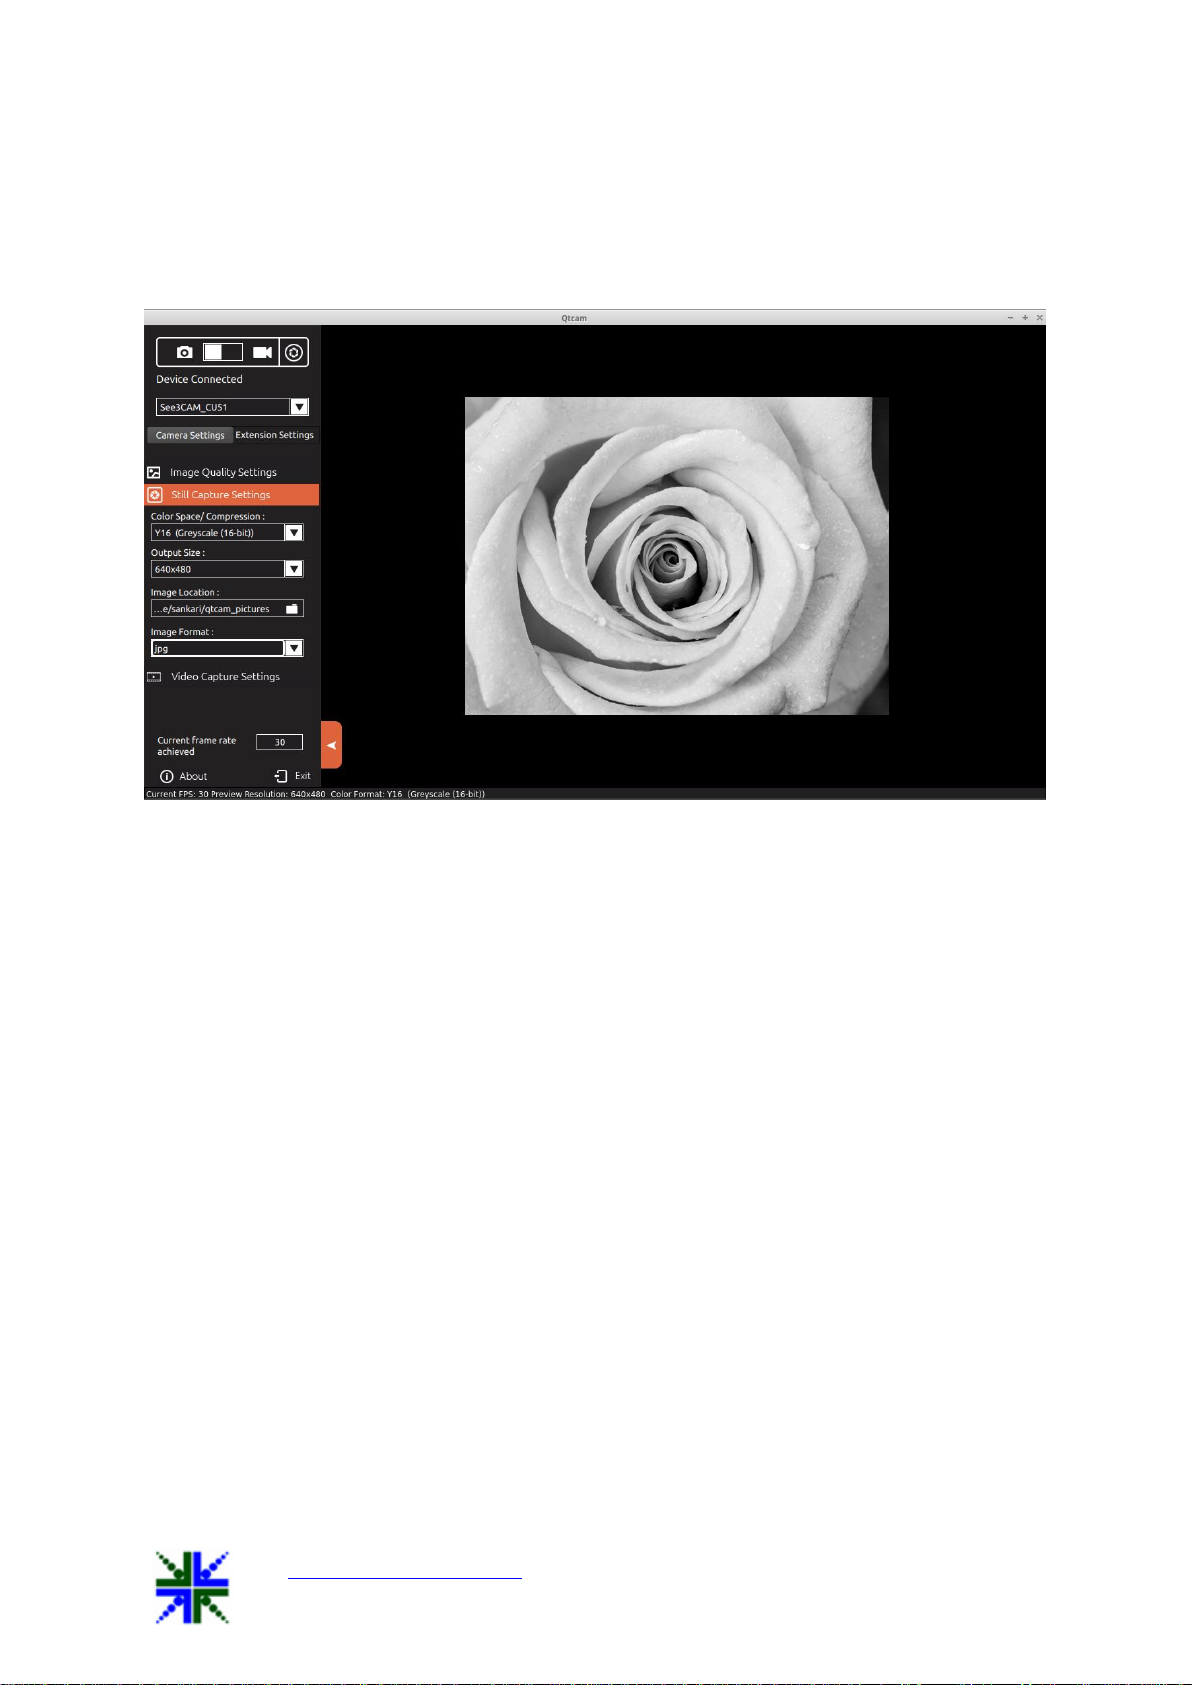
8.4.2 Still Capture Settings
On selecting Still Capture Settings, the user can select colour space, resolution size
for capturing the images, capture image location path and image save format type.
See3CAMCU51 User Manual 13-Aug-15
www.e-consystems.com | Subject to change without notice Page 11 of 23
8.4.2.1 Colour space/compression
Currently See3CAM_CU51 supports Y16 monochrome format.
8.4.2.2 Output Size
Four output resolution sizes are available, they are as follows:-
1. 2592x1944
2. 1920x1080
3. 1280x720
4. 640x480

See3CAMCU51 User Manual 13-Aug-15
www.e-consystems.com | Subject to change without notice Page 12 of 23
8.4.2.3 Image Location
The image location can be changed by clicking the folder icon or the text box, a file
dialog will be open for the user to select the new location. User have to click the open button
in the file dialog to change the path. The default path is “System picture path”
(/home/@user/Pictures).
8.4.2.4 Image Format
Four image formats are available in this version, they are as follows:-
1. jpg
2. bmp
See3CAMCU51 User Manual 13-Aug-15
www.e-consystems.com | Subject to change without notice Page 13 of 23
3. raw
4. png
The captured images are saved as per the selected image format. The default format is
“jpg”.
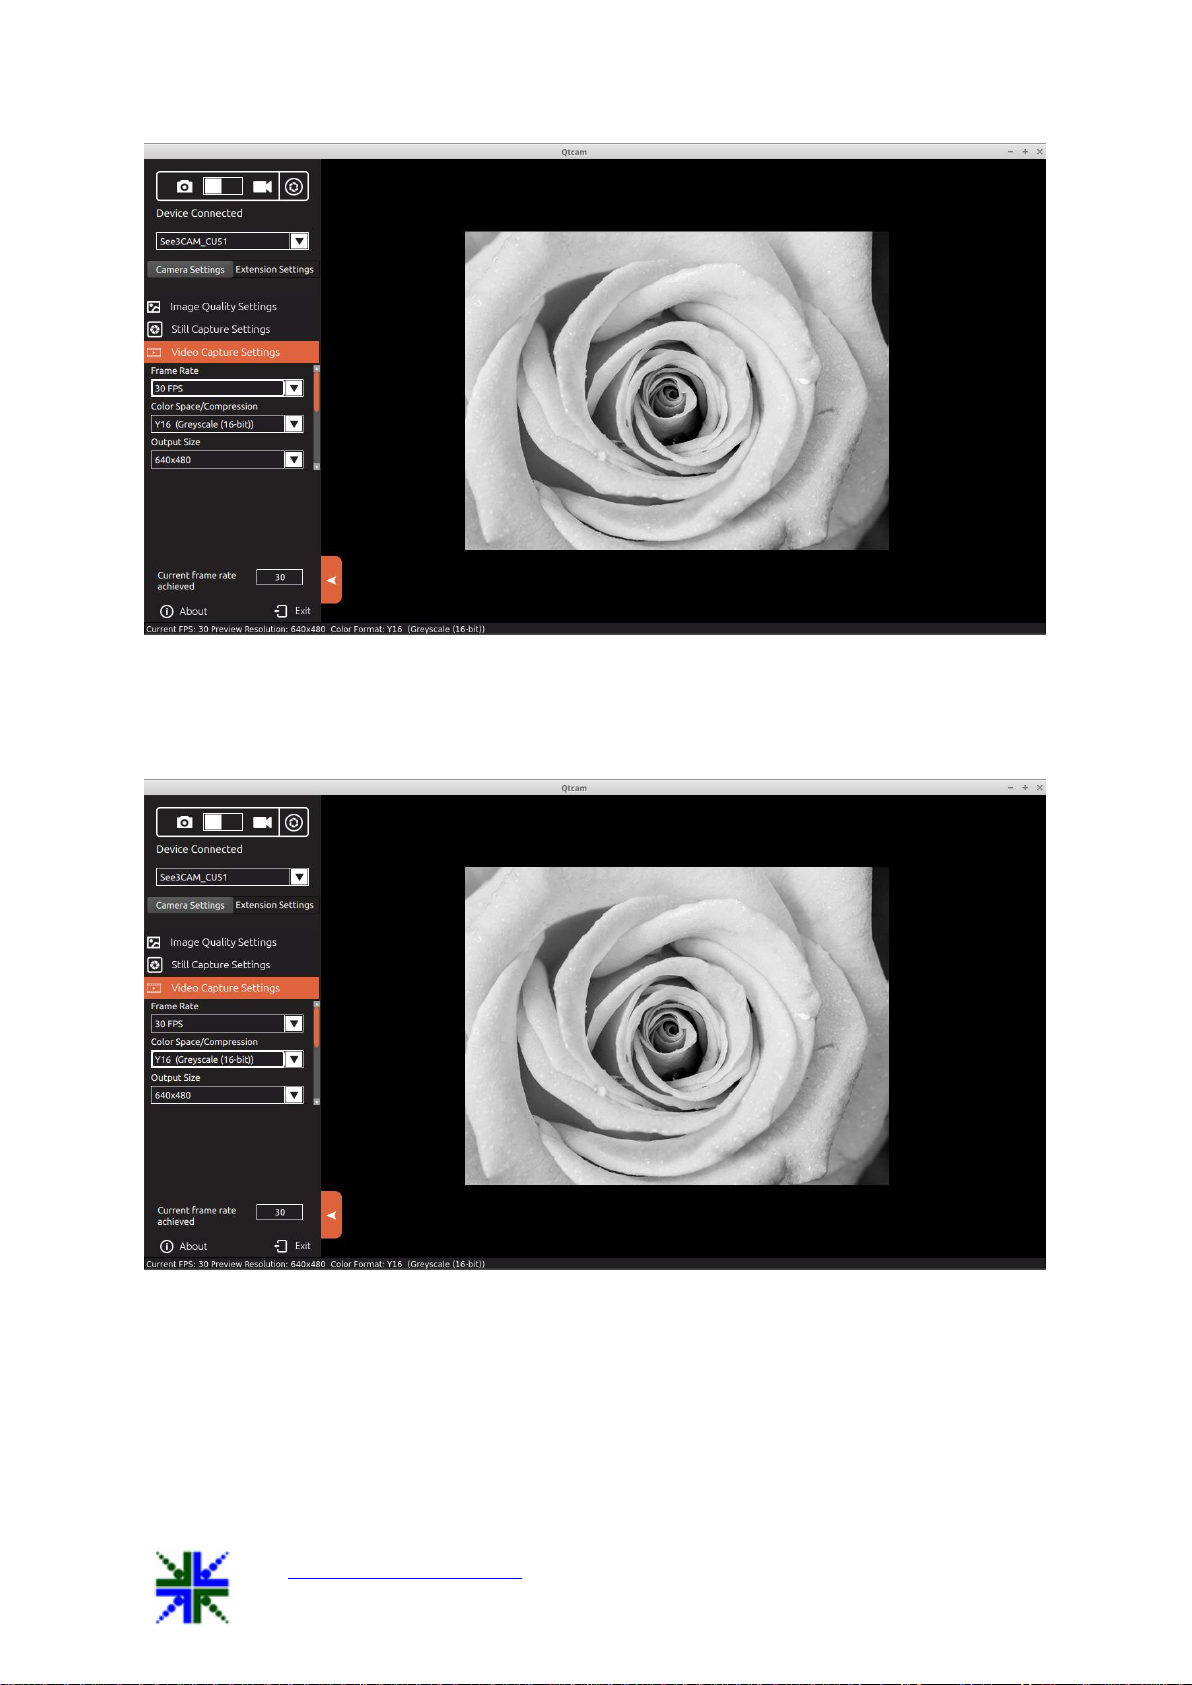
8.4.3 Video Capture Settings
On selecting the Video Capture Settings, the user can select frame rate, colour space,
video output size, video encoder format, video container (Extension) and the video location
to save.
8.4.3.1 Frame Rate
Frame rate displayed is the maximum expected fps for the current resolution (output
size).
See3CAMCU51 User Manual 13-Aug-15
www.e-consystems.com | Subject to change without notice Page 14 of 23
8.4.3.2 Colour space/compression
Currently See3CAM_CU51 supports only Y16 monochrome format.
8.4.3.3 Output size
Four output resolution sizes are available, they are as follows:-
1. 2592x1944
2. 1920x1080
3. 1280x720
4. 640x480
By default (while camera is selected), the preview output size will be selected, but the
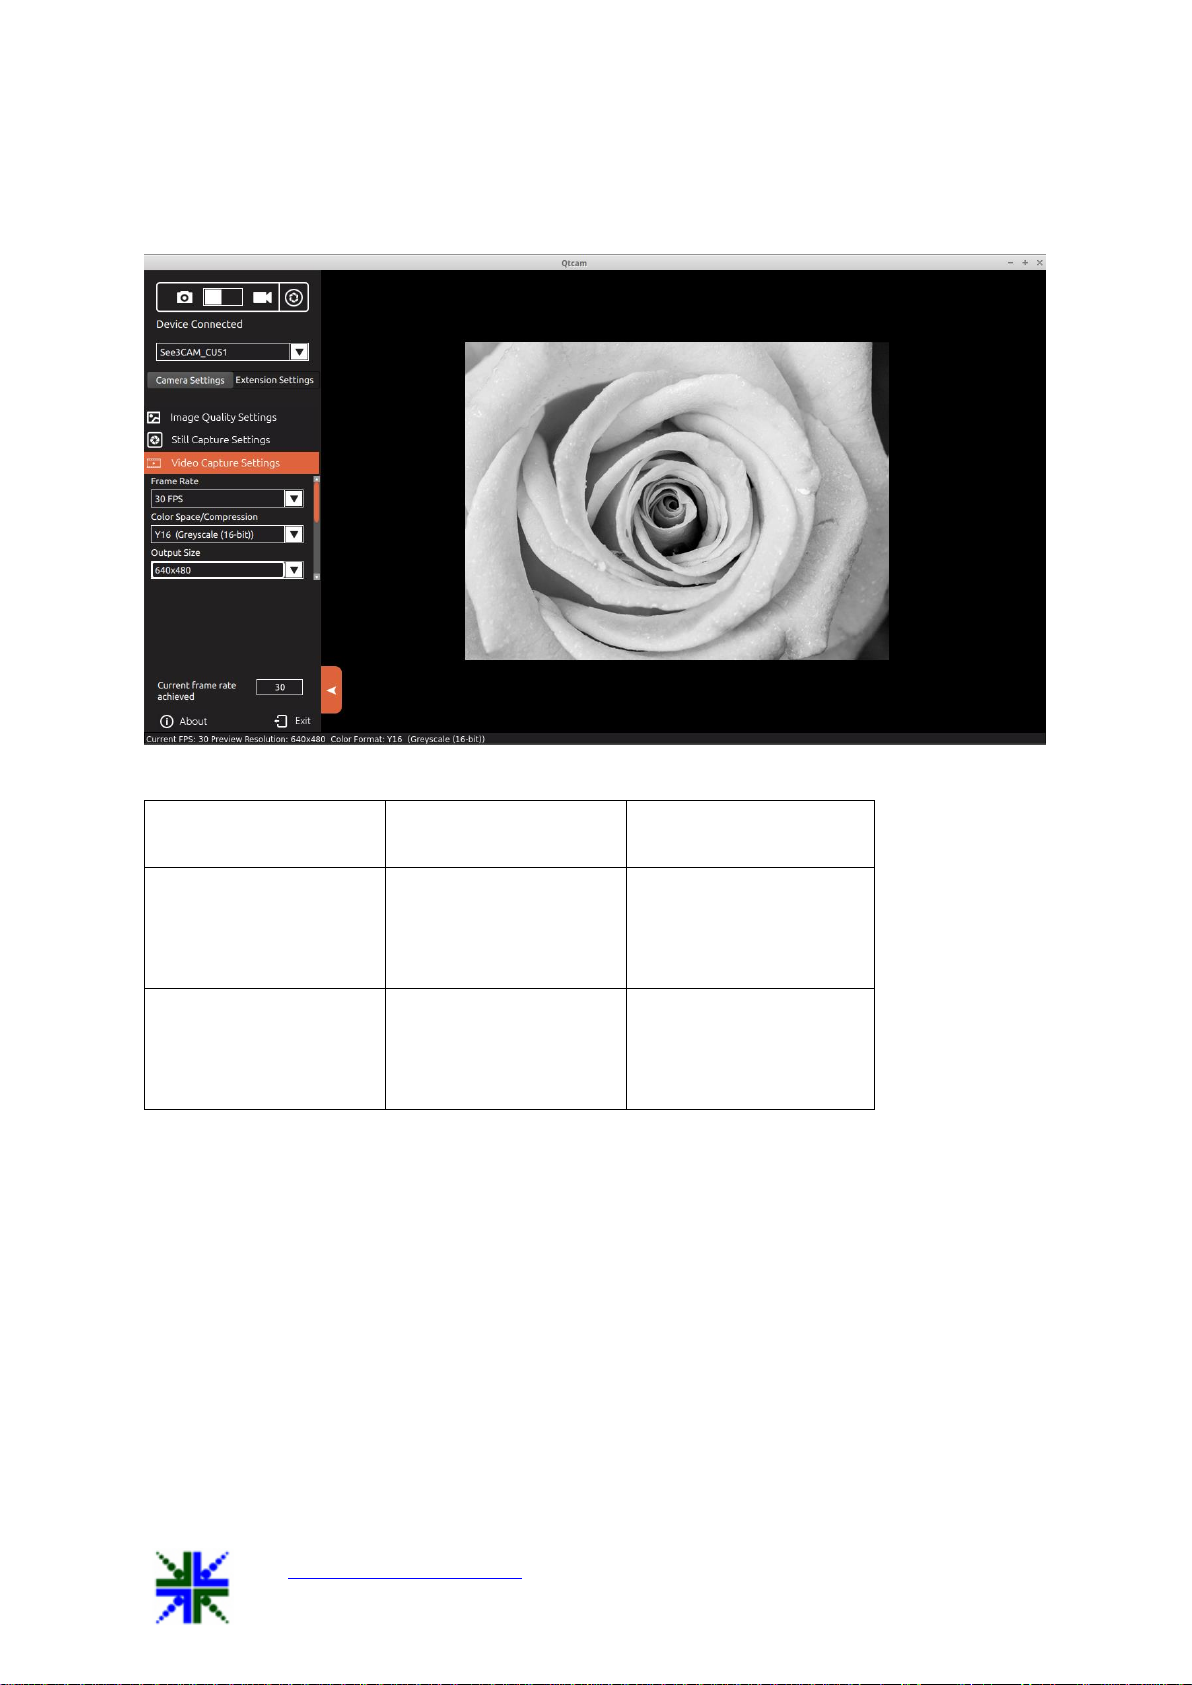
See3CAMCU51 User Manual 13-Aug-15
www.e-consystems.com | Subject to change without notice Page 15 of 23
user can change this on any time. The preview will be updated as per the selected output
size.
USB mode
Resolution
Frame rates at Y16
format
USB 3.0
2592x1944
1920x1080
1280x720
640x480
14
30
60
120
USB 2.0
2592x1944
1920x1080
1280x720
640x480
2
5
12
30
User switches the resolution from 640x480 to 1920x1080, then the preview will be
updated as below one,

See3CAMCU51 User Manual 13-Aug-15
www.e-consystems.com | Subject to change without notice Page 16 of 23
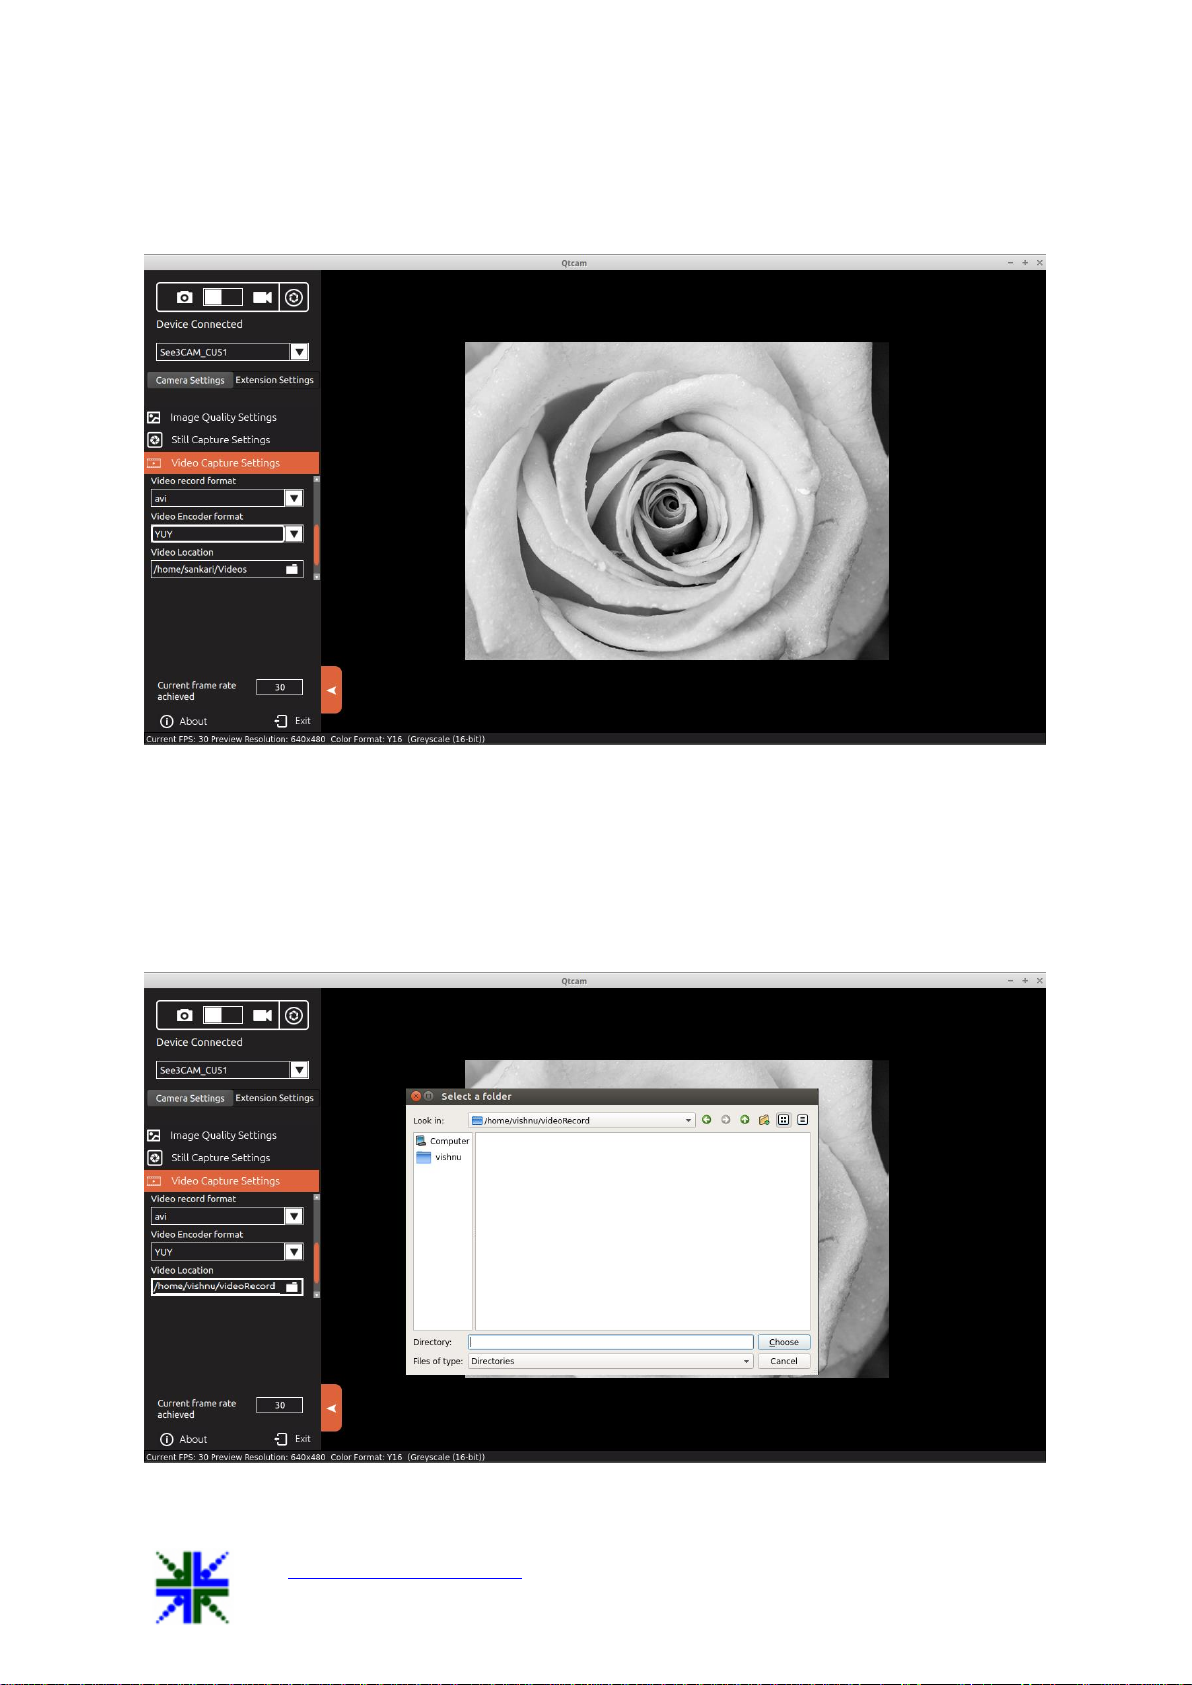
8.4.3.4 Video Record Format
Two video format are available in this version,
1. avi
2. mkv
8.4.3.5 Video encoder format
There are four video encoder formats available in this version,
1. YUY (Raw)
2. MJPEG
3. H264
See3CAMCU51 User Manual 13-Aug-15
www.e-consystems.com | Subject to change without notice Page 17 of 23
4. VP8
The video will be recorded in any one of the selected encoder format.
8.4.3.6 Video Location
The video location can be changed by clicking the folder icon or the text box, a file dialog
will be open for the user to select the new location. User have to click the open button in the
file dialog to change the path. The default path is “System video path”
(/home/@user/Videos).

See3CAMCU51 User Manual 13-Aug-15
www.e-consystems.com | Subject to change without notice Page 18 of 23
8.5 Display Current frame rate achieved
Current frame rate achieved per second: - Frame rate will be affected by various
environmental parameters. It is displayed all the time [Just above “About” option].
8.6 Extension Settings
On selecting the Extension settings tab, the extension control will appear, if the device
supports extension unit. The See3CAM_CU51 camera has some additional controls and
features and these not quite common controls and hence they are not included in the standard
UVC controls, but listed as Extension controls.
The Extension Unit Menu is used to select these extended HID controls of
See3CAM_CU51. It can be used to control master mode, trigger mode, manual exposure,
exposed image capture and select the torch modes. This can be done by clicking the
appropriate controls of the Extension Settings.
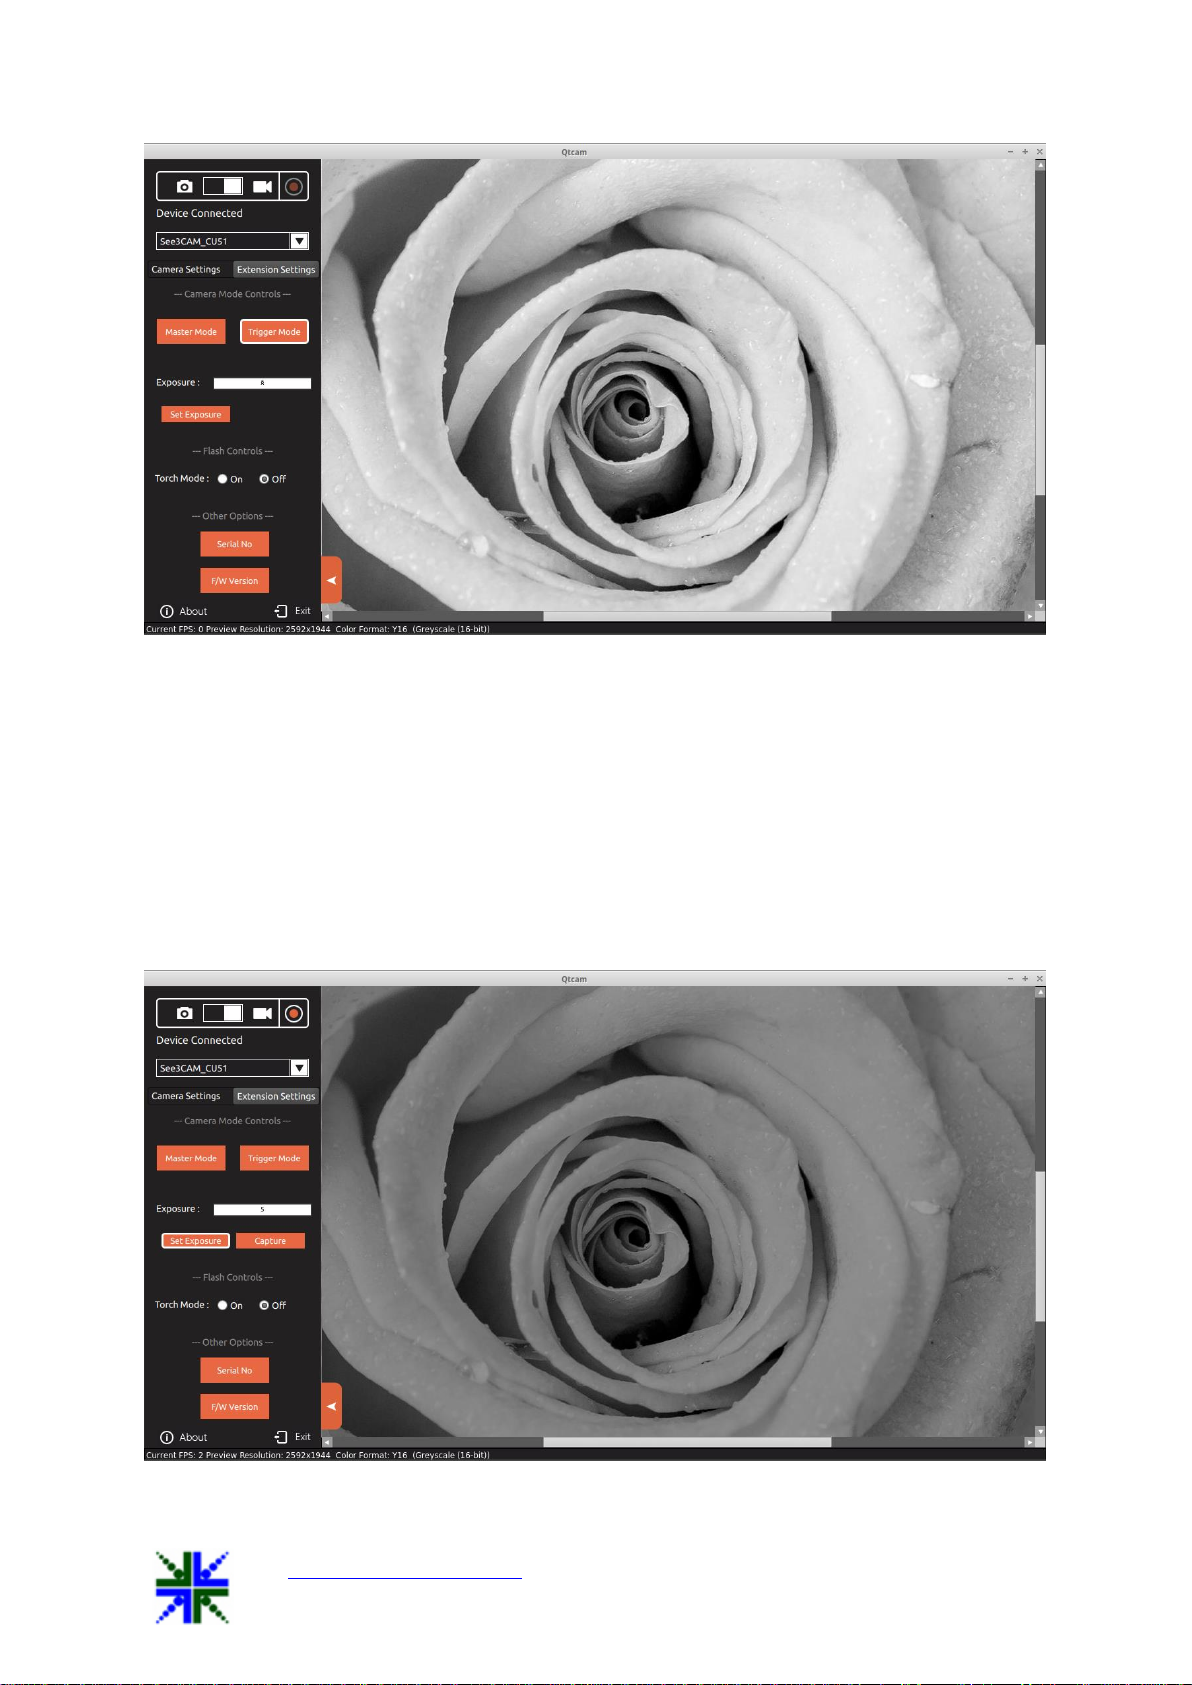
8.6.1 Master Mode
The Master Mode of operation can be considered as a free-running mode of the
camera. The camera is configured for a preview resolution and still resolution. The
application is started and the Master mode is chosen and the application starts streaming the
video. This is a simple mode of operation for the camera without any external trigger
capability.
In master mode of See3CAM_CU51 in Linux, there are two methods of still image
capture. They are
1. Software Still Capture
2. Hardware Still Capture
e-con systems has found an intelligent method to facilitate still image capture by
using the sample application Qtcam. In Master Mode still image can be taken by using any
of the methods, and also in all available resolutions using any brightness value.
If the user wants to take an image in the preview resolution the user should first select
the path of image storage and then click on capture image icon or give a trigger input through
the DIN connector to get the image in the same resolution. If the user wants to take an image
in another resolution, the user must first switch to that resolution and then take the image.
Both Software and Hardware still capture methods are supported in the Master mode
of See3CAM_CU51.

See3CAMCU51 User Manual 13-Aug-15
www.e-consystems.com | Subject to change without notice Page 19 of 23
8.6.2 Trigger Mode
In Trigger mode, See3CAM_CU51 camera is capable of synchronizing the exposure
(or integration) of the pixels of the camera to an external trigger pulse that can be given
through the connector of the camera. Also the duration of the exposure depends on the pulse
duration of the trigger pulse.
Since this is a global shutter camera, all the pixels start and stop integrating at the
same time, avoiding rolling skew during the capture of fast moving scenes. In addition to this,
the start of integration of pixels can be synchronized to an external event in Trigger mode.
In Trigger mode of See3CAM_CU51, the preview will not be available and the
camera will be kept in standby waiting for a trigger pulse to start the integration of pixels and
provide a global shutter image. The user can switch to trigger mode by clicking on the
Trigger Mode button in the Extension Settings tab of the Qtcam application.
The user can configure the camera settings such as exposure, still image resolution,
still image storage location etc., in Master mode and then enter the Trigger mode.
In the Trigger mode, the camera settings will be retained, but preview will not be
available. The camera shall be waiting for an external event on the connector and the camera
will start exposing on the trigger signal. The external trigger pulse on the connector must
have a pulse duration equal to that of the required exposure, so the camera will expose for
this duration and immediately readout the image.
In Trigger mode, only external Trigger event is supported and no software still image
capture is possible.
See3CAMCU51 User Manual 13-Aug-15
www.e-consystems.com | Subject to change without notice Page 20 of 23
8.6.3 Exposure control
The exposure control for See3CAM_CU51 is provided in the extension menu. The
required exposure value can be entered into the text box and this exposure value will be
applied during exposed image capture.
See3CAM_CU51 supports exposure levels ranging from 1 milli second to 30 seconds.
This can be input through the exposure text box, i.e. for 1 milli second the value of 1 should
be entered in the text box, for 1 second the value of 1000 should be set, as 1 second = 1000
milli seconds. Similarly for 30 seconds the value of 30000 should be set, as 30 seconds =
30000 milli seconds.
Other manuals for See3CAM CU51
3
Table of contents
Other e-con Systems Digital Camera manuals

e-con Systems
e-con Systems e-CAM50_CU96 Parts list manual

e-con Systems
e-con Systems See3CAM CU51 Parts list manual

e-con Systems
e-con Systems See3CAM CU135 User manual

e-con Systems
e-con Systems See3CAM CU51 User manual

e-con Systems
e-con Systems Tara See3CAM Stereo User manual

e-con Systems
e-con Systems See3CAM CU51 User manual

e-con Systems
e-con Systems Tara Stereo Vision User manual

e-con Systems
e-con Systems See3CA 80 User manual


