e-JOE Bicycle MOMAS User manual

USERMANUAL
Please read before operating your new scooter.
e-JOE Electric Bicycle Inc.
Phone: 855-888-1891
E-Mail: [email protected]
Website: http://gomomas.com

CONTENTS
Introduction…………………………………………………………………………………….……………………..3
Warranty……………………………………………………………………………………………………………….…4
Structure….………………………………………………………………………………..…………………………….5
Main Specifications: Momas Scooter………………………………………………………………….......6
Battery Charger and Indicator………………………………………………………………………………….7
Battery Access……………………………………………………………………………………………….7
Charging the Battery……………………………………………………………………………………..7
Charge Status Indicator………………………………………………………………………………...7
Battery Precautions……………………………………………………………………………………….8
LCD Dashboard………………………………………………………………………………………………………..9
Display Functions…………………………………………………………………………………………..9
Speed Mode Display…………………………………………………………………………………….10
Multifunction Display Area…………………………………………………………………………..10
ERROR Display……………………………………………………………………………………………..10
Settings and Default Values………………………………………………………………………...11
Handlebars…………………………………………………………………………………………………………….12
To Adjust Handlebar Height………………………………………………………………………...12
To Fold Handlebars Down…………………………………………………………………………...12
Brakes and Lights…………………………………………………………………………………………………..13
Brake Precautions……………………………………………………………………………………….13
Headlights and Brakelights ………………………………………………………………………...13
General Operating Instructions……………………………………………………………………………..14
Before You Ride for the First Time……………………………………………………………….14
During and After Riding: Instructions and Tips…………………………………………….14
Using the Kickstand……………………………………………………………………………………..15
Folding Instructions……………………………………………………………………………………………….15
Unlocking the Securing Latch……………………………………………………………………...16
Maintenance………………………………………………………………………………………………………….16
Water……………………………………………………………………………………………………………………..16
Simple Troubleshooting………………………………………………………………………………………...17
Contact Us……………………………………………………………………………………………………………..18
2

INTRODUCTION
Congratulations on the purchase of your new scooter! We want to make you happy
and believe your new scooter will bring you lots of fun.
We ask that you read this manual thoroughly, paying special attention to the safety
warnings before you start riding your scooter, to help ensure that you ride safely
and your electric scooter has a long service life.
Please observe traffic regulations and do not lend your scooter to anyone who is
unfamiliar with it. The scooter can only be legally used on the road by a person
aged 14 years or older.
Test your brakes prior to using the scooter every time you use it, and remember
the scooter will not stop as quickly in wet or icy conditions as it would on a dry
road.
Frequently check your tire pressures. They should be 35 psi. Low tire pressures will
result in damage to the tires and will massively reduce your range.
NEVER drink alcohol and ride your electric scooter. The use of alcohol greatly
reduces reflexes and limits your ability to ride safely. Even a very small amount of
alcohol will limit your ability to be safe on the road.
When you need to replace your battery, please either dispose of it properly or send
it back to us or your retailer and we'll make sure it is properly recycled.
Happy Scootering!
YourFriendsateJOEBike
3

WARRANTY
LIMITED ONE (1) YEAR COMPONENTS WARRANTY
Handlebars, handlebar sleeves, t-bar, stem, positioning pin, dashboard and throttle unit, brake lever,
t-bar tightening lever, securing latch, ride board, charging socket, kickstand, rear wheel brake, and
hardware are warranted to be free from manufacture defects in materials and/or workmanship for a 1
year period from the date of original purchase.
LIMITED ONE (1) YEAR BATTERY WARRANTY
Lithium Ion batteries are warranted to be free from manufacture defects in materials and/or
workmanship for a 1 year period from the date of original purchase (cycle life or deep charge up to
70% full capacity).
LIMITED 30 DAYS FULL REPLACEMENT WARRANTY
If an Momas Scooter is not working properly because of a major defect within the first 30 days, e-JOE
Bike, Inc. will repair or replace any defective Momas Scooter at its sole option and expense upon
determining whether the damage, failure, or loss is due to a major defect. e-JOE Bicycle will have sole
discretion to determine whether the damage, failure, or loss is due to a major defect or otherwise.
TERMS OF WARRANTY
●This warranty only applies to the original owner of a Momas Electric Scooter.
●
Proof of purchase is required for ALL warranty claims.
●This warranty is for replacement parts ONLY and does NOT cover the cost of labor.
●This warranty covers shipping costs for dealers ONLY.
○
If you believe your scooter needs service, or are experiencing problems with your scooter,
e-JOE Bicycle encourages you to bring your scooter to the nearest electric scooter/e-bike
dealer for warranty determination and assistance.
●This warranty does not cover any defects resulting in failure to follow instructions in the
owner’s manual, acts of God, accidents, misuse, neglect, abuse, commercial use, modification,
or improper assembly.
●This warranty does not include coverage of normal wear-and-tear parts (ex. Tires, tube, breaks,
etc.).
●This warranty does not coverparts damaged by an attempted repair unless performed by an
authorized dealer of Momas Scooter with e-JOE Bicycle’s knowledge.
●e-JOE Bicycle Inc. reserves the right to refuse any warranty claim.
4

STRUCTURE
Refer to the picture below for structure:
1. Integrated
Throttle/
Dashboard
2. Handlebars
3. Hand Brake Lever
4. T-Bar
5. T-Bar Securing
Lever
6. Stem
7. Headlight
8. Securing Latch
9. Ride Board
10. Charging Port
11. Kickstand
12. Rear Wheel
Brake
13. Brake Light
5

MAINSPECIFICATIONS:MOMASSCOOTER
SCOOTER
Weight
30 lbs.
Max Capacity
250 lbs.
Max Speed
20 mph
Full Charge Distance
Up to 20 miles
Climbing Grade
10°-12° incline
MOTOR
Description
Planetary Gear Brushless ub Motor
Max Riding Noise
≤ 40%
Rated Power
350W
Rated Efficiency
≤ 75%
BATTERY
Type
Lithium Ion
Voltage
36V
Capacity
9Ah
CHARGER
Input Voltage
110 - 140v ac
Charging Time
3 hr
How to Charge
Direct Charge: Connect plug with plug receptacle
6

BATTERYCHARGERANDINDICATOR
BatteryAccess
The battery is embedded inside the scooter. We highly recommend only a certified
technician replace the battery.
ChargingtheBattery
●Locate the charging port on the left side of the ride board, closest to the front
wheel, and remove the protective end cap.
●Connect the charger circular plug to the scooter’s charging socket, then
connect the charger 3 prong plug to the power outlet.
ChargeStatusIndicator
The battery charger for the Momas Electric Scooter is equipped with an LED light
indicator that works to help you preserve the battery life of your scooter by
allowing you to quickly see if your Momas is completely charged.
●The battery is charging when the indicator light is red.
●When the indicator light turns green, the battery is fully charged.
7

BatteryPrecautions
●Do not touch the two poles of the battery with your hands when the battery
is removed for charging. The two battery poles should not be touched with
any other metal or other material that conducts electricity.
●While charging, put the battery in a secure place where children cannot reach
it.
●Do not use any other charger other than the one that came with your electric
bike. If you need another charger, contact your local dealer or e-JOE Bicycle.
●Do not attempt to open or repair your charger. The electronics contain high
pressure circuits, so do not dismantle by yourself.
●Prevent liquids, metal, and metal fillings from permeating the charger, and
be careful to not drop or hit the charger causing it to become damaged.
●Do not put anything on top of the charger while charging; it must be well
ventilated to allow the heat generated to dissipate.
●When charging, if there is a peculiar smell or the charger gets too hot to
touch, please stop charging immediately.
●To prevent premature failure of your battery and for your warranty to
remain in effect on your battery, it is RECOMMENDED that you charge and
discharge your battery at least once per month. Do NOT use your battery in a
very low state.
●It is normal for distance range to reduce as a result of low temperatures.
●While carrying the charger, DO NOT bump, drop, or damage the charger, or it
may result in failure.
●Avoid any contact with water while charging your battery. If a plug or socket
becomes wet, dry it completely before using it.
8

LCDDASHBOARD
To turn on the LCD dashboard, hold down the (power) button for 1-2 seconds until
you see the screen light up.
DisplayFunctions
1. Battery Charge Indicator
2. Speed (Km/h or MPH)
3. Speed mode (1 [LO], 2 [MED], 3 [HI])
4. Multifunction Display Area:
ODO - Total Milage
TRIP - Single Trip Milage
RM - Residual Milage
TM - Running Time
ERROR - Error Fault Status
5. Milage Display
9

SpeedModeDisplay
Choose between three speed settings.
●Level 1 (Low)
●Level 2 (Medium)
●Level 3 (High)
Increase Speed Level: Press the (+) button next to the LCD dashboard.
Decrease Speed Setting: Press the (-) button next to the LCD dashboard.
Cruise Control: Hold the throttle for three seconds to activate cruise control.
MultifunctionDisplayArea
To change between ODO, TRIP, RM, TM, and ERROR display, press the (power)
button located next to the LCD dashboard.
ERRORDisplay
The fault status display area, ERROR; When ERROR is flashing, short
press ON/OFF key to adjust the display interface to the ERROR interface. The
corresponding figures represent the specific content of the fault state and are as
follows:
●ERROR 1: Motor Fault
●ERROR 2: Turn Fault
●ERROR 3: Controller Failure
●ERROR 4: Power Brakes
●ERROR 5: Under Voltage Protection
●ERROR 6: Communication Fault - the instrument does not close to the output
of the controller
●ERROR 7: Communication Fault - the controller does not receive the
instrument output
10

SettingsandDefaultValues
To get to settings hold down the 3 buttons [ (+), (power), (-) ] together, until you get
into the mode settings.
Press (+) or (-) to change the setting parameter.
Press (power) to go to the next mode level of the parameter.
●P01: Backlight Brightness
○(1) Darkest (2) Medium [Default] (3) Lightest
●P02: Distance Unit
○(0) Kilometers [Default] (1) Miles
●P03: Voltage Grade
○24V 36V 48V
●P04: Sleep Time
○(0) Don’t Sleep (1)-(60) Unit Minutes (10) [Default]
●P06: Wheel Diameter
○(10) [Default]
●P07: Speed Magnetic Steel Number
○(30) [Default]
●P09: Zero Start and Non-Zero Start Up
○(0) Zero Start [Default] (1) Non-Zero Start [You want to use this mode]
●P12: Starting Torque
○(0) Weakest (1)-(4) Mid Range (5) Strongest [Default]
●P14: Controller for limiting value setting default
○(12) [Default]
●P15: Maximum Speed set to Low Gear Vehicle
○(40) [Default]
To exit from settings, go to ODO mode, then hold (-) for 3-5 seconds to exit.
11

HANDLEBARS
The Momas Scooter features adjustable handlebars that can be adjusted from 24”
to 48” to accommodate riders of any size.
Appropriate adjustments can be made to the vertical handle stem according to
personal preference, but it is forbidden to expose the infix notation (also called the
safety line). If used in an inappropriate way, it may cause serious injury to the rider.
ToAdjustHandlebarHeight:
●Locate the T-bar tightening lever, located where the t-bar meets the stem
●Pull the lever away from the stem until the t-bar is free to move up and down
For taking your scooter on the go, the handlebars can be folded down.
ToFoldHandlebarsDown:
●Grasp the handlebar where it meets the T-bar, and slide the handlebar
securing latch outwards away from the T-bar
●Rotate the handle bar towards the ground until it rests parallel to the stem
12

BRAKESANDLIGHTS
The Momas Scooter uses a
rear wheel, vented “Disk
brake”, that reduces heat
transfer for quick and
smooth deceleration.
The lever for the brake is
located on the left handlebar.
To slow down or stop the scooter when it is powered on and moving, squeeze the
brake lever.
BrakePrecautions
●Do not brake to strongly or abruptly, as it will make it easier to fall down.
●Incline your body backward to reduce the influence of inertia.
●Adjust the brake pads properly. Brake pads gradually wear down with
normal use. If the brake pads are ground flat, repair or replace them
promptly.
HeadlightsandBrakelights
Eachscootercomeswithheadlightsandbrakelightsfortwilightandnightrides.
Toactivatetheheadlight,pushtheonbuttonlocatedontopoftheheadlight.
●Important!
Removetheprotectivestickerbypullingthetabbeforeturning
lighton.HeadlightWILLNOTturnonwithstickerstillinplace.
13
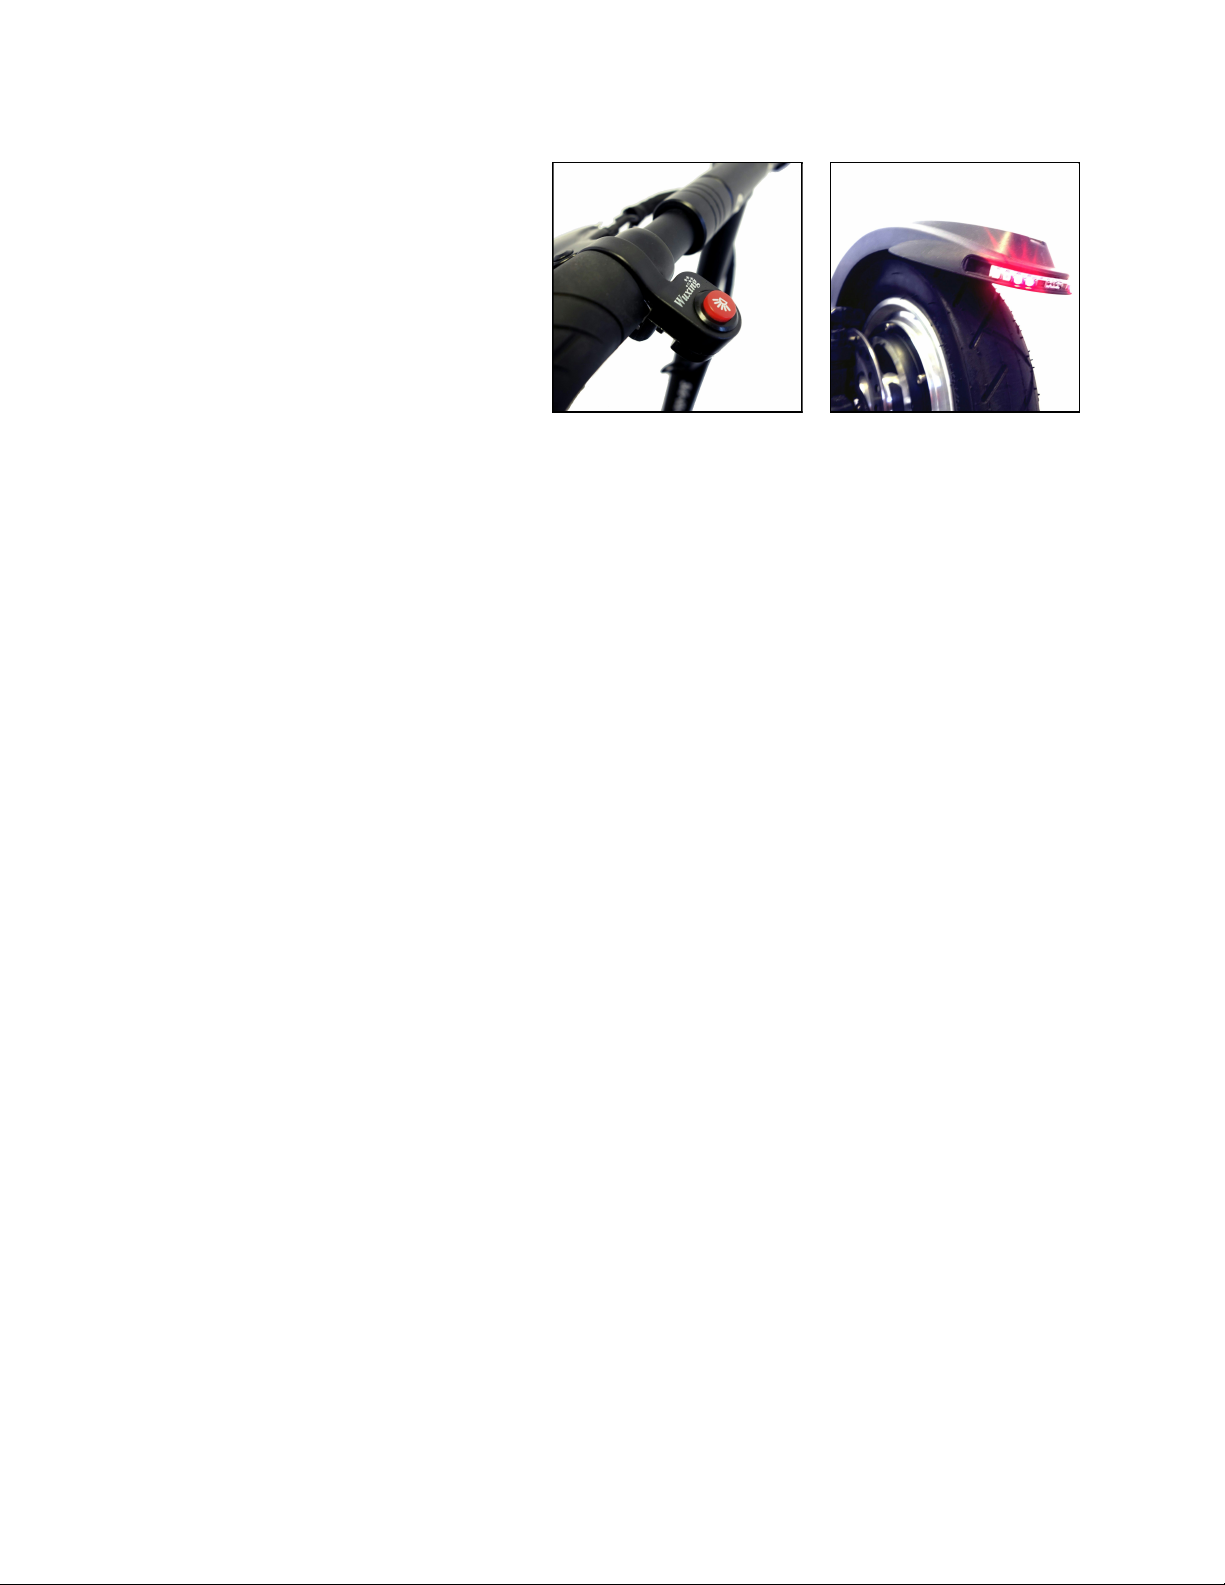
Thebrakelightturnsonwhenthe
brakeonthelefthandlebaris
squeezed.
Toturnonthebrakelight
continuously,presstheredbrake
lightbuttonlocatedontheleft
handlebar.
GENERALOPERATINGINSTRUCTIONS
BeforeYouRidefortheFirstTime:
●Check that the handlebars and handlebar stem are properly tightened
●Check all other nuts and bolts and fixings are properly tightened
●Check that brakes and brake levers are functioning properly
●Check that tire pressures are 35 psi and that tires are not damaged
●Check that reflectors and lights are functioning properly
●Make sure battery is fully charged
●Turn on by pressing the ON/OFF button on the LCD display
DuringandAfterRiding:InstructionsandTips
●Once the scooter is powered ON, when the rider presses down on the thumb
throttle, the scooter will move forward! Do not turn the power ON until you
are ready to go.
●Find a private area without road traffic and enough space to get used to your
Momas Electric Scooter
●When riding down hills, do not turn off power; otherwise, the controller and
motor will be easily damaged.
● If you decide to push your scooter for any reason, make sure to turn the
power off so you don’t automatically turn the throttle on and make the
electrical scooter start suddenly and cause an accident.
●To help get the best distance out of your electric scooter, refrain from
unnecessary braking and coast as much as possible.
14

UsingtheKickstand
The Momas Electric Scooter is equipped with a stabilizing kickstand.
To lower the kickstand: Plant foot on top of the portion of the kickstand nearest the
rear wheel, and guide the kickstand in a clockwise motion until it reaches the floor.
To raise the kickstand: Place foot in front of the kickstand, slightly tilting the scooter
away from your body, and guide kickstand upwards towards the ride board.
FOLDINGINSTRUCTIONS
*Ensure scooter is off before folding and storing.
Fold handlebars down, (see complete instructions on
page 13.)
Grasp the securing latch, located at the front end of
the ride board, and pull outwards away from the
stem and towards the ride board.
Fold stem down to the ride board until you hear it
click into place. While still holding the stem, tug
gently upwards to ensure it has locked into place,
before carrying the scooter.
15

UnlockingtheSecuringLatch
When you are ready to ride again, unlock the
securing latch by pressing it down towards the ride
board until you feel the stem release. Lift the stem
away from the ride board until you hear it click into
place. Check to make sure the latch is secure before
you begin riding.
MAINTENANCE
●Important! Do not attempt to open the casings of the battery, motor, or
controller. It could be dangerous and will void any warranties. If you
experience any problem, please contact our service department or your
retailer.
●The handlebar tube should never be raised beyond the maximum indicated
by the safety lines around the tube.
●It is recommended that you take your scooter for a tune-up and
maintenance check by a e-scooter mechanic on a regular basis.
WATER
●Your electric scooter is rain and splash proof and can be used in all weathers.
●The electric components of the scooter, such as the motor, battery, and
controller, MUST NOT be submerged in water.
●Please use caution. Do not operate your scooter under bad/heavy weather
conditions.
16

SIMPLETROUBLESHOOTING
PROBLEMS
SOLUTIONS
A. Top speed too slow
Fully recharge battery
B. Power on but motor not
working
Replace Fuse
C. Driving shorter distance per
recharge
1. Check tire pressures
2.Recharge completely or have charger
re-inspected
3.Battery needs replaced
D. The power is on, and the
throttle is pressed, but the scooter
does no work
1. Check battery to see if it needs to be charged,
or
2.Fuse needs to be replaced, or
3.Controller needs to be replaced, or
4. Motor needs to be replaced
E. The power is on, and the scooter
takes off without pressing the
throttle
1. Check if throttle is stuck in the on position
2.Lubricate or replace throttle if it is faulty
F. After stopping, the bike does not
start when the throttle is pressed
1. Check whether the brake is fully released
G. You connect the power to the
charger, but the indicator light
does not come on
1.Check whether there is electricity to the charger
2. If you have a voltage meter, you can check to
see if the charger produces the correct current
H. You plug in the charger to the
scooter and the outlet, and the
green light comes on instead of
the red light. This means it is not
charging
1. Check to see if the battery is fully charged
2. Check whether the charger is plugged properly
into both the battery and the outlet
3. Check to voltage of the charger and battery
4. If “zero” voltage on the charger, then it needs
to be replaced.
5. If “zero” voltage from the battery, then check
the fuse.
If all above mentioned situations are normal, then there is another problem. Please call
your local dealer or our service department for more assistance.
17

CONTACTUS
WethoroughlyhopeyouenjoyyournewMomasScooter
byeJOEBike!
Ifyouhavequestions/comments/concerns,orwouldliketoshare
yourexperiencewithus,pleasecontactusat:
Telephone:8558881891
EMail:[email protected]
Website:http://www.gomomas.com
LikeusonFacebook!
https://www.facebook.com/GoMOMAS/?fref=ts
18
Table of contents
Other e-JOE Bicycle Scooter manuals


