manuals.online logo
Brands
  1. Home
  2. •
  3. Brands
  4. •
  5. EarthQuake
  6. •
  7. Amplifier
  8. •
  9. EarthQuake Cinenova-16 User manual

EarthQuake Cinenova-16 User manual

Sound That Will Move You.
Multi source Multi room
16-Channel Audio Controller/Amplifier
Users’ Guide
Multi source Multi room
16-Channel Audio Controller/Amplifier
Users’ Guide
Cinénova-16
Earthquake Sound Corporation/Home Audio Division
2727 McCone Avenue • Hayward CA, 94545 • Phone: 510-732-1000 Fax: 510-732-1095 • www.earthquakesound.com
Cinénova
1616
16
15
14
13
12
11
10
9
8
7
6
5
4
2
1
2
Customer Support
@earthquakesound.com
Tel: 800-576-7944
Fax: 510-732-
tech
1095
Safety First
This documentation contains general safety, installation, and operating instructions for the 5-Channel and 7-Channel
Power Amplifiers. It is important to read this user guide before attem ting to use these products. Pay particular attention to
safety instructions.
s’ p
The following symbols are used in this document:
Appears on the component to indicate the presence of uninsulated, dangerous voltage inside the enclosure –
voltage that may be sufficient to constitute a risk of shock.
Calls attention to a procedure, practice, condition or the like that, if not correctly performed or adhered to, could result
in injury or death.
Calls attention to a procedure, practice, condition or the like that, if not correctly performed or adhered to, could result
in damage to or destruction of part or all of the product.
Note: Calls attention to information that is essential to highlight.
The Sound That Will Move You.
Earthquake Sound, Corp.
2727 McCone Avenue
Hayward, CA 94545
Tel: 510-732-1000
Fax: 510-732-1095
© 2005 Earthquake Sound, Corp. All rights reserved.
This document should not be construed as a commitment on the part of Earthquake Sound, Corp. The information is subject to change without notice.
Earthquake Sound, Corp. assumes no responsibility for errors that may appear within this document.
Safety First
Earthquake Sound
2
Important Safety Instructions
Earthquake Sound
1) Read these instructions in their entirety. 10) Protect the power cord from being walked on or pinched,
particularly at plugs, convenience receptacles, and the pint
2) Store this manual and packaging in a safe place. where they exit from the apparatus.
3) Heed all warnings. 11) Only use attachments & accessories specified by the
manufacturer.
4) Follow instructions (do not take short cuts). 12) Use only compatible rack or cart for final resting position.
5) Do not use this apparatus near water. 13) Unplug this apparatus during lighting storm or when unused
for long period of time.
6) Clean only with a dry cloth.
14) Refer all servicing to qualified service personal. Servicing is
7) Do not block any ventilation openings. Install in accordance required when the apparatus has been damaged in any way
with the manufacturers instructions. such as; power-supply cord or plug is damaged, liquid has
been spilled or objects have fallen into the apparatus, the
8) Do not install near any heat sources such as radiators, heat apparatus has been exposed to rain or moisture, does not
registers, stoves, or other apparatuses that produce heat. operate normally, or has been dropped.
9) Do not defeat the safety purpose of the polarized or 15) To reduce the risk of fire or electric shock, do not expose
grounding-type plug. A polarized plug has two blades with this apparatus to rain or moisture.
one wider that the other. A grounding-type plug has two
blades and a third grounding prong. The wide blade or the
third prong is provided for your safety. If the provided plug
does not fit into your outlet, consult an electrician for
replacement of the obsolete outlet.
Safety First
This triangle, which appears on your component,
alerts you to the presence of uninsulated,
dangerous voltage inside the enclosure -
voltage that may be sufficient to
constitute a risk of shock.
CAUTION
RISK OF ELECTRIC SHOCK
DO NOT OPEN
This triangle, which appears on your component,
alerts you to important operating and
maintenance instructions in this
accompanying literature.
3
Earthquake warrants the original purchaser that all Factory Sealed New Audio surround & dust cap, burnt speaker voice coil.
Products to be free from defects in material and workmanship under normal • Fading and or deterioration of speaker components & finish due to
and proper use for a period of five (5) years from the date of purchase (as shown improper exposure to elements.
on the original bill of sale with serial number affixed/written on it). The five (5) • Bent amplifier casing, damaged finish on the casing due to abuse, misuse
year warranty period is valid only if an authorized Earthquake dealer properly or improper use of cleaning material.
installs the product and the warranty registration card is properly filled out and • Burnt tracers on PCB.
sent to Earthquake Sound Corporation. If a non-authorized party installs the • Product/part damaged due to poor packaging or abusive shipping
product, a ninety (90) day warranty period will be applied. conditions.
• Subsequent damage to other products.
(A) Five (5) years limited warranty plan coverage guidelines:
warranty claim will not be valid if the warranty registration card is not
• First year: Earthquake pays for labor, parts, and ground freight (only in US properly filled & returned to Earthquake with a copy of the sales invoice.
A
mainland, not including Alaska and Hawaii) (shipping to us is not covered). Warranty card is located on the last page of this manual.
• Second year: Earthquake pays for labor and parts only, customer must pay
(E) Service Request:
freight both ways.
• Third, fourth & fifth year: Earthquake pays labor only. Customer must pay
To receive product service, contact Earthquake service department at (510)
for parts and freight both ways.
732-1000 and request an RMA number (Return Material Authorization). Items
shipped without a valid RMA number will be refused. Make sure you provide us
(B) Warning:
with your complete/correct shipping address, a valid phone number, and a brief
description of the problem you are experiencing with the product. In most cases,
Products (sent for repair) that are tested by Earthquake technicians and
our technicians might be able to resolve the problem over the phone; thus,
deemed to have no problem(s) will not be covered by the five (5) year limited
eliminating the need to ship the product.
warranty. Customer will be charged a minimum of one (1) hour of labor (at the
ongoing rates) plus shipping charges back to customer.
(F) Shipping Instructions:
(C) Earthquake will repair or replace - at our option - all defective
Product(s) must be packaged in its original protective box(es) to minimize
products/parts subject to the following provisions:
transport damage. Shipper claims regarding items damaged in transit must
be presented to carrier. Earthquake Sound Corporation reserves the right to
• Defective products/parts have not been altered or repaired by other than an
refuse improperly packed product. Original bill of sale must accompany
Earthquake factory-approved technician.
product returned for service. We encourage you to include with the package
• Products/parts are not subjected to negligence, misuse, improper use or
a written description of the problem. Ship product to: Earthquake Sound
accident, damaged by improper line voltage, used with incompatible products
Corp. 2727 Mc Cone Avenue, Hayward, CA 94545. Ph (510) 732-1000. You
or have its serial number or any part of it altered, defaced or removed, or have
are responsible for the cost of shipping the product to Earthquake Sound
been used in any way that is contrary to Earthquake's written instructions.
Corporation.
(D) Warranty Limitations:
(G) Disputes Resolution:
Warranty does not cover products that have been modified or abused,
All disputes - between clients and Earthquake Sound Corporation - resulting
including but not limited to the following:
from the five (5) years limited warranty policy must be resolved according to
• Damages to speaker cabinet and cabinet finish due to misuse, abuse or
the laws & regulations of the county of Alameda -California.
improper use of cleaning materials/methods.
• Bent speaker frame, broken speaker connectors, holes in speaker cone,
Getting started
Earthquake Sound
Five (5) year limited warranty
PRODUCT REGISTRATION
This Cinénova Grande Power Amp can be registered by returning the Product Registration card attached to
this manual or by visiting www.earthquakesound.com/product registration. Please also retain the bill of sale,
which represents proof of purchase and helps expedite warranty issues. SERIAL NUMBER
We recommended that you place or write
your serial number here for future
reference, if necessary.
4
Getting started
About The Cinénova Grande Amplifiers
Earthquake Sound
Thank you for purchasing this Cinénova Grande reference
amplifier designed to satisfy your audiophile needs for music sers are able to enjoy
enjoyment. The Cinénova Grande is conceived to reproduce"true to pure music, untainted by components distortion.
life" music as it was originally recorded, without tempering, coloration or
compression. Earthquake Engineers, driven by their desire for excellence,
pushed the envelop beyond its limits. They designed the "bi-file" toroidal
transformer circuit witch allows five separate power supplies (one for
each channel) to be magnetically coupled to one single primary 4KVA
transformer. The 99% efficient power supply permits large amount of
voltage to flow through with near nil heat losses.
The "Alpha One" is a monaural 1000 watts amplification/power
block, used in both the 5-channel and 7-channel Cinénova grande
amplifiers. The "Alpha One" blocks are individually removable using the
Earthquake patented "EZXS" system, without the need to dismantle the
rest of the amplifier. Channel separation exceeds the norms of 90
decibels and stretches it to 110 decibels.
"Sounding good" and "looking good" are both integral
characteristics of a Cinénova Grande amplifier. The elegant industrial
design is only surpassed by the sturdy chassis upon which the amplifier
is built, 12 gauge steel is shaped to house the "Alpha One" modules and
transformer. The chassis is beautifully faced with an 8 mm aluminum
plate, hand engraved and available in both Black and Platinum finish.
Constructing a Cinénova Grande is a fun process. From hand
assembling, calibrating, burn testing, and packaging, every step is
The Cinénova Grande t ology integrates minimum conducted with love for details and hunger for perfection. We enjoyed
number of components in the audio path, leading to excellence in sound building your Cinénova Grande and we hope you will feel the same
quality, efficiency and clean amplification. using it.
From our home to your home... Thank you.
Like the finer things in life, the Cinénova Grande was conceived
with love for details, hunger for power, and gratifying grace;
consequently ranking it “at the top” in the realm of High Fidelity.
Most of home theater systems sold to consumers integrate low
power amplifier / receiver units, normally not exceeding 150 Watts per
channel. However, professional theater systems employ individual
components which provide the best separation and potentially a lot
more power. Audiophiles agree that an audio amplifier is the heart of
any system; It must be able to meet the demands of the softest musical
passage to the thundering special effects of a movie, without sacrificing
audio quality.
The Cinénova Grande’s untainted sonic quality is only matched
by its enormous power and stringent technical performance. The
finesse of high-fidelity audio, combined with the mastery of multi-
channel amplification, make the Cinénova Grande the cornerstone for a
high-end home theater setup. This amplifier caters to both the music
afficionado and the home cinema buff. After all, faithful reproduction of
music is our business.
accurate, and powerful, the 15 GHz switcher allowed engineers to use
less number of components in the audio path. U
echn
, Working side by side with
Engineers from Toshiba, our engineers helped develop one of the
fastest transistors in the industry, a 15 Giga-Hertz switcher. Fast,
Professor Joseph J. Sahyoun;
President & Chief Engineer
5
• Keep the original carton and packing materials
for future shipment or storage.
• Check for any visual signs of damage. If you
encounter any concealed damage, consult your
Earthquake Sound dealer before proceeding to
install the unit.
• Retain the sales receipt as it establishes the
duration of the limited warranty and provides
information for insurance purposes.
Unpacking
Earthquake Sound
6
Unpacking system components
• Power cord
• Remote control (Optional)
• Remote gain
• Amplifier
Cinénova-16 included components
There are several factors to consider before
installing the Earthquake Sound Cinénova-16
system.
• What are the intended listening zones?
• What system options and accessories might
be required for features such as local
sources, etc.?
• From where in each zone will the listener
prefer to control the system? Where will the
remote gains be located? Where will the
speakers be located.
• Where will the source equipment be located?
The Cinénova-16 must have adequate
ventilation above and below for air circulation
and heat dissipation. In addition rack mount
locations may require fans and vents.
System installation considerations
• It is recommended that the Cinénova-16 and
the source equipment be plugged into dedicated
20-amp circuit with an isolated ground. A power
line conditions can reduce interference problems
caused by noise found in some electrical
systems.
• Disconnect all live power cords before making
connections to the remote gain.
• Keep all power cords away from all signal
cables to prevent humming from induced noise.
• Choose reliable signal cables cords.
(Earthquake Sound also specializes in high-
performance RCA cables and patches).
• Label all wires with room location at both ends of
the wire.
Connection tips
T.O.C.
Getting Started
Earthquake Sound
Front & Rear Panel Over View . . . . . . . . . . . . . . . . . . . . . . . . . 8-10
Special Features . . . . . . . . . . . . . . . . . . . . . . . . . . . . . . . . . . . . 11
Trouble Shooting & Maintenance . . . . . . . . . . . . . . . . . . . . . . . . 12
Features & Specifications . . . . . . . . . . . . . . . . . . . . . . . . . . . . .
13
Wiring Recommendations . . . . . . . . . . . . . . . . . . . . . . . . . . . . . 14-15
Documentation . . . . . . . . . . . . . . . . . . . . . . . . . . . . . . . . . . . . . . 2
Safety Instructions . . . . . . . . . . . . . . . . . . . . . . . . . . . . . . . . . . . 3
7
Product Warranty . . . . . . . . . . . . . . . . . . . . . . . . . . . . . . . . . . . . 4
About the Cinenova Grande Line of Amplifiers . . . . . . . . . . . . . 5
Basic Operation
Unpacking . . . . . . . . . . . . . . . . . . . . . . . . . . . . . . . . . . . . . . . . . 6
Trouble Shooting & Maintenance
Appendix
Front Panel Map
Front Panel
Earthquake Sound
1) Power/Standby switch
2) Channel Status LEDs Note:
Each LED represents one channel.
This particular model has 16-
channels, so it has sixteen LEDs on
the front panel.
8
Cinénova
1616
16
15
14
13
12
11
10
9
8
7
6
5
4
2
1
3
Rear Panel
Rear Panel Map
CineNova Grande Power Amplifiers
1) 4) Remote level controls for each channel 8)
(optional)
2) 9)
5) Fused Fault Indicators
6) Speaker output binding posts
3) Source selection allows you to select between
the common bus and auxiliary inputs, or the 7) Master level control, when channels are
individual channel input. switched to bus.
Independent level controls for each channel Turn ON the amp via 12V DC trigger
Gold plated RCA individual channel inputs allow Fused AC input
you to connect different audio sources to each
channel. 10) 3-Prong power connection
2
1
3
4
5
7
8
9
9
610
CineNova Grande Power Amplifiers
10
Front and Rear Panel Overview
Front Panel Overview
1. POWER SWITCH
Powers amplifier ON/OFF. Set this switch to OFF when making
or breaking connections to the amplifier, or when changing the
setting of the MODE switch. NOTE: 12-Volt DC trigger turns
ON/OFF amp via another component (It overrides the switch
position)
2 PEAK LED INDICATOR:.
The Cinénova-16 is equipped with 16 LED indicators on the front
panel. These LEDs indicate the operating status of each
corresponding channel. If an LED or all LEDs remain lit
continuously, the amplifier is clipping and the volume should be
turned down immediately to prevent damage. If the LEDs are
simply flickering, the amplifier is close to it’s limits and should not
be pushed any further.
Rear Panel Overview
Source selection allows you to select between the common
bus and auxiliary inputs, or the individual channel input. The
bus option allows a user to use one source input for several
rooms.
3. SOURCE SELECTION SWITCH
1. RCA INPUT
Gold plated RCA individual channel inputs allow you to
connect different audio sources to each channel.
2. LEVEL CONTROLS
Level controls for each channel to adjust volume individually.
4. REMOTE GAIN CONTROLS FOR EACH CHANNEL
Each room can run by an optional remote gain control designed
reduce volume in each room.
5 FUSED FAULT INDICATORS.
Though we have taken every conceivable precaution to ensure
long lasting and trouble-free operation, occasionally a unit will
malfunction. For that, we have made diagnostic simple: each
mono block is equipped with two (10 Amperes) fuses designed to
protect and monitor the voltage of operating rails (+/-). Each fuse
carries its own fault LED indicator that illuminates when the fuse
is burnt.
When one or more of these LEDs is illuminated, this means that
unit needs maintenance or repair.
6 OUT PUT BINDING POSTS.
Binding post speaker outputs allow users to split wires or use
banana plugs for easy connections and bridging.
7. MASTER LEVEL CONTROL
Master level control, when channels are switched to bus.
8 12-VOLT . DC TRIGGER
Turn ON the amp via 12V DC trigger
9 FUSED AC INPUT.
Built in main power fuse
10. 3-PRONG POWER CONNECTION
Easy to use and replaceable power connector.
CineNova-16 Power Amplifiers Features
Eight individual power supplies: Rack mountable:
The Cinenova-16 is designed with 8 individual power supplies This amplifier is designed to conveniently mount in commonly
for better over all sound quality and better channel separation. used racks.
Peak LED indicators: 220V AC and 110V AC selectable:
The Cinénova-16 is equipped with 16 indicators -LEDs- on the Earthquake Sound designs all of it’s high performance
front panel. They show the operating status of each channel; the LEDs amplifiers to be used in almost all scenarios which may require different
will illuminate when the maximum recommended output is exceeded. voltage ratings.
If an LED is illuminated the majority of the time, it indicates that the
corresponding channel is over-driven (clipped). The input to the Remote zone control:
channel must be reduced to eliminate distortion and eventually,
damages to the amplifier. Each of the eight possible zones can be controlled by an
external (optional) remote. This features allows you to completely shut
Thermal protection: down specific zones, control volume and other connected components.
Each channel is equipped with a thermal sensor designed to Bus input:
shut the amplifier down when it overheats. Overheating is not typical. It
only occurs if the amplifier is over driven with low impedance speakers, This feature simplifies installation by consolidating several
or if the amplifier is located in an improperly ventilated space. channels for one source. Simply plug the input source RCAs into the
BUS input on the unit. Then switch the input source selector to BUS for
Individually selected and matched components: as many channels are connected to the corresponding input source.
Components used to construct the Cinénova-16 are subjected Bridgeable function (Bridgeable stable not less than 4-ohm):
to an exhaustive selection process; during which, the components are
matched and individually tested to exact tolerance. The multi-layer, The Cinenova-16 delivers up to 8-zones, and can be bridged
glass-epoxy, double sided printed circuit boards exceed the standard into several different configurations for higher power rooms.
stringent requirements by 50%.
4 or 8-ohm compatible:
8-Zones: Since speakers are manufactured in several different
impedance ratings, Earthquake Sound’s new 16-Channel amplifier is
The Cinenova-16 delivers up to 8-zones, and several other designed to be 4 and 8-Ohm compatible.
room combinations to better suite the your needs.
Special Features
11
Trouble Shooting and Maintenance
CineNova Grande Power Amplifiers
Troubleshooting
Humming noise from speakers.
Often humming noise is emanating from equipment that have
their ground prong broken.
a)
c) If above steps do not isolate your problem star-ground all
components except amplifier from their chassis to the
processor.
With the amplifier OFF, unplug all RCAs connected to the
amp.
b) Turn on amp and listen to speakers.
If buzz has changed or reduced in level, then the problem is
coming to the amp from another source. The rest of the hum
you hear is normal and related to the fact that the RCAs are
open ended and not connected to any thing.
:
Front LEDs are ON all the time
It is normal when running the amplifier to full power that the LEDs
flicker. If you see that the LEDs are on constantly without
flickering (solid orange) it means that the amplifier is clipping.
Reduce volume level to prevent damage to the unit.
Turn amplifier ON and circuit breaker shuts down
This can either be a short in amp or poor circuit breaker in the
house. Plug amplifier into another outlet on a different circuit
breaker with nothing connected. If the amp turns on then the
problem is with your home circuit breaker. If the amplifier still does
not power up, please call Earthquake to consult with a technician.
MAINTENANCE
The following routine maintenance should be
performed on a periodic basis:
• Clean the exterior surfaces of the unit with a
soft, dry, lint-free cloth.
• Do not use alcohol, benzene, acetone-based
cleaners, or strong commercial cleaners.
• Do not use a cloth made with steel wool or
metal polish.
• If the unit is exposed to a dusty environment, a
low-pressure blower may be used to remove
dust from its interior & exterior.
12
Note:
Visit www.earthquakesound.com for answers to
frequently asked questions and additional
troubleshooting information.
If you are still stuck...
1. Contact an authorized Earthquake Dealer.
2. Contact Earthquake Sound Customer Service.
Appendix
Earthquake Sound
SPECIFICATIONS
• Number of channels:
16-Channels
• Power rating per channel:
(8-ohm load), all channels driven: 75 Watts RMS
• Frequency response measured at 1 watt with +/- 0.1 dB:
20 Hz to 20 kHz
• Channel separation: greater than 60 dB
• Maximum input voltage: 100mV – 2V (RMS)
• Input impedance: 19 kilo-ohms
• Total harmonic distortion - THD: 0.1%
• Signal to noise ratio measured: -83 dB
• Dimensions 16-Channel: (HxWxD)
6.5" (165.1mm) x 17" (431.8mm) x 17” (431.8mmmm)
• Weight :
44 lbs
FEATURES
• Short current protection, overload protection, Thermal protection
• Soft start
• Individual channel control
• BUS Input - BUS gain control
• LED Clipping indicators
• Bridgeable function (Bridgeable stable not lower than 4-Ohm)
• 220V AC and 110V AC selectable
• 12-Volt trigger
• Easy Stereo/Bridged binding post connections
13
Wiring diagrams
7-Zone system that includes one high power room
Earthquake Sound
14
High power
bridged room
Input Source
75 Watts RMS/Per Channel
Background room(s)
6-Zones
140 Watts RMS/Per Channel
1-High Power Zones
OFF ON
Remote Gain
C o n t r o l
o p t i o n a l
f o r e a c h
r o o m
This channel
and all to the
righ t o f it
s h o u l d b e
switched to
BUS mode. L R
Earthquake Sound
15
Wiring diagrams
6-Zone system that includes two high power rooms
Input Source
75 Watts RMS/Per Channel
Background room(s)
4-Zones
140 Watts RMS/Per Channel
2-High Power Zones
This channel
and all to the
righ t o f it
s h o u l d b e
switched to
BUS mode.
OFF ON
Remote Gain
C o n t r o l
o p t i o n a l
f o r e a c h
r o o m
Wiring diagrams
L R
Earthquake Sound reserves the right to amend details of the specifications without notice.
Copyright © Earthquake Sound Corporation
Earthquake Sound Corporation • 2727 McCone Avenue Hayward CA, 94545
Phone: 510-732-1000 Fax: 510-732-1095
Sound That Will Move You.

Other EarthQuake Amplifier manuals

EarthQuake Cinenova 7300 User manual

EarthQuake

EarthQuake Cinenova 7300 User manual

EarthQuake XJ-1000FR User manual

EarthQuake

EarthQuake XJ-1000FR User manual

EarthQuake XJ-300 FR User manual

EarthQuake

EarthQuake XJ-300 FR User manual

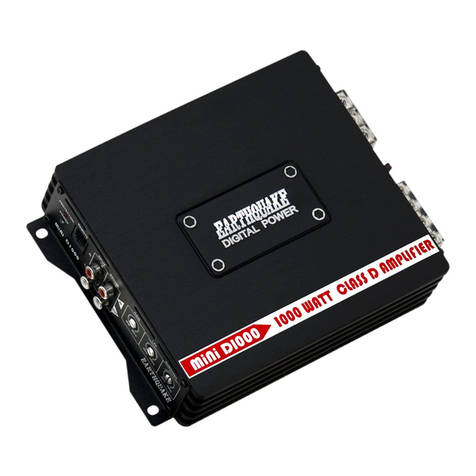
EarthQuake mini D1000 User manual

EarthQuake

EarthQuake mini D1000 User manual

EarthQuake mini D1000 User manual

EarthQuake

EarthQuake mini D1000 User manual

EarthQuake IQ600 User manual

EarthQuake

EarthQuake IQ600 User manual

EarthQuake Cinenova Grande User manual

EarthQuake

EarthQuake Cinenova Grande User manual

EarthQuake EQ-1000 User manual

EarthQuake

EarthQuake EQ-1000 User manual

EarthQuake Nova PA-600 Operation manual Quick start guide

EarthQuake

EarthQuake Nova PA-600 Operation manual Quick start guide

EarthQuake XJ-700DSP User manual

EarthQuake

EarthQuake XJ-700DSP User manual

EarthQuake XJ-300 FR User manual

EarthQuake

EarthQuake XJ-300 FR User manual

EarthQuake XJ-1000FR User manual

EarthQuake

EarthQuake XJ-1000FR User manual

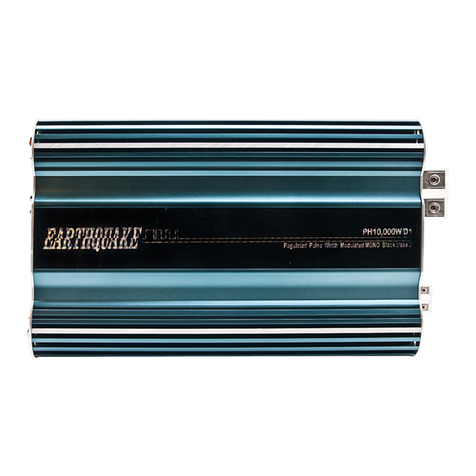
EarthQuake PH10000W/D1 User manual

EarthQuake

EarthQuake PH10000W/D1 User manual

EarthQuake PH800W/2 User manual

EarthQuake

EarthQuake PH800W/2 User manual

EarthQuake Cinenova Grande BR 5 User manual

EarthQuake

EarthQuake Cinenova Grande BR 5 User manual

EarthQuake mini D Series User manual

EarthQuake

EarthQuake mini D Series User manual

EarthQuake XJ-300ST User manual

EarthQuake

EarthQuake XJ-300ST User manual

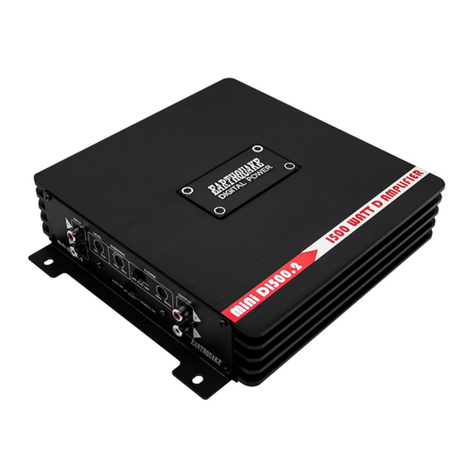
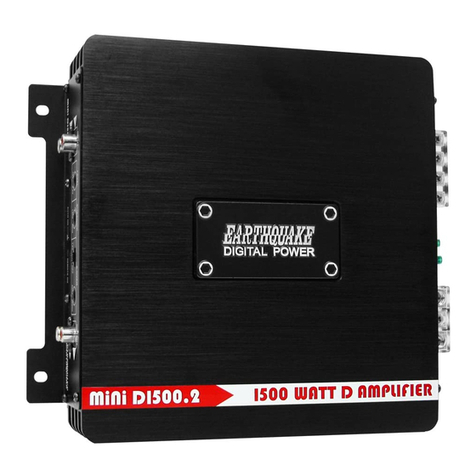
EarthQuake MiNi DI500.2 User manual

EarthQuake

EarthQuake MiNi DI500.2 User manual

EarthQuake XJ-300ST User manual

EarthQuake

EarthQuake XJ-300ST User manual

EarthQuake XJ-700R User manual

EarthQuake

EarthQuake XJ-700R User manual

EarthQuake XJ-700R User manual

EarthQuake

EarthQuake XJ-700R User manual

EarthQuake MiNi D3000.4 User manual

EarthQuake

EarthQuake MiNi D3000.4 User manual

EarthQuake PH2000W/D1 User manual

EarthQuake

EarthQuake PH2000W/D1 User manual

EarthQuake IQ1500 User manual

EarthQuake

EarthQuake IQ1500 User manual

Popular Amplifier manuals by other brands

QSC CXD Series quick start guide

QSC

QSC CXD Series quick start guide

Dave Hill Designs EUROPA I quick start guide

Dave Hill Designs

Dave Hill Designs EUROPA I quick start guide

Epiphone Les Paul Pee Wee Rave Rig supplementary guide

Epiphone

Epiphone Les Paul Pee Wee Rave Rig supplementary guide

LYNXTechnik D VO 5820 Reference manual

LYNXTechnik

LYNXTechnik D VO 5820 Reference manual

Onkyo FR-X7A instruction manual

Onkyo

Onkyo FR-X7A instruction manual

Wintal A-1122A Connection instruction

Wintal

Wintal A-1122A Connection instruction

Audiotec Fischer Helix A6 instruction manual

Audiotec Fischer

Audiotec Fischer Helix A6 instruction manual

axing premium BVS 15-68 Operation instructions

axing

axing premium BVS 15-68 Operation instructions

Gibson Titan III Schematic diagram

Gibson

Gibson Titan III Schematic diagram

Ross DRA-8204 user manual

Ross

Ross DRA-8204 user manual

DLS CC-44 How to install and operate

DLS

DLS CC-44 How to install and operate

Glensound GS-HA001 Wiring diagram

Glensound

Glensound GS-HA001 Wiring diagram

Numan Drive manual

Numan

Numan Drive manual

Bosch LBB 1920/00 Specifications

Bosch

Bosch LBB 1920/00 Specifications

Rotel RA-312 Technical manual

Rotel

Rotel RA-312 Technical manual

Denon PMA-770 Service manual

Denon

Denon PMA-770 Service manual

Crown D Series Operation manual

Crown

Crown D Series Operation manual

Denon AVC-A11SR operating instructions

Denon

Denon AVC-A11SR operating instructions

manuals.online logo
manuals.online logoBrands
  • About & Mission
  • Contact us
  • Privacy Policy
  • Terms and Conditions

Copyright 2025 Manuals.Online. All Rights Reserved.