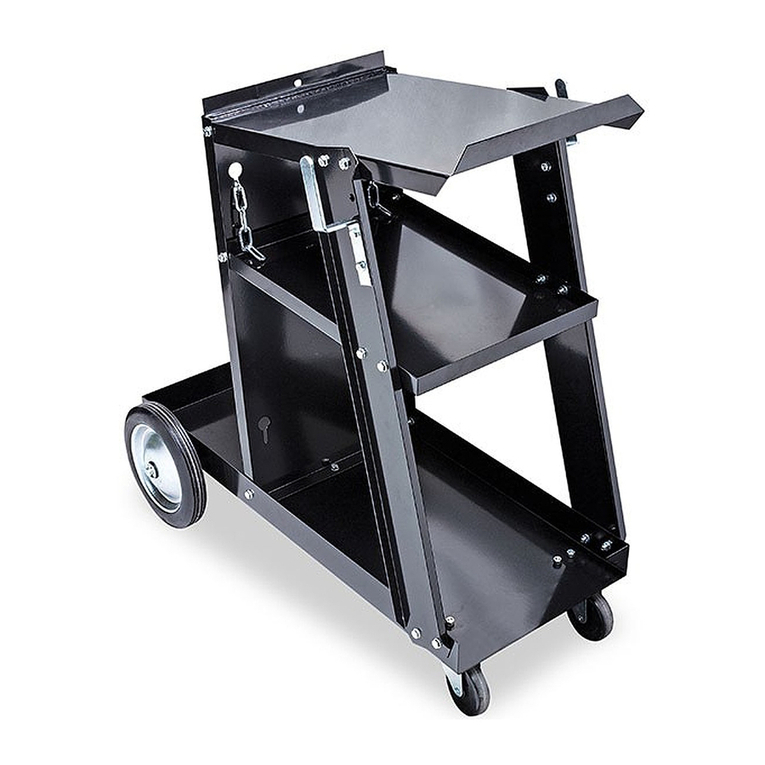
Eastwood 31490 User manual

ROLLING TOOL CART
INSTRUCTIONS
Item #31490

2Eastwood Technical Assistance: 800.544.5118 >> techelp@eastwood.com
The EASTWOOD ROLLING TOOL CART features a spacious, top opening, 4 drawer tool box and open bottom tray. The heavy, all steel support structure and
5” swivel casters support up to a total loaded weight of 580 lbs. [263kg.] yet is completely portable for rolling to the job and between project storage.
CONTENTS
(1) Bottom Tray - [A]
(2) Locking Swivel Casters - [B]
(2) Swivel Casters - [C]
(4) Vertical Posts - [D] (2 left, 2 right)
(2) Cross Supports - [E]
(1) Tool Chest - [F]
(1) Handle - [G]
(34) M8 x 12mm, Carriage Bolts - [H]
(2) M8 x 16mm, Carriage Bolts- [J] (For Handle)
(16) M8 x 16mm, Hex Head Bolts - [K]
(52) M8 Nylon Insert Locknuts - [L]
(52) M8 Flat Washers - [M]
(2) Keys - [N]
TOOLS REQUIRED
• 14mm wrench
• 13mm wrench
SPECIFICATIONS
Maximum Upper Tool Compartment Weight Limit: 200 lbs. [90.7kg.]
Maximum Top Drawer Weight Limit: 30 lbs. [13.6kg.]
Maximum Middle Drawer Weight Limit: 50 lbs. [22.6kg.]
Maximum Bottom Drawer Weight Limit: 70 lbs. [31.7kg.]
Maximum Bottom Tray Weight Limit: 200 lbs. [90.7kg.]
A
B
C
D
E
F
G
H
J
K
L
M
N

To order parts and supplies: 800.345.1178 >> eastwood.com 3
READ INSTRUCTIONS
• Thoroughly read and understand this manual before using.
• Save for future reference.
FALL HAZARD!
• Awkward, out of balance body positions may be attempted while trying to reach specific areas of objects placed on the Tool Cart
during use. Failure to ensure proper footing can quickly result in a fall which could inflict serious personal injury or property damage.
• This Tool Cart is designed for use in storing tools and equipment only.
DO NOT open more than one tool drawer at a time when loaded. This can cause the balance to shift suddenly, tipping the Service Cart
forward which can quickly cause severe injury!
DO NOT exceed the rated 580 lbs. [263kg.] weight capacity.
DO NOT use as a seat.
DO NOT stand on the Tool Cart.
DO NOT use the top of the Tool Chest as a work surface.
PINCH HAZARD!
• This Service Cart has moveable components that can crush and pinch. Keep fingers and hands away from pinch points when operating.
DANGER indicates a hazardous situation which, if not avoided, will result in death or serious injury.
WARNING indicates a hazardous situation which, if not avoided, could result in death or serious injury.
CAUTION used with the safety alert symbol, indicates a hazardous situation which, if not avoided, could result in minor or moderate injury.
NOTICE is used to address practices not related to personal injury.
SAFETY INFORMATION
The following explanations are displayed in this manual, on the labeling, and on all other information provided with this product:

4Eastwood Technical Assistance: 800.544.5118 >> techelp@eastwood.com
ASSEMBLY
The Eastwood Rolling Tool Cart consists of moderately heavy metal components which can cause potentially serious injuries if
allowed to drop. Avoid pinching hands while handling parts during assembly. Obtaining the assistance of a helper during
assembly is strongly recommended. The use of safety shoes is strongly advised.
• Set the Bottom Tray [A] end-up on a soft surface then locate a Locking Swivel Caster [B] at a lower corner of the underside with the mounting
holes aligned (FIG 1).
NOTE: Be sure to group both Locking Swivel Casters [B] on the same end of the Bottom Tray [A].
• Insert M8 x 16mm Hex Head Bolts [K] through mounting holes while adding M8 Flat Washers [M] and M8 Nylon Insert Locknuts [L].
Tighten securely using 13mm and 14mm wrenches.
• Repeat for 2nd Locking Swivel Caster [B] being careful to place both on the same end of the Bottom Tray [A].
• Locate the two Swivel Casters [C] to opposite end of Bottom Tray and attach with hardware [K], [M] & [L] (FIG 1).
A
✓
FIG. 1
B C
BC
✓
✓
✓
✓
K, L, M
✓

To order parts and supplies: 800.345.1178 >> eastwood.com 5
Due to the size and weight of the Tool Chest [F], it is strongly recommended to obtain the assistance of a helper during the following
step. Avoid pinching hands while setting the Tool Chest in place.
• Set a Vertical Post [D] with the square punched hole oriented at 14” from top and opposite Bottom Tray and facing outward (FIG 2).
NOTE: This is necessary for proper location of the Tool Chest [F] further on. Attach to Bottom Tray [A] using M8 x 12mm Carriage Head Bolts [H],
M8 Flat Washers [M] and M8 Nylon Insert Locknuts [L]. Tighten securely using a 13mm wrench.
• Repeat with the remaining three Vertical Posts [D] paying close attention to the orientation of the square punched hole as described in the step above.
• Place the two Cross Supports [E] along the inside of and between the Vertical Posts [D] and bolt in place with 4 M8 x 12mm Carriage Head Bolts [H],
M8 Flat Washers [M] and M8 Nylon Insert Locknuts [L]. Tighten securely using a 13mm wrench.
FIG. 2
H, L, M
✓
D
E
H, L, M
A
✓
✓
✓
✓

6Eastwood Technical Assistance: 800.544.5118 >> techelp@eastwood.com
• With your helper lifting the opposite side, carefully place the Tool Chest between the four Vertical Posts [D] and on the ledges of the Cross Supports [E].
IMPORTANT NOTE: The upper edge of the Tool Chest is crimped over and designed to fit over the upper edges of the Vertical Posts [D] (FIG 3).
• Once the Tool Chest is properly located, attach with M8 x 12mm Carriage Head Bolts [H], M8 Flat Washers [M] and M8 Nylon Insert Locknuts [L].
IMPORTANT NOTE: At this point decide which end you wish the handle to be located and add hardware to the two UPPER end holes only (FIG 3)
leaving the lower two open.
• Lastly, locate the Handle [G] over the two lower end holes and attach with the two longer 16mm Carriage Head Bolts [J], M8 Flat Washers [L]
and M8 Nylon Insert Locknuts [M]. Tighten securely.
• Your Eastwood Rolling Tool Cart is now ready for use.
FIG. 3
✓
✓
✓
H
FD
J
G
Fit crimp over edge
✓

To order parts and supplies: 800.345.1178 >> eastwood.com 7
OPERATION
• The Eastwood Tool Cart can be locked by lowering the Tool Box Lid fully and locking with included Keys [N].
IMPORTANT NOTE: Keep objects away from the Pushrods at the rear of the upper tray to prevent binding which may jam or prevent the Tool box
from being unlocked.
• The two Locking Swivel Casters can be locked by rotating the Brake Lever in a Counter-Clockwise direction. This will prevent the Tool Cart from moving.
To release brake feature, rotate levers in a Clockwise motion.
MAINTENANCE
• 2 vertical Pushrods are located at the rear upper shelf area of the Tool Chest. The Pushrods must be totally free to move up and down to allow the
Drawers to lock and unlock. Periodically lubricate the sliding contact areas of these Pushrods and keep them clean to prevent binding which may
potentially prevent the Tool box from being unlocked.
• Keep stored objects away from the Pushrods to prevent binding which can prevent the Tool box from being unlocked.
• Always check Pushrods for proper operation before closing and locking lid.
• The Tool Cart and Box is finished in rugged powdercoating which will provide many years of effort free beauty however it is advisable to keep the
finish clean and free from excessive dust and dirt.
• Keep the Tool Cart in a clean and dry environment. DO NOT store it in or expose it to a damp or wet environment.
This Tool Cart has rotating/moveable components that can generate crushing and bending forces if allowed to move suddenly which
can quickly cause severe injury! Keep fingers and hands away from moving parts when operating.
DO NOT open more than one tool drawer at a time when loaded. This can cause the balance to shift suddenly, tipping the Service
Cart forward which can quickly cause severe injury!
Store the Tool Cart on a flat, level surface only to prevent possible unattended rolling and property damage.

© Copyright 2016 Easthill Group, Inc. 8/16 Instruction Item #31490Q Rev. 0
If you have any questions about the use of this product, please contact
The Eastwood Technical Assistance Service Department: 800.544.5118 >> email: techelp@eastwood.com
PDF version of this manual is available online >> eastwood.com/31490manual
The Eastwood Company 263 Shoemaker Road, Pottstown, PA 19464, USA
US and Canada: 800.345.1178 Outside US: 610.718.8335
Fax: 610.323.6268 eastwood.com
ADDITIONAL ITEMS
#30553 Eastwood Creeper
#30540 Eastwood Shop Stool
#30186 Eastwood Toolbox Trays
#30185 Eastwood Parts Trays
Table of contents
Other Eastwood Outdoor Cart manuals
Popular Outdoor Cart manuals by other brands

Opti-Med
Opti-Med JM025-011 user manual

Harbor Freight Tools
Harbor Freight Tools 60570 Owner's manual & safety instructions

Sealey
Sealey APPC07 instructions

Metro DataVac
Metro DataVac MYCART Series Instructions for use

Premier Mounts
Premier Mounts UPD Series Specifications

DAYTEK
DAYTEK HOMEBUILDER Assembly instructions

Metro DataVac
Metro DataVac Flo Series Operation manual

Chauvet
Chauvet NIMBUS Quick reference guide

Great Little Trading
Great Little Trading Time for Tea Trolley quick start guide

Luxor
Luxor ECMBSKBC-B Assembly instructions

Agri-Fab
Agri-Fab Poly Lawn Cart 45-02264 owner's manual

MUNDUS
MUNDUS 35581 instruction manual