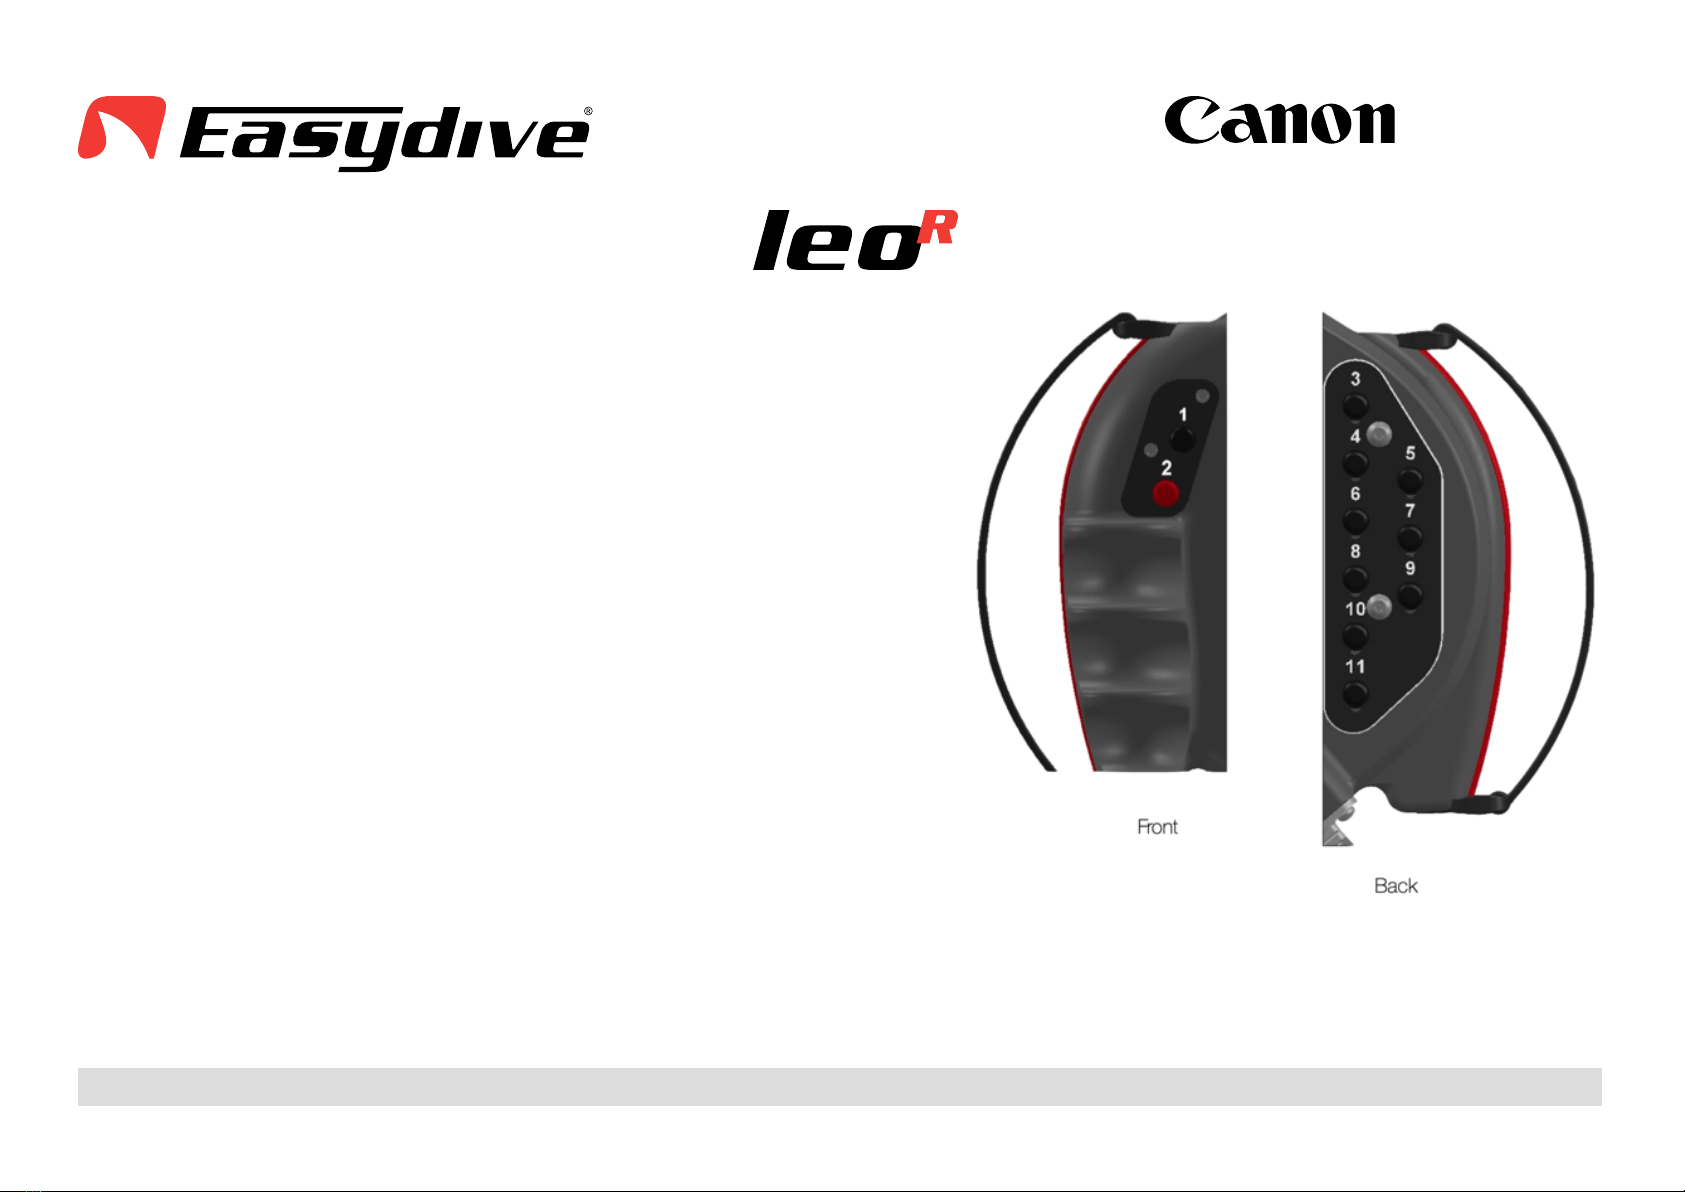
1. Autofocus (exposure reading) and shooting mode change. To change shooting mode, keep the
button pressed until the icon changes on the display. In Ph. Mode, the timer shooting ends.
2. Shooting:
Mode (Re): When the button is pressed, autofocus occurs, when the button is released, the shot will
be triggered.
Mode (Pr): When the button is pressed, first the autofocus is obtained and then the shutter. (if the lens
is already in focus, direct shooting will occur).
Mode (Ph): When the button is pressed, the timed shutter for the photogrammetry function is triggered
(Mode Activated on Demand).
In video mode, the button activates or deactivates video recording (REC).
3. Autofocus Mode. In photo mode it allows you to select ONE SHOT - SERVO.
4. White Balance Preset.
5. Shift Point or Area of Focus. 9 Perimeter positions in addition to the central point.
6. Video Resolution or Photo Format, changes the video resolution or the Photo Format (depends
of the mode selected) one step back.
8. Change Photo / Video Mode.
9. Drive Mode (Photo Mode), in Video Mode it allows the acquisition of the white balance in manual
(Push Custom White Balance).
10. Switch Button, by pressing once you pass to the Switch 1, and a blue led lights up. Pressing the
button once more switches to the Switch 2 and a yellow LED lights up. Pressing a third time turns off
the LED and returns to the main mode. Keeping the button pressed for 3 sec. The Housing Menu
mode is activated and a purple LED lights up. Follow the numbering of the buttons in this manual to
navigate the menus. To exit the menu mode, press button 11 "on / off".
11. Housing and camera "on / off" button *. To switch on, keep the button pressed until the
monitor housing is switched on (Easydive logo). It is possible to turn off or turn on the camera only, by
pressing the button once quickly. To turn off both the housing and camera, press and hold the button
until it turns off.
* For improved management of camera shutdown, the purchase of a compatible exteral battery is
recommended.
Switch Mode 1
Easydive
-
Via
dell'Industria
13
int
6,
48015
Cervia
(RA)
-
Italy
[email protected] - +39 0547 962923 - +39 338 9994219Buttons Panel LeoR
Blue Led Actived
7. Video Resolution, changes the video resolution. In Photo Mode, zoom 5x and 10x of
AF Point.
EOS R5 | EOS R6 | 5D Mk IV


