Ebode IP Vision 58 User manual

Outdoor IP Camera with Night Vision
IP Vision 58
User Manual

Manual version 1 – March 2012 2 IP Vision 58
Index
1.0 INTRODUCTION
1.1 Features
1.2 Packing List
1.3 Product Views, Connections and Buttons
1.4 PC System Requirements
1.5 Hardware Installation
1.6 Software Installation
2.0 Software Operation
2.1 IP Camera Tool
2.1.1.1 Basic Properties
2.1.1.2 Network Configuration
2.1.1.3 Upgrade Firmware
2.1.1.4 Refresh Camera List
2.1.1.5 Flush Arp Buffer
2.1.1.6 About IP Camera Tool
2.2 Camera Login
2.3 For IE Browser
2.4 For Safari, Firefox, Google Browser
2.5 For Mobile Phone
2.6 ActiveX Mode (For IE Browser)
2.7 For Visitor
2.8 For Operator
2.9 For Administrator
3.0 SETTINGS AS ADMINISTRATOR
3.1 Multi-Device Settings
3.1.1 Set Multi-Device in LAN
3.1.2 Set Multi-Device for WAN
3.1.3 Upgrade Device Firmware
3.1.4 Restore Factory Settings
3.1.5 Reboot Device
3.2 Network Settings
3.3 Basic Network Settings
3.4 Wireless LAN Settings
3.5 ADSL Settings
3.6 UPnP Settings
3.7.1 To change the camera’s port
3.7.2 DDNS Status
3.7.3 Set Port Forwarding in the router
3.8 System Settings
3.8.1 Device Info

Manual version 1 – March 2012 3 IP Vision 58
3.9 Alias Settings
3.10 Date & Time Settings
3.11 Users Settings
3.12 Backup & Restore
3.13 Other Settings
3.14 Mail Service Settings
3.15 FTP Service Settings
3.16 Alarm Service Settings
3.16.1 Motion Detect Armed
3.16.2 Motion Detect Sensitivity
3.16.3 Alarm Input Armed / IO Linkage on Alarm
3.17 Send e-mail on Alarm
3.18 Path Settings
3.19 Server Push Mode (For Safari, FireFox, Google Browser)
3.20 Sign in mobile phone
4.0 APPENDIX
4.1 Frequently Asked Questions
4.2 Default Parameters
5.0 SPECIFICATIONS
6.0 OBTAINING TECHNICAL SUPPORT

Manual version 1 – March 2012 4 IP Vision 58
1 WELCOME
This is an integrated wireless IP Camera solution. It combines a high quality digital Video Camera with
network connectivity and a powerful web server to bring clear to your Desktop from anywhere on your local
network or over the Internet.
The basic function of it is transmitting remote video on IP network. The high quality video image can be
transmitted with 30fps speed on the LAN/WAN by using MJPEG hardware compression technology.
It is based on TCP/IP standard, build-in WEB server which could support Internet Explore. Therefore the
management and maintenance of your device become more simply by using network to achieve the
remote configuration, start-up and upgrade firmware.
You can use this IP Camera to monitor some special places such as your home and your office. Also
controlling and managing images are simple by clicking the website through the network.
1.1 Features
☆Powerful high-speed video protocol processor
☆High-sensitivity 1/4’’ CMOS sensor
☆Picture total 300k pixels
☆Optimized MJPEG video compression for transmission
☆Multi-level users’ management and passwords definition
☆Embedded Web Server for users to visit by IE
☆Support wireless network (WI-FI/802.11/b/g)
☆Supporting Dynamic IP (DDNS) and UPNP LAN and Internet (ADSL, Cable Modem)
☆Giving alarm in cause of motion detection
☆Supporting image snapshot
☆Support multiple protocols:HTTP/TCP/IP/UDP/SMTP/DDNS/SNTP/DHCP/FTP
☆Support WEP/WPA/WPA2 encryption
☆Support 3G phone, Smart phone control and surveillance
☆Support Firefox, Safari, Google chrome browser.
1.2 Packing List
Untie the pack and check the items contained against the following list:
●IPCamera X1
●Quick Start Guide X1
●Power Supply X1
●CD X1
●Network Cable X1
●Mounting bracket X1
NOTE: Please contact us immediately in case of any damaged or short of contents.

Manual version 1 – March 2012 5 IP Vision 58
1.3 Product Views
1.3.1 Front View
Figure 1.1
Sensitive Hole: For light sensitive
Infrared LED: For night Vision.
LENS: CMOS sensor with fixed focus lens. (Default is 6mm, 3.6mm optional)
Antenna: WI-FI Antenna
Shell: For protection and waterproof
1.3.2 Rear Panel
Figure1.2
Network Indicator LED: The green LED will on when connect to the network, the yellow LED will blink when
data transferred
RJ45 Port: RJ-45/10-100 base T, connect the network cable here.
Power Jack: DC 5V/2A power supply
RESET BUTTON: Press and hold the RESET BUTTON for 15 Seconds, then the IPCAM will be reset back to the
factory default Parameter. (Please keep the power on when do RESET)

Manual version 1 – March 2012 6 IP Vision 58
1.3.3 Bottom View
a
Figure 1.3
Original ebode IPCAM have some stickers at the bottom/back, such as MAC address sticker, QC sticker etc.
If your camera does not have these stickers, it may be a clone one, clone ebode IPCAM could not use the
original firmware and obtain our good after sale service.
1.4 PC System Requirements
System configuration requirements : (Example for viewing four IPCAM)
CPU: 2.06GHZ or above
Memory: 256M or above
Network Card: 10M or above
Display Card: 64M or above memory
Recommendable Operating system: Windows 2000/ XP/ Vista/ 7
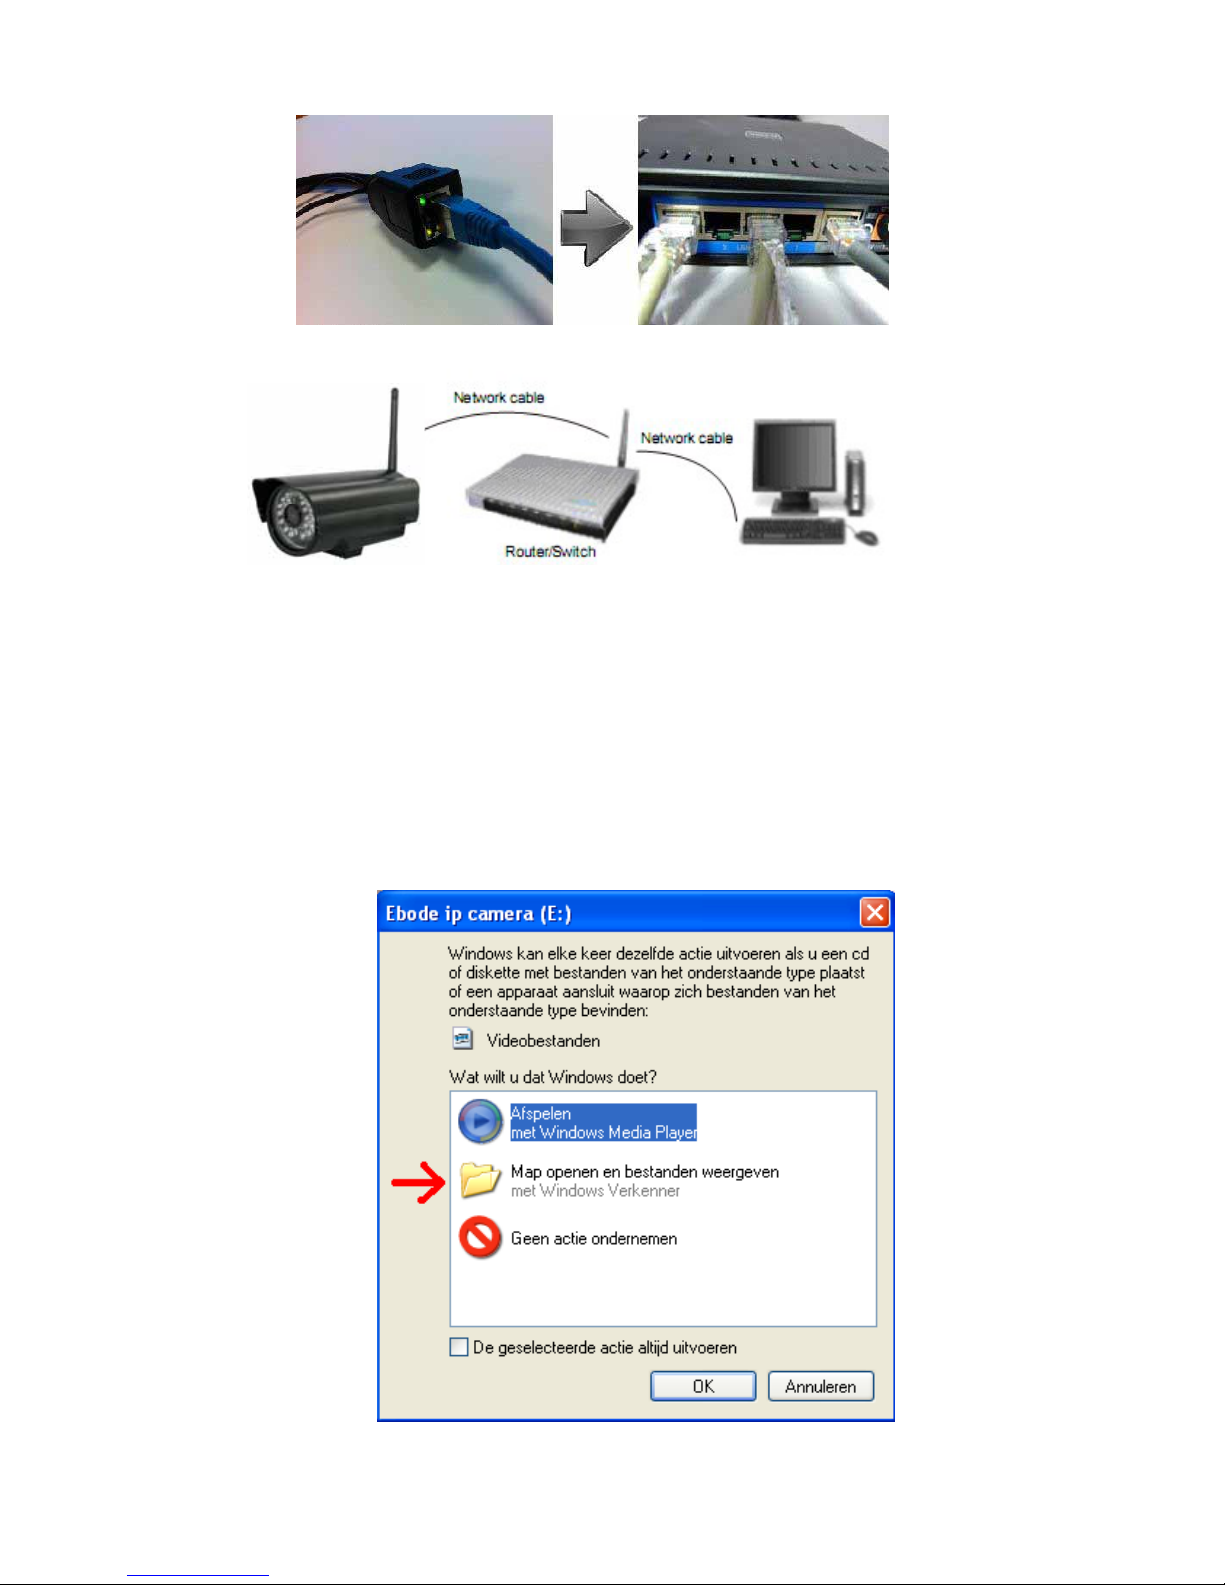
1.5 Hardware Instruction
Follow the steps below to set up your camera hardware. Make sure to follow each step carefully to ensure
that the camera operates properly
1. Install the Wi-Fi antenna
2. Plug the power adaptor into camera
3. Plug the network cable into camera and router/switch
4. It takes approx 30 seconds to boot up the camera, then you will find the IP address from
“IP Camera Tool” (Figure: 1.9)
5. When the power on and network cable connected, the green led of the real panel will keep on,
The yellow led will keep flash, and the Indicator led at the front of the camera will flash. (The indicator LED
can be controlled by software)
Manual version 1 – March 2012 7 IP Vision 58
Figure1.4
1.6 Software Installation
1. IP Camera Tool: Insert the CD, a popup menu might appear like shown in the picture below.
2. Select “Open Map” and click “OK”

Manual version 1 – March 2012 8 IP Vision 58
3. Open the “ebode IP Vision Software” map and double click “IPCamSetup.exe” then click next to
complete the software installation. (Please note that on some computer systems it might take a few
seconds before the “IPCamSetup” icon will appear)
In order to run smooth we will need to install the “ActiveX App” on each system we would like to use to visit the
camera. The “AppInstall” file is located in the same folder as the “IPCamSetup” file from the previous steps.
Please take the following steps:
4. ActiveX: Double click “Appinstall.exe”—“Next”—“Install”—“Finish”.
Figure 1.5

Manual version 1 – March 2012 9 IP Vision 58
Figure1.5
Figure1.6

Manual version 1 – March 2012 10 IP Vision 58
Figure1.7
Figure1.8
After this done, the icon “IP Camera Tool” will be displayed on desktop automatically.
CAUTION: Before installing and using the product, please read the following precautions carefully and make
sure they are fully understood.
Use only the power adaptor attached with the product. Use unauthorized power adapter may cause
damage to your IP Camera.
IP Camera terminal could be installed in an outdoor environment.
Do not touch the lens of the IP Camera at will. The optimum focus range has been set before it is delivered
out of the factory. If you turn the lens, it may cause incorrect focus and vague images.
For firmware upgrading or connection with an external, refer to detailed instructions contained in the CD.
Table of contents
Other Ebode Security Camera manuals


