manuals.online logo
Brands
  1. Home
  2. •
  3. Brands
  4. •
  5. Echo
  6. •
  7. Trimmer
  8. •
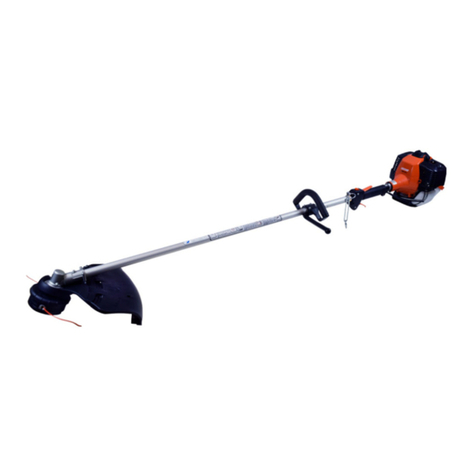
  9. Echo M35A User manual

Echo M35A User manual

ACHTUNG GEFAHR
LESEN SIE DIE BEDIENUNGSANLEITUNG SORGFÄLTIG DURCH
UND BEFOLGEN SIE DIE SICHERHEITSBESTIMMUNGEN, WEIL
SONST DAS RISIKO SCHWERER VERLETZUNGEN BESTEHT.
ATTENTION DANGER
LISEZ ATTENTIVEMENT CE MANUEL ET APPLIQUEZ LES
RÈGLES DE SÉCURITÉ ET D’UTILISATION. TOUTE NÉGLIGENCE
A CET ÉGARD PEUT CAUSER DES ACCIDENTS GRAVES.
ATTENZIONE PERICOLO
LEGGERE ATTENTAMENTE LE ISTRUZIONI E SEGUIRE LE
REGOLE PER OPERARE IN SICUREZZA.
LA MANCATA OSSERVANZA DI QUESTA AVVERTENZA
POTREBBE CAUSARE GRAVI LESIONI.
D
I
F
DISCO A 3 DENTI
M35A
LAME 3 DENTS
3-ZAHN DICKICHTMESSER
WARNING DANGER
READ INSTRUCTIONS CAREFULLY AND FOLLOW RULES FOR
SAFE OPERATION.
FAILURE TO DO SO COULD RESULT IN SERIOUS INJURY.
GB
3 CUTTER BLADE
2
E
N
G
L
I
S
H
F
R
A
N
Ç
A
I
S
D
E
U
T
S
C
H
I
T
A
L
I
A
N
O
•Operator’s manual must be read for proper and safe
operation.
•Wear the recommended foot, leg, head, eye and
hearing protection at all times during operation. Also
assess the job to be done, and whether other types of
protection may be necessary. Never operate the unit
without the proper guards and other protective devices.
Never operate the unit without good visibility and light.
Do not allow anyone to enter the operating DANGER
ZONEwithyou.Thedangerzoneisanareaof15meters
(50 feet) in radius.
•Inspect blades before use. Check for sharpness. Dull
blades increase the risk of blade kick-back reactions.
Small cracks can develop into fractures resulting in a
piece of blade flying off during operation. Discard
cracked blades no matter how small the crack.
•Alwaysusethe blade suited for thejob.Do not hit rocks,
stones, tree stumps, and other foreign objects with the
blade. Do not cut into the ground with the blade. If
blade strikes an obstruction, stop engine immediately
and inspect blade for damage.
•La lecture du manuel d’utilisation est essentielle a une
bonne utilisation et a la securite.
•Portez toujours la tenue de protection pour vous
protéger les pieds, les jambes, la tête, les yeux et les
oreilles durant l’utilisation. Considérez aussi le type
de travail à exécuter et s’il est nécessaire de prendre
d’autres précautions. Avant de démarrer la machine,
assurez-vous que le couteau de mise à longueur du fil
nylon est correctement installé sur le protecteur et que
le fil n’est pas déroulé trop au-delà de ce couteau.
N’utilisez jamais la machine sans plaque ou autre
dispositif de protection. N’utilisez jamais l’outil si la
visibilité ou l’éclairage sont insuffisants.
Ne laissez personne s’approcher dans la ZONE
DANGEREUSE. Cette zone s’étend sur un rayon de
15 mètres.
•Examinez les lames avant l’emploi. Vérifiez l’affûtage.
Leslames émoussées augmentent le risque derebond
de la lame. Les fissures peuvent se transformer en
fractures et causer des projections de morceaux de
lame durant la marche. Mettez au rebut les lames
fissurées même si les fissures sont très faibles.
•Utilisez toujours la lame qui convient à la tâche. Ne
heurtez pas des roches, pierres, souches d’arbres et
autres objets avec la lame. N’entaillez pas le sol avec
la lame.
•Zwecks sicheren und Ordnungsgemässen Betriebs
mussen sie die Bedienungsanleitung unbedingt
durchlesen.
•Bevor Sie das Gerät starten, sollten Sie sich davon
überzeugen, daß das Nylonfadenschneidmesser an
der Schutzverlängerung angebracht ist und der
Nylonfaden nicht über das Fadenschneidmesser
hinaussteht. Das Gerät nie ohne den Schleuderschutz
bzw. die anderen angemessenen Schutzeinrichtungen
benutzen. Das Gerät nie bei schlechter Sicht bzw.
schlechtem Licht einsetzen. Erlauben Sie niemandem,
IhreGEFAHRENZONE zu betreten. Die Gefahrenzone
umfaßt einen Radius von 15m.
•Metallmesser vor dem Einsatz überprüfen. Auf Schärfe
überprüfen. Bei stumpfen Messern erhöht sich das
Risiko eines Rückschlages der Klinge. Kleine Risse
können sich zu Brüchen entwicken, die bewirken, daß
sich ein Klingenfragment beim Betrieb losreißt. Rissig
Klingen wegwerfen, auch wenn der Riß noch so klein
ist.
•StetsdasfürdiebetreffendeAufgabe geeignete Messer
benutzen. Keine Felsbrocken, Steine, Baumstümpfe
oder anderen Fremdkörper mit der Klinge berühren.
Nicht mit dem Messer den Boden berühren. Trifft das
Messer auf ein Hindernis, Motor sofort anhalten und
Klinge auf Schäden prüfen.
•Leggere il manuale dell’utente per un uso appropriato
e sicuro.
•Quando si usa l’attrezzo indossare sempre i mezzi di
protezione raccomandati per piedi, gambe, capo, occhi
e udito. Valutare il lavoro da eseguire e decidere se
occorrono altri tipi di protezione. Prima di avviare,
controllare che la lama di taglio sia posizionata
adeguatamente nel paradisco e che il filo non superi
dimolto la lama. Non utilizzareil decespugliatore senza
dispositivi di sicurezza egli altri mezzi di protezione
adatti. Non utilizzarlo o se visibilità o luce non sono
buone.Nonpermettereadalcunodientrare nella ZONA
PERICOLOSA.La zona pericolosa è un’areadelraggio
di 15 metri.
•Verificare il disco prima dell’uso. Controllarne
l’affilatura. Le lame usurate aumentano il rischio di
reazioni di contraccolpo; lievi incrinature possono
svilupparsi in fratture, ed un pezzo di lama potrebbe
staccarsi durante l’utilizzo. Scartare le lame incrinate,
a prescindere dalle dimensioni dell’incrinatura.
•Utilizzaresempre un disco adatto allavoro da eseguire.
Non urtare con il disco contro pietre, sassi, ceppi od
altri corpi estranei. Non inserire o piantare il disco nel
suolo. Se il disco colpisce un ostacolo, spegnere
immediatamente il motore e controllare se il disco é
stato danneggiato.
15 meters
15 mètres
15 metri
Bedienungsanleitung
Oprator’s manual
Manuale d’istruzione
Manuel d’utilisation
3
E
N
G
L
I
S
H
F
R
A
N
Ç
A
I
S
D
E
U
T
S
C
H
I
T
A
L
I
A
N
O
•Do not raise the cutting attachment above knee height.
If raised higher, the cutting attachment will be more
directly in line with your face. Thrown objects may hit
your face and eyes.
•Inspect the area before using the unit. Remove objects
the unit could throw. Remember where there are
obstructions to be avoided.
•Shut down immediately if the unit starts to shake or
vibrate. A sudden vibration is a sign there may be
dangerous trouble, such as a broken flywheel, clutch
or cutting attachment, or loose parts. Do not use the
unit until the problem has been properly diagnosed
and corrected.
•The sharpening of the blade is a specialized operation
and should be refered to you local blade repair shop.
•Store unit in a dry, dust free place, out of the reach of
children.
Si la lame heurte un obstacle, arrêtez le moteur
immédiatement et examinez la lame pour voir si elle
est abimée.
•Ne relevez pas l’outil de coupe à une hauteur au-
dessus du genou. A cette hauteur, l’outil de coupe se
trouvera plus directement en ligne avec le visage et
vous risquez davantage de recevoir des projections
dans le visage et les yeux. Mettez au rebut les lames
fissurées même si les fissures sont très faibles.
•Inspectez la zone avant de vous mettre au travail.
N’effectuez que les opérations d’entretien ou de
réglage qui sont indiquées dans le manuel d’utilisation.
•En cas de secousses ou de vibrations, arrêtez
immédiatement la machine. Une vibration soudaine
indique la possibilité d’un incident dangereux, par
exemple une rupture du volant, de l’embrayage ou de
l’outil de coupe ou des pièces desserrées. Ne reprenez
pas le travail avant d’avoir identifié et résolu le
problème.
•L’affûtage de la lame est une tâche spécialisée et vous
devrez consulter votre réparateur de lames.
•Rangez la machine dans un endroit sec et non
poussiéreux où les enfants n’ont pas accés.
•Beim Betrieb stets die empfohlenen Fuß-, Bein-, Kopf-,
Augen-, und Gehörschutzvorrichtungen tragen. Die
durchzuführende Arbeit abschätzen und beurteilen, ob
andere Schutzvorkehrungen erforderlich sind.
•Das Einsatzgebiet ist vor Benutzung des Geräts
gründlich zu untersuchen. Alle Objekte entfernen, die
evtl. vom Gerät hochgeschleudert werden könnten.
Merken Sie sich, wo Hindernisse sind.
•Falls das Gerät plötzlich zu rütteln bzw. zu vibrieren
beginnt, ist es sofort auszuschalten. Ein plötzliches
Vibrieren ist ein Hinweis darauf, daß gefährliche
Probleme wie z.B. ein beschädigtes Schwungrad oder
eine schadhafte Kupplung bzw.
Schneidvorrichtungvorliegenodersich bestimmteTeile
gelöst haben. Das Gerät darf erst dann wieder
eingesetzt werden, wenns Problem richtig erkannt und
behoben worden ist.
•Das Schärfen der Klinge ist ein Vorgang, den Sie am
besten einer auf das Schärfen von Klingen
spezialisierten Werkstatt überlassen.
•Das Gerät an einem trockenen, staubfreien Platz
lagern, zu dem Kinder keinen Zugang haben.
•Non alzare l’accessorio di taglio al di sopra del livello
del ginocchio perché sarebbe più direttamente a livello
con il viso ed eventuali corpi estranei scagliati
potrebbero colpire viso ed occhi.
•Ispezionare l’area circostante prima di utilizzare la
macchina e rimuovere corpi estranei che potrebbero
essere scagliati da questa.
•Spegnere immediatamente la macchina se iniziasse
ad oscillare o vibrare. La vibrazione improvvisa indica
un probabile guasto pericoloso, come ad esempio
volano, frizione o accessorio di taglio spezzati, o parti
allentate. Non utilizzare l’accessorio se non quando il
problema sarà stato correttamente diagnosticato e
risolto.
•L’affilatura della lama è un lavoro specializzato e deve
essere eseguita in un'officina di riparazione lame.
•Conservarel’attrezzoinluogoasciuttoeprivodipolvere,
lontano dalla portata dei bambini.
4
E
N
G
L
I
S
H
F
R
A
N
Ç
A
I
S
D
E
U
T
S
C
H
I
T
A
L
I
A
N
O
1-1 1-2
23
4
5
E
N
G
L
I
S
H
F
R
A
N
Ç
A
I
S
D
E
U
T
S
C
H
I
T
A
L
I
A
N
O
Insert locking tool into a hole located on the right side of
angle transmission while forcing retainer spring to the left
side. Insert locking tool further into blade retainer fixing
hole to fix output shaft.
CAUTION
Fasten output shaft using locking tool securely in
order to avoid the possibility of output shaft
rotatingwhenmountingcuttingbladewhichwill
prevent the cutting blade fastening nut from being
tightendsufficiently.
1. Blade
2. Angle transmission 1. Blade
2. Locking tool
3. Hole for locking tool
4. Retainer spring
1. Messer
2. Arretierwerkzeug
1. Messer
2. Winkelgetriebe 3. Loch für
Arretierwerkzeug
4. Rückhaltefeder
1. Disco
2. Testina 3. Foro per chiave a
perno ferma-disco
4. Molla
1. Disco
2. Chiave a perno ferma-disco
1. Lame
2. Réducteur 3. Trou pour la broche
4. Ressort de retenue 1. Lame
2. Broche
ATTENTION
Bloquer l’axe d’outil en utilisant la broche de
blocage pour éviter que l’axe ne tourne lors du
montage de la lame, ce qui empêchrait un blocage
correct de l’écrou de fixation d’outil.
56
12
3
4
12
Introduire la broche de blocage dans le trou situé sur la
droite du réducteur en poussant le ressort de retenue vers
la gauche.
Introduire la broche dans le trou de la flasque supérieure
pour bloquer l’axe d’outil.
Stecken Sie das Arretierwerkzeug in das Loch auf der
rechten Seite des Winkelgetriebes.
Drücken Sie dabei die Rückhaltefeder nach links.
Schieben Sie das Arretierwerkzeug bis in die Bohrung der
Fixierplatte um den Werkzeug-Aufnahmebolzen zu
blockieren.
VORSICHT
Hindern Sie Werkzeug-Aufnahmebolzen sich zu
drehen, indem Sie das Arretierwerkzeug benutzen,
während Sie das Messer montieren. Dies
verhindert, daß sich der Aufnahmebolzen von
selbst dreht.
ATTENZIONE
Fissate l’alberino di uscita usando la chiave a
perno ferma-disco per evitare che l’albero ruoti
quando si monta il disco, altrimenti il dado di
fissaggio del disco potrebbe non essere serrato
sufficientemente.
Inserite la chiave a perno ferma-disco nel foro sulla parte
destra della testina, tirando la molla porta disco a sinistra.
Inserite la chiave a perno ferma-disco nel foro fissaggio
porta-disco per fissare l’alberino di uscita.
6
E
N
G
L
I
S
H
F
R
A
N
Ç
A
I
S
D
E
U
T
S
C
H
I
T
A
L
I
A
N
O
1. Locking tool
2. Blade
1. Arretierwerkzeug
2. Messer
1. Chiave a perno ferma-disco
2. Disco
1. Broche
2. Lame
7
CAUTION
Wear gloves to reduce the risk of injury caused by
unintentionalcontactwiththeblade.
8
1
2
Tighten the nut (turn counterclockwise) using a socket
wrench.
Pourserrerl’écrou,utiliserunecléentubeouàpipe(serrer
dans le sens inverse des aiguilles d’une montre écrou pas
à gauche).
Die Mutter mittels Steckschlüssel (entgegen dem
Uhrzeigersinn) festziehen.
Serrare il dado (girare in senso antiorario) utilizzando una
chiave a tubo.
Offer the cover plate up to the bearing housing assembly
and secure with the four bolts.
Befestigen Sie nun den Auflageteller mit den vier
Schrauben gem. Abbildung am Kugellagergehäuse.
Avvicinare la piastrina di protezione al gruppo al gruppo
sede cuscinetti e fissarli con i quattro bulloni.
VORSICHT
Handschuhe tragen, um das Risiko einer
Verletzung durch Berührung mit der Klinge zu
vermeiden.
ATTENZIONE
Mettere i guanti per ridurre il pericolo di
infortunarsi a causa di contatto involontario con il
disco.
Bloquer l’écrou sur l’axe d’entraînement d’outil et monter
le bol glisseur sur écrou. Bloquer ensuite les 4 boulons de
fixation.
7
E
N
G
L
I
S
H
F
R
A
N
Ç
A
I
S
D
E
U
T
S
C
H
I
T
A
L
I
A
N
O
GB F D I X750-008790
X750223-4300
7-2 SUEHIROCHO 1-CHOME, OHME, TOKYO 198-8711, JAPAN
PHONE: 81-428-32-6118. FAX: 81-428-32-6145.
©2005
PrintedinJapan
0601BES

Other Echo Trimmer manuals

Echo SRM-266U User manual

Echo

Echo SRM-266U User manual

Echo RM-410ES User manual

Echo

Echo RM-410ES User manual

Echo SRM-4605 Mounting instructions

Echo

Echo SRM-4605 Mounting instructions

Echo SRM-225 - PARTS CATALOG SERIAL NUMBER... Instruction Manual

Echo

Echo SRM-225 - PARTS CATALOG SERIAL NUMBER... Instruction Manual

Echo SRM-266T User manual

Echo

Echo SRM-266T User manual

Echo SRM - 2400SB User manual

Echo

Echo SRM - 2400SB User manual

Echo GT-2000R User manual

Echo

Echo GT-2000R User manual

Echo HC-1800 Type 1E User manual

Echo

Echo HC-1800 Type 1E User manual

Echo Grass Trimmer/Brush Cutter SRM-280 User manual

Echo

Echo Grass Trimmer/Brush Cutter SRM-280 User manual

Echo SRM-2655SI Instruction manual

Echo

Echo SRM-2655SI Instruction manual

Echo HCA-260 User manual

Echo

Echo HCA-260 User manual

Echo SRM-3020 User manual

Echo

Echo SRM-3020 User manual

Echo SRM-260U User manual

Echo

Echo SRM-260U User manual

Echo HCA-2500 Mounting instructions

Echo

Echo HCA-2500 Mounting instructions

Echo DSRM-2600 User manual

Echo

Echo DSRM-2600 User manual

Echo SRM-4510 User manual

Echo

Echo SRM-4510 User manual

Echo GT-225L User manual

Echo

Echo GT-225L User manual

Echo GT-200R - 11-03 User manual

Echo

Echo GT-200R - 11-03 User manual

Echo SRM-211 User manual

Echo

Echo SRM-211 User manual

Echo SRM-2655 User manual

Echo

Echo SRM-2655 User manual

Echo Power Pruner PP-1200 User manual

Echo

Echo Power Pruner PP-1200 User manual

Echo Pro Attachment Series User manual

Echo

Echo Pro Attachment Series User manual

Echo HC-155 User manual

Echo

Echo HC-155 User manual

Echo SRM-280 User manual

Echo

Echo SRM-280 User manual

Popular Trimmer manuals by other brands

Nursery V8NEWZ2 SC2 operating instructions

Nursery

Nursery V8NEWZ2 SC2 operating instructions

IVT GTE-300 manual

IVT

IVT GTE-300 manual

Ryobi 725rE Operator's manual

Ryobi

Ryobi 725rE Operator's manual

Ryobi RHT3620G Original instructions

Ryobi

Ryobi RHT3620G Original instructions

HIKOKI CG 18DA Handling instructions

HIKOKI

HIKOKI CG 18DA Handling instructions

EGO AH1522 operating manual

EGO

EGO AH1522 operating manual

Stiga BC 900 D Li 48 Operator's manual

Stiga

Stiga BC 900 D Li 48 Operator's manual

Elem Garden Technic CBE25022-1B Original instructions

Elem Garden Technic

Elem Garden Technic CBE25022-1B Original instructions

Yard Machines MTD16K Operator's manual

Yard Machines

Yard Machines MTD16K Operator's manual

Gardenpro Powerplus POWXG2008 manual

Gardenpro

Gardenpro Powerplus POWXG2008 manual

Westfalia TMK-006 instruction manual

Westfalia

Westfalia TMK-006 instruction manual

EINHELL HEC 550 operating instructions

EINHELL

EINHELL HEC 550 operating instructions

Ryobi OHT18 instructions

Ryobi

Ryobi OHT18 instructions

Wolf Garten GT-S 800 Original operating instructions

Wolf Garten

Wolf Garten GT-S 800 Original operating instructions

Weed Eater FL1500 LE H parts list

Weed Eater

Weed Eater FL1500 LE H parts list

Sovereign ASYEGT01240 instruction manual

Sovereign

Sovereign ASYEGT01240 instruction manual

Stihl HLA 135 instruction manual

Stihl

Stihl HLA 135 instruction manual

Craftsman 917.773421 owner's manual

Craftsman

Craftsman 917.773421 owner's manual

manuals.online logo
manuals.online logoBrands
  • About & Mission
  • Contact us
  • Privacy Policy
  • Terms and Conditions

Copyright 2025 Manuals.Online. All Rights Reserved.