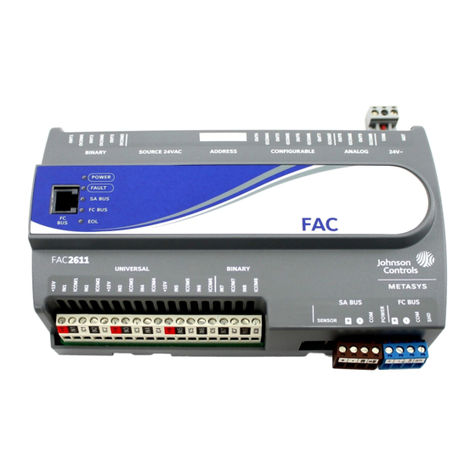
echoflex Elaho SmartSpace Controller-Gen2 User manual

Echoflex Solutions Installation Guide
Elaho SmartSpace Controller–Gen 2
Ma in Office Squamish, BC, Canada Phone +1 778 733 0111
Email info@echoflexsolutions.com Web echoflexsolutions.com
© 2019 Echoflex Solutions, Inc. Trademark and patent info:echoflexsolutions.com/ip
Echoflex Solutions intends this document to be provided in its entirety.
Product information and specifications subject to change.
8187M2103 Rev C Released 2019-12
Overview
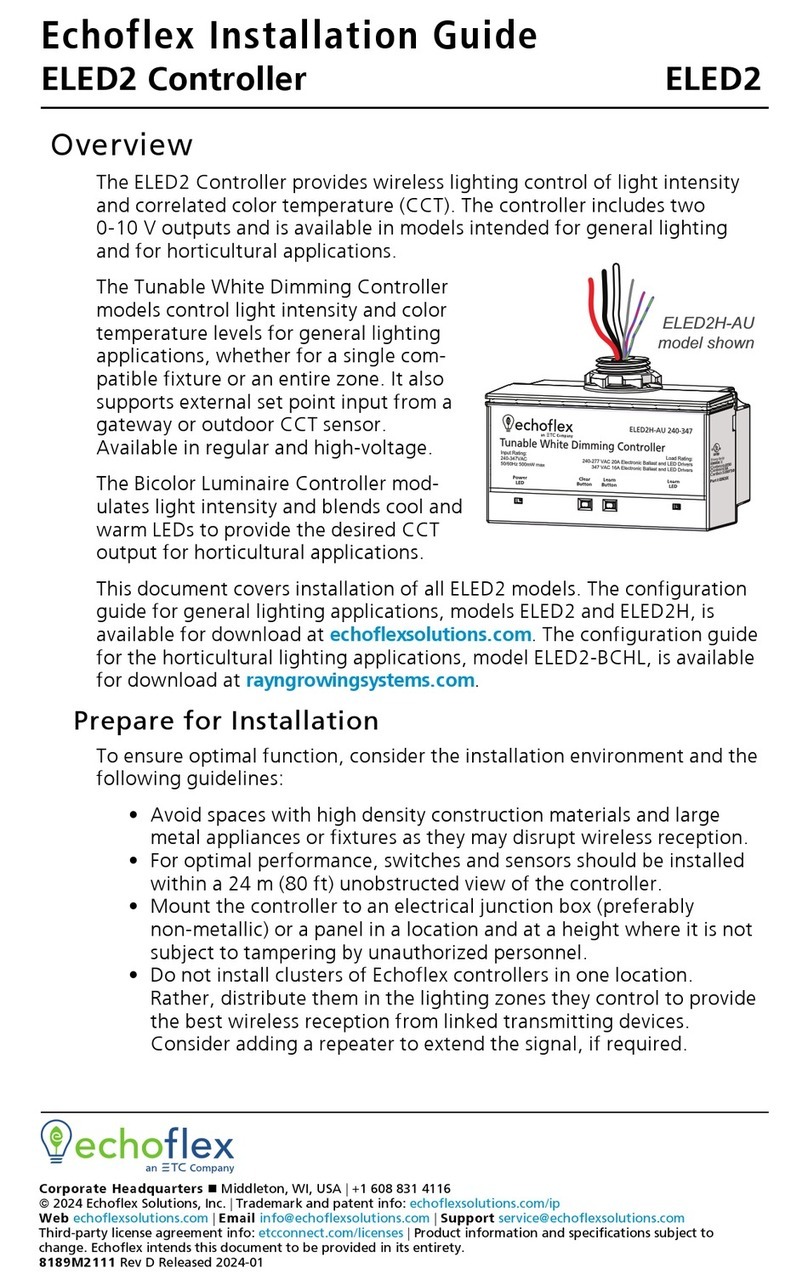
The Elaho SmartSpace Controller–Gen 2 provides fully-rated 20A relays for
direct control of individual fixtures or zone power, and offers fully isolated 0–
10V dimming control for compatible LED drivers and fluorescent ballasts.
Through its 24V power supply, the Elaho SmartSpace Controller–Gen 2 can
power an auxiliary device, such as an Echoflex Solutions or third-party
occupancy, vacancy, or photo sensor. A dry contact input allows responsive
controls to initiate control events across the Elaho control system.
Single Zone
model shown
Two models are available:
•
Single Zone (ESSC-G2)
•
Dual Zone (EDSSC-G2)

Echoflex Solutions Installation Guide
SmartSpace Controller–Gen 2
The SmartSpace Controller–Gen 2 controls lighting loads based on the
following:
•
Preset and Zone controls received from connected Elaho control
stations
•
Ambient light levels as monitored by Elaho Light Sensors
•
Occupancy state as monitored by Elaho Occupancy/Vacancy Sensors
•
Occupancy state as monitored by third-party occupancy/vacancy
sensors via dry contact
•
Input from other Elaho control devices
Custom Configuration
This document guides you through the installation and local configuration of
the SmartSpace Controller–Gen 2. You can access advanced functionality
using the ElahoAccess Mobile App. For more information, see the
ElahoAccess integrated help system.
EchoConnect
EchoConnect is a two-wire topology free system that provides the
SmartSpace Controller–Gen 2 with the flexibility to connect in a system with
up to 16Elaho control products and up to 15 other Elaho output products over
500m (1,640ft) of control wire.
Plug-and-Play Functionality
Using the SmartSpace Controller–Gen 2 on the EchoConnect control system
allows simple plug-and-play functionality, where no software or external
programming is required. The connected control stations or sensors provide
the control message and the SmartSpace Controller–Gen 2 responds.
See the
Elaho Inspire Station Installation Guide
,
Elaho Occupancy/Vacancy
Sensor Installation Guide
, or
Elaho Light Sensor Installation Guide
for more
information about how to set levels and controls. You can download Echoflex
Solutions manuals free of charge from the Echoflex Solutions website (see
page 1).
SmartSpace Controller–Gen 2 Page 2 of 12 Echoflex Solutions

Echoflex Solutions Installation Guide
SmartSpace Controller–Gen 2
Specifications
For use with Echoflex Solutions dimming and relay products.
Ambient Environment
For indoor use only. Rated for plenum use.
•
32°F to 104°F (0°C to 40°C) operating temperatures in 5–95% non-
condensing humidity
Electrical Specification
Single Zone model supports:
•
Power input 120–277 VAC, 60 Hz
•
Load rating:
-
20A general purpose, tungsten, or resistive
-
16A electronic ballast
Dual Zone model supports:
•
Power input 120–277VAC, 60 Hz
•
Load rating:
-
20A general purpose, tungsten, or resistive
-
16A electronic ballast
Compliance
•
cULus listed
•
Conforms to:
-
UL 508 (Industrial Control Equipment)
-
UL 916 (Energy Management Equipment)
-
UL 2043 (Plenum rated)
-
CSAC22.2No.14 (Industrial Control Equipment)
-
CSA C22.2 No. 205 (Signal Equipment)
SmartSpace Controller–Gen 2 Page 3 of 12 Echoflex Solutions

Echoflex Solutions Installation Guide
SmartSpace Controller–Gen 2
Prepare for Installation
The SmartSpace Controller–Gen 2 is designed for mounting directly to an
electrical junction box or panel (provided by others) at the electrical lighting
load, upstream of the load in the circuit.
Note: If your installation requires Class 2 wiring to be installed in
separate conduit, a voltage barrier installation box is available from
Echoflex Solutions. Order Echoflex Solutions part number 7187A1000.
EchoConnect Control Wiring
The SmartSpace Controller–Gen 2 connects to the EchoConnect station
communication bus for control. EchoConnect is a bidirectional protocol that
uses one pair of wires (data+ and data-) for both data and power. Echoflex
Solutions recommends using Belden 8471 (or approved equal) Class 2 wire.
The total combined length of an EchoConnect wire run (using Belden 8471, or
equal) may not exceed 500m (1,640ft).
Note: All control wiring should be installed and terminated by a
qualified installer and should follow standard wiring installation practices.
Leave approximately 20cm (8in) of wiring in the back box for connection
and to allow slack for future service needs.
Note: Echoflex Solutions requires that all Elaho stations and devices be
grounded for ESDprotection. Pull an additional 2.5 mm2(14AWG) wire
for grounding when control wires are not installed in grounded metal
conduit.
SmartSpace Controller–Gen 2 Page 4 of 12 Echoflex Solutions

Echoflex Solutions Installation Guide
SmartSpace Controller–Gen 2
Installation
Installation should follow all local codes and standard electrical practices.
Ensure that the junction box is clean and free of obstructions and that all
wiring is installed correctly.
WARNING: Risk of electric shock! This device utilizes high voltage
and should only be installed by a qualified installer or electrician. Follow
all local codes for installation. Before terminating the AC power wiring
verify that the main breaker is in the off position and follow the proper
lockout/tag out procedures per NFPA Standard 70E.
AVERTISSEMENT: Risque de décharge électrique! Cette appareil
utilise une haute tension et ne doit être installé que par un installateur
qualifié ou un électricien. Suivez tous les codes locaux pour l'installation.
Avant de raccorder le câblage du courant alternatif, vérifiez que le
disjoncteur principal est en position d'arrêt et suivez les procédures de
Consignation/Déconsignation prescrites par la norme NFPA 70E.
WARNING: For indoor use only! Must install to an electrical junction
box or wireway.
AVERTISSEMENT: Uniquement pour usage d'intérieur! Doit être
installé sur une boîte de raccordement électrique ou un chemin de câbles.
1. Locate the circuit breaker panel and turn off the power to the lighting
circuit.
2. To gain access to the line voltage wiring, remove the cover plate and
other hardware from the junction box at the load.
3. Mount the SmartSpace Controller–Gen 2 to the exterior of the junction
box or panel using the 1/2 in threaded nipple. Use the provided 1/2 in
conduit locknut to secure the SmartSpace Controller–Gen 2 to the
junction box or panel.
Note: Follow all local code requirements for terminating wire.
•
Notice that the harness wires on the controller are pre-stripped
for your installation convenience.
•
Use appropriately sized wire nuts (not provided) to terminate
power wires, and use included WAGO®connectors to
terminate EchoConnect wires.
SmartSpace Controller–Gen 2 Page 5 of 12 Echoflex Solutions

Echoflex Solutions Installation Guide
SmartSpace Controller–Gen 2
Connect EchoConnect
The EchoConnect wire terminations are bound together and include a black
wire (data -), a white wire (data +), and a green/yellow wire (ESD). Because
EchoConnect is topology free, you can install the wires in any combination of
bus, star, loop, or home-run.
Note: When using Category5 (or equivalent) cable on the EchoConnect
communication bus, please note the following:
•
Not all topologies are supported using Cat5; plan carefully to
ensure that the proper termination kits are available and the
wire is pulled appropriately.
•
Terminate Cat5 wiring using the EchoConnect Cat5 Station
Termination Kit, and install it using a bus topology. See the
installation guide that is provided with the Cat5 Station
Termination Kit (8186A1707) for information on terminating
Cat5 wiring.
1. Pull all required wiring (data +, data -, and the ESD ground wire) to the
junction box.
2. Use the included WAGOconnectors to make the following
terminations:
a. Connect the incoming ground wire to the ESD green/yellow
ground wire on the unit.
b. Connect the white (data +) wire to the incoming data + (typically
white).
c. Connect the black (data -) wire to the incoming data - (typically
black).
Terminate EchoConnect
wiring using provided
WAGO connectors.
SmartSpace Controller–Gen 2 Page 6 of 12 Echoflex Solutions

Echoflex Solutions Installation Guide
SmartSpace Controller–Gen 2
Connect Power Input and Relay Output
The power input and relay output wiring exits the SmartSpace Controller–Gen
2 through the knockout mount on the enclosure.
1. Connect the power input wiring.
a. Connect the white wire (14 AWG) to the incoming neutral wire
from the breaker panel and the neutral wire of the lighting load.
b. Connect the black power input wire (12 AWG) to the line input
feed wire (hot) from the breaker panel.
2. Connect the relay output wiring. A Single Zone controller has one (red)
relay output wire (12 AWG). A Dual Zone controller has two relay
output wires (12 AWG): Zone 1 is red and Zone 2 is red/white.
a. Connect the Zone 1 relay output wire (red) to the hot input of the
load.
b. For the Dual Zone controller, connect the Zone 2 relay output
wire (red/white) to the hot input of the second load.
SmartSpace Controller–Gen 2 Page 7 of 12 Echoflex Solutions

Echoflex Solutions Installation Guide
SmartSpace Controller–Gen 2
Dimming
Ballast 1
Gray (-)
0–10 V
Violet (+)
Red
Load 1
White
Black
Green/Yellow
EchoConnect
Ground
Black 120–277 VAC
White Neutral
Black 120–277 VAC
White Neutral
Single Zone
SmartSpace
Dimming
Ballast 1
Gray (-)
0–10 V
Violet (+)
Gray/White (-)
0–10 V
Violet/White (+)
Dimming
Ballast 2
White
Black
Green/Yellow
EchoConnect
Ground
Red
Load 1
Red/White
Load 2
Occupancy
Sensor
(24 VDC)
24 VDC Red
Common Black
Sensor Input
Yellow
Dual Zone
SmartSpace
Occupancy
Sensor
(24 VDC)
24 VDC Red
Common Black
Sensor Input
Yellow
Connect Sensor Wiring
1. Locate the sensor input wires on the side of the controller.
2. Connect the red wire (22 AWG) to the 24 VDC red wire from the
sensor.
3. Connect the black wire (22 AWG) to common.
4. Connect the yellow wire (22 AWG) to the sensor control output.
SmartSpace Controller–Gen 2 Page 8 of 12 Echoflex Solutions

Echoflex Solutions Installation Guide
SmartSpace Controller–Gen 2
Connect 0–10V Dimming Output
WARNING: RISK OF DEATH OR INJURY BY ELECTRIC SHOCK! 0–10V
wiring may not be fully isolated from high-voltage AC power. Do not
assume that 0–10V wiring is safe to touch, even when run as an NEC
Class 2 signal. Test for AC voltage to ground before terminating any 0–
10V control wiring to the device.
AVERTISSEMENT: RISQUE DE MORT OU DE BLESSURE PAR
ÉLECTROCUTION! Le câblage 0–10V peut ne pas être complètement isolé
du courant alternatif haute tension. Ne supposez jamais que le câblage 0–
10V peut être touché en toute sécurité, même s'il est utilisé avec un
signal NEC de Classe 2. Testez la tension alternative par rapport à la
terre avant de raccorder tout câblage de commande 0–10V à l'appareil.
The 0–10V dimming output wiring exits the SmartSpace Controller–Gen 2
through the top nipple of the enclosure with the power wiring.
1. Connect the 0–10V dimming output wiring. A Single Zone 0–10V
controller has one pair (violet and gray) of 0–10V output wires
(22AWG). A Dual Zone 0–10V controller has a second pair of 0–10V
output wires (22AWG): gray/white and violet/white.
a. Connect the Zone 1 output wires, gray (-) and violet (+), to the
dimmed input of the connected load.
b. For the Dual Zone 0-10V Controller, connect the Zone 2 output
wires, gray/white (-) and violet/white (+), to the dimmed input of
the second connected load.
2. Reinstall the junction box cover plate.
CAUTION: The 0–10V control outputs must be treated as NEC Class 1
control signals, in the same manner as other high voltage connections.
SmartSpace Controller–Gen 2 Page 9 of 12 Echoflex Solutions

Echoflex Solutions Installation Guide
SmartSpace Controller–Gen 2
Assign Zones and Spaces
Rotary
switches
You can assign zones and spaces using
the two rotary switches on the side panel
of the controller.
The Dual Zone controller assigns two
zones by using the Zone switch setting as
the first zone assignment and then
automatically assigning the next
consecutive zone number for the second
zone.
By default, these switches are set to
Zone1, Space 1. Control inputs from the
connected stations, sensors, and other
controls are shared by all devices within a
space.
1. Set the Zone rotary switch to the
desired Zone address for this
controller.
Note: For the Dual Zone model only, do not set the Zone switch setting
to a number higher than 15. If set to 16, both circuits in the controller will
be assigned to and controlled on Zone16.
2. Set the Space rotary switch to the desired Space for this controller.
Power Up and Test
1. Restore power to the circuit. The SmartSpace Controller–Gen 2 will
power up and turn on all connected loads to full output.
2. Test the circuit by activating the associated Elaho station preset or by
changing the zone intensity control.
3. Test the controller response. Use station controls to alter preset or
zone status, and ensure that the SmartSpace Controller–Gen 2
responds.
Power-Up Behavior
In the event of a power loss to the SmartSpace Controller–Gen 2, the
controller will return to its last output level when power is restored.
SmartSpace Controller–Gen 2 Page 10 of 12 Echoflex Solutions

Echoflex Solutions Installation Guide
SmartSpace Controller–Gen 2
Set the Sensor Type
Press and release the Aux Input Mode button repeatedly to cycle through
the available sensor types. The LED indicator shows the currently selected
sensor type.
LED Indicator Sensor Type Description
Red Disabled
Green
Occupancy
(default after con-
tact detected)
•
Closed contact: Activates Preset 1 for all Elaho
power controllers in the space.
•
Open contact: Triggers vacancy and plays the Off
Preset.
Amber Photo
•
Closed contact: Assumes a dark state and plays
Preset 1 for all Elaho power controllers in the
space.
•
Open contact: Assumes a bright state and plays
the Off Preset.
Off
Not configured
(and no contact
detected)
If the LED indicator is Off, press the Aux Input
Mode button to cycle through the available
sensor types.
Troubleshooting
Restore Defaults
To return the SmartSpace Controller–Gen 2 to factory defaults, set both
rotary switches to 16 and then press and hold the Restore Defaults button
for 10 seconds. The LED will blink red quickly to indicate that the factory
defaults have been restored.
When you return the SmartSpace Controller–Gen 2 to factory defaults, the
sensor type is set to Off. The sensor type will return to the default setting
(Occupancy) after contact closure is detected, or you can reset the sensor type
to the desired setting by pressing the Aux Input Mode button to cycle
through the available sensor types. See
Set the Sensor Type on page 11
.
Note: After you return the SmartSpace Controller–Gen 2 to factory
defaults, reset the rotary switches to the appropriate values for the
controller zone and space.
SmartSpace Controller–Gen 2 Page 11 of 12 Echoflex Solutions

Echoflex Solutions Installation Guide
SmartSpace Controller–Gen 2
Update Firmware
If updated firmware is required, you can update the firmware on the
SmartSpace Controller–Gen 2 by using ETC UpdaterAtor software and a
microSD card. You can download UpdaterAtor from the ETC website at
etcconnect.com.
Note: Plan to update firmware when troubleshooting any issues with
the SmartSpace Controller–Gen 2.
1. Get the firmware update file using UpdaterAtor.
2. Save the firmware update file to the root directory of a microSD card.
3. Ensure that power is supplied to the controller.
4. Insert the microSD card in the SD slot on the side of the SmartSpace
Controller–Gen 2 enclosure.
•
The Dim Mode LED will illuminate amber in a triple-blink
pattern while the firmware is updating, and then will return to its
previous state when the update is complete.
•
If the LED illuminates red in a double-blink pattern, an error has
occurred. Ensure that the firmware file has not been renamed
and is located at the root directory on the microSD card, and then
attempt the firmware update again. If the LED continues the
double-blink pattern, contact Echoflex Solutions Technical
Services using the information at the bottom of page1.
5. When the LED returns to its previous state, remove the microSD card.
microSD
card slot
SmartSpace Controller–Gen 2 Page 12 of 12 Echoflex Solutions
This manual suits for next models
2
Table of contents
Other echoflex Controllers manuals
Popular Controllers manuals by other brands
Emerson
Emerson Tescom 44-2300 Series Instructions for use
Sherline Products
Sherline Products CNC Metric Linear Controller Installing and using
Carel
Carel pCO1 series user manual
Merlin
Merlin 58184 quick start guide
HP
HP Compaq Presario,Presario 4400 Replacement instructions
Adaptec
Adaptec ASR-2045 Important information about issues and errata
Emerson
Emerson PACSystems RX3i Energy Pack quick start guide

Aaeon
Aaeon AEC-6930 manual

EBS
EBS CPX200NB Installation and programming manual
Amperes
Amperes VP7810 instruction manual
Martin Audio
Martin Audio CMX2A Specification sheet

Mitsubishi Electric
Mitsubishi Electric M800VS Series Connection and set up manual
