Ecleris PROCAM HD User manual

INMANUUIN121 M. USO VI340-HC118G2 ING USA V.2016.10.06.DOCX
PROCAMHD
CCDCAMERA AND CONSOLE
VI340
HC118

ECLERIS USA.
11801 NW 100th Rd
Suite 17
Medley, FL 33178, U.S.A.
Phone: +1 786 483 7490
EU Authorized Representative:
MEDES Ltd. UK
5 Beaumont Gate, Shenley Hill, Radlett, Herts WD7 7AR, England
Tel: +423-663-169205
Tel/Fax: +44 1923 859 810
Ecleris PROCAM cameras are CE approved, complying with European Council Directive 93/42/CEE related to medical
equipment. The MDD equipment classification is I.

INMANUUIN121 M. USO VI340-HC118G2 ING USA V.2016.10.06.DOCX i
CONTENTS
1.SYMBOLS ..............................................................................................................................................................................................................................1
2. WARNINGS ..........................................................................................................................................................................................................................2
3. DESCRIPTION .......................................................................................................................................................................................................................3
3.1 INTENDED USE ......................................................................................................................................................................................................3
3.2 INTENDED USER ....................................................................................................................................................................................................3
3.3 COMPONENTS ......................................................................................................................................................................................................4
3.3.1 PROCAM HD Console...............................................................................................................................................................................4
3.3.1.1 Front Panel ........................................................................................................................................................................ 4
3.3.1.2 Rear Panel.......................................................................................................................................................................... 4
3.3.2. PROCAM HD Camera ..............................................................................................................................................................................5
4. INSTALLATION......................................................................................................................................................................................................................5
4.1 COUPLING TO ECLERIS EVERLUX LIGHT SOURCE...........................................................................................................................................................6
5. REVISION AND OPERATION..................................................................................................................................................................................................9
5.1 REVISION ............................................................................................................................................................................................................9
5.2 OPERATION .........................................................................................................................................................................................................9
5.2.1 White balance ........................................................................................................................................................................................10
5.2.2 Window Function ...................................................................................................................................................................................10
5.2.3 Function Anti-Moiré ...............................................................................................................................................................................10
6. MAINTENANCE ..................................................................................................................................................................................................................12
6.1 CLEANING.........................................................................................................................................................................................................12
6.1.1 External Surfaces....................................................................................................................................................................................12
6.2 ELECTRICAL CONNECTIONS ....................................................................................................................................................................................12
6.3 CHANGING THE FUSE ...........................................................................................................................................................................................12
7. TECHNICAL SPECIFICATIONS ..............................................................................................................................................................................................14
8. TROUBLESHOOTING ..........................................................................................................................................................................................................15
9. TECHNICAL SERVICE...........................................................................................................................................................................................................16
10. WARRANTY ......................................................................................................................................................................................................................16
11. COPYRIGHT ......................................................................................................................................................................................................................16
INMANUUIN121 M. USO VI340-HC118G2 ING USA V.2016.10.06.DOCX 1
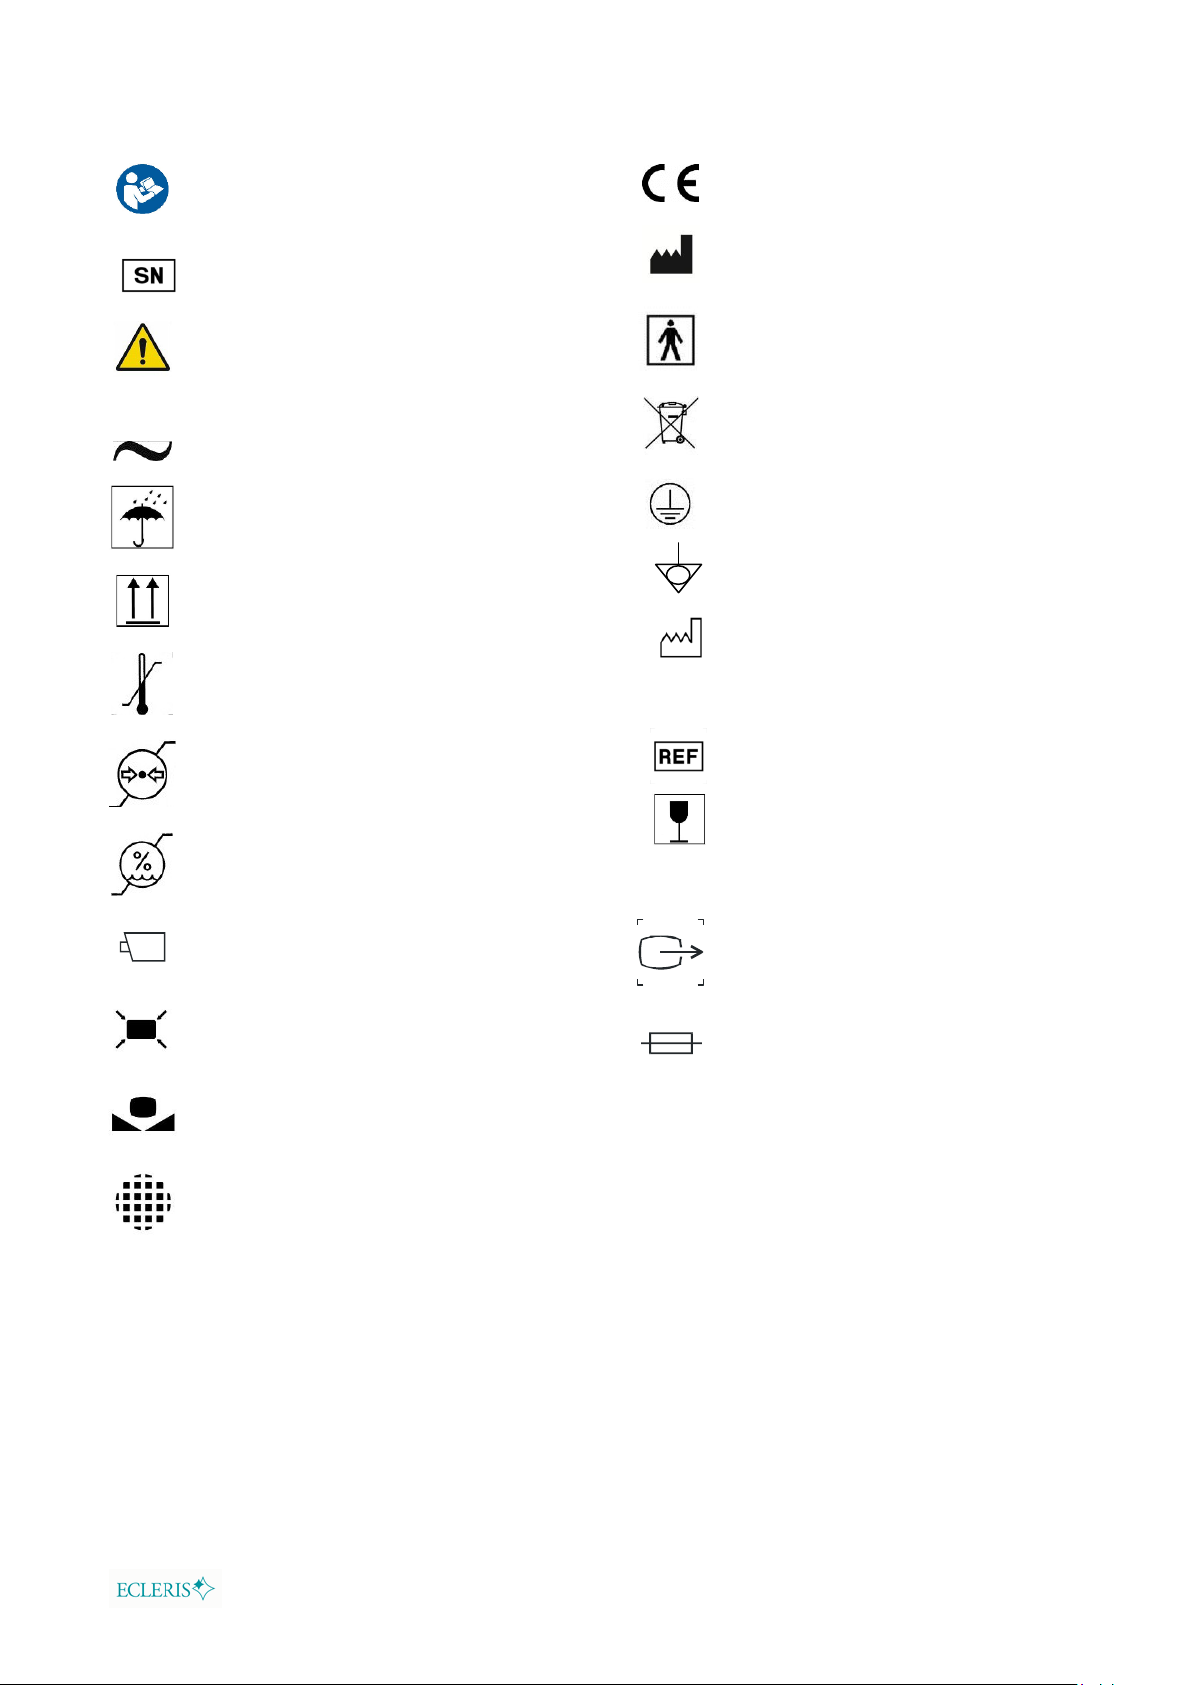
1.SYMBOLS
Read the related
documentation
Warning
Alternate current
Protect from water.
This side up
Enviroment transport
conditions
Pressure Limits
Humidity Limits
Camera connection
Window Function
White Balance
Anti-Moiré Function
CE Mark
Manufacturer Information
(Name, Address)
Type BF
Do not discard with the
household waste
Protective Earth (Ground)
Equipotential bonding
Date of Manufacture
(MM/AAAA)
Product code
Fragile
Video output
Fuse
Serial number

INMANUUIN121 M. USO VI340-HC118G2 ING USA V.2016.10.06.DOCX 2
2. WARNINGS
It is important to read this manual carefully before using the device
ECLERIS will not be held responsible for damage that can occur to the equipment due to not following the instructions or not observing the following
criteria:
Keep the equipment out of children reach.
Do not install the equipment next to heat sources, such as heaters
Install the equipment on a firm horizontal surface, in a well-ventilated area.
Protect the equipment and accessories from direct solar light, dust, humidity and vibrations or excessive banging.
Equipment not appropriate to be used near or around flammable anestheticmixture with air, oxygen or nitrous oxide.
The equipment does not need sterilization.
Do not put any container with liquids on top of the device.
Main power cord and PROCAM HD cable are resistant to deformations and mechanical tensions however do not damage or avoid violent
shocks to the cables.
Do not use the equipment during electrical storms.
Unplug the equipment when it is not being used.
This equipment has to be connected to ground through a ground conductor in the power cable. This ground connection is essential for the
safe use of the equipment
Do not connect the equipment to devices that do not comply with IEC60601-1ed 3.0 or later.
The device is provided with a connectable power cable that assures proper electrical isolation.If it needs to be replaced, the replacement
will not be longer that the original cable and it needs to be certified under IEC 60245-1 or IEC 60227-1.
In case of interference with other electro medical or electric equipment, we recommend increasing the distance between PROCAM HD and
the other equipment to minimize these effects.
Do not open the equipment. Maintenance and repairs must be done by ECLERIS or an authorized company. ECLERIS will not be responsible
for the consequences of repairs or maintenance carried out by non-authorized personal.
In case of any problem, disconnect the power cable
The device must be used only by personnel informed of all this warnings.
This instruction manual must be kept together with the equipment for future reference. If the equipment should be sold or donated this
manual must be enclosed.
Any use outside of the manufacturer specific intent use, will exclude ECLERIS of all liability.
If by any of the following:
Inadequate use of the equipment.
Failure to use the instruction manual.
Bad maintenance and care of the equipment.
Repair or manipulation by unauthorized personal.
…personal or material damage is produced to a third party, ECLERIS, the manufacturer and sales agent of this equipment, will not assume
reasonability for said damage.
The device should never be discarded with the household waste. Please check local regulations for electronic components disposal or
recycling. It is the user’s responsibility to deliver the system to the proper location for disposal or recycle of electrical and electronic
device

INMANUUIN121 M. USO VI340-HC118G2 ING USA V.2016.10.06.DOCX 3
3. DESCRIPTION
PROCAM HD camera has a 1/3” high resolution CMOS chip in one control unit.
The CMOS chip, is located in the front of the camera head, it takes the image and converts it to electronic signals.
The image is processed in the control unit and provides an HDMI (High Definition Multimedia Interface) in the back panel to be either projected on a
LCD monitor or other digital visualization devices.
The PROCAM HD camera provides images with great sharpness, clarity and depth of perception with excellent color reproduction. It has a compact
and ergonomic design plus is light weight therefore is very comfortable to use.
The camera has several controls that allows to select, by single buttons, different functions as White Balance, Anti-Moiré (to minimized the edges of
the fiber optic grid when using flexible fiber endoscopes) and Windows, (minimizes the light saturation when using small diameter endoscopes,
PROCAM HD power supply (console) was specifically designed to be used together with High Definition cameras from Ecleris. This Central Control Unit
(CCU) gives power to the videocamera which process the video. Up to two high resolutions imaging devices can be connected.
PROCAM HD power supply can be fixed to Everlux light source manufactured by Ecleris. It can be placed hanging together with the light source down
the colposcope or microscope forearm from ECLERIS. Also it can be attached under an Everlux light source on a desk, cart or any flat surface. It can be
used also as a standalone unit as it includes rubber slip supports
3.1 Intended use.
The device is intended for use in all types of diagnoses and surgeries that require real-time capture of high sharpness and contrast images, without
being exclusive stereoscopy as a conditioning technique
3.2 Intended user.
The device is intended for use by physician, paramedic or health care professional

INMANUUIN121 M. USO VI340-HC118G2 ING USA V.2016.10.06.DOCX 4
3.3 Components.
3.3.1 PROCAM HD Console
3.3.1.1 Front Panel
1. ON/OFF button
2. PROCAM HD Connector
3.3.1.2 Rear Panel
1Power connector
2Equal-potential Ground connection.
3Video output in high definition (HDMI output connectors)
4Fuse holders.
1
2
1
2
3
4
INMANUUIN121 M. USO VI340-HC118G2 ING USA V.2016.10.06.DOCX 5
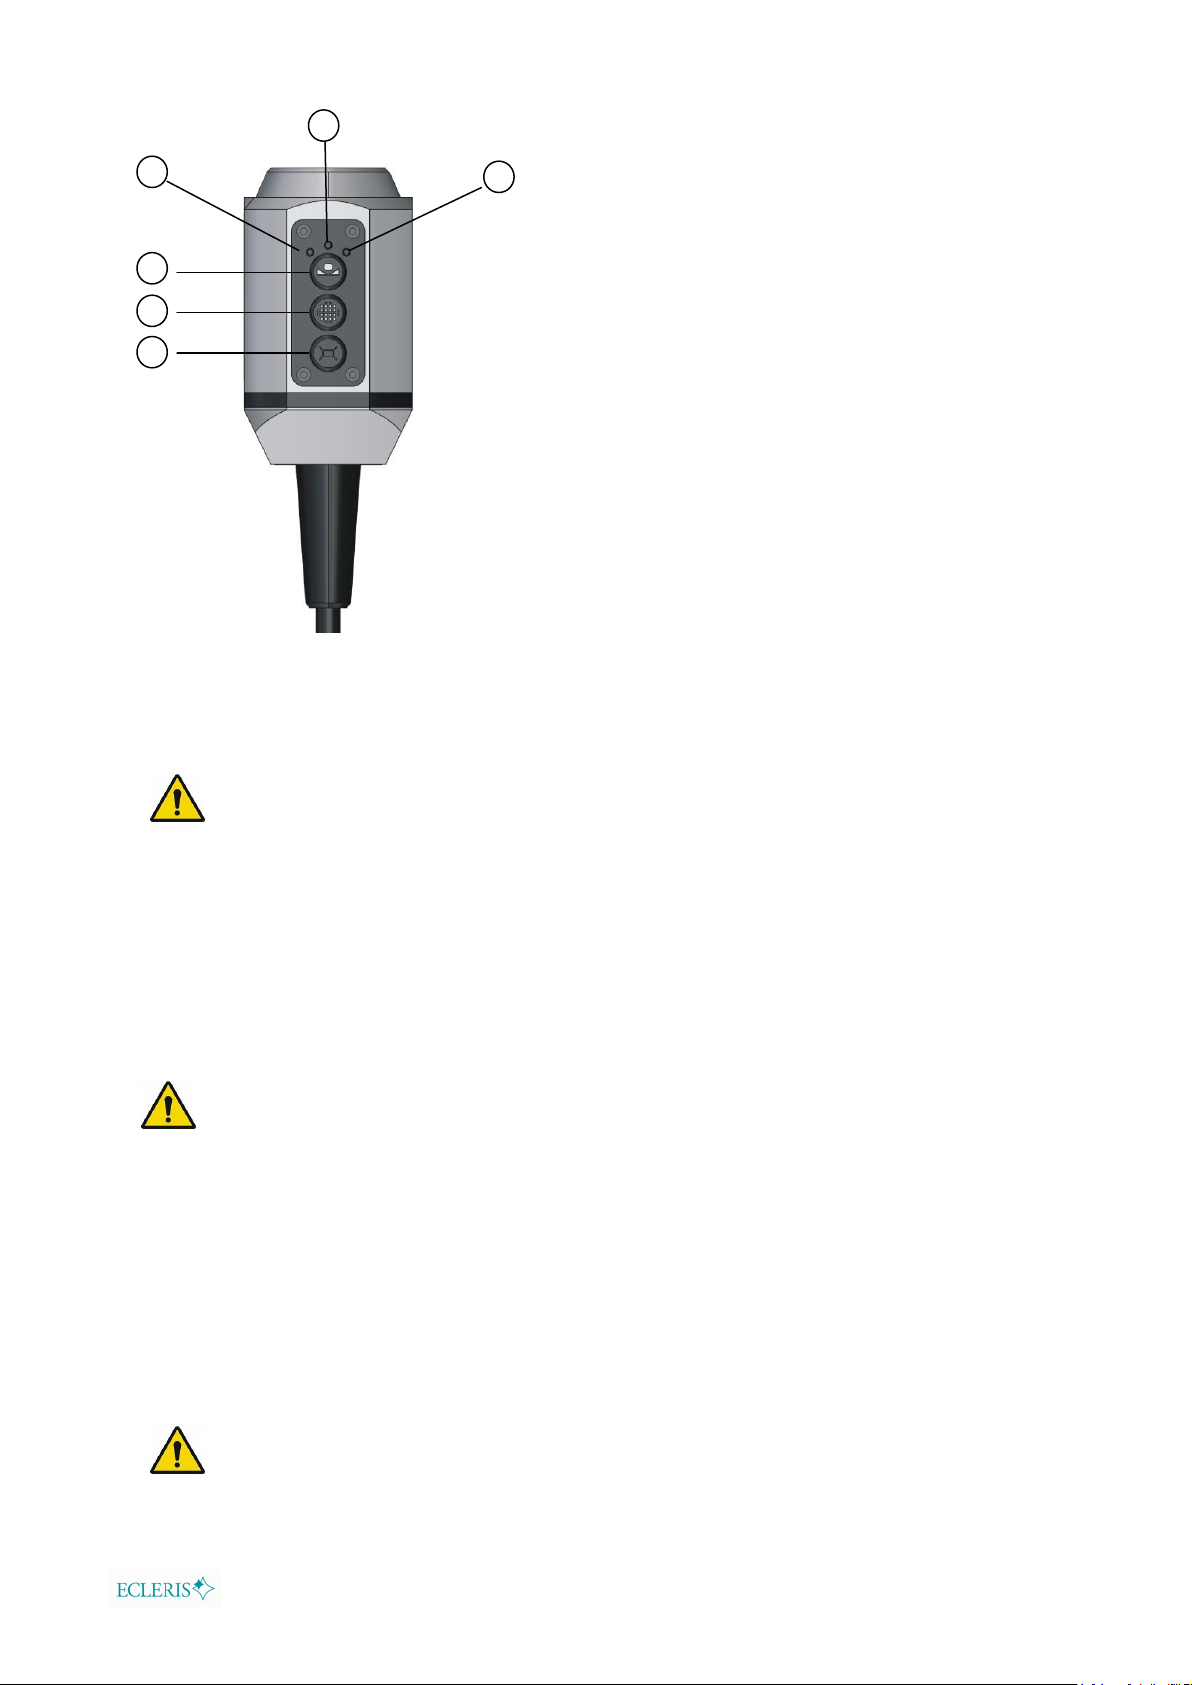
3.3.2. PROCAM HD Camera
1White Balance Button.
2Anti-Moiré Button.
3Window Button.
4White Balance LED.
5Anti-Moiré LED.
6Window LED.
4. INSTALLATION
Connection and revision of this Equipment must be done by technical personnel with electrical installation
knowledge
The PROCAM HD includes the following components. Check and identify them before proceeding to the installation.
Console
Videocamera HD
Main power cable
Use video monitors certified under IEC60601-1 ed 3.0 or later
Use the endoscope in accordance with IEC60601-2-18
1. Unpack the device with care.
2. Place the PROCAM HD console on a solid surface.
3. If the building structure has equipotential grounding, connect the equipment to ground through the equipotential ground terminal located
on the rear panel of the unit.
4. Connect the connector of the video camera ECLERIS to the connector in the front panel.
5. Plug the video output connector on the rear panel of the PROCAM HD console to the video input of the video monitor.
Check if the image device (videomonitor / video printer / LCD TV etc…) supports the camera resolutions
6. Connect the optical device to the camera head with the C-Mount screw (Endoscope, Microscope, Colposcope, etc)
1
2
3
4
5
6

INMANUUIN121 M. USO VI340-HC118G2 ING USA V.2016.10.06.DOCX 6
7. With the equipment off, connect power cable to the electrical socket.
4.1 Coupling to ECLERIS Everlux light source
PROCAM HD console (CCU) can be attached to the ECLERIS Everlux light source or used as a standalone unit.
To attach the PROCAM HD console to the ECLERIS Everlux light source, you will need a 2,5 millimeters Allen key. With this Allen key, unscrew the two
screws at the bottom of the PROCAM HD console as it is shown in the picture
Doing so, two heads of screws will emerge from the top of the PROCAM HD console. These head of screws shall be anchored to the bottom side of
the ECLERIS Everlux light source.
The base of the ECLERIS Everlux light source has two holes where the head of the screws of the PROCAM HD console shall be introduced in order
to attach it to the ECLERIS Everlux light source.

INMANUUIN121 M. USO VI340-HC118G2 ING USA V.2016.10.06.DOCX 7
Once the head of the anchor screws are in place into the holes of the ECLERIS Everlux light source base, you need to slightly push back the
PROCAM HD console in order to attach it completely to the ECLERIS Everlux light source
Finally, to ensure a strong and stable coupling, tighten the screws of the PROCAM HD console from the base of it.

INMANUUIN121 M. USO VI340-HC118G2 ING USA V.2016.10.06.DOCX 8
Once the coupling is finished, the combined set ECLERIS Everlux light source and PROCAM HD console is ready to use as itself or it can be attached
to an ECLERIS microscope forearm or to an ECLERIS colposcope forearm through the ECLERIS Everlux light source (after removing the Everlux
handle on top of the unit).
In order to avoid both the use of two electrical power sockets to supply both devices and also the use of many cables, ECLERIS has specially designed
an interlock male-female cable of 24 centimeters. With this cable, the PROCAM HD console can be supplied by the ECLERIS Everlux light source
directly. This cable is optional and it has to be requested by the user.
This cable connects both units as it is shown in the picture.

INMANUUIN121 M. USO VI340-HC118G2 ING USA V.2016.10.06.DOCX 9
5. REVISION AND OPERATION
5.1 Revision
Once the installation is complete and before turning on the PROCAM HD camera we recommend to do the following controls:
•Verify that the electrical circuit is connected to ground and in perfect condition and that the connection to the equipment is done perfectly
too.
•Confirm that the power supply fuses are in the socket and that it is suitable.
•Make sure no water or liquid supplies, or gases or inflammable fumes in the environment are near the equipment that can harm it.
•The equipment has to be connected to the electrical socket through the power cable supplied by ECLERIS.
•The electrical supply has to be done at electrical socket without power adapters.
The equipment must be used only in places where the electrical installation complies with local regulations.
If any abnormality is detected before turning on the equipment, please contact the technical service of your local distributor or
your nearest ECLERIS office before using it
5.2 Operation
In this section there are detailed procedures to turning on and verifying the equipment functions. We recommended following them after the
installation.
Only medical, paramedical or health personnel should work this equipment
1. Press the power button in front of the PROCAM HD console. The LEDs of the PROCAM HD camera will blink for few seconds and then they
INMANUUIN121 M. USO VI340-HC118G2 ING USA V.2016.10.06.DOCX 10
will turn off. It indicates that the PROCAM HD camera head is being powered.
2. Verify that the video monitor is ON and in Video mode through its HDMI/DVI input.
3. Adjust the picture on the monitor according to your preferences of Brightness, Contrast, Saturation, Color, HUE, Gamma etc.
4. Proceed with the white balance (see 6.2.1 White Balance section).
5. Adjust the level of Window and Anti-Moiré functions according to your preferences (see 6.2.2 and 6.2.3)
6. Once the procedure is over, turn the device off in order to maximize the system lifetime and energy saving.
5.2.1 White balance
To obtain the white balance, focus on a completely bright and white image lit with the maximum intensity and press the White Balance button for
approximately 3 seconds. This white balance will be stored in the memory even if the camera is off. While the white balance function is working, the
light on the camera function panel flicker
If the white balance is well adjusted, this guarantees the reproduction of natural colors
Perform a new white balance every time the light source is changed.
Perform the White Balance with the same light source that you will use in the intervention.
5.2.2 Window Function
With the Window Function activated, only the surface that contains image information is used to control the camera sensitivity, this way the camera
adjustment and the image contrast is optimized even for very thin optics and short work distances.
Once the object to be observed is in the center of the image, as with very thin diameter endoscopes in which the outer edge of the image is black,
activate the window function pressing the Window button. The object will now be seen with the adequate lighting on the screen and the outer
margins of the image will appear proportionally brighter.
Contrary to the standard measuring where the average brightness is intergraded on the whole image, by selecting the Window function only the
central part of the image is evaluated for an average brightness, not taking into account the external margins.
When the Window function is activated, a light around the button turns on.
If the object to be observed is centered in the monitor screen, as when thin endoscopes are being used (<10mm) , and where
the edge of the image displayed is black, select the Window function by pressing the corresponding button.
Window function indicator:
OFF Window Deactivated (Area of interest: External, Medium and Central)
Blinking Window Level 1 (Area of interest: Medium and Central)
ON Window Level 2 (Area of interest: Central)
Press the Window button again to pass to next level of the window and press again to deactivate this function.
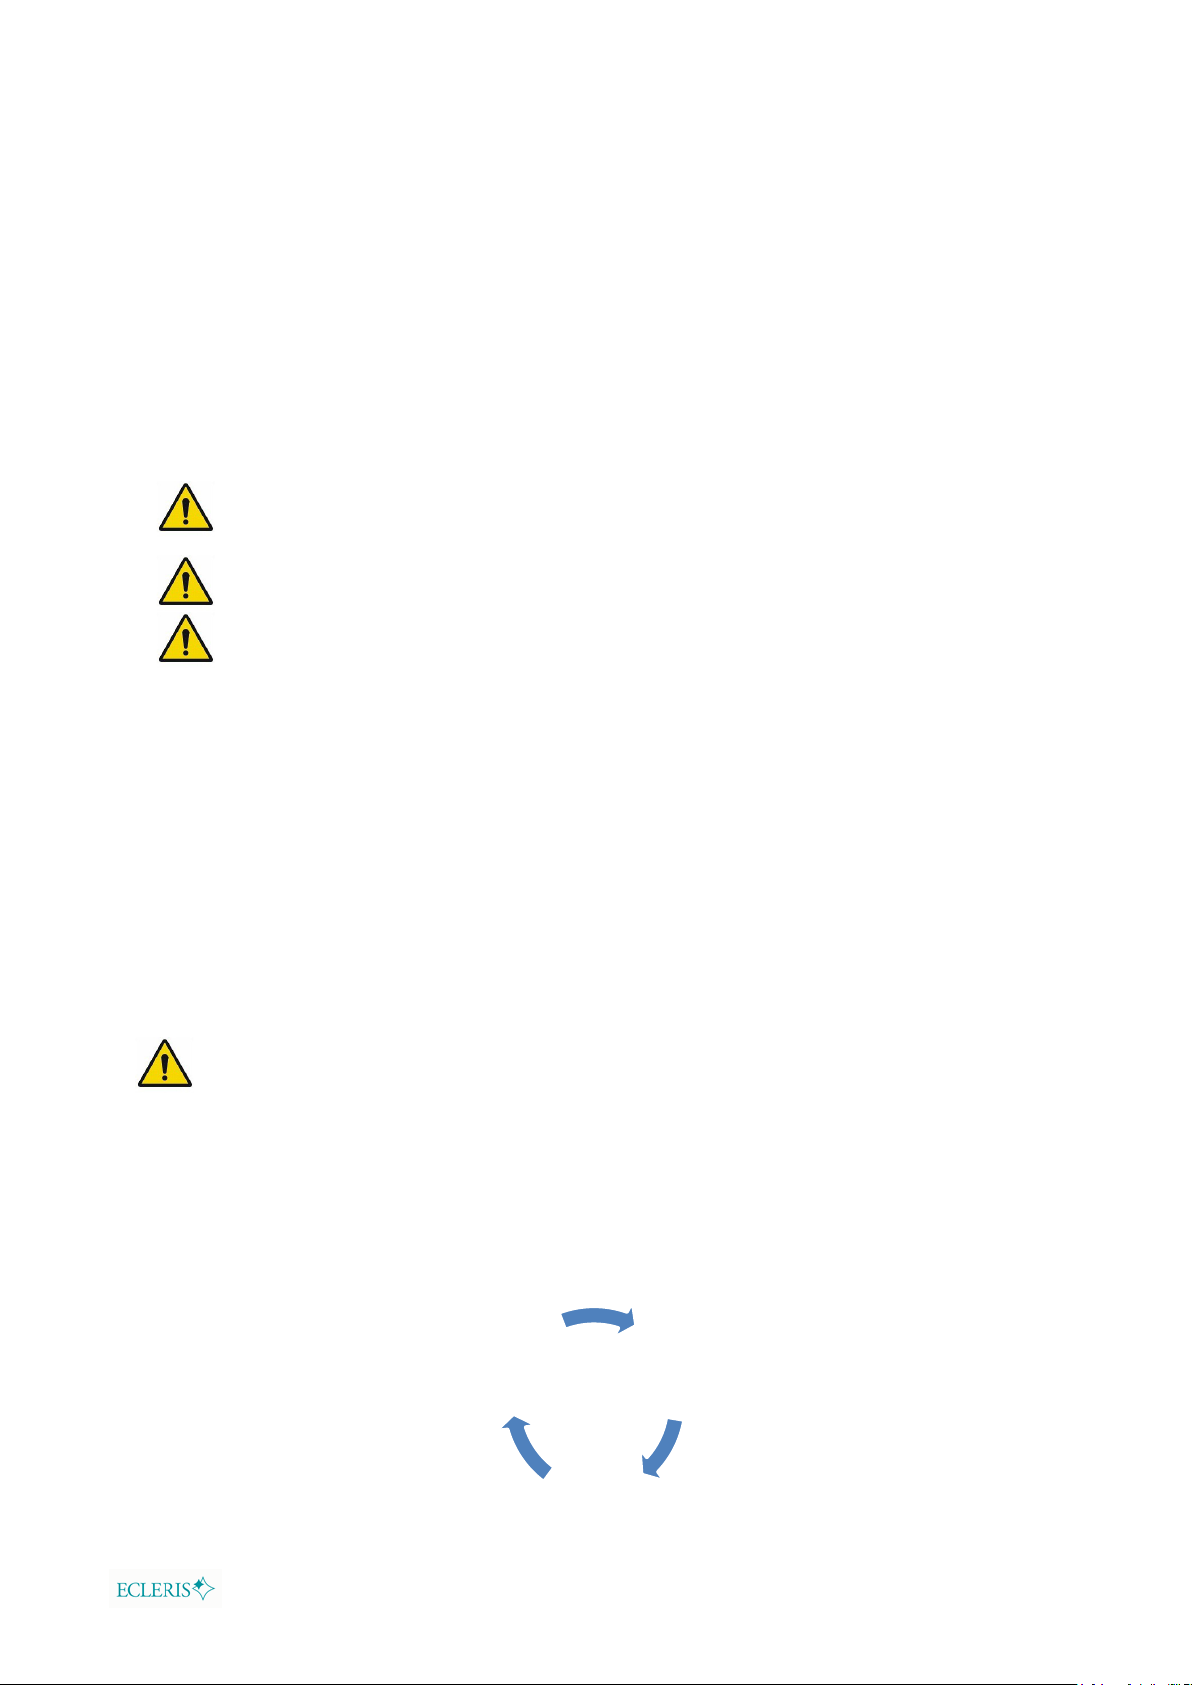
5.2.3 Function Anti-Moiré
Deactivate
Level 1
Level 2

INMANUUIN121 M. USO VI340-HC118G2 ING USA V.2016.10.06.DOCX 11
The PROCAM HD camera has 2 levels of Anti-Moiré digital filters to optimize the images obtained, minimizing the grid affect originated in the
visualization of images taken from flexible endoscopes considerably.
Anti-Moiré function indicator:
Turn off Anti-Moiré Deactivated
Blinking Anti-Moiré level 1
Turn on Anti-Moiré level 2
To active the first level of filtration press the Anti-Moiré button on the camera once. When the first level is activated the green light around the button
flickers.
To activate the second level of filtration, press the Anti-Moiré button again. When the second level is activated the green light around the button stays
on.
Press the Anti-Moiré button one more time to deactivate this option
Deactivated
Level 1
Level 2

INMANUUIN121 M. USO VI340-HC118G2 ING USA V.2016.10.06.DOCX 12
6. MAINTENANCE
The following procedures are recommended to conserve PROCAM HD, in optimum working conditions:
Before the maintenance of the PROCAM HD, disconnect the power cable from the electric power supply
•Periodic cleaning of all external components.
•Check connections.
•Annual technical verification of the equipment.
For any type of maintenance work or revision contact your local distributor or nearest ECLERIS office.
All technical service, repairs or modifications must be registered in the Maintenance Sheet of this manual, indicating the work done, date, name and
signature of the person in charge
6.1 Cleaning
Before cleaning the PROCAM HD, disconnect the power cable from the electric power supply
6.1.1 External Surfaces
To clean the outer surfaces of the device only use cotton or cloth dampened in mild detergent or soap. Only use adequate cleaning products prepared
for electrical equipment following the products instructions
While cleaning, be careful not to let water or humidity get into the equipment.
Never use flammable products, especially alcohol, when the unit is hot.
Do not turn the equipment on until one (1) hour after cleaning process
We recommend cleaning the external surface of the equipment every 15 days.
Do not sterilize any parts of the device in autoclave unless they are marked as autoclavable
Do no immerse the device or its accessories.
The cleaning, disinfection and sterilization of accessories notprovided by ECLERIS must be performed following the
instructionprovided by their manufacturer.
6.2 Electrical Connections
Permanently check the condition of all the electrical components.
Check that there are no:
Cables in bad conditions; cut or torn.
Bad connection of the cable with the socket.
Rusty pins in the connectors.
Disconnected equipotential ground connection (in places with equipotential ground).
6.3 Changing the Fuse
To avoid a waste of time for unavailability, we recommend having spare fuses on hand.
1Disconnect the power cable from the electric current and from the device.
2Next to the power cord connector there are two plastic knobs where the fuses are housed. Manually turning these knobs in the direction
indicated by the arrows, both handles can be removed, one at a time, to replace damaged fuses
3Remove the damaged fuses and replace them with the spare fuses, to do this use the same value of the replaced fuses.

INMANUUIN121 M. USO VI340-HC118G2 ING USA V.2016.10.06.DOCX 13
Only use fuses as shown at the rear side of the PROCAM HD console and certified by
IEC60127
4Screw again the knobs.
5Connect the power cord.

INMANUUIN121 M. USO VI340-HC118G2 ING USA V.2016.10.06.DOCX 14
7. TECHNICAL SPECIFICATIONS
POWER SUPPLY 100 - 240 V
Nº OF PHASES 1 (single phase)
FRECUENCY 50 - 60 Hz
CLASS I
TYPE BF
USE MODE Continuous
GRADE OF WATER PROTECTION IPX0
POWER CONSUMPTION 25VA
FUSES 2 x T2AL250V
VIDEO OUTPUT 2 x HDMI (DVI 1.0)
RESOLUTION 1920 (H) x 1080 (V) @ 60 fps.
SENSOR CMOS
THERMAL PROTECTION Overheating automatic shutdown of power supply
OPERATING CONDITIONS 10 - 40 ºC
35 - 75 % relative humidity
700 - 1060 hPa
STORAGE AND TRANSPORT -30 - 45 ºC
CONDITIONS 10 - 95 % relative humidity
500 - 1060 hPa
This system is not designed to be used in the presence of inflammable anesthetic gases mixture with air, oxygen,
nitrous oxide, or ambient with high oxygen content.
The device is provided with a connectable power cable that assuresproper electrical isolation.

INMANUUIN121 M. USO VI340-HC118G2 ING USA V.2016.10.06.DOCX 15
8. TROUBLESHOOTING
The following table indicates the most common problems and their solutions. Please consult this table if you have any inconvenience.
As PROCAM HD console is always used in combination with a video monitor and a videocamera, faults will be analyzed considering the whole system.
PROBLEM
PROBABLE CAUSE
SOLUTION
The equipment will not
turn on
It is not connected to the
electric power supply.
Connect the cable to the electric power supply
The power cable is damaged or
cut.
Replace the power cable
The plug is in bad conditions.
Replace the plug
The fuse is damaged or burnt.
Replace the fuse
The green pilot light on
the switch turns on but
there is no image on
the screen
HDMI cable with poor
connection.
Verify that both ends of the HDMI cable are completely plugged to the connector.
Video Input processor of the
monitor does not register the
camera correctly
Turn off the monitor, and turn it on again after 30 seconds.
Turn off the PROCAM HD console and turn it on again after 30 seconds.
Change the output HDMI video at the PROCAM HD console. .
If the monitor has more than one video input, change the connection to another
input.
Monitor off.
Turn the monitor on.
Monitor disconnected.
Plug the monitor to the PROCAM HD console through the provided cord.
Monitor in wrong video mode.
Set the monitor in HDMI/DVI video input.
The camera is not connected.
Connect the camera connector to the front panel of the console
Videocamera incorrectly
connected.
Check if the videocamera connector is correctly and completely connected to the
frontal panel of the PROCAM HD console
Image is in black and
white
Camera is defective.
Please contact to the nearest Technical Service.
Image without real
colors
Incorrect White Balance.
Adjust White Balance
Blurred Image
Lack of focus adjustment of
the external optical system.
Perform the focus adjustment of the optical system.
Anti-Moiré function is
activated.
If you don’t use flexible scope, deactivate Anti Moiré function.
Image is too bright.
Misadjusted monitor
Calibrate properly the image levels of the monitor
Misadjusted Window Function
Change the levels of Window Function to adjust the image
Image is too dark.
Not enough light
Increase the levels of intensity of illumination of the light source
Verify that the video monitor is configured with adequate levels of brigthtness.
If the inconvenience cannot be solved, please contact your local distributor or the nearest ECLERIS office and ask for technical
service.

INMANUUIN121 M. USO VI340-HC118G2 ING USA V.2016.10.06.DOCX 16
9. TECHNICAL SERVICE
PROCAM HD should be repaired and/or maintained exclusively by ECLERIS trained and qualified personnel in authorized installations and must only
be repaired the parts of the device that ECLERIS state as repairable. ECLERIS will provide under request circuits, list of components, description
calibration instructions or any other information in order to assist the ECLERIS authorized technical personnel.
We recommend using the following procedure to expedite repair service and reposition of products under guarantee.
1 Contact the technical service department of your local distributor or nearest ECLERIS office.
2 Provide detailed information on the problem.
3 If the problem cannot be solved through troubleshooting, it must be sent for repair.
The following information should be sent with the product:
•Owners name
•Owners address
•Person to contact and a telephone number
•Product serial number
•Problem description
The shipment should be done in the original packaging to avoid damage to the equipment during the transportation. ECLERIS will
not be responsible for damage caused during the transportation due to improper packaging
10. WARRANTY
ECLERIS declares that the PROCAM HD has passed our Quality Control and no defects have been found in its manufacture, therefore guarantees
proper working order under adequate conditions that are indicated in this manual. The guarantee is for the term of one (1) year starting on the
purchase date.
ECLERIS shall not be responsible for damage caused by/to the PROCAM HD and its power supplies for inadequate use, neglect, incorrect cleaning or
storage. Any repairs carried out by anyone other than ECLERIS authorized personal will annul this warranty. This warranty is only valid for the original
buyer.
Without regarding the warranty, all shipping cost to and from ECLERIS authorized installations are exclusive responsibility of the client
11. COPYRIGHT
All the rights to this manual are reserved, especially reproduction, publication and translation rights. No portion of this manual may be reproduced by
no means (photocopy, microfilm or other methods) without previous written authorization from ECLERIS. Neither can it be reproduced, multiplied or
published through any electronic data processing form.
The information contained in this manual may be modified or broaden without previous notification, without it representing any responsibility to
ECLERIS.
Other manuals for PROCAM HD
3
Table of contents
Other Ecleris Digital Camera manuals


