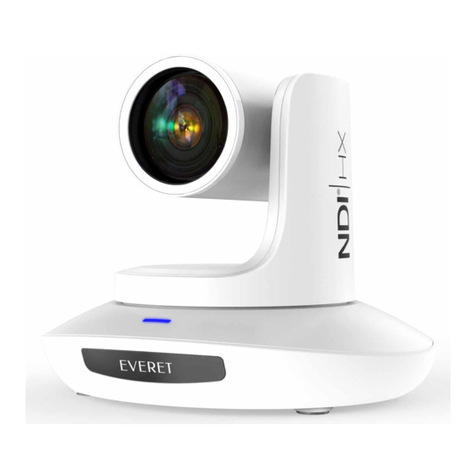
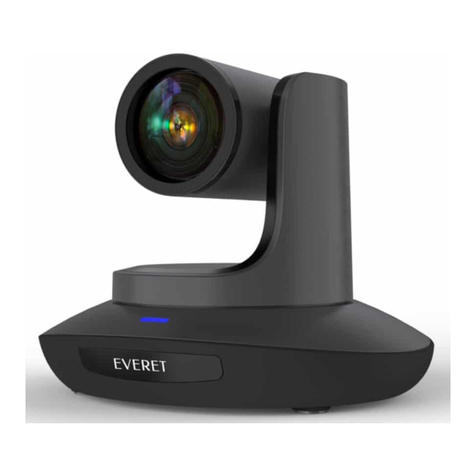
Everet EVP435N User manual

EVERET EVP435N
4K UHD NDI PTZ Video Camera 35x Zoom
User Manual
Version V1.0
(English)

1WWW.EVERETIMAGING.COM
CONTENT
SAFETY GUIDES 1
PACKING LIST 2
QUICK START 3
2. Dial Switch Settings (at the bottom of the camera) 4
PRODUCT HIGHLIGHTS 6
TECHNICAL SPECIFICATIONS 7
CAMERA INTERFACE 9
CAMERA DIMENSIONS 9
IR REMOTE CONTROLLER 11
OSD MENU 14
Webinterface 24
GETTING STARTED WITH NDI 35
VISCA OVER IP 40
HOW TO USE VISCA OVER IP 40
SAFETY GUIDES
1. Before operation, please fully read and follow all instructions in the manual.
2. The camera power input range is 100-240 VAC (50-60Hz), ensure the power supply input
within this rate before powering on.
3. The camera power voltage is DC12V/8W. We suggest you use it with the original power
supply adapter or use PoE+ (IEEE802.3at) compatible switch.
4. Please keep the power cable, video cable and control cable in a safe place. Protect all
cables especially the connectors.
5. Operational environment: 0℃-50℃, humidity less than 90%.To avoid any danger, do not
put anything inside the camera, and keep away from the corrosive liquid.
6. Avoid stress, vibration and damp during transportation, storage and installation.
7. Do not detatch the camera housing and cover. For any service, please contact authorized
Everet technicians.
8. Video cable and control cable should be individually shielded, and cannot be substituted
with other cables.
9. Do not direct the camera lens towards strong light, such as the sun or the intensive light.

2WWW.EVERETIMAGING.COM
10. Use a dry and soft cloth to clean the camera housing. Applied with neutral cleaning agent
when there is need to clean. To avoid damage on the camera lens, never use strong or
abrasive cleaning agents on the camera housing.
11. Do not move the camera by holding the camera head. To avoid mechanical trouble, do
not rotate the camera head by hand.
NEVER MOVE THE CAMERA MANUALLY WHEN IT IS WORKING.
12. Put the camera on fixed and smooth desk or platform, avoid leaned installation.
13. Power Supply Polarity (Drawing)
Note:
The video quality may be affected by the specific frequencies of electromagnetic fields. Never grasp
the head of the camera, and never move the camera by hand when it is working, otherwise the
camera will breakdown.
PACKING LIST
Check all bellow items when open the package:
Camera
1
Power Adapter
1
Power Cable
1
RS232 Control Cable
1
USB 3.0 Cable
1
Remote Controller
1

3WWW.EVERETIMAGING.COM
QUICK START
1. Check if following products are in the box
- Camera
- DC12V input
- Power supply cable
- RS232 Cable
- IR Remote Control
2. Power on the camera with the 12V adapter or use a POE+ switch.
PoE+ switch requirements:
(PoE+ IEEE 802.3af/at compliant with total power of 126W up to 30W per port)
Recommended unmanaged PoE+ network switches:
- TP link TL-SG1008MP 8-port
- Netgear GS16PP 16-port
3. Check if you get video output from HDMI or SDI on a display.
NOTE: The default resolution of the camera is 1080P30. If your display does not
support this resolution you can easily change the resolution with the IR remote
control. Please go to chapter: IR Remote Controller in this manual and follow
instructions ‘Change video output Resolution for SDI, HDMI and USB 3.0‘ on how to
do this.
4. Check if you can Pan and Tilt the camera wit the IR remote controller.
NOTE: if you cannot pan or tilt the camera. Please go to chapter: IR Remote
Controller in this manual and follow instructions ‘SET Camera 1-4’ on how to do
this.
5. Please check the default camera IP address (192.168.1.188) for operation in your
network or simply change IP address in OSD menu settings using IR remote
controller. Please go to chapter: ‘OSD Menu’and follow instructions ‘Change IP
address’ to see how to do this.

4WWW.EVERETIMAGING.COM
2. Dial Switch Settings (at the bottom of the camera)
Dial Switch(ARM)
SW-1
SW-2
Instruction
1
OFF
OFF
Updating mode
2
ON
OFF
Debugging mode
3
OFF
ON
Undefined
4
ON
ON
Working mode

5WWW.EVERETIMAGING.COM
Dial Switch
SW-3
SW-4
Instruction
1
OFF
OFF
reserve
2
ON
OFF
reserve
3
OFF
ON
reserve
4
ON
ON
reserve
Dial Switch (USB)
SW-5
SW-6
Instruction
1
OFF
OFF
Undefined
2
ON
OFF
Working mode
3
OFF
ON
Updating mode
4
ON
ON
Undefined

6WWW.EVERETIMAGING.COM
PRODUCT HIGHLIGHTS
•Sony 1/1.7 inch 12MP sensor, providing 3840x2160 p30 Ultra HD video resolution
•High Quality Full HD lens with 35x Optical Zoom + 2x Digital Zoom, with 60 degree
field of view
•NDI|HX, 3G-SDI, HDMI, USB 3.0 output video simultaneously
•NewTek NDI v4.5 video transmission and control
•3G-SDI compatible with Blackmagic Design SDI Level-B
•IP Video Streaming, includes both H.264, H.265 video encoding
•White Balance, Exposure, Focus, Iris can be adjusted automatically or manually
•Power over Ethernet (PoE+) support: get video, control, tally and power supply with
one CAT5/6 cable
•Built-in tally light
•Special Focusing Algorithm: fast and precise focusing performance when zooming or
moving
•Smooth PTZ mechanical design, accurate pan tilt motor control
•128 presets supported
•Standard Sony VISCA, VISCA over IP, PELCO-P, PELCO-D control protocol; IP VISCA
over both TCP and UDP
•Daisy chain supported, max 7 cameras connected in VISCA protocol
•Image flip function, support upside-down installation
•Supplied with functional IR remote controller
•Fast video format switch: less than 3 seconds
•Support RS232/RS485/UVC control
•Standard UVC1.5 protocol, seamlessly compatible with major video conferencing
software and platform
•OSD menu in English, IP address, streaming resolution and size can be set in OSD
menu

7WWW.EVERETIMAGING.COM
TECHNICAL SPECIFICATIONS
Video Format
HDMI
(v1.4)
3840*2160P30/25
1920*1080P60/50/30/25/59.94/29.97/24
1920*1080i60/50/59.94
1280*720P60/50/30/25/59.94/29.97
SDI
1920*1080P60/50/30/25/59.94/29.97/24
1920*1080I60/50/59.94
1280*720P60/50/30/25/59.94/29.97
NDI | HX
2 (v4.5
SDK)
3840*2160P30/25
1920*1080@3~30,
1280*720@3~30,
1024*576@3~30,
640*360@30 (low bandwidth mode)
IP
Main Stream:
3840*2160P30/25, 1920*1080@3~30,
1280*720@3~30, 1024*576@3~30;
Sub Stream: 1280*720@3~30, 1024*576@3~30,
640*360@3~30.
USB 3.0
1920*1080P60/50/30/25
1280*720P60/50/30
1280*720P25
1024*576P30
960*540P30
640*360P30
352*288P30
Video Interface
HDMI (V1.4), 3G-SDI, NDI|HX, USB 3.0
Sensor
Sony CMOS sensor 1/7” 12.4MP
Zoom
F5.8~203mm(35X), F1.5 –4.8. View Angle:60°(Far)-2.02°(Near)
Rotation Angle
Pan: -170° ~ +170°; Tilt: -30° ~ +90°
Rotation Speed
Pan: 0°~120°/s ; Tilt: 0°~80°/s
Preset:
Remote controller: 10; RS232: 128; Accuracy: 0.1°

8WWW.EVERETIMAGING.COM
Control Port
RS232, RS485,RJ45
Network Speed
1000M
Video encode
H.264/H.265(default: H.264)
Bit Rate
Control
Variable Bit Rate, Constant Bit Rate
Video Bit Rate
1024Kbps~16384Kbps
IP Protocol
TCP/IP, HTTP, RTSP, DHCP ,RTMP, Onvif(2.4), NDI(V4.5)
Visca over IP(TCP&UDP), HTML5, Visca, Pelco P, Pelco D
POE
Supported
Daisy Chain
Support RS232 serial daisy chain
Minimum Lux
0.1 lux
White Balance
Auto/Indoor/Outdoor/Manual/One Push/ATW
Exposure
Auto/Manual/Shutter Priority /Iris Priority/Bright
Focus
Auto / Manual
Iris
Auto / Manual
Electric Shutter
Auto / Manual
Gamma
Supported
WDR
Supported
BLC
Supported
2D/ 3D Noise
Reduction
Supported
Anti Flicker
OFF/50Hz/60Hz
Pan Tilt Flip
Supported

9WWW.EVERETIMAGING.COM
Input Voltage
DC12V/12W PoE+ recommended (IEEE802.3at)
Dimension
220mm×190mm×173mm
Net Weight
1.5KG
CAMERA INTERFACE
1.Camera Lens
2.Camera Base
3.IR Receiver Panel
4.Power Indicator Light
5.Dial Switch
6. Tripod Screw Hole
7. Installation Hole
8. RS232 control port (input)
9. RS232 control port(output)
10. HDMI port
11.3G-SDI port
12, USB port
13, RJ45 port (IP&NDI)
14. DC12V plug
CAMERA DIMENSIONS

10 WWW.EVERETIMAGING.COM

11 WWW.EVERETIMAGING.COM
IR REMOTE CONTROLLER
POWER
By pressing the POWER key when the camera
is on, the camera will rotate and go in the
‘stand-by’ mode. When the camera is in stand-
by mode and you Press the power button
again, the camera will boot and automatically
go back to the Default PTZ position. The
Default PTZ position is the PTZ position of the
camera when you turn it on for the first time.
The only preset that overrules this Default PTZ
position when the camera is rebooted, is the
‘0’ Preset. You can always go back to the
Default PTZ position by pressing the OK
button.
NOTE: The above is only applicable when
solemnly IR remote control is used to control
PTZ camera. In situations where the EVKB-100
is used to control the camera Preset ‘1’ will
overrule the HOME position.
FREEZE (Not Supported in USB)
Short press FREEZE key to freeze/ unfreeze the
image.
IRT (IR Transfer/IR Pass)
Open / close the IR pass function. Once press
the IRT key, the camera will receive and
Pass the IR remote control signal to the
codec/terminal (via VISCA IN port).

12 WWW.EVERETIMAGING.COM
SETTING 1-4 CAMERAS
The SET keys are used to connect one of the
CAM buttons to a specific camera. For
example. If you have a EVP212, EVP220 and
EVP230 and you want to configure them as
follow:
CAM1 = EVP212
CAM2 = EVP220
CAM 3 =EVP230
1. Point the IR to camera you would like
to configure.
2. Long press one of the SET1 button for
3 seconds until the key light of one of
the CAM buttons starts flickering red.
3. When the happens just let go of the
SET button you were pressing.
4. Short press CAM1 button to configure
for e.g. EVP212 to CAM1.
Every time you press CAM1 you will be
controlling the EVP212. You can follow these
exact steps to configure other cameras.
NOTE: If you want to configure more cameras
to the same CAM number than you should SET
all the cameras to CAM1.
PRESET NUMBER KEY (1-9)
Set preset: long press (3 seconds) the number
key to set preset.
Call preset: Short press the number key to run
preset.
CLR PRE (CLEAR PRESET)
Press CLR PRE and then choose number key of
the preset you like to clear.
Long press CLR PRE to clear all presets.
FOCUS KEY ( ON THE LEFT)
With this button the focus of the camera can
be controlled when it is in Manual focus mode.
ZOOM KEY( ON THE RIGHT SIDE)
= Zoom in
= Zoom out
NAVIGATE KEY: UP/DOWN/LEFT/RIGHT
Under working mode, use navigate key to set
the pan tilt, and select menu when enter OSD.
OK
Under working mode, short press OK to make
the camera go back to Default PTZ position;
and confirm the selection when enter OSD.
AF: Auto Focus
MF: Manual Focus
RESET: Press 3 seconds to reset camera
MENU: Enter OSD menu
LEARN+LIMIT L key:
Set the pan tilt left limit position.
LEARN+LIMIT R key:
Set the pan tilt right limit position.
LEARN+LMT CLR key:
Clear the limit position.
BLC OFF/ BLC ON:
Set backlight ON/OFF
BRIGHT-/BRIGHT+:
Set image brightness, only valid under bright
priority exposure mode.

13 WWW.EVERETIMAGING.COM
Change Video output resolution for SDI, HDMI
and USB 3.
Long press one of the blue resolution buttons
until the screen turns black. When the screen
turns black let go of the button and the video
output will automatically appear.

14 WWW.EVERETIMAGING.COM
OSD MENU
1. Press the MENU key on the IR remote controller, to enter the OSD menu as bellow:
2. After entering the main menu, use the UP/DOWN keys on the IR remote controller to navigate
through the menu. Once selected, the main menu will change to blue background, and the
right side will show all sub menu options.
3. Press the navigate RIGHT key to enter sub menu; use UP/DOWN key to select the submenu.
use the LEFT/RIGHT key to select parameter.
4. Press the MENU key again to return to previous menu. Press the MENU key continuously to
exit the OSD menu. Settings that have been changed are automatically saved.

15 WWW.EVERETIMAGING.COM
5. System
SYSTEM
PROTOCOL
VISCA,PELCO-P,PELCO-D
Default:VISCA
ADDRESS
VISCA:1~7 PELCO-P/D:1~255
Default:1
BAUD RATE
2400,4800,9600,115200
Default:9600
PTL LOCK
Protocol lock: once set, above protocol setting will be
locked
Default:OFF
RS485
RS485 ON/OFF
Default:OFF
VISCA
To select VISCA sources
Optional from via COM and via IP(VISCA over IP)
Default:
OVER ALL
LANGUAGE
English
Default:English

16 WWW.EVERETIMAGING.COM
6. Exposure
EXPOSURE
EXPOSURE MODE
AUTO, MANUAL, SHUTTER, IRIS, BRIGHT
Default:AUTO
SHUTTER
Shutter speed:1/8~1/10000, only valid under manual mode
Default:AUTO
IRIS
Iris setting: CLOSE~F1.5, only valid under manual mode
Default:AUTO
GAIN
Gain setting:0dB~28dB , only valid under manual mode
Default:AUTO
BRIGHT
Bright setting:0~15
Default:8
EBRIGHT
Bright setting:0~15 only valid under bright priority mode.
NOTE: this setting is meant to control the bright when using
the EVKB-100
Default:8
WDR
ON/OFF
Default:OFF
WDR Level
WDR Level
Default:1
BLC
ON/OFF
Default:OFF

17 WWW.EVERETIMAGING.COM
7. Image
IMAGE
WB MODE
AUTO, INDOOR, OUTDOOR, MANUAL, PUSH, ATW
Auto:
Automatically detects light in the room and selects the best white
balance option for you.
Indoor:
Preset settings for indoor camera use.
Outdoor:
Preset settings for outdoor camera use.
Manual:
You Set the white balance options based on Red and Blue gains.
One-Push:
Used in conditions where Auto White balance is unable to detect
and use a white image to auto set the white balance. Basically, you
fill the frame with what you know to be a white object (even under
colored lighting), this is saved as the camera's "white" reference and
camera now auto-white-balances using the new reference "white"
instead of its internal reference.
ATW: Auto Tracking White Balance
ATW is a more dynamic version of AUTO white balance. It detects
when your ambient lighting shifts significantly (such as moving from
indoors to outdoors) and dynamically changes the AWB for you.
Default:AUTO
R/B GAIN
Red/Blue gain level: 0~255, only valid under manual white balance
mode.
NOTE:
0db is 100 ISO | 6db is 200 ISO | 12db is 400 ISO | 24db is 800 ISO
Default:AUTO
FLICK
Anti-Flicker setting:50/60HZ, to reduce the video flicker
Default:50HZ
DZOOM
Turn on/off digital zoom (2x digital zoom)
Default:OFF
FOCUS
Select focus mode: AUTO/MANUAL
Default:AUTO

18 WWW.EVERETIMAGING.COM
Quality
QUALITY
2D NR
2D noise reduction: the bigger value, the less noise on
image, the lower resolution
Default:OFF
3D NR
3D noise reduction: OFF/AUTO/0~4, the bigger value, the
less motion noise on image, high value will cause image
smear.
Default:AUTO
SHARPNESS
Sharpness setting: 0~15, the higher value, edge of the
image will be sharpened
Default:AUTO
CONTRAST
Set contrast level
Default:50HZ
SATURATION
Set saturation.
Default:8
GAMMA
Select gammar level
Default:0
AF SENSITIVITY
Optional:LOW/NORMAL/HIGH
Default:NORMAL

19 WWW.EVERETIMAGING.COM
8. PTZ
PTZ
SPEEDBYZ
SpeedByZoom: proportional speed, the bigger zoom, the
slowerspeed
Default:ON
FLIP.HOR
Flip horizontal
Default:OFF
FLIP VER
Flip vertical
Default:OFF
PT SPD
Pan Tilt speed
Default:18
ZOOM SPD
Zoom speed
Default:5
MENU MIR
Turn on/off left/menu mirror function
Default:NORMAL
PRE FRZ
Preset Freeze function
Freeze last preset video image when switching between
presets
Default: OFF
PRE PTSPD
Pan Tilt Speed of the Preset
Default: 7
PRE ZSPD
Zoom speed of the Preset
Default: 1
Table of contents
Other Everet Digital Camera manuals

