Ecobike LCD C900 USB User manual

1
1. USER MANUAL LCD C900 USB
1.1. REMOTE AND DISPLAY APPEARANCE
1.2. TURNING ON / OFF THE DISPLAY
Press and hold the ON / OFF button for 3 seconds to turn the
LCD on or off.
➢When the display is off, there is no battery
consumption. The current flow is not more than 2 µA.
➢The panel will revert to sleep mode when the speed is
5 minutes level 0 km / h.
1.3. MOTOR POWER INDICATION
Indicates the power with which the motor works, when the
entire power bar is displayed, this means that the motor
works at full power. The battery is discharged faster then.
1.4. BATTERY SOC INDICATOR
The battery level is indicated by symbol located in the battery
symbol in the upper left corner of the display. Each missed
part of the symbol corresponds to 20% battery charge.
Remember to give more attention to the BMS (voltage), than
to battery indicator.
1.5. WALK ASSISTANCE
Press and hold the "MINUS" button to start the motor that will
go at 6km / h without pedaling. The display will show the
icon as in the picture beside. When the user releases the
button, the engine will automatically shut down.
2
1.6. BACKLIGHT AND LIGHT INDICATION
With the turned on display, click on / off at once the lights
button to turn on the display backlight and the front and
rear lights. Click the button again to turn off the backlight
and lights. When the light is on, you can see the icon on the
screen as in the picture beside.
1.7. MOTOR ASSISTANCE LEVEL SELECTION
The level of electric assistance can be adjusted using the
display. Adjustments can always be made while driving. The
electric system has 6 levels, depending on them the speed
to which the bike will accelerate. The default assistance
level after turning the display on is "1". To change the
assistance level, use the "PLUS" buttons to increase the
assistance level or "MINUS" to decrease the assistance level,
respectively.
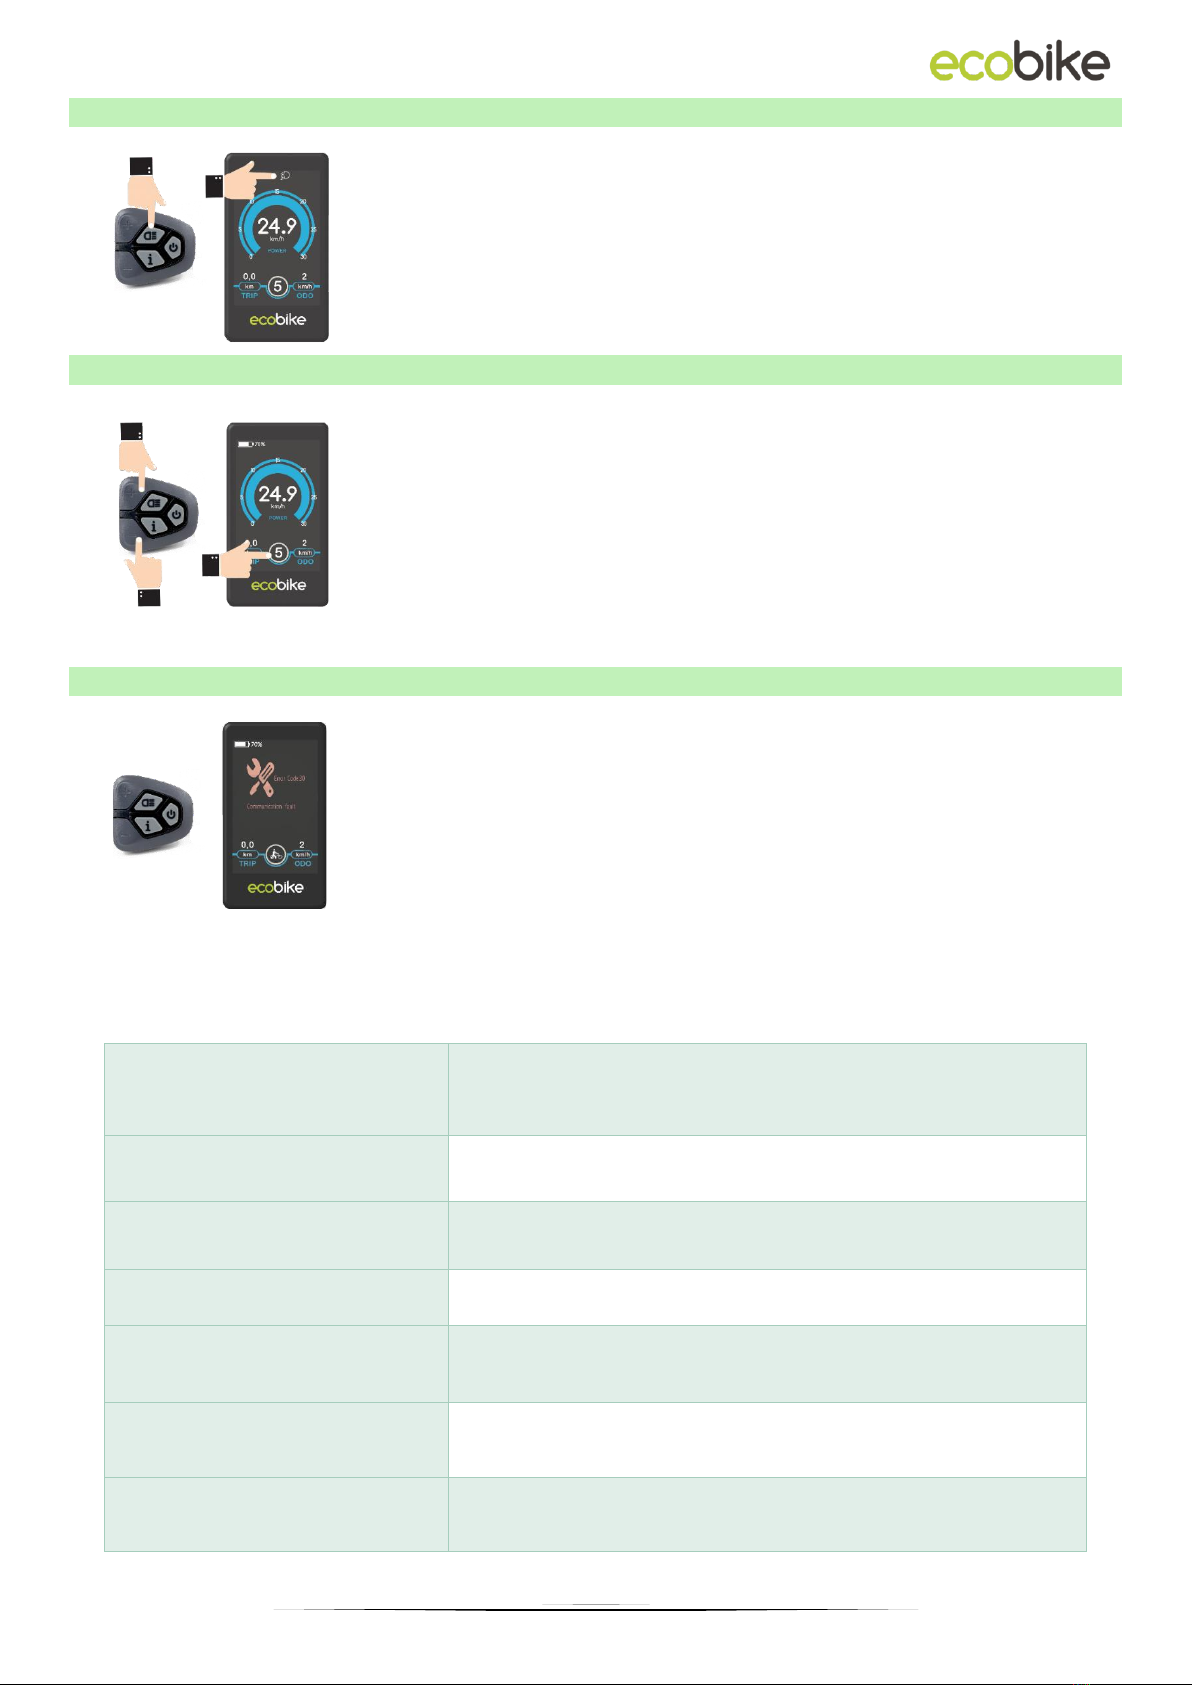
1.8. ERROR INDICATION
If an error code appears on the display, contact your dealer
immediately to resolve the problem. Each code is matched
to a different type of error, more detailed information can
be found in the table below.
The display cannot return to normal until the problem is resolved. The e-bike will not work
until the problem is resolved.
Error code
Description
21
Current flow fault / Communication fault
22
Throttle fault
23
Motor fault
24
Hall sensor fault
25
Brake levers fault
30
Display connection fault

3
1.9. CURRENT DISPLAY
When the electrical system is turned on, the display will
show the speed and distance as defaults.
Pressing the "i" button switches between the following
information:
Trip distance (km) → ODO (km) → Max. Speed (km / h)
→ Avg. Speed (km / h) → Time (min.).
2. USER SETTINGS
2.1. ENTER THE SETTINGS MENU
To enter the display menu, press and hold the "PLUS" and "MINUS" buttons for 3 seconds.
Then select "User setting" and press the "i" button.
2.2. RESETTING THE TRIP DISTANCE
Trip Reset means resetting the trip distance. To reset the trip distance, press the "+" button
or the "-" button to select Yes / No.
YES means resetting trip distance. NO means no cleaning trip distance. To save the
changed setting, press the "i" button. The default value is NO.
2.3. UNIT SETTING
Toggle Unit means setting the measuring unit. To change the unit, press the "+" button or
the "-" button to select the desired unit, and then press the "i" button to confirm. To save
the changed setting, press the "i" button. The default unit is "Metric (km)".

4
2.4. WHEEL SIZE SETTING
Wheel indicates the wheel diameter setting. To change the basic settings, press the "+" or
"-" button to increase or decrease until the desired value is displayed. To save the
changed setting, press the "i" button. The default value is 28 inches (28 inches). Changing
the wheel size will result in incorrect driving data being displayed, including speed,
distance travelled and total distance.
2.5. LCD LUMINANCE
LCD luminance indicates the brightness of the display backlight. To change the brightness
of the backlight, press the "+" or "-" button to select the desired value. To save the
changed setting, press the "i" button - The default value is 100%.
3. ADVANCED SETTINGS
3.1. ADVANCED SETTINGS MENU
To enter the advanced settings of the display press and hold the "PLUS" and "MINUS"
buttons for 3 seconds. Then select "Advanced Settings" and press the "i" button. Then enter
the correct password to enter the advanced settings interface. The default password is
1212.
3.2. ELECTRIC ASSISTANCE LEVEL RANGE
Assist Levels indicates the settings for the range of assist modes. There are 8 modes to
choose from: 0-2, 1-2, 0-4, 1-4, 0-6, 1-6, 0-8, 1-8. The default value is 0–6. To change the
range of assist level modes, press the "+" or "-" button to select the desired range of
modes, and then press the "i" button to confirm.

5
3.3. VOLTAGE SETTING
Set Voltage indicates the battery voltage bar (battery level) settings. Enter 5 voltage values
one after the other. For example, VOL 1 is the first stage voltage value. The default value is
41.5 V.
To set the battery voltage bar, press the "+" or "-" button to increase or decrease the value.
To save the changed setting and access the second bar, press the "i" button.
After entering 5 voltage values, press the "i" button to confirm and save the settings.
If no operation is performed for one minute, the display will close the settings menu
automatically.
Table of contents


