♦Most Likely •Less Likely ♣Least Likely
Symptom Cause Remedy
1. Heater shuts
o
♦Manual reset ♦Requiring manual restart by reset button on.
2. Loss
o
prime overnight ♦Vacuum air leak i
n
uel line ♦Check all
uel connections. Tight
en
ittings.
W
on
t hold vacuum ♣Plugged pump screen ♣Check pump screen, may need cleaning-to access, remove pump cover
IS TANK EM
P
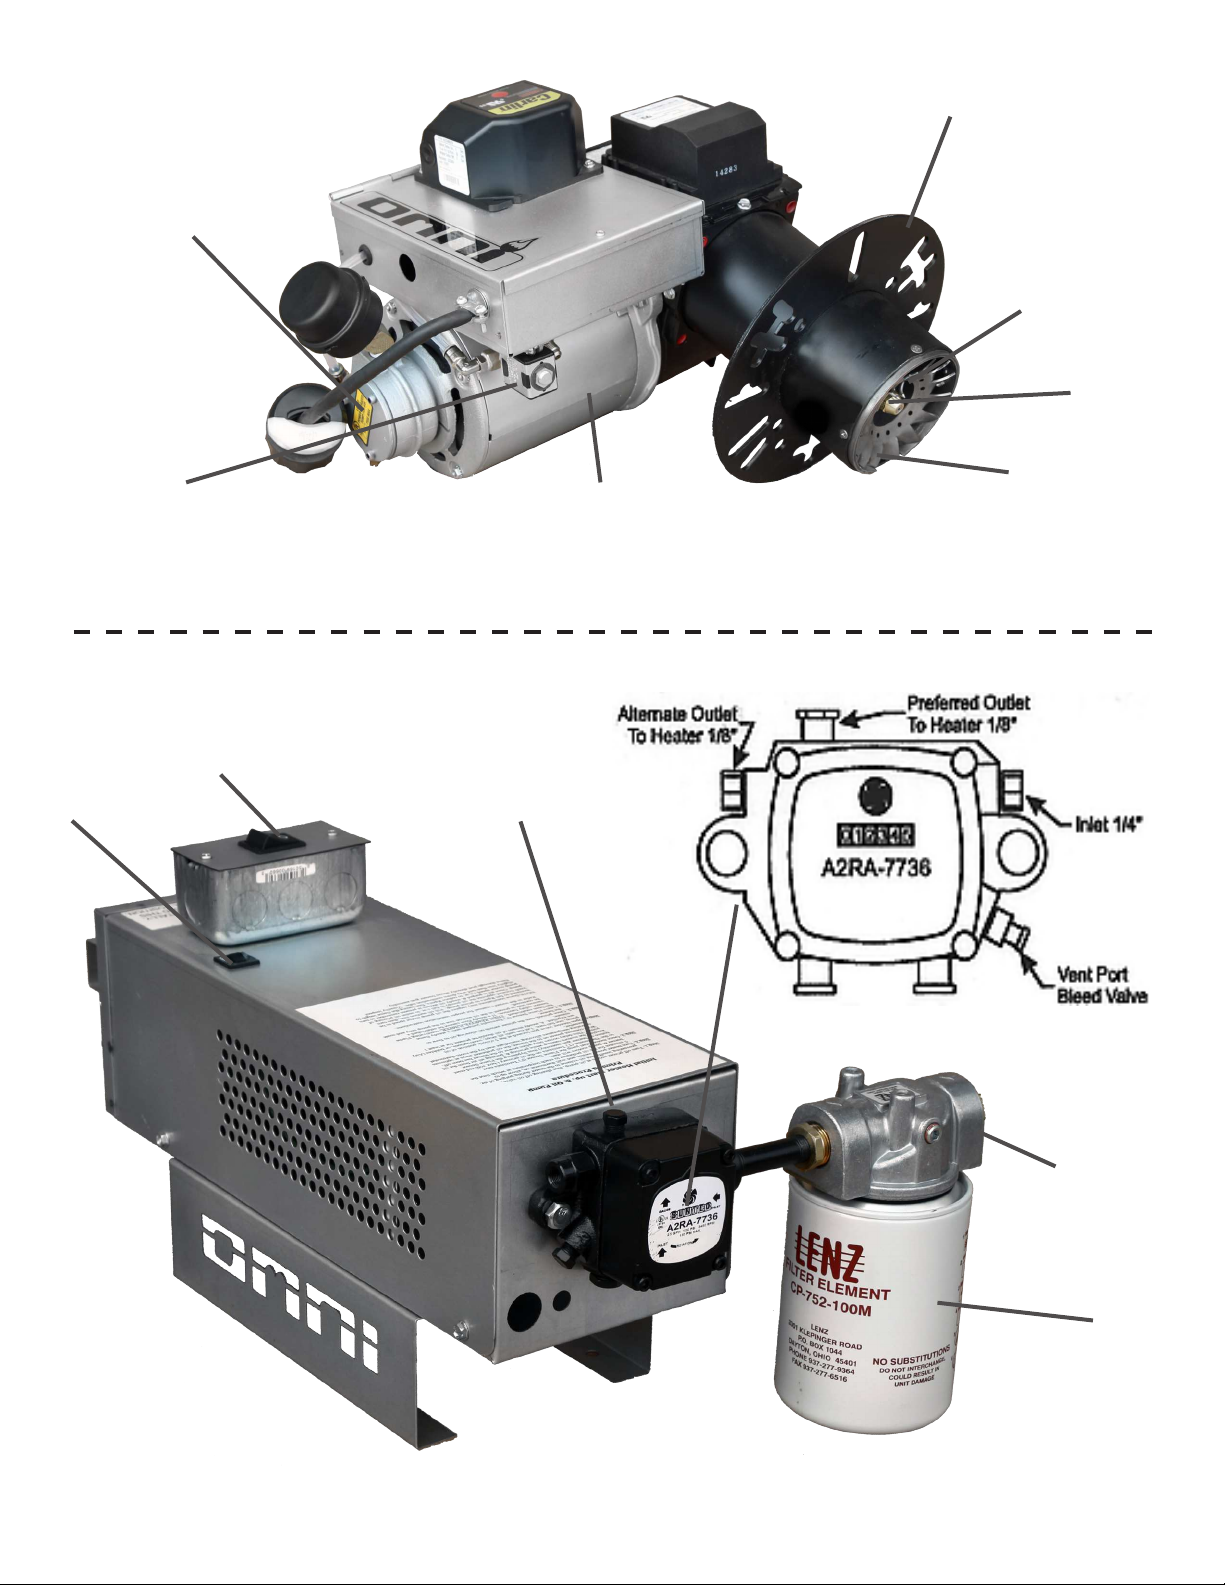
•Plugged
e
r or tank oil empty •Clean
ilter. Using vent port, reprime pump
(
Figures 6 & 7).
3. Fails to start. ♦Vacuum Leak ♦Open bleeder port i
air present. Check and tighten
ittings.
♦Inadequate Fuel Supply ♦Clean
ilter. Check all
uel connections. Tighten
ittings.
•No Pressure •Check, may need cleaning—to access, remove pump cover.
•Using vent port, reprime pump
(
Figures 6 & 7).
•No Pre-heat •Be sure all wiring to pre-heater is tight-no loose connections.
•B
a
irerod
replace; continuity at terminals.
•Auto start circuit not
unctioning •Check circuit control board and replace i
necessary
(
all
actory).
•Check continuity at terminals
o
irerod limit snap switch.
Replace i
needed.
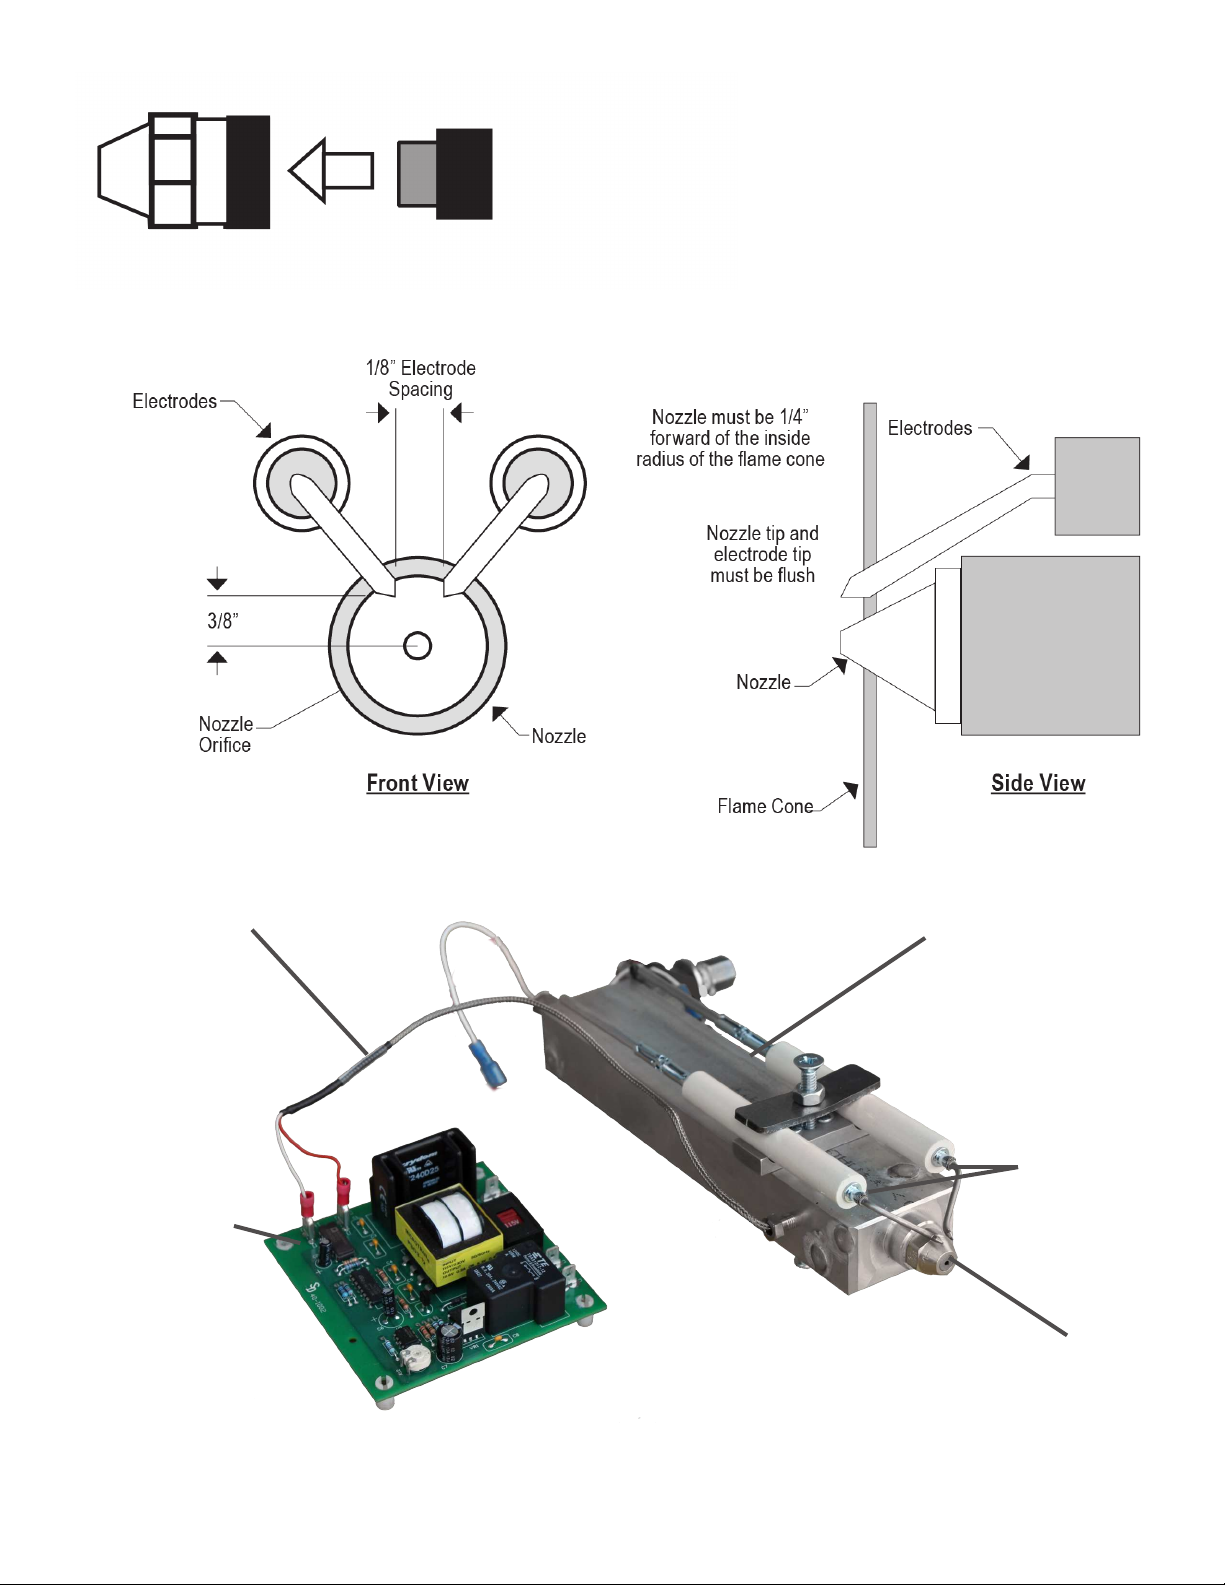
•No Arc •Check springs to electrode rod
a
ustment
(
under tr
a
n
ormer)
make sure they make good contact. Open burner door and make
sure electrode tips ar
en
t touchi
n
lame cone or one another. R
e
a
ust.
4. Hard starting diminished ♦Partially plugged
e
r. ♦Clean
ilter. Using vent bleeder port on pump, re-prime pump
(
See Figure 6 & 7)
lame.
♣Out
o
uel ♣R
e
ill Storage.
♣No oil to burner ♣Check pump screen
remove pump cover; clean i
needed.
Using vent bleeder port, re-prime pump.
(
Figures 6 & 7)
•Inadequate combustion air
rom burner •Remove nozzle and check
or
oreign
o
ects.
(
Figures 9 &
1
)
•Aluminum Block Pre-heater inside burner may not build
up carbon. I
carbon is present, thermocouple heat sensor wire could
have open circuit. Heat control board may have blown circuit and circuit
board
use.
Inspect both and replace either i
needed
(
Figure
1
).
Back dr
a
t in combustion chamber may be present. Check dr
a
t
lue
pipe & over
ire at vision port.
•Air band open t
oo
ar •Close air band—while viewing
lame; open air band slowly until
combustion chamber is clear, not orange.
5. Heater cycles
requently, ♦Heater over
iring, Inadequate ♦Investigate and locate reason
or over
iring. Check and clean end cone
without thermostat combustion air
rom burner turbulator i
needed.
temperature setting being
achieved in area to be ♣Temperature setting wrong ♣Check temperature setting and
a
ust as necessary.
heated. On high limit
an
a
ety switch
•High limit
a
ety switch bad •Replace high limit
an
a
ety switch.
6. Heater rumbles and ♦Pump setting wrong ♣Clean ash buildup in combustion chamber, exchange and vent
lue pipe.
excessive heat blow back
rom
lame vision port.
♣Dra
t incorrect. I
proper dra
t
a
n
t♣Set dr
a
t. Clean out combustion chamber and exchangers
be achieved, consider any exhaust
o
ash. Check dr
a
t-reset i
needed.
ans in building i
added since initial install.
7. Heater establishes
lame ♦Photo eye cant
ee
lame. ♦Clean photo eye which is clouded by back dr
a
t smoke.
but locks out or shuts
o
.♣Due to back dr
a
t. Flame end ♣Swing open burner door and clean ash buil
rom
lame
Need to reset primary. cone may have ash. end cone.
(
See Figure 5 & 8).
•Bad or uncontroll
e
lame due to
nozzle erosion •Replace nozzle
8. Proper dr
a
t setting ♦Negative dr
a
t in building ♦May need to install power vent/dr
a
t inducer
s in stack.
cannot be achieved or exhaust
ans present.
(
See Figur
e
or wiring).
♣Excessive ash buildup/Heater ♣Clean ash and soot
rom combustion chamber and heat
exchangers.
9. Poor or reduced heat ♦Flame too small ♦Nozzle or preheater block may be plugged with carbon debris.
production. ♣Entir
e
uel supply may be plugged. ♣Clean
ilter both, oil strainer and check oil pump screen.
•
Excessive ash buildup exchangers •Clean ash
rom combustion chamber and exchangers.
•
Through vision port, check
lame
to see i
lame is smaller than usual
or too large and uncontrolled.