Ecosoft FU1013CABDVUP User manual

Manual for Ecosoft Pink
softeners

2
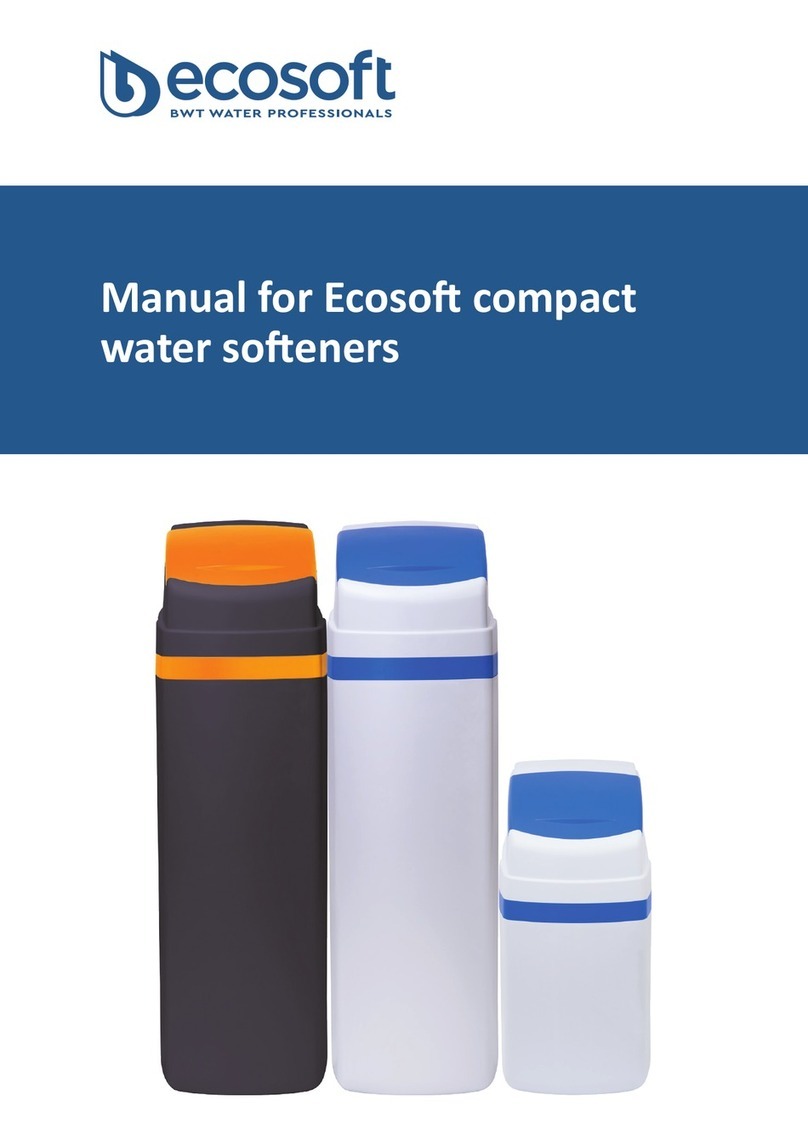
MANUAL FOR ECOSOFT COMPACT WATER SOFTENERS
ecosoft.com
ECOSOFTPINK SOFTENER RANGE
Compact water soener
Part # Descripon Quanty of
media, L
FU1013CABDVUP Ecosoft Pink 10 compact water
softener 10
FU1016CABDVUP Ecosoft Pink 15 compact water
softener 15
FU1024CABDVUP Ecosoft Pink 20 compact water
softener 20

2 3
MANUAL FOR ECOSOFT COMPACT WATER SOFTENERS
This manual is the intellectual property of Ecosoft. Copying and reprinting is prohibit This manual is the intellectual property of Ecosoft. Copying and reprinting is prohibited. © 2023 ecosoft.com
CONTENTS
1. Introduction 4
1.1 General provisions 4
1.2 Manufacturer 4
1.3 Safety rules 4
2. Technical data 6
2.1 6
2.2 7
Cabinet dimensions
Pink series
8
9
3. Delivery set
4. Preparation of the installation site
5. Procedure for installing an FU Cabinet system 9
5.1 Optional equipment 10
12
14
15
16
18
6. Quick Set Up Guide
7. Installation diagram
8. Service
9. Troubleshooting
10. Guarantee
11. Serial information 20

4
MANUAL FOR ECOSOFT COMPACT WATER SOFTENERS
ecosoft.com
1. INTRODUCTION
1.1 General provisions
1.3 Safety rules
1.2 Manufacturer
Filter installaon should be carried out by a specialist with appropriate qualicaons and
experience. Children aged 8 years and older, as well as people with limited physical, sensory and
mental abilies, with the lack of necessary knowledge and experience to use this device, they
can use soener only under supervision and in compliance with the specied data security rules
equipment and understand the hazards involved. Cleaning and user maintenance shall not be made
by children without supervision. Do not allow children to play with the device!
If the soener is not used for a long me used: If you do not plan soon somemes use the
equipment (for example, during holidays) put it in bypass mode and turn it o it from the water
supply network. For this it is necessary move the three taps to the opposite posion (according to
the installaon secon of this manual soener); or carry out the necessary procedures for using the
Mulblock block (depending on what you are the one using it).
If the installaon has not been used for a long me, we recommend soener regeneraon in manual
mode, in accordance with Secon 4.2. given instrucons Protecon against extreme temperatures:
Do not install the soener where it is joining it (including drainage pipes and overow hose) can be
exposed to temperature below 5ºC or above 40ºC.
Electrical safety - we ask you use an adapter or baery (opon) supplied with equipment Before
using the device, check compability of the technical characteriscs of the power supply unit with
characteriscs of the local power supply network.
A 50Hz 230V input voltage must be used to connect the water soener
Danger to life due to electric shock.
Work with electrical equipment is allowed only to authorized service centers or qualied electricians
who have been instructed
Electric shock!
ECOSOFT SPC LTD
Pokrovska 1st
08200, Irpin city, Kyiv region,
Ukraine
ECOSOFT 22
Industrieweg 8
3190, Boortmeerbeek
Belgie
!

4 5
MANUAL FOR ECOSOFT COMPACT WATER SOFTENERS
This manual is the intellectual property of Ecosoft. Copying and reprinting is prohibit This manual is the intellectual property of Ecosoft. Copying and reprinting is prohibited. © 2023 ecosoft.com
1. INTRODUCTION
When carrying out service work with the control valve of the soener, turn o the power supply
from the outlet
The power cord cannot be replaced. If the power cord is damaged, the appliance should not be
used. If the power cord is damaged, please ask consultaon with a qualied electrician. In the event
of a power outage during regeneraon, ensure the draining of wastewater into the drain. So BE
SURE to connect to a soener overow hose and drainpipes and connect them to suitable for this
drainage / sewage system to avoid spillage of water in the room.
Warning: Do not use aggressive detergents. Wipe contaminated surfaces dry with a damp cloth.
Maintenance: When carrying out installaon and technical works maintenance and repair of the
soener isolate it. To make the soener last longer maintained good work results, necessary
regularly carry out service work service. In more detail you can nd out about it by contacng the
nearest one partner service organizaon of the Ecoso company
Before starng work with water soening systems, it is necessary to eliminate the pressure in the
water supply
Opening threaded connecons or taps can cause injury!
Unauthorized modicaon or changes to the system design may adversely aect the safety of
people and the operaon of the system
Touching live parts can lead to electric shock
Pipelines of water soening systems are under pressure.
!
!

6
MANUAL FOR ECOSOFT COMPACT WATER SOFTENERS
ecosoft.com
2. TECHNICAL DATA
2.1 Cabinet dimensions
Control valve port sizes (port height**, mm) Dimensions*, mm
Model Water
Inlet
Water
Outlet
Drain
Outlet
Brine
Inlet
E
(distance
between
Inlet /
Outlet)
W D H H1
FU1013CABDVUP 1″ M
(540)
1″ M
(540)
¾″ M
(640)
⅜″ CF
(640) 78 270 430 469 387
FU1016CABDVUP 1″ M
(970)
1″ M
(970)
¾″ M
(1070)
⅜″ CF
(1070) 78 270 430 539 457
FU1024CABDVUP 1″ M
(970)
1″ M
(970)
¾″ M
(1070)
⅜″ CF
(1070) 78 270 430 741 659

6 7
MANUAL FOR ECOSOFT COMPACT WATER SOFTENERS
This manual is the intellectual property of Ecosoft. Copying and reprinting is prohibit This manual is the intellectual property of Ecosoft. Copying and reprinting is prohibited. © 2023 ecosoft.com
2. TECHNICAL DATA
2.2 Pink series
TECHNICAL SPECIFICATION:
Parameter FU1013CABDVUP FU1016CABDVUP FU1024CABDVUP
Operating flow rate, m3/h 1.21.5 1.8
Quantity of media, L 10 15 20
235
Usage of salt per regeneration1, kg 1.0 1.5 2.0
Usage of water per regeneration
(= discharge per regeneration), m30.08 0.1 0.12
Duration of regeneration, minutes 80–110
Pressure drop in service mode, bar 0.5
Inlet pressure, bar 2–6
Electrical requirements 230 V, 50 Hz
Power consumption, W 30
Inlet/outlet pipe connections 3/4’’
Dry weight, kg 18.8 22.2 32.5
Overall dimensions,
(Width × Depth × Height), cm 270 х 430 х 469 270 х 430 х 539 270 х 430 х 741
Volume capacity, m3
@250 mg/L CaCO3 influent harness
INFLUENT WATER LIMITATIONS:
Hardness 750 mg/L CaCO3
Iron 0.2 mg/L
Manganese 0.05 mg/L
Chemical Oxygen Demand 5 mg/L O2
Sediment prelter rating 100 μm
Temperature of water 2 +4…+30 °C

8
MANUAL FOR ECOSOFT COMPACT WATER SOFTENERS
ecosoft.com
3. DELIVERY SET
Ecoso fabric soener comes in
Kits with the following parts and blocks:
a) Soener body assembly
(includes pressure tank with media inside,
Clack DV control valve)
b) Cоnnecon kit c) Plug connector for connecon
to power grids (EU)
d) Equipment passport
Compact
water soener

89
MANUAL FOR ECOSOFT COMPACT WATER SOFTENERS
This manual is the intellectual property of Ecosoft. Copying and reprinting is prohibit This manual is the intellectual property of Ecosoft. Copying and reprinting is prohibited. © 2023 ecosoft.com
4. PREPARATION OF THE INSTALLATION SITE
•Installation area must meet all relevant building code. Water and power supply, and
ambient conditions must meet Specification requirements of this manual.
•Observe all local plumbing and electrical code when connecting system to utilities.
•Install check valve when connecting the filter to water mains. Install second check valve after the
system to prevent back flow.
•Particles such as sand, scale or rust can damage the control valve. Install a point-of-entry
sediment filter.
•Equip the system with sampling taps and pressure gauges as shown on drawings. It will help in
case any maintenance or troubleshooting is necessary.
•Install a vacuum relief valve as shown if there is a booster pump downstream of Ecosoft filter.
The FRP tanks may implode if subjected to negative pressure.
•If your system does not include bypass valve assembly, run a bypass pipeline along the entire
system. This may be necessary for diagnostics and maintenance.
5. PROCEDURE FOR INSTALLING AN FU CABINET SYSTEM
If your cabinet was delivered pre-loaded with media, place the cabinet in the installaon spot, ll
salt compartment with salt pellets, and then only carry out steps 5 – 8 of the procedure, skipping
steps 1 – 4. If the resin was shipped in bag, then carry out all of the following steps.
1. Disconnect the exible tube from brine inlet of the control valve. Unmount the valve by screwing
it counterclockwise.
2. Put a plug or cap on the top end of the riser pipe to prevent geng any media inside the pipe.
Pour the media in the tank using the funnel. When loading the tank, keep riser pipe vercal. If the
pipe lts, restore it to straight vercal direcon. When nished, rinse the thread of tank opening
with water to remove any beads of media stuck in the groove.
3. Mate the top distributor with the top end of riser pipe, then screw control valve in the tank
opening. Connect the free end of brine tube back to the brine inlet of the control valve.
4. Place the cabinet in the installaon spot. Open top lid and ll the salt compartment with soener
salt pellets at least half full.
5. Connect drain pipe to the male threaded drain outlet of the control valve. Run the drain pipe to
oor drain or gravity drain pipe socket. Secure the drain pipe end above the receiving xture with
at least 1″ air gap.

10
MANUAL FOR ECOSOFT COMPACT WATER SOFTENERS
ecosoft.com
5. PROCEDURE FOR INSTALLING AN FU CABINET SYSTEM
5.1 Oponal equipment
6. Mount the pipe thread elbow adapters to the control valve’s In and Out ports and ghten the
coupling nuts. Do not put any mechanical load on ngs or use them to support pipes.
Connect the system to water supply and downstream pipework without turning on the water
supply. Do not confuse In and Out ports. They are embossed with direcon arrows.
7. Remove the front panel by pulling the locking tabs on the le and right side. Run the power cord
through the cord guide in the control valve’s backplate and connect it to 12 VAC socket on the circuit
board. Plug the power supply in the mains to power up the system.
8. Start manual regeneraon of the system. Scroll regeneraon to backwash if it isn’t the 1st step of
the sequence. When the control valve starts the backwash, turn on mains water supply slightly at
rst. Air will be displaced from the system via drain line while the pressure tank is being lled with
water. When the tank is full, water will start owing down the drain line. At this point, fully open
mains water supply.
Let the system complete regeneraon, then perform one more manual regeneraon.
Soening systems can be
addionally equipped with a Clack
or Mulblock bypass valve.
The Clack bypass valve is aached
directly to the inlet and puried
water pipes and has 4 operang
modes, listed below:
NORMAL OPERTION
DIAGNOSTIC MODE
BYPASS OPERTION
SHUT OFF MODE
“TREATED”
WATER EXIST
SUPPLY
WATER EXIST
SUPPLY
WATER EXIST
NO WATER
EXIST
SUPPLY WATER
ENTERS
SUPPLY WATER
ENTERS
SUPPLY WATER
ENTERS
SUPPLY WATER IS SHUT
OFF FROM THE HOUSE
AND THE VALVE

10 11
MANUAL FOR ECOSOFT COMPACT WATER SOFTENERS
This manual is the intellectual property of Ecosoft. Copying and reprinting is prohibit This manual is the intellectual property of Ecosoft. Copying and reprinting is prohibited. © 2023 ecosoft.com
5. PROCEDURE FOR INSTALLING AN FU CABINET OR FK CABINET SYSTEM
The mulblock performs a bypass funcon, is equipped with a sampler and has 2 modes
of operaon:
Open posion — Supply via
soener/limescale protecon
system: handwheel in UPPER
posion (stop)
Bypass posion — Supply via
soener/limescale protecon
system: handwheel in LOWER
posion (stop)
Place the ng of the overow hose (1) at
least 20 mm below the height of the safety
overow of the domesc water soening
system. Fix vercally with the bracket
(H). Connect the ush water hose with a
downward slope to the ng (2) and insert to
a depth of approx. 90 mm.
Connect the overow hose from the brine
tank to the ng (1) and x with a hose
clamp.
The ush water hose and the overow hose
mustn`t be connected and mustn`t have
narrowing in the cross secon.

12
MANUAL FOR ECOSOFT COMPACT WATER SOFTENERS
ecosoft.com
6 QUICK SET UP GUIDE
After installing and powering up an Ecosoft FU or FK system,set display language, water hardness,
current me, and regeneraon opons in the Installer menu of control valve.
Use ▲and ▼ buons to change seng; NEXT buon to save and go to next step; CLOCK to save and
exit menu; REGEN to move back one step.
To proceed, hold NEXT and ▲ buons simultaneously
for 3 seconds.
STEP 2I. Hardness: Set the amount of hardness as
calcium carbonate per PPM, using ▼ or ▲.
Press NEXT to go to Step 4I.
Press REGEN to exit Installer Display Settings
STEP 3I. Service Water Hardness (PPM): If a mixing
valve is installed in the valve, service hardness needs
to be set. Setting range is always less than the setting
in Step 2I. This screen will only appear if Step 4S is set
to rES. Press NEXT to go to Step 4I. Press REGEN to
return to previous step.
STEP 4I. Set Day Override to 1 – 28 days or OFF using
▲ or ▼. Press NEXT to go to Step 5I. Press REGEN to
return to previous step.
This manual is the intellectual property of Ecosoft. Copying and reprinting is prohibited. © 2023

12 13
MANUAL FOR ECOSOFT COMPACT WATER SOFTENERS
This manual is the intellectual property of Ecosoft. Copying and reprinting is prohibit This manual is the intellectual property of Ecosoft. Copying and reprinting is prohibited. © 2023 ecosoft.com
6 QUICK SET UP GUIDE
STEP 5. Choose whether to Turn off display backlight
5 minutes after last keypad input event (only
accessible in CE valves). Pressing NEXT will exit the
menu.
STEP 6. Enter current time setting by pressing CLOCK.
STEP 7. Set current time, hours then minutes.
NORMAL MODE
NORMAL MODE

14
MANUAL FOR ECOSOFT COMPACT WATER SOFTENERS
ecosoft.com
7. FK, FU INSTALLATION DIAGRAM
Compact water soener

14 15
MANUAL FOR ECOSOFT COMPACT WATER SOFTENERS
This manual is the intellectual property of Ecosoft. Copying and reprinting is prohibit This manual is the intellectual property of Ecosoft. Copying and reprinting is prohibited. © 2023 ecosoft.com
8. SERVICE
8.1 Maintenance work
8.2 User responsibility
8.3 Service and spare parts
8.4 Disposal
To ensure proper operaon soener, the user should regularly carry out the following checks:
Check the presence of salt and if necessary, add.
Check water hardness: hardness of drinking water and the hardness of mixed water should be
checked no less than 2 mes a year, if necessary, it should be adjusted the hardness of the mixed
water (see the “Installaon” secon).
Check for ghtness, carry out: visual inspecon: check for possible leakage of all connecons and
pipelines. Check the cleanliness of the salt and saline soluon storage capacity 1 me in 2 months,
if necessary, clean and rinse clean water
The indicated terms of the recommended inspecons are available are minimal and must be
adjusted, depending on operang condions.
Any technical equipment requires regular maintenance.
Constantly monitor the quality and level of soened pressure water If the water quality has
changed, change it too parameter sengs are set. If necessary, consult a specialist.
Regular checks by the operator are required as a guarantee normal funconing of the device.
Emollient water should be regularly inspected compliance with the condions of its operaon.
Frequency of checks performed by the user:
Aer use: add salt for regeneraon.
2 mes a year: check the pressure
2 mes a year: check water quality
Once a year: clean the salt tank
Parts that wear out must also be replaced in the specied maintenance period so that to guarantee
awless operaon of the installaon and perform warranty condions. Soener maintenance it is
recommended to carry out once a year.
Replacement of wearing parts can be performed only qualied personnel (specialists of the
organizaon water supply or service).
We recommend concluding a service contract service with our service department.
Cleaning: do not use alcohol for cleaning or alcohol-based detergents to avoid damage surfaces of
plasc parts.
Aer the end of the service life of the installaon contact Ecoso Service to arrange soener
replacement. Disposal of soener and of all electrical parts is carried out only in specialized
recycling centers.

16
MANUAL FOR ECOSOFT COMPACT WATER SOFTENERS
ecosoft.com
9. TROUBLESHOOTING
PROBLEM CAUSE CORRECTION
1. Decreased
service ow
capacity.
Decreased supply water pressure. Increase supply water pressure.
Clogged lter bed. See paragraph 3.
Obstructed/clogged drain line. Clean the drain line.
Clogged control valve. Inspect and clean the control valve.
NHWBP/MAV failure (if used). Inspect and repair the motorized valve.
2. Decreased quality
of treated water.
Faulty chemical analysis of water. Perform one more test using freshly
prepared reagents.
Supply water chemistry has changed. Make new check analysis and if changed
contact your dealer.
Bypass valve is set to bypass. Turn bypass valve to operating position.
Riser pipe or seals are damaged. Take apart the lter, inspect and replace or
lubricate pipe and seals if necessary.
Clogged lter bed. See paragraph 3.
Filter media loss. See paragraph 4.
Improper lter regeneration. See paragraph 6.
Leakage of raw water inside the control
valve.
Take apart the control valve, inspect and
replace or lubricate the seals if needed.
3. Clogged lter bed. Insucient backwash ow rate. Check backwash ow rate. If supply pres-
sure is within the limits and the ow rate is
insucient, inspect and clean the drain line
ow control or replace it if needed.
Insucient backwash stage. Increase the duration of backwash stage.
Clogged top distributor. Clean the top distributor.
Excessive backwash ow rate. Measure backwash ow rate. If supply
pressure is normal and the ow rate is
exceeding, consider changing the drain
line ow control.
4. Filter media
entrainment.
Filter media is entrained and discharged
during backwash.
Replace the top distributor if needed.
Filter media is entrained and discharged
during service.
Replace the bottom distributor if needed.
5. System will not
regenerate.
No electric power. Check power supply.
No/insucient salt in brine tank. Chech the amount of salt in brine tank and
add salt if needed.
Brine is not sucked in during regen., or not
all brine is drawn.
See paragraph 6.
Control valve is out of order or settings
were changed.
Check the control valve and its settings
(see the manual for the control valve).
Brine tank is not relled or is relled with
not enough water.
See paragraph 7.

16 17
MANUAL FOR ECOSOFT COMPACT WATER SOFTENERS
This manual is the intellectual property of Ecosoft. Copying and reprinting is prohibit This manual is the intellectual property of Ecosoft. Copying and reprinting is prohibited. © 2023 ecosoft.com
9. TROUBLESHOOTING
PROBLEM CAUSE CORRECTION
6. Brine will not draw
during regeneration
or not all brine will
draw.
Low supply water pressure. Check supply water pressure.
Clogged injector or brine tube. Clean brine injector and/or brine tube.
Clogged basket or salt crystals on ball in
air check valve.
Clean air check valve basket and/or ball.
High pressure drop on the lter (control
valve, distributors or lter media are
clogged).
See paragraphs 1 and 4.
Air is injected due to brine line not being
airtight.
Check airtightness of the drain line.
Control valve settings changed. Increase brine stage duration.
7. Brine tank is not
relled or relled
with less water than
needed.
Low supply water pressure. Check supply water pressure.
Clogged injector or brine tube. Clean brine injector and/or brine tube.
Stuck ball in the air check valve. Clean the air check valve.
Control valve settings changed. Check the duration of brine tank rell and
correct if necessary.
8. Excess use of salt
per renegeration.
Control valve settings changed. Decrease the amount of salt per
regeneration in the control valve settings.
Brine tank lled with excess water. See paragraph 9.
9. Brine tank is
relled with excess
water.
High main water pressure. Check water pressure. Install pressure
regulator if needed.
Control valve settings changed. Check the duration of brine tank rell and
correct if necessary.

18
MANUAL FOR ECOSOFT COMPACT WATER SOFTENERS
ecosoft.com
10. GUARANTEE
WARRANTY OBLIGATIONS
WARRANTY OBLIGATIONS
The warranty period of the water puricaon system is 12 months and is counted from the day of sale of the
system through the retail network (unless otherwise stated in the product warranty card).
The manufacturer guarantees that this water puricaon system does not contain manufacturing defects
and that such defects will not be detected during the warranty period specied in the warranty card, from
the moment of sale from the manufacturer’s warehouse or retail network, in the event that the puricaon
system is installed and operates in accordance with the technical requirements and operang condions.
Before using the water puricaon system, be sure to read the instrucons for connecng and operang the
water puricaon system and the terms of the warranty obligaons.
Carefully check the appearance of the water puricaon system and its completeness. Submit all claims
regarding appearance and completeness to the seller upon receipt of the product.
We reserve the right to make changes to the design, conguraon, or manufacturing technology, such
changes do not impose obligaons to replace or improve previously released products.
The warranty card is valid only if the model, date of sale, and clear stamps of the seller are correctly specied.
Consumer claims, in accordance with current legislaon, can be submied during the warranty period
of operaon, provided that the defects of the water puricaon system did not arise as a result of:
- non-observance of the condions of operaon and storage of systems specied in the instrucons
for connecon and operaon of the system;
- caused by transport damage, incorrect installaon, careless use or misuse, connecon to a power supply
voltage that does not correspond to that specied in the operang instrucons, failure to follow the aached
connecon and operang instrucons.
- operaon with unremedied defects, or with defects that arose as a result of maintenance or repair by
persons or organizaons that are not representaves of an authorized service center;
- causes independent of the manufacturer, such as: power supply voltage drops, natural phenomena,
and natural disasters, re, ingress of foreign objects (liquids) or other substances into the product;
- external and internal contaminaon, scratches, cracks, bruises, abrasions, and other mechanical damage
that occurred during operaon;
- changing the design or unauthorized opening of system nodes, when changing the serial number
of the product or the date of manufacture;
- unmely replacement of elements, the terms of which are indicated in the instrucons for connecon
and operaon, as well as when using replaceable elements of other manufacturers.

18 19
MANUAL FOR ECOSOFT COMPACT WATER SOFTENERS
This manual is the intellectual property of Ecosoft. Copying and reprinting is prohibit This manual is the intellectual property of Ecosoft. Copying and reprinting is prohibited. © 2023 ecosoft.com
10. GUARANTEE
WARRANTY OBLIGATIONS
Warranty obligaons do not extend to:
- replaceable elements (cartridges, reverse osmosis membrane, carbon posilter, mineralized, and other
replaceable elements that can be equipped with the system) and sealing rings;
- components that need to be replaced as a result of their wear and tear;
- types of work, such as adjustment, cleaning, replacement of consumables, and other care of water
puricaon systems, spulated by the instrucons for connecng and operang the product.
The manufacturer shall not be liable for any damage or any other damage, including lost prots, arising
incidentally or as a result of the use or inability to use this product. The material liability of the Manufacturer
under this Warranty cannot exceed the cost of the water treatment system.
In the case of an independent connecon of the system, the manufacturer is not responsible and does not
accept claims that may be caused by incorrect connecon and incorrect operaon of the system as a whole.
The list of authorized service centers is indicated on the website hps://ecoso.ua/contacts/
All claims regarding the quality of water, taste, smell and other properes of water puried with the help of
water puricaon systems are accepted only in the presence of a conrming protocol of analysis performed
by a research accredited laboratory in accordance with the ISO 17025 standard.
Cases not covered by this Warranty are regulated by the Legislaon.

20
MANUAL FOR ECOSOFT COMPACT WATER SOFTENERS
ecosoft.com
11. SERIAL INFORMATION
INSTALLATION
INSTALLER
_______________________________________________________________________________
date of installaon
_______________________________________________________________________________
address and phone
_______________________________________________________________________________
accepted (customer`s name and signature)
_____________________________________________
organizaon
_____________________________________________
address and phone
_____________________________________________
works accomplished (name and signature)
_______________________________
date of sells
_______________________________
dealer company
_______________________________
saller name
Only the original Warranty Registraon Card with signature and stamp of the dealer is valid.
This manual suits for next models
2
Table of contents
Other Ecosoft Water Dispenser manuals
Popular Water Dispenser manuals by other brands
Halsey Taylor
Halsey Taylor WM8 Series owner's manual

Aqua Essentials
Aqua Essentials Borg & Overstrom B2 user guide
Hatco
Hatco ATMOSPHERIC AWD-12 Series Replacement parts list
Scotsman
Scotsman HID312 instructions

Kenmore
Kenmore ULTRASOFT 250 625.38826 owner's manual
Excalibur Water Systems
Excalibur Water Systems EWS SD2MQC120 Installation and user guide
