2. If cooler is not functioning make sure you are using a working outlet by testing it with a lamp
What To Do If:
1. Cooler Is Not Dispensing Water
a. Make sure water bottle is full
b. Make sure the water bottle is being properly pierced by the probe in the baffle
c. Confirm that cooler is not frozen by:
1. Removing baffle (see above instructions under Parts Removal section 3),
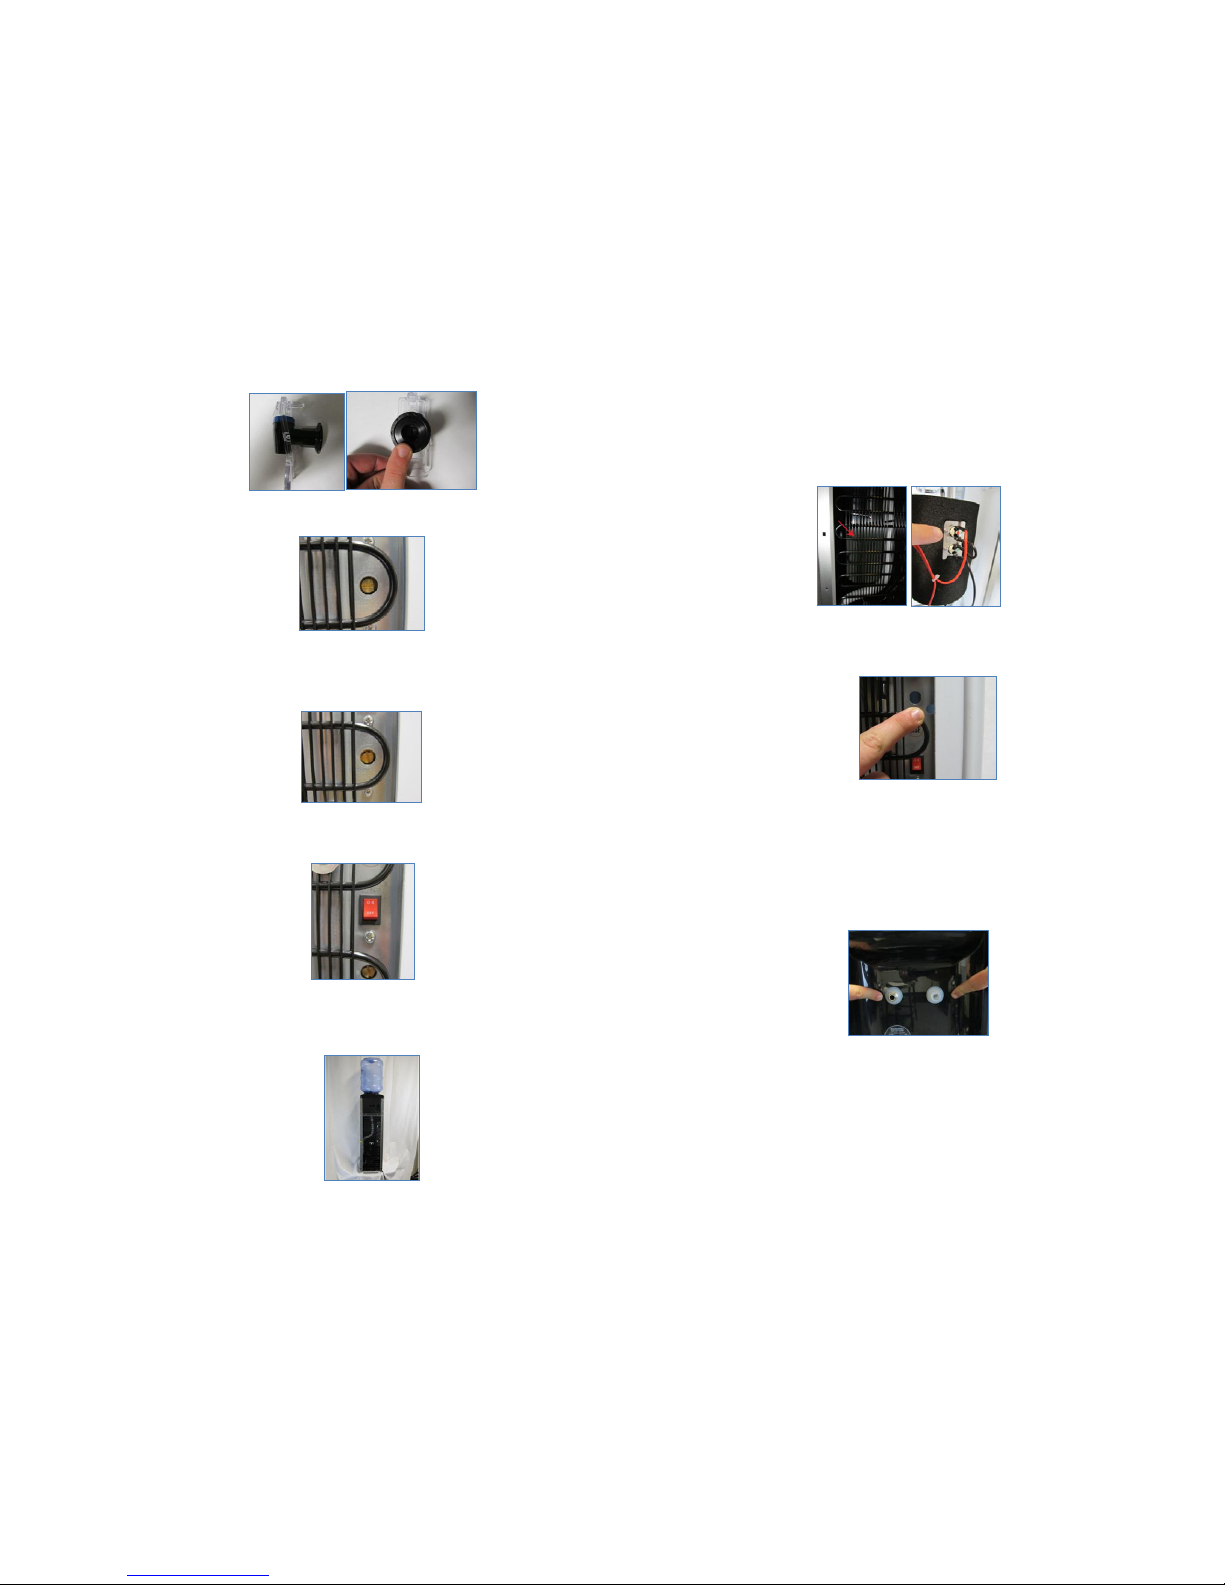
d. Check water bottle to determine if cap is jammed and not dispensing water (see figure O below)
Figure O
e. Check faucets to determine if water is able to flow through when in on position (see figure P and Q below)
Figure P Figure Q
2. Cooler Is Not Dispensing Chilled Water
a. Check that cold water thermostat is not turned to the off position (see figure R below)
Figure R
b. Determine whether the compressor is working by putting your ear close to the top of the cooler with the
bottle off (if you hear silence, the compressor is not working, if you hear a humming noise the compressor is
working)
4. Using a chopstick or screwdriver, depress the hot tank reset button (water should be hot in 30 minutes
time, see figure X below which pictures hole used to access hot tank reset button)
Figure X
4. Water Is Leaking
a. Identify the source of the leak (i.e. internal, faucets, or top)
b. If the leak is coming from the top of the cooler check the water bottle to make sure there are no visible
punctures, or pinholes. If the water bottle appears to be intact, make sure the cap of the water bottle is secure
(see note in General Trouble Shooting 1. below)
c. If the faucets are the source of the leak, check to make sure the faucets have been screwed on completely. If
still leaking, drain the cooler of water and remove the faucets (see above instructions under Parts Removal
section 3), and make sure the gaskets around the water spigots are in good condition (see figure Y below). If
leaking is occurring from the nozzle of the faucets please contact customer service at 1-866-872-5722
Figure Y
d. If the leak is internal, please contact customer service at 1-866-872-5722
c. Turn the thermostat all the way clock wise (see figure S below)
Figure S
3. Cooler Is Not Dispensing Hot Water
a. Check the back of the cooler, and make sure the hot tank switch is in the on position (see figure T below)
Figure T
b. Depress the hot tank reset button by:
1. Unplug water cooler
2. Turning the cooler around so you are facing the back (wire caged portion) of the cooler (see figure U
below)
Figure U
3. Locate the hot tank through the back cage, and then locate the hot tank reset button on the right side of
the hot tank (see figure V and W below)
Figure V Figure W


 User manual")


