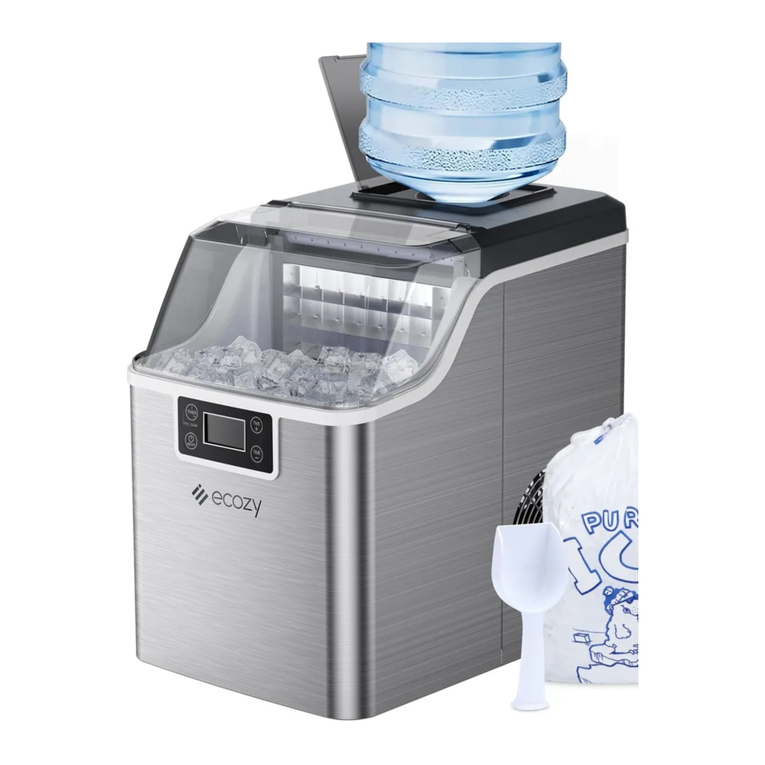
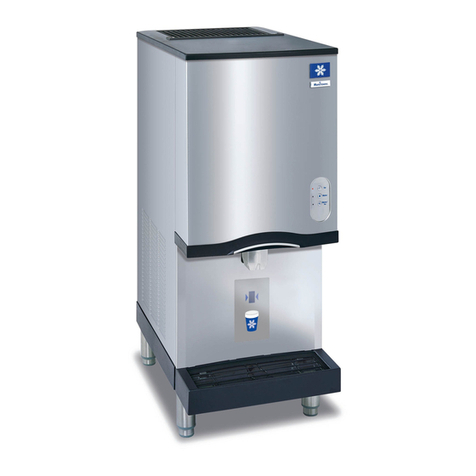
Ecozy IM-BS260A User manual

7
ecozy
ICE
MAKER
IM-BS260A
|
26lbs
User
Manual
It
is
important
that
you
read
these
instructions
before
using
your
ice
maker
and
we
strongly
recommend
that
you
keep
them
in
а
safe
place
for
future
reference.

Thank
you
for
purchasing
from
ecozy.
If
you
have
any
questions
or
need
further
assistance,
please
contact
us
at
or
call
и
via
hotline
(443)
991-8777
(UTC
14:00-22:00,
Monday
to
Friday).

CONTENTS
IMPORTANT
SAFETY
INSTRUCTIONS
-+
PACKAGE
CONTENTS
PRODUCT
OVERVIEW
-+
Ice
Maker
-+
Control
Panel
-
BEFORE
FIRST
USE
USE
YOUR
ICE
MAKER
-+
1.Add Water
2.
Start/Stop
Making
Ice
-
3.
Select
Ice
Cube
Size
4.
Ice
Full
Reminder
-
5.
Self-cleaning
Mode
6.
Water
Drain
-
SPECIFICATIONS
-+
TROUBLESHOOTING

IMPORTANT
SAFETY
INSTRUCTIONS
To
reduce
the
risk
of
fire,
electric
shock,
ог
injury
during
ice-making
operation,
always
read
carefully
and
obey
all
safety
information.
ALL
SAFETY
INFORMATION
WILL
FOLLOW
THE
SAFETY
ALERT
SYMBOLS
BELOW
B o
B
b
®
SAFETY
PRECAUTIONS
You
need
to
follow
these
instructions
and
execute.
Read and
follow
these
instructions.
Use
this
ice
maker
only
for
its
intended
purpose
as
described
in
this
user
manual
Do
not
use
other
liquid
to
make
ice
cubes
other
than
water.
If
the
supply
cord
5
damaged,
it
must
be
replaced
by
the
manufacturer
ог
its
service
agent
ога
similarly
qualified
person
in
order
to
avoid
a
hazard.
Do
not
turn
the
ice
maker
upside
down
ог
tilt
it
more
than
45°
during
transportation
or
use.
If
it
happens,
let
it
stand
upright
for
at
least
one
hour
before
plugging
in
апа
using
it
again.
|
©
A
@
A
>
PROHIBITED
MATTERS
Prohibit
these
operations;
otherwise,
it
will
cause
danger.
Plug
the
ice
maker
into
а
grounded
3
prong
outlet
with
110~120/60Hz
power
supply.
Itis
suggested
to
put the
ice
maker
in
a
cool
апа
ventilated
place,
which
will
greatly
improve
the
ice
producing
capacity.
Unplug
the
ice
maker
before
cleaning, repairing
ог
servicing.
Do
not
use
flammable
liquid
to
clean
the
ice
maker.
Place
this
ice
maker
away
from
direct
sunlight
апа
make
sure
that
there
15
at
least
6
inches(15
ст)
о!
free
space
between
all
sides
of
your
ice
maker
апа
surrounding
objects.
01

02
B>
Keep
flammable
materials
and
vapors,
such
as
gasoline,
away
from
the
ice
maker.
@
Do
not
use
an
extension
cord.
Ё
Packaging
materials
сап
be
dangerous
for
children.
Thereis
а
potential
risk
of
suffocation!
Keep
all
the
packaging
materials
away
from
children.
С
То
avoid
а
hazard
due
to
instability
of
this
ice
maker,
it
must
be
placed
оп
ап
even
ог
flat
surface.
PACKAGE
CONTENTS
Ice
Maker
х
1
User
Manual
x 1
Do
not
remove
е
ground
prong.
This
ice
maker
must
be
properly
grounded.
Never
plug the
power
cord
into
а
receptacle
that
is
not
grounded
well
апа
not
in
accordance
with
local
апа
national
codes.
Children
should
be
supervised
to
make
sure
аё
they
do
not
play
with
the
appliance.
Do
not
place
the
power
cord
over
carpets,
rugs,
etc.
Do
not
cover
the
cord
and
do
not
submerge
it
in
water.
Ice
Basket(pre-assembled)
x
1
Quick
Guide
x
1
*
If
there
15
any
part
missing,
please
contact
our
customer
service:

PRODUCT
OVERVIEW
Ice
Maker
Transparent
Cover
Ice
Scoop
Ice
Full
Sensor
Ice
Basket
Ice
Shovel
—
—
—
|
Water
Drain
Рр
Аг
Outlet
(Do
not
block)
Control
Panel
-—
MAXLevel
|
—
WaterTank
03

Control
Panel
POWER
-
ICEFULL
&
«®
LARGE
С>
VALL
ADDWATER
&
ON/OFF
SELECT
O
&t
ON/OFF
Button
Press
this
button
to
start
or
stop
making
ice.
ON/OFF
Press
апа
hold
this
button
for
3-5
seconds
10
activate
self-cleaning
mode.
@
SELECT
Button
Press
this
button
10
select
ice
cube
size:
LARGE
ог
SMALL,
SELECT
POWER
POWER
Indicator
Flashes
when
the
ice
maker
is
plugged
in;
becomes
solid
оп
when
the
ice
maker
15
making
ice.
1СЕ
FULL
ICE
FULL
Indicator
—
Lights
ир
when
the
ice
basket
15
full.
ADD
WATER
ADD
WATER
Indicator
—
Lightsupwhenthereisno
enough
waterin
the
water
tank.
LARGE
LARGE
Indicator
Lights
ир
when
you
select
LARGE.
SMALL
SMALL
Indicator
Lights
ир
when
you
select
SMALL,
BEFORE
FIRST
USE
@
Unpack
the
ice
maker,
then
remove
all
the
packaging
materials.
@
Clean
the
interior
of
the
ice
maker,
the
ice
basket
and
the
ice
shovel
with
warm
water
and
а
soft
cloth
for
3-5
times
to
remove
possible
odor
or
residue
caused
by
the
manufacturing
ог
transportation.
04

©
Place
the
ice
maker
on
а
level
surface
in
а
location
where
your
ice
maker
15
protected
from
direct
sunlight
and
other
sources
of
heat
(such
а5
а
stove,
furnace,
ог
radiator)
No
sunlight
and
heat
sources
Ona
level
surface
Reduce
vibration
апа
noise
@
маке
sure
10
leave
а!
least
4
inches(10
cm)
clearance
оп
all
sides
of
the
ice
maker
for
proper
ай
circulation.
<
7
10
ст
10
ст
4inches 4inches
—
@
Before
pluggingin,
please
let
the
ice
maker
stand
upright
Юг
1
hour
to
allow
the
refrigerant
to
settle.
@
Plugthe
ice
maker
into
а
well-grounded
outlet.
>
Must
be
grounded
well.
[
I
]
//
°
_/
DANGER!
Improper
use
of
the
plug
may
result
in
the
risk
of
LI
electrical
shock.
05

06
USE
YOUR
ICE
MAKER
1.Add
Water
Open
the
transparent
cover,
remove
the
ice
basket,
then
fill
the
water
tank
with
clean
drinking
water.
Make
sure
that
the
water
level
15
below
the
MAX
line.
After
adding
water,
please
place
the
ice
basket
back
and
close
the
cover.
MAX
Level
Adding
Water
Notes:
*
The
ADD
WATER
indicator
lights
ир
when
there
is
по
enough
water
in
the
water
tank
®
Please
use
clean
drinking
water.
Do
not
use
distilled
water,
beverages
including sparkling
water
or
coke.
2.
Start/Stop
Making
Ice
Press
(&)
10
start
making
ice;
the
POWER
indicator
becomes
solid
on.
Press
(&
it
again
10
stop
making
ice;
the
POWER
indicator flashes
again.
POWER
ICEFULL
®
@®
LARGE
ADD
WATER
®® ®®
SVALL
SELECT

Every
single
ice-making
cycle
can
produce
9
ice
cubes.
When
the
cycle ends,
the
ice
cubes
will
be
automatically
collected
into
the
ice
basket.
Notes:
«
When
the
ice-making
cycle
ends,
open
the top
cover
апа
transfer
the
ice
cubes
to
а
freezer
in
time.
If
the
ice
cubes
melt
апа
the
water
flows
10
the
wate
tank,
the
ice
maker
will
start
making
ice
again.
«
Depending
оп
the
ambient
апа
water
temperature,
the
ice-making
cycle
may
last
for
6
10
13
minutes.
If
the
ambient
temperature
is
too
high,
the
cycle
may
take
longer.
3.
Select
Ice
Cube
Size
Press
the
SELECT
button
10
select
the
ice
cube
size.
You
get
two
sizes
of
ice
selectable:
SMALL
апа
LARGE.
Selecting
SMALL
means
the
ice-making
cycle takes
a
relatively
shorter
time.
ICEFULL
®
@®®
LARGE
ADD
WATER
®
®®
SVALL
Notes:
If
the
ice
maker
15
shut
down
within
5
minutes,
please
wait
at
least
5
minutes
to
restart
the
ice
maker.
4.
Ice
Full
Reminder
The
ICE
FULL
indicator
willlight
ир
when
the
ice
basket
is
full,
апа
then
the
ice
maker
will
stop
making
ice
automatically.
Gently
remove
the
ice
cubes
from
the
ice
basket
with
the
scoop,
еп
restart
the
ice
maker.
POWER
-
Lightsup
ICEFULL
®
@®®
LARGE
@«
SMALL
ADD
WATER
@
stlecr
®
5М

5.
Self-cleaning
Mode
When
the
ice
make
is
connecting
to
power
апа
not
making
ice,
press
and
hold
(@)
until
the
LARGE
апа
SMALL
indicators
flash,
which
means
the
ice
maker
enters
self-cleaning
mode.
It
will
automatically
start
cleaning.
The
process
takes
20
minutes
@®
LARGE
ICEFULL
®
ADD
WATER
@
@®®
SVALL
SELECT
Tip:
This
process
can
be
manually
terminated
by
pressing
the
button
(&)
at
any
time.
6.
Water
Drain
After
the
ice
maker
finishes
the
ice-making,
you
can
take
out
the
сар
оп
the
water
drain
plug
to
drain
=
the
water
in
the
tank.
Tips:
*
Itis
better
to
change
water
every
24
hours.
«
Ifthe
ice
maker
15
not
in
use,
please
clean
it
апа
агу
all
the
parts
of
it

SPECIFICATIONS
Model
IM-BS260A
Rated
Voltage/Frequency
115V/60
Hz
Power
Consumption
120W
(25°C),140W
(40°C)
Ice
Marking
Rated
Current
L7TA
Ice
Harvest
Rated
Current
20A
Refrigerant
R600a
0.740z/21g
System
Pressure
High
Side:
290psig/Low
Side:
88psig
Net
Weight
15.6
165
(7.1kg)
Dimensions(H
x
W
x
D)
8.7*12.3*12.6.
(222
х
313
х
320mm)
Enclosure
Stainless
Steel
09

TROUBLESHOOTING
Issue
Possible
Cause(s)
Solution
ADD
WATER
indicator
lights
up
No
enough
water
Please
turn
оЁ
the
ice
maker
and ада
some
water
into
the
water
tank.
ICE
FULL
indicator
lights
ир
Ice
basket
15
full
Remove
the
ice
cubes
from
ice
basket.
Ice
cubes
are
sticking
together
The
time
of
ice-making
15
too
long
Turn
off
the
ice
maker,
and
restart
it
after
the
ice
cubes
melt.
Making
small
ice
cubes
takes
а
relatively
shorter
time.
Water
temperature
in
the
water
tank
15
too
low
The
water
temperature
should
range
from
45°F(7°C)
to
90°F(32°C).
The
ice-making
cycle
seems
normal,
but
noice
cubes
are
formed
Room
temperature
or
water
temperature
in
the
water
tank
15
too
high
The
room
temperature
should
be
in
the
range
of
50°F-105°F(10°C-40°C),
and
water
temperature
should
be
in
the
range
of
45°F-90°F(7°C-32°C)
Refrigerant
in
cooling
system
leaks
Contact
a
qualified
service
technician
for
repair
or
customer
service.
Pipe
in
the
cooling
system
is
blocked
Contact
a
qualified
service
technician
for
repair
or
customer
service.
The
ice
maker
can't
stop
making
ice
Direct
sunlight
or
sunlight
reflection
cause
the
sensor
to
malfunction
Move
your
ice
maker
to
somewhere
shady.
The
ice
maker
is.
noisy
Improper
setup
ог
component
failure
Follow
the
instruction
and
check
if
you
set
ир the
ice
maker
properly.
If
the
issue
still
exists,
please
contact
а
qualified
service
technician
or
customer
service.
If
there
is
апу
issue
unresolved,
please
contact
us
at:
10

€.
5o
Intertek
3149457
Conforms
to
UL
STD.563
Certified
10
CSA
STD.C22.2
No120
Table of contents
Other Ecozy Ice Maker manuals
Popular Ice Maker manuals by other brands
Vivax
Vivax IM-122T user manual
Scotsman
Scotsman MXG 327 Installation and operating instructions

Xo
Xo XOUIM1565O Installation and Use and Care Guide
Hoshizaki
Hoshizaki KM-1900SAH Service manual
Clatronic
Clatronic EWB 3526 instruction manual
Koolaire
Koolaire KD0172A Lnstallation, operation and maintenance manual
U-Line
U-Line UONP115-SS01A User guide & service manual
Follett
Follett Horizon Elite HMF1010RJS installation instructions
Cornelius
Cornelius 2306 installation instructions

KitchenAid
KitchenAid LKUIX335PPS Series owner's manual
Marvel
Marvel MLNP115-I S 01A MLNP115-SS01B Quick reference guide
Kold-Draft
Kold-Draft T261 Assembly, installation and operation instructions
