Edco TS8 Assembly instructions

Page 1
Tool Rental Center
MANUAL
EDCO
Tile Shark
94400-HD-10.17 REVISED STARTING SERIAL # 171010130

Page 2
READ AND UNDERSTAND THE OPERATORS INSTRUCTION MANUAL THOROUGHLY
BEFORE ATTEMPTING TO OPERATE THIS EQUIPMENT.
Death or serious injury could occur if this machine is used improperly.
Extreme care must be taken when operating electric
models with water present: Ensure power cord is prop-
erly grounded, is attached to a Ground-Fault-Interrupter
(GFI) outlet, and is undamaged.
•Check all electrical cables - be sure connections are tight and
cable is continuous and in good condition. Be sure cable is
correctly rated for both the operating current and voltage of
this equipment.
•Improper connection of the equipment-grounding conductor can
result in a risk of electric shock. Check with qualied electri-
cian or service person if there is any doubt as to whether the
outlet is properly grounded. Adhere to all local codes and
ordinances.
•NOTE: In the event of a malfunction or breakdown, grounding
provides a path of least resistance for the electric current to
dissipate. The motor is equipped with a grounded plug and
must be connected to an outlet that is properly installed and
properly grounded. DO NOT modify the plug provided on the
motor. If the plug does not t the outlet have a qualied electri-
cian install the proper receptacle.
•Switch motor OFF before disconnecting power.
•Engine exhaust from this product contains
chemicals known to the State of California to
cause cancer, birth defects or other reproduc-
tive harm.
• Gasoline is extremely ammable and poisonous.
It should only be dispensed in well ventilated areas,
and with a cool engine.
•Small gasoline engines produce high concentra-
tions of carbon monoxide (CO) example: a 5 HP 4 cycle
engine operation in an enclosed 100,000 cu. ft. area with
only one change of air per hour is capable of providing
deadly concentrations of CO in less than fteen minutes.
Five changes of air in the same area will produce noxious
fumes in less than 30 minutes. Gasoline or propane pow-
ered equipment should not be used in enclosed or partially
enclosed areas. Symptoms of CO poisoning include, head-
ache, nausea, weakness, dizziness, visual problems and
loss of consciousness. If symptoms occur - get into fresh
air and seek medical attention immediately.
SAFETY
MESSAGES
SAFETY MESSAGES
Indicates an imminent hazard which, if not
avoided, will result in death or serious injury.
Indicates an imminent hazard which, if not
avoided, can result in death or serious injury.
Indicates hazards which, if not avoided, could
result in serious injury and or damage to the
equipment.
•Safety Instructions are proceeded by a graphic alert symbol
of DANGER, WARNING, or CAUTION.
ELECTRICAL POWERED EQUIPMENT
GASOLINE/PROPANE POWERED EQUIPMENT
•Equipment should only be operated by trained personnel in
good physical condition and mental health (not fatigued). The
operator and maintenance personnel must be physically able
to handle the bulk weight and power of this equipment.
•This is a one person tool. Maintain a safe operating distance
to other personnel. It is the operators’ responsibility to keep
other people (workers, pedestrians, bystanders, etc.) away
during operation. Block off the work area in all directions with
roping, safety netting, etc. for a safe distance. Failure to do so
may result in others being injured by ying debris or exposing
them to harmful dust and noise.
•This equipment is intended for commercial use only.
•For the operator’s safety and the safety of others, always keep
all guards in place during operation.
•Never let equipment run unattended.
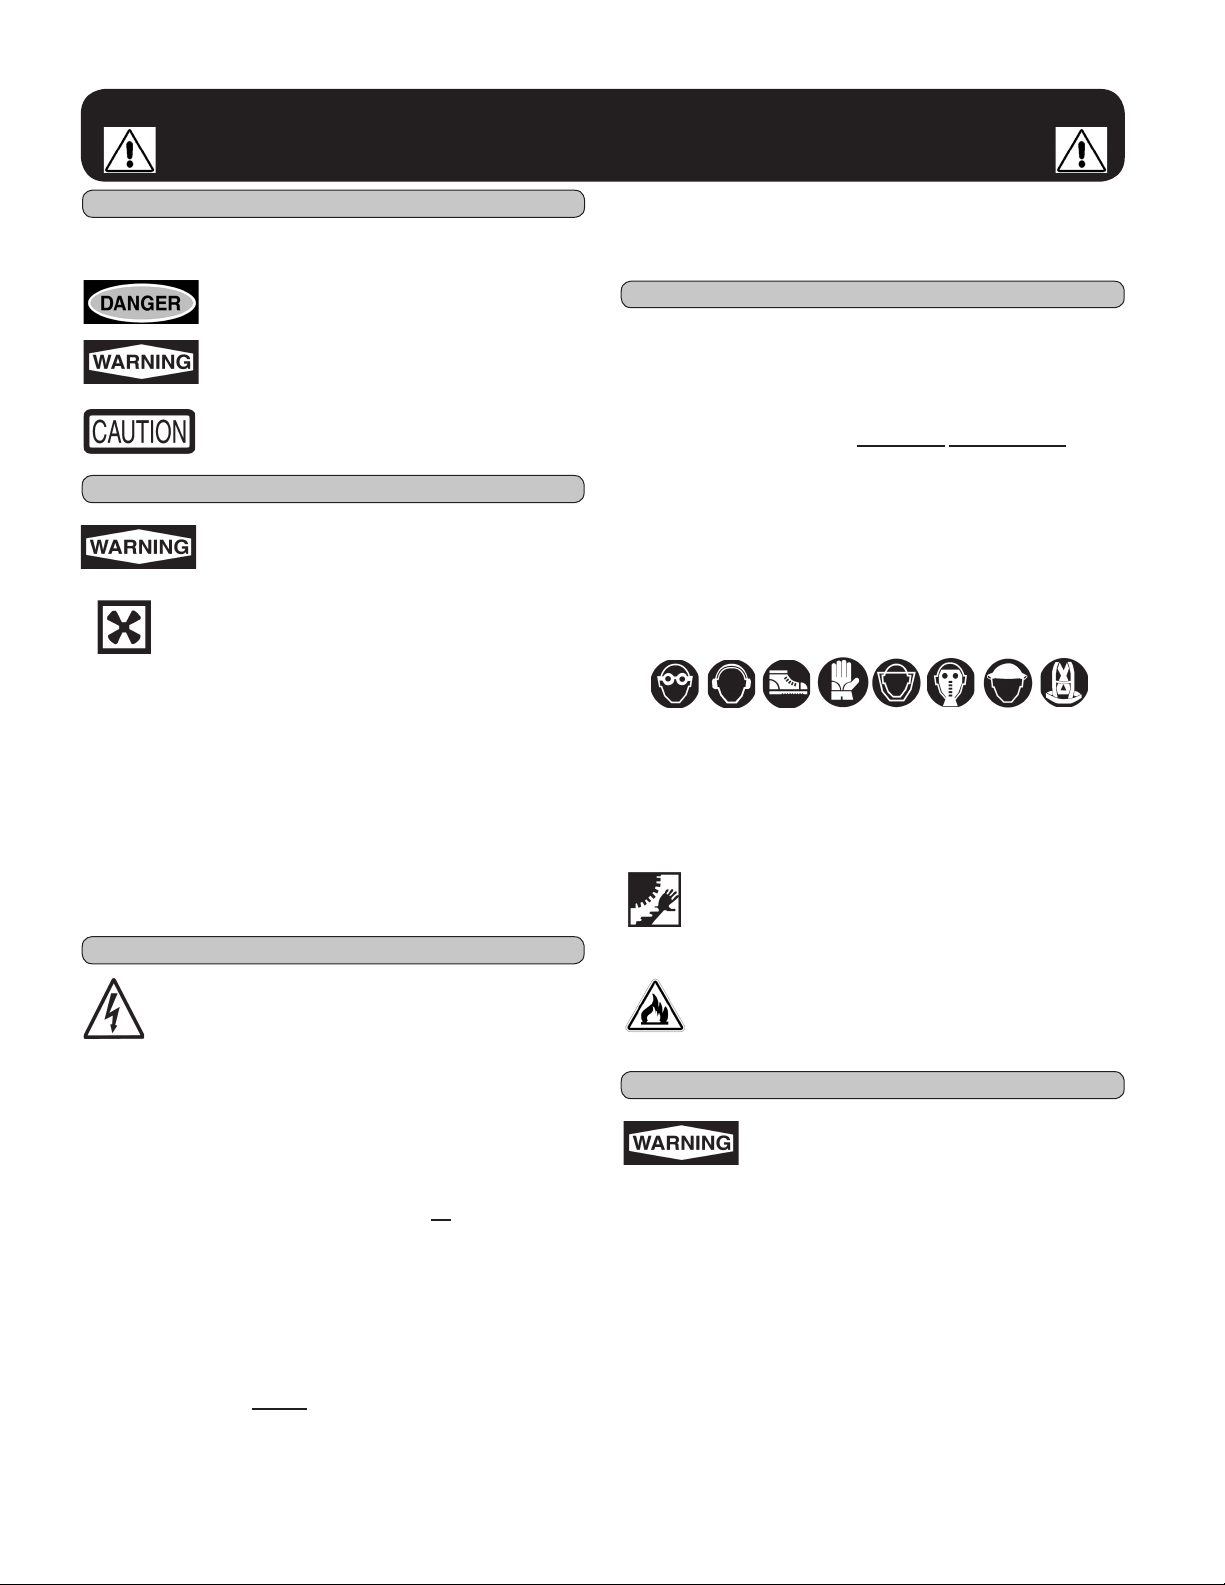
•Personal Protection Equipment and proper safety attire must
be worn when operating this machinery. The operator must
wear approved safety equipment appropriate for the job such
as hard hat and safety shoes when conditions require. Hear-
ing protection MUST be used (operational noise levels of this
equipment may exceed 85db). Eye protection MUST be worn
at all times.
Keep body parts and loose clothing away from moving
parts. Failure to do so could result in dismemberment
or death.
•Do not modify the machine.
•Stop motor/engine when adjusting or servicing this equipment.
Maintain a safe operating distance from ammable
materials. Sparks from the cutting-action of this machine
can ignite ammable materials or vapors.
GENERAL INSTRUCTIONS
DUST WARNING
Some dust created by power sanding, sawing,
grinding, drilling, and other construction activi-
ties contains chemicals known to cause cancer,
birth defects, or other reproductive harm. Some
examples of these chemicals are:
•Lead from lead-based paints, and
•Crystalline silica from bricks and concrete and other
masonry products.
Your risk of exposure to these chemicals varies depending
on how often you do this type of work. To reduce your risk:
work in a well ventilated area, use a dust control system, such
as an industrial-style vacuum, and wear approved personal
safety equipment, such as a dust/particle respirator designed
to lter out microscopic particles.
•Do not disconnect power by pulling cord. To disconnect, grasp
the plug, not the cord.
•Unplug power cord at the machine when not in use and before
servicing.

Page 3
TOOL RENTAL CENTER MANUAL
TILE Shark
Section Page Number
Safety Messages and General Instructions . . . . . . . . . . . . . . . . . . . . . . . . . . . . . . . . . . . . 2
How To Order Replacement Parts . . . . . . . . . . . . . . . . . . . . . . . . . . . . . . . . . . . . . . . . . . . 3
Safety Decal Reference Chart. . . . . . . . . . . . . . . . . . . . . . . . . . . . . . . . . . . . . . . . . . . . . . . 4,5
Operating Instructions . . . . . . . . . . . . . . . . . . . . . . . . . . . . . . . . . . . . . . . . . . . . . . . . . . . . 6, 7
Troubleshooting . . . . . . . . . . . . . . . . . . . . . . . . . . . . . . . . . . . . . . . . . . . . . . . . . . . . . . . . . . 8
Dust and Crystalline Silica Warning . . . . . . . . . . . . . . . . . . . . . . . . . . . . . . . . . . . .. . . . . . . 9
Important Notes . . . . . . . . . . . . . . . . . . . . . . . . . . . . . . . . . . . . . . . . . . . . . . . . . . . . . . . . . .10
Before Using This Product . . . . . . . . . . . . . . . . . . . . . . . . . . . . . . . . . . . . . . . . . . . . . . . . . . 11
Illustration 1: Main Grouping. . . . . . . . . . . . . . . . . . . . . . . . . . . . . . . . . . . . . . . . . . . . . . . 12,13
Illustration 2: Wheel, Fork and Lower Handle . . . . . . . . . . . . . . . . . . . . . . . . . . . . . . . . . . 14,15
Illustration 3: Handle Grouping . . . . . . . . . . . . . . . . . . . . . . . . . . . . . . . . . . . . . . . . . . . . . 16, 17
Motor Grouping . . . . . . . . . . . . . . . . . . . . . . . . . . . . . . . . . . . . . . . . . . . . . . . . . . . . . . . . . . 18,19
Switch Wiring Diagram . . . . . . . . . . . . . . . . . . . . . . . . . . . . . . . . . . . . . . . . . . . . . . . . . . . . 20
Motor Wiring Diagram . . . . . . . . . . . . . . . . . . . . . . . . . . . . . . . . . . . . . . . . . . . . . . . . . . . . 21
Maintenance. . . . . . . . . . . . . . . . . . . . . . . . . . . . . . . . . . . . . . . . . . . . . . . . . . . . . . . . . . . . 22
Operation Keys . . . . . . . . . . . . . . . . . . . . . . . . . . . . . . . . . . . . . . . . . . . . . . . . . . . . . . . . . . 23
TABLE OF CONTENTS
HOW TO ORDER REPLACEMENT PARTS
To insure product safety and reliability, always use
genuine EDCO replacement parts when making
repairs to the equipment.
When calling for parts, specify the MODEL and
SERIAL number of the machine, which can be found
on the NAME PLATE. Keep that information in the
space provided. In addition to this information, give
part number, description, and quantity as listed on
the parts list to your parts representative.
Please note: Due to improvements and changes
in the equipment, the illustrations shown may be
dierent than the actual machine.
FILL IN INFORMATION BELOW
Date of Purchase ______________________________
Model # _____________________________________
Serial # ______________________________________
SKU # ______________________________________

Page 4
This symbol means that the machine is heavy if the machine needs to be lifted onto or o of a truck,
loading dock etc. that proper technique or heavy duty lifting device should be used, personal injury could result.
(Yellow background with black pictogram and black outline)
This symbol means that dangerous chemicals, gases, dust particles and/or fumes are present including
carbon monoxide. Proper ventilation must be maintained. Do not use gasoline/diesel/propane powered
equipment indoors.
(Yellow background with black pictogram and black outline)
This symbol means that there are sharp components and if feet/ngers/digits come in contact personal
injury or death could result.
(Yellow background with black pictogram and black outline)
This symbol means that potential hazardous voltages are present and the equipment must be properly
grounded and extreme caution should be taken. If for any reason maintenance or repair is needed,
insure that voltage(s) are disconnected at the machine and the source unless (be cautious) voltage needs
to be present to troubleshoot the problem, then only qualied personal should work on “live” systems.
(Yellow background with black pictogram and black outline)
This symbol means hazardous pressures are present. Caution should be exercised to prevent personal
injury or damage to equipment. Face, eye and head protection should be used.
(Yellow background with black pictogram and black outline)
This symbol means explosive and hazardous vapors are present. Caution should be exercised to
prevent personal injury to face and eyes. Breathing and personal protection should be used when
servicing.
(Yellow background with black pictogram and black outline)
This symbol means that the guards must remain in place while the engine/motor on the machine is
running because death or personal injury may result.
(Yellow background with black pictogram and black outline)
This symbol means that there are moving parts and if feet/ngers/digits are inserted under any edge of
the cutter/grinder/saw cover while the engine/motor on the machine is running that personal injury and loss
of foot/ngers/digits may result.
(Yellow background with black pictogram and black outline)
This symbol means the surface is HOT and that if ngers/digits/hands or any bare or unprotected skin comes
in contact with this surface or hot accessory, possible serious burns and personal injury may result.
(Yellow background with black pictogram and black outline)
Safety Symbols

Page 5
This symbol means that the Operator’s, owners, instruction and/or manufacturer(s) manuals must be
read and understood before operating or attempting to operate this electrical, gasoline, diesel or
propane powered equipment, failure to do so can result in personal injury and possible death.
(Blue background with white pictogram.)
This symbol means that proper eye protection must be worn/used during the operation of this equipment. There is
a potential risk of operator eye damage, injury or loss of sight. This also applies to any personnel standing
nearby observing the operation of this equipment.
(Blue background with white pictogram.)
This symbol means that proper ear protection should be worn/used during the operation of this equipment.
There is a potential risk of operator hearing damage, injury or loss of hearing which will increase based on the
length of exposure. This also applies to any personnel standing nearby observing the operation of this equipment.
(Blue background with white pictogram.)
This symbol means that proper head protection should be worn/used during the operation of this equipment there
is a potential risk of operator head injury from foreign or loose objects the equipment might come in
contact with during operation. This also applies to any personnel standing nearby or observing the
operation of this equipment.
(Blue background with white pictogram.)
This symbol means that proper breathing protection or engineering controls must be worn/used during the
operation of this equipment there is a potential risk of operator lung damage. Repeated and/or substantial
inhalation of airborne crystalline silica can cause serious or fatal respiratory diseases, including silicosis. In
addition, to California and some other authorities have listed respirable crystalline silica as a substance known
to cause cancer. When grinding/cutting/drilling such materials, always follow local respiratory precautions.
This also applies to any personnel standing nearby or observing the operation of this equipment.
(Blue background with white pictogram.)
This symbol means do not insert ngers/digits under any edge of the belt cover while the engine/
motor on the machine is running because personal injury and loss of ngers/digits may result.
(Black pictogram with red “No” symbol outline)
This symbol denotes the lifting point and means that if lifting of this equipment is necessary use a lifting
device that is designed to accomodate or exceed the weight of this machine. Check the Operator’s
manual for specications. Using a device that is not designed to accomodate or exceed the weight of this
machine could result in damage to the machine and personal injury. Do not lift equipment over people
because death or serious injury could result.
(Blue background with white pictogram.)
This GHS pictogram identies that the chemicals contained present serious health hazards.
(Black pictogram with red diamond symbol outline)
Safety Symbols

Page 6
A) On/O Switch
B) Angle Adjustment
C) Blade Holder
D) Cushioned Grips for Greater
Operator Comfort
E) 25’ AC Power Cord
F) Oversized Wheels for Easy
Maneuverability
G) Easy access grease point
H) Heavy duty 3/4 HP motor
I) Ergonomic design handle
J) 2 Position Handle Bracket
(normal, aggressive)
About the Tile Shark:
• The Tile Shark is a low maintenance unit, designed to remove vinyl tile (Note: for ceramic tile a special blade is
required), industrial build-ups, adhesives and carpet from at horizontal surfaces using a rapid action, oscillating
blade. The Tile Shark may be used on concrete and/or wood surfaces and operates on standard household cur-
rent. Do not use the Tile Shark for any purpose other than that for which it was designed. Do not modify the
machine.
Before Starting:
• Inspect the work surface for cracks, uneven joints and foreign objects such as nails, screws and pipes. Damage
to the blade and/or equipment may result, which can also cause serious injury to the operator. Hazardous areas
should be properly identied, clearly marked and avoided.
• Be sure the power switch is in the OFF position. Inspect the power and extension cords before plugging into the
power source. Do not use if either cord is frayed or showing wear.
Inspect the blade carefully before installing. Blade must be sharp and properly installed. (See page 6) Use
only genuine EDCO blades. Do not use any questionable blade since serious personal injury and/or dam-
age to property can result. NOTE: BLADE IS EXTREMELY SHARP! Wear heavy duty work gloves when
changing the blades and handle with care.
• Adjust the angle of the cut for the conditions of the job at hand. (See page 6 for suggestions)
If you need to make a test cut, do it in an inconspicuous area.
• On carpet and sheet oors, pre-cut the material to be removed in a strip as wide as the blade.
• NOTE: A special blade is required for ceramic tile removal.
Figure 2
C
B
F
E
G
I
D
H
A
D
Note: Raise handle (I) slightly
to release downward pres-
sure on angle adjustment
mechanism before attempt-
ing blade angle adjustment.
Operating Instructions
J

Page 7
Cutting:
• The TileShark is equipped with a 2 position handle bracket. Rear slot for normal
removal. Front slot for aggressive removal.
Concrete Base:
• Generally, on concrete based oors, the bevel on blade should be facing up
and at a fairly steep angle . (Figure 4 - angle exaggerated) If the blade “jumps up” from
the oor surface, the angle may be too shallow.
• If removing tile from a concrete base, work diagonally on the tile surface.
• Use only 2/3rds width of blade on each pass. Removing an excessive amount of
material will damage the equipment.
Wood Base:
• Generally, on wooden based oors, the bevel on the blade should be facing down and
use a atter angle of cut. (Figure 5 - angle exaggerated) Using an angle that is too steep
may result in damage to the oor base material.
• Remove material in the direction of the wood grain to minimize gouging.
NOTE: Some gouging is unavoidable and will occur.
• Use only 2/3rds width of blade on each pass. Removing an excessive amount of
material will damage the equipment.
Starting the Machine:
• Make sure the machine is clear of walls and/or obstructions, tilt it back slightly to shift the
weight onto the wheels, then turn the switch to ON. (Figure 3)
• Do not force the machine.
• Shut the machine OFF when repositioning for another pass.
• Unplug machine from power source. Use the appropriate tools & techniques
to remove the blade to minimize the chance of the wrench slipping. Tilt ma-
chine back on handle to access hardware on bottom of striker plate (Figure 6).
• Loosen but do not remove the three bolts shown in (Figure 6) from the bottom
side of the striker plate.
• Inspect the new EDCO blade.
• Carefully slide the old blade out and replace with the new EDCO blade or
rotate blade if changing surfaces. Tighten bolts.
• Be sure the blade is secure before plugging the Tile Shark back in to the
power source.
Changing or Rotating the Blade:
Figure 4
Figure 5
Blades are extremely sharp! For your own protection - wear heavy duty work
gloves when changing the blades.
Figure 3
Figure 6

Page 8
TROUBLESHOOTING AND SERVICING
A TILE SHARK
The Tile Shark and Other System Compo-
nents:
On any tile removing equipment there are numer-
ous components that could be the root cause of
any type of problem. Therefore take time to analyze
any problem that might arise, a little thought and
patience can save many hours of down time and
frustration.
It is simply a mechanical device designed to ef-
ciently remove vinyl tile, industrial buildups, ad-
hesives and carpet .
If the machine is forced into the work surface it
can cause unnecessary vibration and noise. The
expected results will not be attained.
As with any mechanical equipment, an ounce of
prevention is worth a pound of cure. You can pre-
vent most problems and need for repair with routine
preventative maintenance. Much like maintaining
your automobile, many preventative measures are
simple visual checks of, lubrication points, and
loose hardware.
Guards are provided for personal as well as ma-
chine safety and protection. They are intended to
be in place at all times during storage, turn around,
operation and only removed for servicing. Foreign
objects could fall into the works of the machine
unnoticed and cause personal injury and damage
when the machine is turned on.
Most parts of the machine cannot be seen from
the outside. For a complete breakdown of the ma-
chine, any single component or troubleshooting re-
fer to the following pages for detailed information.
System Checklist:
Begin with this simple checklist:
1. Is the source power what it should be or is the
voltage too high, too low or nonexistent?
2. Is the drive system loose or worn?
3. Are the lubrication points lubricated properly?
4. Is all the hardware tight?
Common Problems:
If you have checked these items and a problem
still exists, you should analyze the nature of the
problem and the possible causes. While we will
not cover all of the possibilities, these are the most
common problems and their probable causes.
Excessive Noise:
Excessive noise is most often caused by loose
components of the machine to include bolts or
any adjustable function that is not tightened after
adjustment is made.
Excessive Vibration:
Vibration can be caused by a loose motor mount,
out of balance grinding disc or missing and worn
inserts. Motor and drive shaft sheaves out of align-
ment.
Leaking Lubricants:
Leaking lubricants can be caused by over heating,
worn or bad bearings and over lubrication.
Loss of Power:
A loss of power can be caused by over tightened
belts, low voltage, defective wiring or pushing the
machine into the work to forcefully and/or adding
to much weight to the machine.

Page 9
Grinding/cutting/drilling of masonry, concrete, metal and other materials can generate dust,
mists and fumes containing chemicals known to cause serious or fatal injury or illness, such as
respiratory disease, cancer, birth defects or other reproductive harm. If you are unfamiliar with
the risks associated with the particular process and/or material being cut or the composition of
the tool being used, review the material safety data sheets and/or consult your employer, the
manufacturers/suppliers, governmental agencies such as OSHA and NIOSH and other sources
on hazardous materials. California and some other authorities, for instance, have published lists
of substances known to cause cancer, reproductive toxicity, or other harmful eects.
Control dust, mist and fumes at the source where possible. In this regard use good work practices
and follow the recommendations of the manufacturers/suppliers, OSHA/NIOSH, and occupa-
tional and trade associations. Water should be used for dust suppression when wet grinding/
cutting/drilling is feasible. When the hazards from inhalation of dust, mists and fumes cannot
be eliminated, the operator and any bystanders should always wear a respirator approved by
NIOSH/MSHA for the material being used.
Grinding/cutting/drilling of masonry, concrete and other materials with silica in their composi-
tion may give o dust or mists containing crystalline silica. Silica is a basic component of sand,
quartz, brick clay, granite and numerous other minerals and rocks. Repeated and/or substantial
inhalation of airborne crystalline silica can cause serious or fatal respiratory diseases, including
silicosis. In addition, California and some other authorities have listed respirable crystalline silica
as a substance known to cause cancer. When grinding/cutting/drilling such materials, always
follow the respiratory precautions mentioned above.
See more on the importance of dust prevention and silica warnings at osha.gov/silica.
See more concrete and silica dust supression training and educational
materials at edcoinc.com/silica-standards or scan the QR code at right.
REVISED JUNE 1, 2017
DUST AND CRYSTALLINE SILICA WARNING
E-DCSW-0617

Page 10
IMPORTANT NOTES
Normal operating position.
Aggressive operating position.
Storage/Transport Position
Fold handle down by pull-
ing up on the spring load-
ed bar and moving for-
ward.

Page 11
NOTES
________________________________________________________________
________________________________________________________________
________________________________________________________________
________________________________________________________________
________________________________________________________________
________________________________________________________________
________________________________________________________________
________________________________________________________________
________________________________________________________________
________________________________________________________________
________________________________________________________________
________________________________________________________________
________________________________________________________________
________________________________________________________________

Page 12
ILLUSTRATION 1: MAIN GROUPING

Page 13
PARTS LISTING
ILLUSTRATION 1 : MAIN GROUPING
ITEM # PART # DESCRIPTION QTY.
1 28101 MAIN FRAME, TILE SHARK 1
2 80009G BEARING, BALL 5/8” 2-HOLE (W/ G.F.) 1
3 10602 WASHER, FLAT 1/4 SAE ZINC 2
4 10031 SCREW, CAP 1/4-20 X 1 2
5 10861 NUT, KEPS LOCK 1/4-20 ZINC 2
6 28148 ISOLATOR CUP, TILE SHARK 4
7 28115 MOUNT, FLEX-BOLT SANDWICH 3/8-16 4
8 10811 WASHER, LOCK 3/8 ZINC 4
9 10404 NUT, HEX 3/8-16 ZINC 4
10 28145 STRIKER PLATE, TILE SHARK 1
11 28146 RETAINER, SCRAPER BLADE 1
12 10801 WASHER, LOCK 5/16 ZINC 3
13 10627 SCREW, SKT. BUTTON HD. 5/16-18 X 3/4 3
14 62022 BEARING, BALL 1” 2-HOLE FLANGE 1
15 10003 SCREW, CAP 7/16-20 X 1-1/4 ZINC 2
16 10450 WASHER, LOCK 7/16 ZINC 2
17 10481 NUT, HEX 7/16-20 ZINC 2
18 10811 WASHER, LOCK 3/8 ZINC 4
19 10907 SCREW, CAP 3/8-16 X 3/4 4
20 28116 CAM SHAFT, STRIKER PLATE, TS-8 1
21 50049 BEARING, BALL 3/4” 2-HOLE FLANGE 1
22 10309 SCREW, CAP 3/8-24 X 1-1/4 ZINC 2
23 10811 WASHER, LOCK 3/8 ZINC 2
24 10014 NUT, HEX 3/8-24 ZINC 2
25 28137 HOOD, TILE SHARK 1
26 10213 WASHER, FLAT 5/16 SAE ZINC 4
27 10801 WASHER, LOCK 5/16 ZINC 4
28 10053 SCREW, CAP 5/16-18 X 3/4 4
29*
28040
28050
28060
SCRAPER & SLICER BLADES (NOT INCLUDED)
8” RIGID (PACK OF 5)
8” SLICER FOR LINOLEUM & CARPET (PACK OF 5)
12” FOAM RUBBER BACKING (PACK OF 5)
*
* REFER TO EQUIPMENT CATALOG & PRICE LIST FOR BLADES THAT ARE AVAILABLE.
BLADES ARE SOLD IN PACKS 0F 5.

Page 14
ILLUSTRATION 2: WHEEL, FORK AND
HANDLE LOWER LEG GROUPING

Page 15
PARTS LISTING
ILLUSTRATION 2: WHEEL, FORK AND HANDLE LOWER LEG GROUPING
ITEM # PART # DESCRIPTION QTY.
1 28117 LEG, HANDLE BAR LOWER, TILE SHARK 2
2 28110 MOUNTING BRKT., HANDLE BAR, TS-8 2
3 10029 SCREW, CAP 3/8-24 X 1-3/4 4
4 10025 WASHER, FLAT 3/8 SAE ZINC 8
5 40329 BUSHING, RUBBER 1”OD X 3/8”ID X 3/8 8
6 10004 NUT, HEX LOCK 3/8-24 ZINC 4
7 28103 FORK, TILE SHARK 1
8 28134 TREAD, ABRASIVE 2-1/2 X 7-1/2 1
9 28126 WIPER, WHEEL, TILE SHARK 2
10 10018 SCREW, CAP 1/4-20 X 3/4 4
11 10602 WASHER, FLAT 1/4 SAE ZINC 4
12 10861 NUT, KEPS LOCK 1/4-20 ZINC 4
13 28143 ADJUSTMENT BAR, ANGLE, TILE SHARK 1
14 28104 AXLE SHAFT 3/4”DIA. X 17, TS-8 1
15 28105 SPACER, WHEEL, TILE SHARK
13/16”ID x 15/16”OD x 7/8”L
2
16 28129 WHEEL, PHENOLIC 10 X 2-1/2 X 3/4BRG 2
17 10428 COLLAR, LOCKING 3/4”ID 2
18 10355 SCREW, CAP 1/2-13 X 11 1
19 10407 NUT, HEX LOCK 1/2-13 ZINC 1

Page 16
ILLUSTRATION 3: HANDLE GROUPING

Page 17
PARTS LISTING
ILLUSTRATION 3: HANDLE GROUPING
ITEM # PART # DESCRIPTION QTY.
1 28109 HANDLE BAR, TILE SHARK 1
2 10608 GRIP, HAND 1” MODEL AT 2
3 10053 SCREW, CAP 5/16-18 X 3/4 1
4 10213 WASHER, FLAT 5/16 SAE ZINC 3
5 28125 LATCH, HANDLE HOLD DOWN, TILE SHARK 1
6 10807 NUT, HEX LOCK 5/16-18 ZINC 1
7 28118 ROD, HANDLE SPRING, TILE SHARK
3/8”DIA. X 11-3/8”L
1
8 3636 SPRING, EXT. 6”L 2
9 10336 SCREW, CAP 3/8-24 X 2-1/4 2
10 10025 WASHER, FLAT 3/8 SAE ZINC 2
11 28133 WASHER, FLAT 13/32 X 1-1/4 X .047 2
12 10004 NUT, HEX LOCK 3/8-24 ZINC 2
13 28142 LATCH SUPPORT WELDMENT, TILE SHARK 1
14 72304 LATCH, SPRING 1/2” SNAP LOCK 1
15 11634 SCREW, CAP M6 X 1.0P X 20MM 4
16 28026 NUT, HEX NYLON LOCK M6 X 1MM 4
17 28132 WRENCH, HEX KEY 3/16, T-HANDLE 1
18 28122 RUBBER PLUG, HEX KEY WRENCH
NOTE: HOLE IS DRILLED OUT TO 1/4”
1

Page 18
ILLUSTRATION 4: MOTOR GROUPING

Page 19
PARTS LISTING
ILLUSTRATION 4: MOTOR GROUPING
ITEM # PART # DESCRIPTION QTY.
1
16045
16182
16153
16051
16516
16517
MOTOR, LEESON C-FACE (SEE 60 OR 50 HZ. BELOW)
MOTOR .75HP 60HZ 1-PHASE, 115/208-230V (CAT. NO. 116664.00)
REPLACEMENT PARTS:
CAPACITOR, START, LEESON 003024.48 (600 MFD, 115V)
RESET BUTTON, LEESON 300002.02 (CEJ53CA)
MOTOR .75HP 50HZ 1-PHASE 110/220V (CAT. NO. 116930.00)
REPLACEMENT PARTS:
CAPACITOR, START, LEESON 003024.16 (440 MFD, 125V)
RESET BUTTON, LEESON 300031.02 (CED2715)
1
1
1
1
1
1
228111 MOUNT, MOTOR, TILE SHARK 1
3 10811 WASHER, LOCK 3/8 ZINC 4
4 10907 SCREW, CAP 3/8-16 X 3/4 4
5 10025 WASHER, FLAT 3/8 SAE ZINC 4
6 10811 WASHER, LOCK 3/8 ZINC 4
7 10055 SCREW, CAP 3/8-16 X 1 4
8 - - - - - KEY 3/16SQ X 1-3/8 (INCLUDED WITH MOTOR) -
9 28131
28069
SHEAVE 3.0”OD X 6GR.J X 5/8”BORE (60Hz MODEL)
SHEAVE 3.5”OD X 6GR.J X 5/8”BORE (50Hz MODEL)
1
1
10 28113 BELT 220J-6 V RIBBED 1
11 28130 SHEAVE 2.80”OD X 6GR.J X 3/4”BORE 1
12 10016 KEY 3/16SQ X 1-1/2 1
13 77043 SWITCH, ROTARY CAM ON/OFF 1
14 11663 SCREW, MACHINE 8-32 X 1/2 RHCD ZINC
NOTE: THIS SCREW IS LOCATED INSIDE THE SWITCH BOX
4
15 10462 NUT, KEPS LOCK 8-32 ZINC 4
16 77042 BRACKET, ROTARY CAM SWITCH 1
17 77043-1 SWITCH ADAPTER, PG16 TO 1/2”NPT 2
18 41130 STRAIN RELIEF 1/2NPT X .550-.650” (CG50A-650) 3
19 10790 CONDUIT LOCK NUT 1/2 NP
NOTE: THIS NUT IS LOCATED INSIDE THE JUNCTION BOX
1
20 77045 WIRE HARNESS 12/3 X 42”LOA (CORD SJOOW 300V) 1
21 86422 CORD W/ PLUG, 25FT. POWER
12/3 SJOOW 300V CORD WITH MOLDED STRAIGHT BLADE PLUG.
NOTE: PLUG IS NEMA 5-15P 15A/125V FOR DOMESTIC USE ONLY.
FOREIGN UNITS HAVE THE PLUG REMOVED.
1
22 11690 CLAMP, LOOM, 3/8” 1
23 11565 CLAMP, LOOM, 5/8” (SAE SIZE 10) 1
24 10038 WASHER, LOCK 1/4 ZINC 2
25 10846 SCREW, CAP STSHW 1/4-20 X 1/2 2

Page 20
WIRING DIAGRAM FOR SWITCH
Other manuals for TS8
1
Table of contents