manuals.online logo
Brands
  1. Home
  2. •
  3. Brands
  4. •
  5. Glasdon
  6. •
  7. Construction Equipment
  8. •
  9. Glasdon DRAINAGEMASTER User manual

Glasdon DRAINAGEMASTER User manual

DRAINAGEMASTER INSTALLATION INSTRUCTIONS
Ensure that personnel carrying out this installation have the relevant qualifications/certificates.
Ensure that all relevant personnel read the points listed within this leaflet and that a copy is given to
staff involved with the installation and maintenance of this product.
Please refer to ‘The Manual Handling Operations Regulations 1992’.
Glasdon recommends that a full Health and Safety analysis is carried out prior to installation.
!
1
KIT CONTENTS EQUIPMENT REQUIRED
1- Drainagemaster x1
2- Ground Pegs x6
-Spade
-Rubber Hammer
-Tape Measure
-Spirit Level
-Relevant Safety Equipment (gloves, reective clothing, etc)
-Cold Bitumen (recommended for a water tight seal between the road edge and
grip)
Please note that diagrams are not to scale
1
See page 3 for instructions on
using the optional Extension
Channel.
Choose the location where the
Drainagemaster is to be installed and
check for buried services. Ensure it is
to be located where pooling water
will be able to ow o the road and
through the channel i.e. by a gully, at
a lower part of the road.
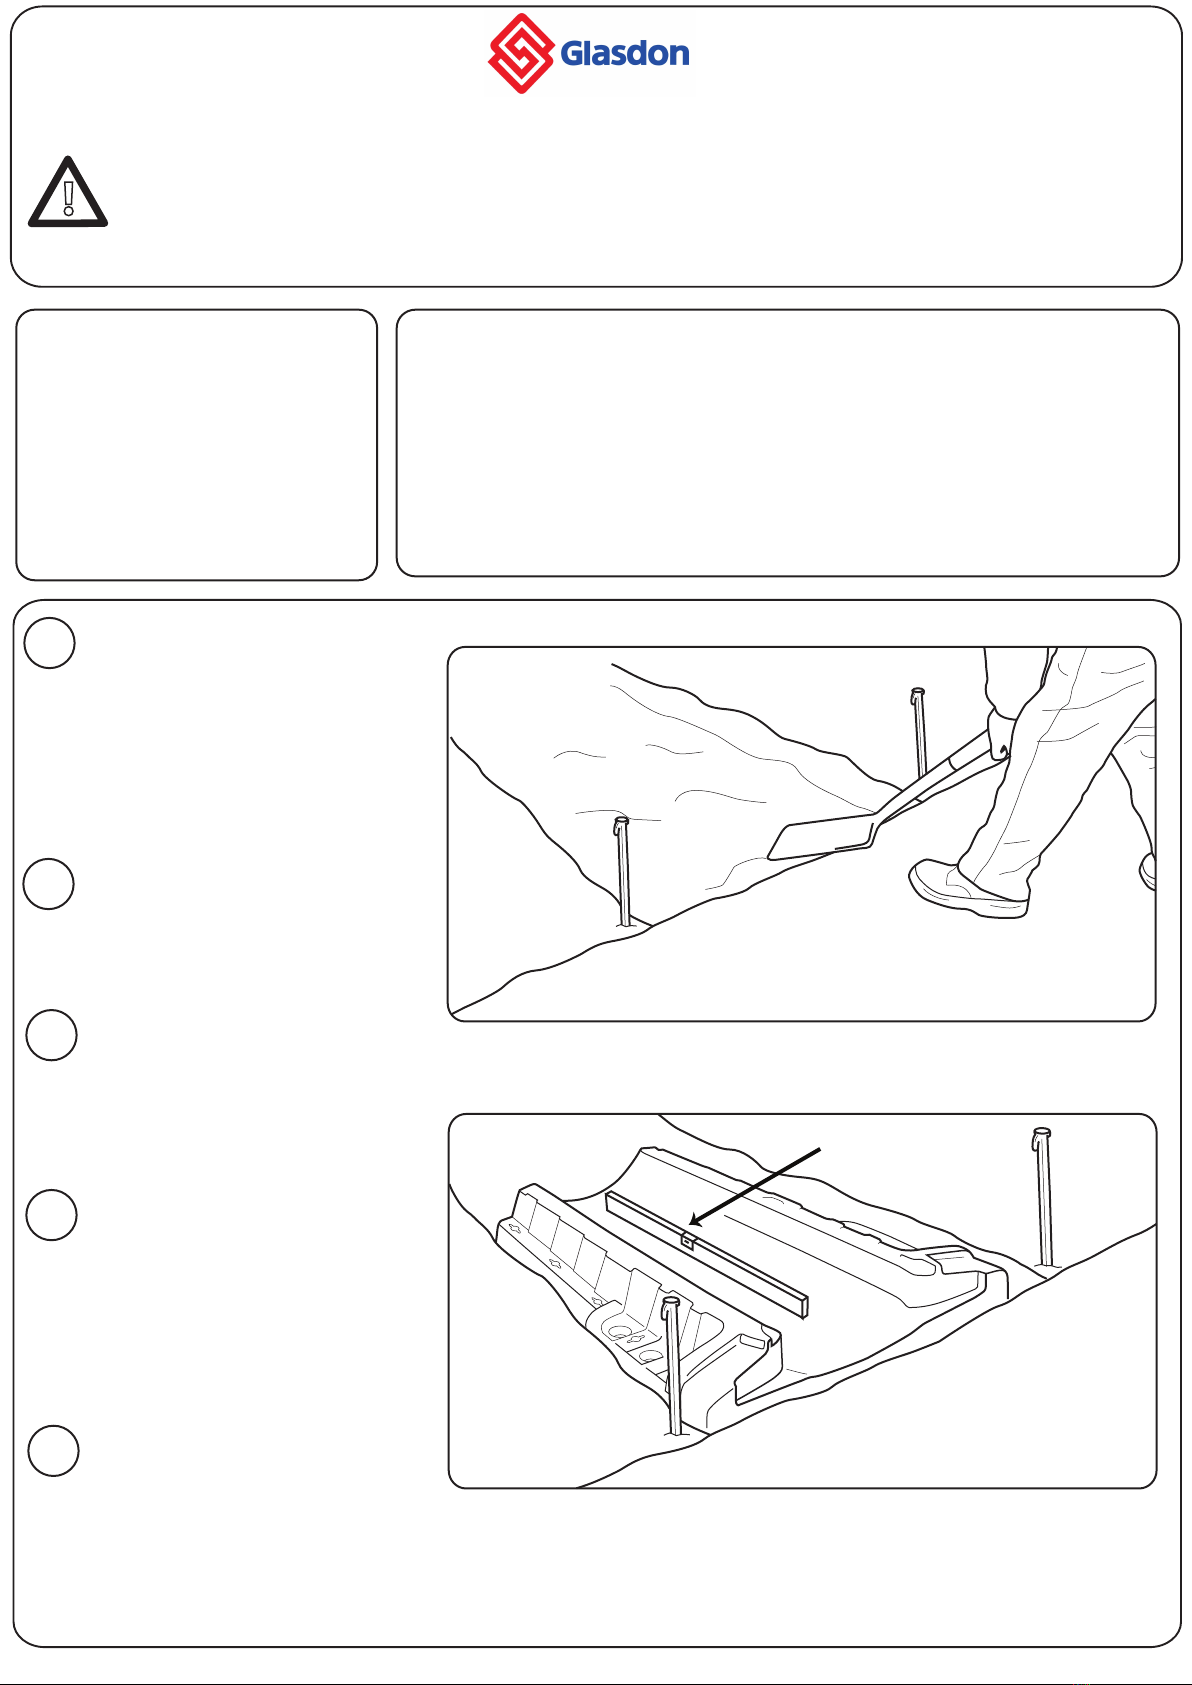
Position the Drainagemaster where it
is to be installed and mark the width
and length using the pegs provided
(see gure A).
Put the Drainagemaster to one side
and dig a channel for the grip to lay
in, approximately 70mm deep. Add a
slight downward gradient for
optimum performance.
Position the Drainagemaster into the
prepared channel and ensure it lays
at (if it doesn’t feel secure remove
and replace soil as required). For areas
of very hard soil we recommend
using sand to ensure a level
installation.
Ensure front of the Drainagemaster is
located up to the edge of the road
ensuring no soil is left between. Also
ensure the channel is slightly lower
than the roads edge. Use a spirit level
to check the Drainagemaster is on a
downward gradient (see gure B).
ROAD EDGE
Figure A
Figure B
2
3
4
5
Spirit Level
TM
2
Using a rubber hammer insert all
the pegs provided into 6 of the
dedicated holes in the
Drainagemaster. If a rock is located
beneath the surface simply put the
peg into a dierent hole.
6
7
8
Figure C
Figure D
Figure E
Backll each side of the
Drainagemaster with soil to secure
it further and to allow for grass
growth and a neat nish.
To ensure optimum performance
of your Drainagemaster, Glasdon
would strongly recommend the
use of cold bitumen to create a seal
between the road edge and the
Drainagemaster.
For best results mix the bitumen
with sand, pour into the gap and
allow to set.
For verges wider than 900mm we
recommend the use of the Extension
Channel to channel water from the road
into a nearby gully.
The length of the Extension Channel can
be adjusted by sliding it beneath the grip,
see Figure G.
Figure F
OPTIONAL EXTENSION CHANNEL
3
AND DRAINAGEMASTER ARE TRADEMARKS OR REGISTERED TRADEMARKS OF GLASDON GROUP OR
ITS SUBSIDIARIES IN THE U.K AND OTHER COUNTRIES
• A planned maintenance schedule or regular inspection is recommended, replacing
components as necessary.
• Replacement components are available direct from GLASDON.
• GLASDON cannot be held responsible for claims arising from incorrect installation,
unauthorised modifications or misuse of the product.
Issue 1 March 2011 Stock no. C000/0377
© Copyright 2011
Glasdon UK Ltd reserve the right to alter specifications without prior notice.
Glasdon U.K Limited
Preston New Road
BLACKPOOL
Lancashire FY4 4UL
Tel: 01253 600410
Fax: 01253 792558
email: [email protected]
web: www.glasdon.com
IMPORTANT NOTE: PLEASE ENSURE THAT ALL RELEVANT PERSONNEL READ THE POINTS LISTED WITHIN THIS LEAFLET AND
THAT A COPY IS GIVEN TO STAFF INVOLVED WITH THE INSTALLATION AND MAINTENANCE OF THIS PRODUCT.
SAFETY NOTE: PLEASE REFER TO ‘THE MANUAL HANDLING OPERATIONS REGULATIONS 1992’ DURING HANDLING.
The ground beneath the
Extension Channel can be
shaped in order to create a‘U’
section to help water ow if
required.
[We recommend installing a
Vergemaster next to the grip
for ease of maintenance as it
allows the grip to be quickly
and easily located.]
Figure G
Figure H
Road Edge
Gully
Grass Verge
Drainagemaster
Extension Channel
Use the pegs
provided to secure
the channel as
done with the
Drainagemaster.
TM

Popular Construction Equipment manuals by other brands

Vestil WTJ-HITCH Series Use and maintenance manual

Vestil

Vestil WTJ-HITCH Series Use and maintenance manual

Altrad Belle RPX 59 Operator's manual

Altrad Belle

Altrad Belle RPX 59 Operator's manual

MULTIQUIP WM70SLF Operation manual

MULTIQUIP

MULTIQUIP WM70SLF Operation manual

Zoomlion ZCC1300 Maintenance manual

Zoomlion

Zoomlion ZCC1300 Maintenance manual

WIRTGEN W 100 F instruction manual

WIRTGEN

WIRTGEN W 100 F instruction manual

MULTIQUIP EM120P series Operation and parts manual

MULTIQUIP

MULTIQUIP EM120P series Operation and parts manual

Toro Line Painter 1200 Operator's manual

Toro

Toro Line Painter 1200 Operator's manual

Dawson EMV-70 METRIC Operator's instructions/Spare parts list

Dawson

Dawson EMV-70 METRIC Operator's instructions/Spare parts list

Clarke Strong-Arm CFC1000LR Assembly & user instructions

Clarke

Clarke Strong-Arm CFC1000LR Assembly & user instructions

MQ Multiquip Mikasa MVH508GH manual

MQ Multiquip

MQ Multiquip Mikasa MVH508GH manual

Dynapac BOMAG BVP 12/50 A Operating	 instruction

Dynapac

Dynapac BOMAG BVP 12/50 A Operating instruction

New Holland W170 Workshop manual

New Holland

New Holland W170 Workshop manual

ALCOMEXINDO ALUSCAFF S1F-0114-01-MF instructions

ALCOMEXINDO

ALCOMEXINDO ALUSCAFF S1F-0114-01-MF instructions

Clarke CCM125P Operating & maintenance instructions

Clarke

Clarke CCM125P Operating & maintenance instructions

FORS MW C4,0P instruction manual

FORS MW

FORS MW C4,0P instruction manual

FOUNTAINLINE CLUBLINE 2 quick start guide

FOUNTAINLINE

FOUNTAINLINE CLUBLINE 2 quick start guide

Clarke CHT617 User instructions

Clarke

Clarke CHT617 User instructions

jcb VM117 Operator's manual

jcb

jcb VM117 Operator's manual

manuals.online logo
manuals.online logoBrands
  • About & Mission
  • Contact us
  • Privacy Policy
  • Terms and Conditions

Copyright 2025 Manuals.Online. All Rights Reserved.