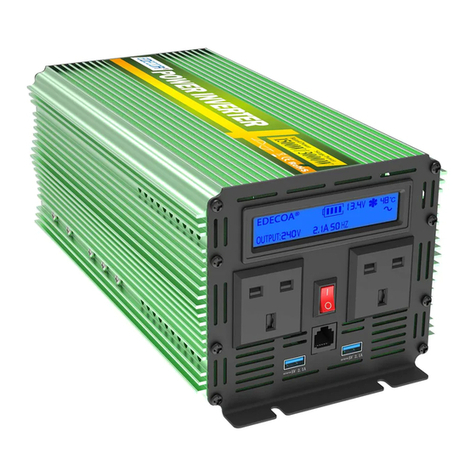
EDECOA DPP10 User manual

COPYRIGHT©EDECOA, ALL RIGHT RESERVED,PSW-EU-V2.7------English
1 / 15
USER MANUAL
Model:
DPP10 DPP15
DPP20 DPP25
DPP30 DPP35
DPP50
Language: English

COPYRIGHT©EDECOA, ALL RIGHT RESERVED,PSW-EU-V2.7------English
2 / 15
ENGLISH
1.What is the power inverter?................................................................................................................................................. 3
2.Intended use..........................................................................................................................................................................3
3.Installation............................................................................................................................................................................ 3
3.1Background............................................................................................................................................... 3
3.1.1Checking packing...................................................................................................................................3
3.1.2Checking accessories............................................................................................................................. 3
3.2Installation environment requirements..................................................................................................... 4
3.3Install carrier requirements....................................................................................................................... 4
3.4Installation requirements:..........................................................................................................................4
3.5Installation space requirements.................................................................................................................5
4.Opening the device............................................................................................................................................................... 5
5.Ventilation............................................................................................................................................................................ 5
6.Connection............................................................................................................................................................................5
7.About the remote controller................................................................................................................................................. 6
8.Technical data(Pure sine wave)......................................................................................................................................8
9.How to select the proper inverter you need?.................................................................................................................... 8
11.How to choose the proper cable?....................................................................................................................................... 9
12.Types of batteries............................................................................................................................................................... 10
13.Inverter appearance description......................................................................................................................................... 11
14.How to connect two or more batteries?............................................................................................................................. 12
15.Wiring diagram...................................................................................................................................................................13
16.Protection features..............................................................................................................................................................13
17.Service environment:..........................................................................................................................................................13
18.Problem Causes.................................................................................................................................................................. 13
10.Improper use of power inverter..........................................................................................................................................14
19.Disposal.............................................................................................................................................................................. 15
20.Warranty............................................................................................................................................................................. 15
21.Disclaimer of Warranties................................................................................................................................................... 15
22.Compensation..................................................................................................................................................................... 15

COPYRIGHT©EDECOA, ALL RIGHT RESERVED,PSW-EU-V2.7------English
3 / 15
1. WHAT IS THE POWER INVERTER?
The power inverter converts direct-current (DC) low voltage (12V, 24V, 48V) power to 230V alternating-current (AC). You
can connect and operate different devices, for example: microwave, air conditioner, TV, computer or work tools. You must
connect the battery and devices to the inverter. It is simple and you can use it anywhere, anytime, you will always be able to
run your devices from battery.
2. INTENDED USE
This inverter is used to convert low voltage (Direct Current-DC) into alternating voltage of 230V AC, for example, from
battery or in photovoltaic-island systems.
Please use the inverter according to the following instruction and in accordance with the standards and guidelines applicable
locally. Any other use may cause injury or property damage. These inverters are not suitable for the supply of life support
and / or medical equipment. The inverters are not Uninterruptible Power Supply!
3. INSTALLATION
3.1 Background
Do not install the inverter on flammable building materials.
Do not install the inverter in areas where flammable or explosive materials are stored.
The inverter must only be installed by sufficient trained personnel in compliance with local safety regulations.
When the inverter is running, the temperature of the chassis and the heat sink can be high. Do not install the
inverter in locations where it can be inadvertently touched.
3.1.1 CHECKING PACKING
Before unpacking, please check to see if the outer package has been damaged; out of the box, you need to check whether the
delivery is complete
3.1.2 CHECKING ACCESSORIES
After unpacking the inverter package, check that the delivery unit is complete and that there is no visible external damage.
If any items are missing or if there is any damage, contact your dealer.
Check that the package contains the deliveries as listed below:
1) Power Inverter ×1
2) One pair of screw cap (Red and Black)
3) One pair of DC input terminal ring (For backup)
4) User manual ×1
5) Ground Cable×1 (Partial model)

COPYRIGHT©EDECOA, ALL RIGHT RESERVED,PSW-EU-V2.7------English
4 / 15
6) Battery cable
7) Remote controller and connecting cable (Need purchasing)
8) Spare fuse (Some models)
SELECT THE INSTALLATION LOCATION
You need to choose the appropriate location to install the inverter to ensure that the inverter can work properly and efficiently.
Basic requirement:
Inverter protection class IP65, indoor and outdoor environment can be used.
The mounting method and position must be suitable for the weight and dimensions of the inverter, please refer to
the technical data.
When the inverter is running, the temperature of the chassis and the heat sink can be high. Do not install the
inverter in locations where it can be inadvertently touched.
Do not install the inverter in areas where flammable or explosive materials are stored.
3.2 Installation environment requirements
Ambient temperature should be kept below 50 ℃, to ensure the best inverter operating conditions, and extend its
service life.
Inverter should be installed in a well-ventilated environment to ensure good heat dissipation.
Avoid to place the inverter in direct sunlight, rain and snow. This can extend the life of the inverter. It is advisable to
select the installation site with occlusion but ensure proper air-circulation.
3.3 Install carrier requirements
The inverter mounting carrier must be fire-resistant.
Do not install the inverter on flammable building materials.
Please ensure that the mounting surface is strong enough to meet the load requirements of the inverter.
In a residential area, do not install the inverter on a plasterboard wall or similar sound-poor wall to avoid interference
with the noise in the work area.
3.4 Installation requirements:
Install it vertically or tilt it back up to 15 ° to allow the fan to cool the machine.
Figure 3-1Proper installation Figure 3-2Installation Space (Unit: mm)

COPYRIGHT©EDECOA, ALL RIGHT RESERVED,PSW-EU-V2.7------English
5 / 15
3.5 Installation space requirements
It is recommended that the inverter be mounted at an adequate height for easy operation and subsequent maintenance.
When installing the inverter, make sure that there is enough space around the inverter to ensure adequate installation and
cooling space, as shown in Figure3-2.
4. OPENING THE DEVICE
Non-professional personnel must not open the inverter as there is high voltage inside. Before opening the device, please
remove cables of both DC and AC sides, turn on the switch and leave the inverter alone for 1 hour.
5. VENTILATION
The inverter should be installed in a dry and well ventilated area. The air inlet may not be blocked, and it should be kept
20cm away from the wall.
Do not install the inverter near flammable or explosive material. Please use dry cloth to clean the inverter.
Do not stack multiple inverters in operation above another so as the cooling is not guaranteed.
6. CONNECTION
1. Battery connection
Set the switch to the "OFF" position when connecting the inverter to the power source. The energy source may be a
battery or other stable DC power supply.
It must be ensured that the DC voltage of the power source is matched to the rated DC voltage of the inverter. Higher
voltages can cause fire and damage the inverter.
The two DC-input connectors of the inverter are color-coded::
- The red terminal for the positive pole (+) and the black terminal for the negative pole (-).
- Use the supplied cable from the manufacturer or at least those with the same or larger cross-section.
- Keep these connections as short as possible, it will flow considerable current depending on power extraction!
- The connections between power source (battery) and inverter cable terminals must be securely mounted.
2. Load connection
3.
4. The battery must be able to deliver necessary amperage according to the power of the inverter and load. For example,
for a 24v inverter to drive 1000W resistive load, the battery should be able to provide more than 45 amps! (on a 12V
inverter it will be >90 amps!)
The load power should not exceed the rated power of the inverter.
Please do not connect the AC output side to other power source (i.e. electric supply) as this is not a grid interactive inverter.
Please read the manual carefully and install the inverter properly. If you have questions, please contact our service team. It
may cause damage to the inverter or cause injury if you do not act in accordance with the instructions from the manual.
5. Grounding wire installation
The connection method of the ground wire is different based on the different using environment (vehicle, boat, home,
outdoors) . You could find where to connect the ground cable in the power inverter following that icon “ ”
When using the power inverter in a vehicle, please connect the ground wire to the chassis of the vehicle.
When using the power inverter on a boat, please connect it to the boat's ground system.
When using the power inverter at home, please connect it to the home ground wire system. If there is no ground wire
system at home, please connect it to the negative terminal of the battery.

COPYRIGHT©EDECOA, ALL RIGHT RESERVED,PSW-EU-V2.7------English
6 / 15
When using the power inverter outdoors, please connect it to the negative terminal of the battery. It will not affect the
normal working of the power inverter without connecting the ground wire.
6. Please pay attention when the power inverter works for the main power system in RV or at home
When the power inverter is connected to the RV power system or home power system for power supply, the inverter could
be damaged If the shore power or alternator is connected at the same time by mistake when the power inverter is working.
The AC input voltage is not accepted by the power inverter.
To prevent this case, we recommend installing a Dual Power Automatic Transfer Switch (ATS).
The ATS mainly used for testing whether normal(N) or spare(R) power is normal or not. Here is the compatible
specification:
12P; ②230V/50HZ;
③Travel switch includes shutdown function ON (R )-OFF-ON(N),
Here is the schematic diagram of RV power system.
Note:
1. The ATS must contain an intermediate disconnect setting to prevent the generator or grid from being connecting at the
same time as the inverter, resulting in the inverter being burnt.
2. The switching time of the ATS is 1-2s, and the electrical device will stop working in a short time.
7. ABOUT THE REMOTE CONTROLLER
Tips: The switch of the remote control and the switch of the inverter is parallel.
Therefore, when any one controls the inverter, the other switch must keep the "OFF" state.
According to different models, we have two models of remote control (ED-RC, ET-RC). However, it is not possible to
replace each other.

COPYRIGHT©EDECOA, ALL RIGHT RESERVED,PSW-EU-V2.7------English
7 / 15
ED-RC remote controller
1. ON/OFF switch
2. Status light: If it is green, it means the inverter is on. If it is off, then the inverter is off.
3. Low input voltage indicator light: If the DC input voltage of the inverter is too low, it will be yellow.
4. Battery power indicator light.
About ED-RC remote cable
ED-RC remote cable is 2M or 4M long standard RJ45 network cable, it is easy for you to extend the length of it. When
working, the voltage drop through this 2M cable is about 0.02V, you can ignore it. If it is a 10M long cable, the voltage
drop will be about 0.1V. If you use very long remote cable, please note that the battery power indicator light maybe not
correct.
Note: If the remote controller can’t work properly, please try to replace the remote cable first.
ET-RC remote controller
1. ON/OFF switch(press 3s),Backlight switch(press once)
2. LCD display
3. USB charging: 5VDC/2.1A Max
About ET-RC remote cable
ET-RC remote cable is 4M long standard RJ45 network cable,In order not to affect the display signal transmission, it is
recommended to use network lines within 5M.
Because there are 2 USB interfaces on the remote control, you cannot use a longer network cable.
Battery power indicator light:
If DC voltage ≥12.5V, 4 LED lights will be
green
If 12V≤DC voltage≤12.5V, 3 LED lamps will
be green
If 10.8V≤DC voltage≤12V, 2 LED lamps will
be green
If 10V≤DC voltage≤10.8V only 1 LED lamp
will be green
Note: If your inverter is 24v, please multiply
the above DC input voltage by 2.

COPYRIGHT©EDECOA, ALL RIGHT RESERVED,PSW-EU-V2.7------English
8 / 15
If you do not use the USB interface to charge, you can extend the use of 8M RJ45 network lines, display, and switching
functions are not affected.
Note: If the remote controller can’t work properly, please try to replace the remote cable first.
8. TECHNICAL DATA:(PURE SINE WAVE)
9. HOW TO SELECT THE PROPER INVERTER YOU NEED?
Dependent of the devices you want to operate, you must pay attention on the wattage of each device and calculate the total
watts. We recommend you to buy an inverter higher than the power you think you need – good practice is around 30% -
50% more.
For example:

COPYRIGHT©EDECOA, ALL RIGHT RESERVED,PSW-EU-V2.7------English
9 / 15
We recommend you to buy the power inverter 1500w. Sometimes devices like a motor, it needs more power at start-up
(peak power) although after the motor is running continuous power. This is important to consider. For example, an air
conditioner, may need startup-power from 3 to 7 times of its the continuous power. The best procedure is to find out about
the current requirement of the device to be connected to the inverter. Normally this information is in the device
specifications.
Example:
If you have a refrigerator with a continuous load of 0.8 amps and a startup load of 8 amps:
0.8 amps x 230 volts = 184 watts continuous
8 amps x 230 volts = 1840 watts continuous
In this case you should use an inverter with 2000W.
11. HOW TO CHOOSE THE PROPER CABLE?
Inverters should be attached directly to the battery. The wire size depends on the distance between the battery and inverter.
The following is a reference to the cable size of the battery recommended by the DC12V system inverter. (DC24V system
inverter Cable /2)
800W continuous load
0,5 – 1m Cable 10mm²
1 – 1.5m Cable 12mm²
2 – 4m Cable 20mm²
1000W continuous load
0,5 – 1m Cable 16mm²
1 – 1.5m Cable 16mm²
2 – 4m Cable 25mm²
1200W continuous load
0,5 – 1m Cable 16mm²
1 – 1.5m Cable 18mm²
2 – 4m Cable 28mm²
1500W continuous load
0,5 – 1m Cable 16mm²
1 – 1.5m Cable 21mm²
2 – 4m Cable 34mm²
2000W continuous load
0,5 – 1m Cable 16mm²
1 – 1.5m Cable 32mm²
2 – 4m Cable 50mm²
2500W continuous load
0,5 – 1m Cable 25mm²
1 – 1.5m Cable 36mm²
2 – 4m Cable 60mm²
3000W continuous load
0,5 – 1m Cable 25mm²
1 – 1.5m Cable 45mm²
2 – 4m Cable 70mm²
3500W continuous load
0,5 -1m Cable
16*2mm²
1 -1.5m Cable 50mm²
2 – 4m Cable 80mm²
5000W continuous load
0,5-1m Cable 35*2mm²
1 -2m Cable 75mm²
>2m Not recommended

COPYRIGHT©EDECOA, ALL RIGHT RESERVED,PSW-EU-V2.7------English
10 / 15
12. TYPES OF BATTERIES
You can calculate that the storage battery’s use-time by this formula:
푈푠푖푛푔푇푖푚푒 퐻표푢푟푠 =퐵푎푡푡푒푟푦퐶푎푝푎푏푖푙푖푡푦 퐴퐻
푙표푎푑 푝표푤푒푟(푊) 0.85/퐵푎푡푡푒푟푦voltage(V)
Attention:
The use time of storage battery is determined by the quality and the condition and lifetime of the storage battery!
If batteries of the same size are connected in parallel, the time is multiplied by the number of parallel batteries. For
example, four 12V 60AH batteries are connected in parallel, and 500W of load can be used continuously for 1 h 12 min*4=4
h 48 min
The above is the time that can be used when the new battery is fully charged. If it is an old battery, use it for more than
half a year and multiply it by 0.8. If the battery has been used for more than one year, it needs to multiply the usage time
by 0.5. For example, a 12V 100A battery has been used for half a year. If a 1000W load is used, it can be used continuously
for 1h*0.8=48 min.

COPYRIGHT©EDECOA, ALL RIGHT RESERVED,PSW-EU-V2.7------English
11 / 15
Tip: Use the inverter in your car. Engine start batteries should not be discharged below 90% charged state, and marine
deep cycle batteries should not be discharged below 50% charged state. Doing so will shorten the life of the battery based
on most battery manufacturers recommendations.
Note: If you intend to use power tools for commercial use, or any load of 200W for more than 1 hour regularly
(between battery recharging) we recommend installing an auxiliary battery to provide power to the inverter. This
battery should be a deep cycle type and sized to meet your run time expectations with the engine off. The auxiliary
battery should be connected to the alternator through an isolator module to prevent the inverter from discharging the
engine start battery when the engine is off.
13. INVERTER APPEARANCE DESCRIPTION

COPYRIGHT©EDECOA, ALL RIGHT RESERVED,PSW-EU-V2.7------English
12 / 15
①LCD Display
②Outlets
③Power ON/OFF Switch
④AC Output : 3P Terminals
⑤Remote Control Port
⑥USB Charging
⑦GND Terminal
⑧Battery input -
⑨Battery input +
⑩Fans
○
11 LED Status Display
14. HOW TO CONNECT TWO OR MORE BATTERIES?
Connected in parallel = same voltage doubled AH
Connected in series = double voltage same AH
Output socket
AC output voltage 220 ~ 230VAC 240VAC 240VAC 220 ~
240VAC
Single socket max output
current 16A 13A 10A 13A
Single socket max output
power 3500W 3100W 2400W 3100W

COPYRIGHT©EDECOA, ALL RIGHT RESERVED,PSW-EU-V2.7------English
13 / 15
15. WIRING DIAGRAM
Red wire to + terminal of the battery and red terminal,
Black wire to – terminal of the battery and black terminal of the inverter
16. PROTECTION FEATURES
Low Voltage Protection: when the battery is in discharged condition, the inverter will shut down, at the same
time, an alarm will sound and the indicator light will turn on.
Over-voltage protection: when the input voltage exceeds rated voltage, the inverter will shut down, at the same
time, an alarm will sound and the indicator light will turn on. A substantial excess of the rated voltage, for
example, at 100V on a 24V inverter will destroy the inverter!
Reverse polarity protection: when the inverter is connected reversely, inverter’s fuse will blow out to protect
the inverter. The DC input side with MOSFET protection will not work.
You have to replace all burnt fuses.
Overload protection: when the continuous draw exceeds rated Watts, the inverter will shut down, at the same
time, an alarm will sound and the indicator light will turn on.
Short circuit protection: when the output side is short circuited, the inverter will shut down, an alarm will sound
and the indicator light will turn on.
Temperature control: If the temperature in the unite reaches 45°C the fan will start and cool down the device.
Over-temperature protection:when the inside temperature is over 75°, the inverter will shut down, an alarm
will sound and the indicator light will turn on.
17. SERVICE ENVIRONMENT
Ambient temperature:-20~+50℃
Storage temperature:-40~+85℃
Relative humidity: 0~85% Non condensing
18. PROBLEM CAUSES
PROBLEM POSSIBLE CAUSE SOLUTION
The inverter is switched on
but the LED does not work.
No response. No alarm.
Open circuit. No DC input.
Fuse faulty.
1. Check entry circuit continuity
2. Check that the battery fuse is right.
3. Check if all circuit connections are correct.
4. Check the on/off button wiring.
The inverter is switched on
and the LED works. No AC
output. No alarm.
Reversed of polarity
connection on input side
and internal fuses have
been burnt.
1. Check and correct the polarity of input connections and
replace the internal fuse. (NOTE: Reversing the polarity may
cause irreversible damage to the circuit)
Unusual Low output AC
voltage
Poor battery. Internal
MOSFET faulty. Drive
circuit faulty.
1. Reverse the potentiometer on drive panel to get right
output voltage.
2. Ensure enough and full battery power..
3. Contact the technical support.
The alarm sounds 1 (2) time
per time, after 2 seconds,
same beeps again. (Without
any load)
Poor battery. Connection
cable is too thin or too
long.
1. Ensure enough and full battery power.
2. Use the original cable.

COPYRIGHT©EDECOA, ALL RIGHT RESERVED,PSW-EU-V2.7------English
14 / 15
The alarm sounds 1 time per
time, after 2 seconds, same
beeps again.
The input voltage is very
low. DC12V inverter: 10-
10.5V DC24V inverter: 20-
21V
1. Ensure enough and full battery power.
2. Check that the battery cables are suitable for transporting
the DC voltage. Use a thicker or shorter cable.
3. Setting DC input circuit connections
The alarm sounds 2 times
per time, after 2 seconds,
same beeps again.
The input voltage is too
low and the inverter stop
working.
1. Ensure enough and full battery power.
2. Check that the battery cables are suitable for transporting
the DC voltage. Use a thicker or shorter cable.
3. Checking DC input circuit connections.
The alarm sounds 3 times
per time, after 2 seconds,
same beeps again.
The input voltage is too
high. DC12 inverter:
higher than 15.5V;DC24V
inverter: higher than 30V
1. Check that the voltage at the input DC terminals does not
exceed 15v
2. Make sure that the maximum voltage of the battery
controller does not supply voltages higher than 15v(30V)
3. Check that we are not using a panel or wind turbine not
regulated for battery charging
The alarm sounds 5 times
per time, after 2 seconds,
same beeps again. (The
alarm is beeping
repeatedly)
The load AC exceeds the
nominal power by 120%.
Short circuit in
connection.
1. Disconnect the inverter
2. Disconnect the load
3. Reduce load
4. Connect the appliance first, turn on the inverter switch
after turning on the appliance switch
The alarm sounds 4 times
per time, after 2 seconds,
same beeps again.
Inverter overheating Check that the fan is working correctly, Try again when the
inverter has been cool down.
Got 115VAC or so while
testing inverter's ground
wire and Neutral line ?
This voltage is an
electromagnetic induction
voltage, there is no
current leakage.
This is normal. Inverter output communication does not
distinguish hotline and neutral line, if you need to distinguish
the hotline and neutral line, please contact customer service
or after-sales technology.
10. IMPROPERUSE OF POWER INVERTER
1. Reverse polarity: For the models which have reverse polarity protection, inverter's fuse will blow out to protect the
other part inside the inverter when the inverter is connected reversed. It is possible to damage the part of the positive
and negative terminals due to high current after a short circuit. It will not affect the normal use after changing the fuse.
For the model which is not equipped with reverse polarity protection, it is possible that the electrolytic capacitor and
the Mosfet will burn out. When this occurs, a crack sound can be heard and smoke will be seen coming out.
2. When the input voltage exceeds the allowable voltage range of the inverter, the electrolytic capacitor inside the
inverter will burn out. In this case, a crack sound can be heard and smoke will be seen coming out.
3. Heavy overload. The overload protection power of the inverter is 10% higher than the rated Watts, mainly used to
start some appliances which require high start current. It doesn't support a long-term use. If customer uses the inverter
for long period of overload, it may cause aging of electronic parts and rapid increase of machine temperature. In more
serious cases, the electrolytic capacitor inside the inverter will burn out. If so, a crack sound can be heard and smoke
will be seen coming out.
4. The power inverter is used outdoor during rainy days or when water gets into the inverter. Because the inverter is
not waterproof, water entering any electronic part will cause short circuit and corrosion of such electronic parts.
Failure to dry after water entry will cause the electronic components to burn. When this occurs, a crack sound will be
heard and smoke will be seen.

COPYRIGHT©EDECOA, ALL RIGHT RESERVED,PSW-EU-V2.7------English
15 / 15
5. The inverter output socket or terminal can only be connected to the appliance with the matching voltage. If the
customer connects the 110-120V appliance to the 230V inverter outlet, it may cause the appliance to burn out.6. The
AC output can only be connected to the electrical appliances. If connected to grid or generator, it may burn electronic
components. When this happens, a crack sound will be heard and smoke will be seen.
Should any of above cases occur here is the proper operation: first turn the inverter off; then disconnect the battery
cable; finally disconnect the appliances when smoke dissipates. Please feel free to contact Customer Service for
technical guide or repair service. (When the part in the inverter burns out, a crack sound will always be heard and
smoke seen. Please keep calm and follow the step above. Attention: please don't use water to irrigate the inverter or it
will cause more loss.)
19. DISPOSAL
Do not dispose the product in the household waste. Please dispose it according to the disposal regulations for electronic
waste in your country.
20. WARRANTY
Warranty for the product is one year starting from the date of purchase.
21. DISCLAIMER OF WARRANTIES
By damage of the unit in case of faulty installation, incorrect connection, misuse or abuse of the equipment will void the
warranty.
Incorrect repairs by unauthorized persons / workshops on the unit also lead to loss of warranty.
22. COMPENSATION
If not satisfied with the product, the product can be replaced within 7days (from date of delivery). When the casing or
packaging of the products is damaged, it will not be replaced for free.
Manufacturer:Chang Tian Electrical Technology Co., Ltd
Address: HaiXiaDaSha 502WushigangGongYeQu, DongchengDistrict,DongGuanCity,GuangDong Province,52300,China.
Email: info@edecoa.com Designed in Germany, Made in China
visit our official website for more information
Other manuals for DPP10
1
This manual suits for next models
6
Table of contents
Other EDECOA Inverter manuals
Popular Inverter manuals by other brands

Black Diamond Equipment
Black Diamond Equipment BD100619 Operator's manual

LEGRAND
LEGRAND WIREMOLD XSOLARCS installation instructions
SolaX Power
SolaX Power X1 Series Quick installation guide

Hoymiles
Hoymiles HM-300 user manual
Sincro
Sincro EP260L Use and maintenance manual
Solplanet
Solplanet ASW H-T1 Series user manual
