Eden ED-7005 User manual

ED-7005
EN | Instruction manual
NL | Gebruiksaanwijzing
FR | Mode d’emploi
DE | Bedienungsanleitung
ES | Manual de usuario
PT | Manual de utilizador
IT | Manuele utente
SV | Bruksanvisning
PL | Instrukcja obsługi
CS | Návod na použití
SK | Návod na použitie
MIN
°C

MIN
°C
PARTS DESCRIPTION / ONDERDELENBESCHRIJVING / DESCRIPTION DES PIÈCES /
TEILEBESCHREIBUNG / DESCRIPCIÓN DE LAS PIEZAS / DESCRIÇÃO DOS
COMPONENTES / DESCRIZIONE DELLE PARTI / BESKRIVNING AV DELAR /
OPIS CZĘŚCI / POPIS SOUČÁSTÍ / POPIS SÚČASTÍ
1
2
3
4
6
5

Instruction manual
3
SAFETY
• By ignoring the safety instructions the
manufacturer cannot be held responsible for
the damage.
• If the supply cord is damaged, it must be
replaced by the manufacturer, its service
agent or similarly qualified persons in order
to avoid a hazard.
• Never move the appliance by pulling the
cord and make sure the cord cannot
become entangled.
• The appliance must be placed on a stable,
level surface.
• This appliance is only to be used for
household purposes and only for the
purpose it is made for. In worst case the
food can catch fire. (i.e. do not use more
than one tea spoon of oil, no meat that will
release to much grease or water intended
for boiling foods.
• This appliance shall not be used by children
aged less than 8 years. This appliance can
be used by children aged from 8 years and
above and persons with reduced physical,
sensory or mental capabilities or lack of
experience and knowledge if they have been
given supervision or instruction concerning
use of the appliance in a safe way and
understand the hazards involved. Children
shall not play with the appliance. Keep the
appliance and its cord out of reach of
children aged less than 8 years. Cleaning
and user maintenance shall not be made by
children unless older than 8 and supervised.
• To protect yourself against an electric shock,
do not immerse the cord, plug or appliance
in the water or any other liquid.
• The appliance is to be connected to a
socket-outlet having an earthed contact (for
class I appliances).
• WARNING: If the surface is cracked, switch
off the appliance to avoid the possibility of
an electric shock.
• Keep the appliance and its cord out of reach
of children less than 8 years.
• The temperature of accessible surfaces may
be high when the appliance is operating.
• The appliance is not intended to be operated
by means of an external timer or a separate
remote-control system.
EN

Instruction manual
4
• Surfaces indicated with this logo
are liable to get hot during use.
• In order to prevent disruptions of the airflow
do not put anything on top of the appliance
and make sure there is always 10 centimeter
of free space around the appliance.
• After the baking process the appliance
needs to cooldown, this cooling process will
activate automatically when the timer is
done. Avoid to unplug the appliance from the
net socket before the cooling process is
finished because the remaining hot air can
damage the appliance.
• This appliance is intended to be used in
household and similar applications such as:
• Staff kitchen areas in shops, offices and
other working environments.
• By clients in hotels, motels and other
residential type environments.
• Bed and breakfast type environments.
• Farm houses.
SAVE THESE INSTRUCTIONS
HOUSEHOLD USE ONLY
Cleaning and maintenance
• Before cleaning, unplug the appliance and
wait for the appliance to cool down.
• Never immerse the device in water or any
other liquid. The device is not dishwasher
proof.
• Clean the pan and aeroplate (removable
grid) with hot water, some washing-up liquid
and a non-abrasive sponge. The pan and
aeroplate (removable grid) are not
dishwasher-proof.
• If dirt is stuck to the aeroplate (removable
grid) or the bottom of the pan, fill the pan
with hot water with some washing-up liquid.
Put the aeroplate (removable grid) in the pan
and let the pan and the grid soak for about
10 minutes.
• Clean the appliance with a damp cloth.
Never use harsh and abrasive cleaners,
scouring pad or steel wool, which damages
the appliance.
PARTS DESCRIPTION
1. Air inlet
2. Display
3. Removable grid (do not use without this grid)

Instruction manual
5
4. Pan
5. Handle
6. Air outlet openings
BEFORE THE FIRST USE
• Remove all packaging material.
• Remove any stickers or labels from the appliance.
• Thoroughly clean the parts with hot water, some washing-up
liquid and a non-abrasive sponge.
• Wipe the inside and outside of the appliance with a moist cloth.
• Place the appliance on a stable, horizontal and level surface, do
not place the appliance on non-heat-resistant surfaces.
• When the device is turned on for the first time, a slight odour will
occur. This is normal, ensure adequate ventilation. This fragrance
is only temporary and will disappear soon.
• Place the removable grid in the pan properly. NOTE: do not use
the appliance without this grid.
•This is an air fryer that works on hot air. Do not fill the pan
with oil or frying fat.
•In order to prevent disruptions of the airflow do not put
anything on top of the appliance and make sure there is
always 10 centimeter of free space around the appliance.
ICON FUNCTIONS AND USE
POWER ON/
OFF
START/STOP MODE TIMER
• Press the ON/OFF icon to turn the appliance on or off or to
cancel a setting.
• Press the START/STOP icon to start or pause a program. To
stop, press the it again. The appliance will shut off after 20
seconds.
• Press the MODE icon to select between programmed mode.
There are 8 frying programs modes included: [PEREHEAT]
[FRIES] [MEAT] [CHICKEN DRUM STICKS] [SHELLFISH],
[ROASTBEEF] [FISH] and [BAKE]. Press the MODE icon
followed by the desired frying program then press START.
Using the Aero fryer
• Put the mains plug in an earthed wall socket.
• Carefully pull the pan out of the Aero fryer.
• Put the ingredients in the pan, make sure the removable grid is
placed in the pan before you put in the ingredients.
• Slide the pan back into the Aero fryer.
• Do not touch the pan during and sometime after use, as it gets
very hot. Only hold the pan by the handle.
• Press the POWER button to turn on the appliance then choose
between using manual input or a programmed setting.
EN

Instruction manual
6
Manual settings for time and temperature
Time 1-60 minutes
• The time can be adjusted with the timer control icons. Press time
UP or time DOWN icons to increase or decrease the frying time
by one minute. Press and hold one of the icons to adjust the time
faster. You can set the timer between 1 and 60 minutes. When
using the timer pressing the time UP or DOWN icons will increase
or decrease the time by 30 minutes.
Temperature 80°C - 200°C
• The temperature can be adjusted with the temperature control
icons Press temperature UP or DOWN icon to increase or
decrease the temperature by 5 degrees. Press and hold one of
the buttons to adjust the temperature faster. You can set the
temperature between 80 and 200 degrees.
• When the desired time and temperature are set, press the START
icon to start frying.
Min-
max
amount
(g)
Time
(min)
Temperature
(°C)
Shak
e
Extra
information
Fries 300-900 10-18 200 shake
Homemad
e fries
300-800 16-20 200 shake add 1/2 a
tablespoon
of oil
Frozen fish
fingers
100-400 6-10 200 Use oven
ready
Drumsticks 100-500 18-22 180
Hamburger 100-500 13-15 180
Spring rolls 100-400 8-10 200 shake Use oven
ready
Cake 300 20-25 160 Use baking
tin
Quiche 300 20-25 160 Use baking
tin
Muffins 300 15-18 200 Use baking
tin
Programmed modes
# Symbol Program Temperature
(°C)
Time (min)
1 Preheat 190 3
2 Aero fryer
fries
200 20
3 Meat 180 10

Instruction manual
7
4 Chicken 200 20
5 Shellfish/
Crustaceans
180 12
6 Roast beef 180 23
7 Fish 180 15
8 Bake 170 16
• Press the MODE icon. The first program and the start icon will
flash repeatedly.
• Keep pressing the MODE icon until the desired program flashes.
• Press the START icon to start the operation. The Aero fryer will
start the corresponding program.
• To cancel any program press the POWER button once. After this
you can select another function. It is also possible to adjust the
chosen program by changing the time and temperature.
• When you pull out the pan during the frying process, the device
will shut off automatically within 5 seconds. When you reinsert
the device, the program will resume.
• Excess oil from the ingredients is collected on the bottom of the
pan.
• Some ingredients require shaking halfway through the
preparation time. To shake the ingredients, pull the pan out of the
appliance by the handle and shake it. Then slide the pan back
into the Aero fryer.
• When you hear the timer beep, the set preparation time has
elapsed. The device will shut off after 20 seconds. Pull the pan
out of the appliance and place it on a heat resistant surface.
• Check if the ingredients are ready. If the ingredients are not
ready yet, simply slide the pan back into the appliance and set
the timer to a few extra minutes.
Using the timer
• Select the desired program or manually input the desired
settings.
• The time and temperature of that program will be displayed.
• To set the starting time for the chosen program press the TIMER
icon on the bottom row of the display.
EN

Instruction manual
8
• A small timer icon will appear near the time indication display.
The timer, time, time up, and time down indicators will flash 3
times.
• Use the Time UP or DOWN icons to set the timing. The timer can
be set to start the program within 30 minutes to 12 hours.
• Pressing the time UP or DOWN icons while in the TIMER mode,
the time will increase or decrease the time by 30 minutes.
• Press START. The timer icon will flash and the countdown to start
will be displayed.
• The program will begin when the countdown is finished.
• During the countdown you can revert to working mode by
pressing START. The display will show the programmed settings.
Press the TIMER icon again to revert to the set timer.
Tips
• Shaking smaller ingredients halfway during the preparation time
optimizes the end result and can help prevent unevenly fried
ingredients.
• Add some oil to fresh potatoes for a crispy result. Fry your
ingredients in the air fryer within a few minutes after you've added
the oil.
• Do not prepare extremely greasy ingredients such as sausages in
the air fryer.
• Place a baking tin in the pan if you want to bake a cake or quiche
or if you want to fry fragile ingredients or filled ingredients.
• You can also use the aero fryer to reheat ingredients. To reheat
ingredients, set the temperature to 150°C for up to 10 minutes.
ENVIRONMENT
This appliance should not be put into the domestic garbage at
the end of its durability, but must be offered at a central point for the
recycling of electric and electronic domestic appliances. This symbol
on the appliance, instruction manual and packaging puts your
attention to this important issue. The materials used in this appliance
can be recycled. By recycling of used domestic appliances you
contribute an important push to the protection of our environment. Ask
your local authorities for information regarding the point of
recollection.
Support
You can find all available information and spare parts at
www.edenappliances.com!

Gebruiksaanwijzing
9
VEILIGHEID
• Als u de veiligheidsinstructies negeert, kan
de fabrikant niet verantwoordelijk worden
gehouden voor de mogelijke schade.
• Als het netsnoer beschadigd is, moet het
worden vervangen door de fabrikant, de
onderhoudsmonteur van de fabrikant of door
personen met een soortgelijke kwalificatie
om gevaar te voorkomen.
• Verplaats het apparaat nooit door aan het
snoer te trekken en zorg dat het snoer niet
in de war kan raken.
• Het apparaat moet op een stabiele, vlakke
ondergrond worden geplaatst.
• Dit apparaat is uitsluitend voor huishoudelijk
gebruik en voor het doel waar het voor
bestemd is. In het ergste geval kan het
voedsel vlam vatten. (Gebruik niet meer dan
één theelepel olie, geen vlees dat te veel vet
vrijgeeft of water dat bedoeld is om voedsel
te koken.)
• Dit apparaat mag niet worden gebruikt door
kinderen jonger dan 8 jaar. Dit apparaat kan
worden gebruikt door kinderen vanaf 8 jaar
en door personen met verminderde
lichamelijke, zintuiglijke of geestelijke
vermogens of gebrek aan de benodigde
ervaring en kennis indien ze onder toezicht
staan of instructies krijgen over hoe het
apparaat op een veilige manier kan worden
gebruikt alsook de gevaren begrijpen die
met het gebruik samenhangen. Kinderen
mogen niet met het apparaat spelen. Houd
het apparaat en het netsnoer buiten bereik
van kinderen jonger dan 8 jaar. Laat
reiniging en onderhoud niet door kinderen
uitvoeren, tenzij ze ouder zijn dan 8 jaar en
onder toezicht staan.
• Dompel het snoer, de stekker of het
apparaat niet onder in water of andere
vloeistoffen om elektrische schokken te
voorkomen.
• Het apparaat moet worden aangesloten op
een geaard stopcontact (voor klasse I-
apparaten).
• WAARSCHUWING: Indien het oppervlak is
gebarsten, schakel dan het apparaat uit om
elektrische schokken te voorkomen.
• Houd het apparaat en het netsnoer buiten
bereik van kinderen jonger dan 8 jaar.
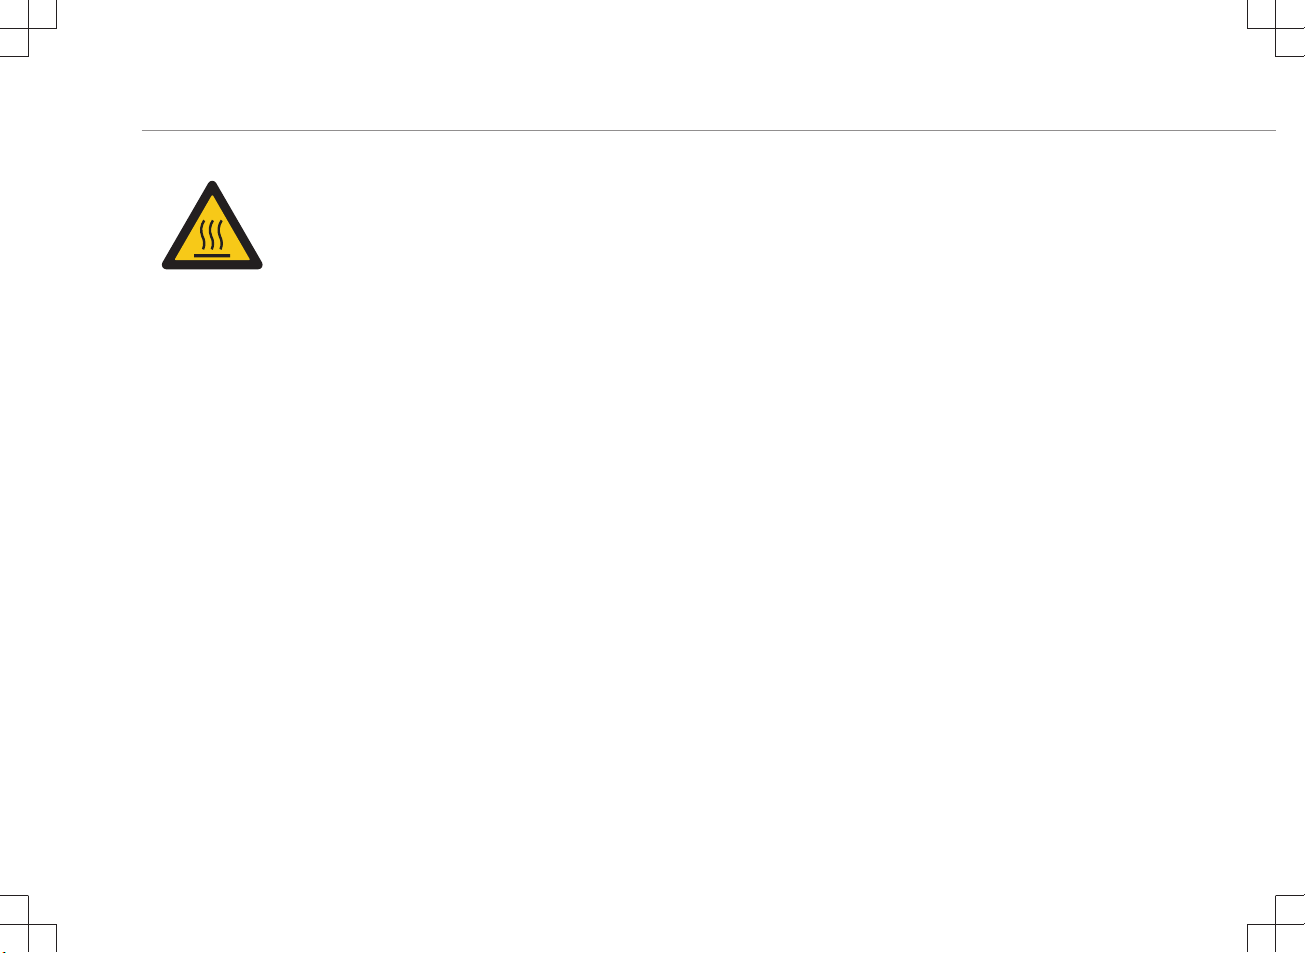
• De temperatuur van de toegankelijke
oppervlakken kan hoog zijn wanneer het
apparaat in gebruik is.
NL

Gebruiksaanwijzing
10
• Het apparaat is niet bedoeld om bediend te
worden met behulp van een externe timer of
een afzonderlijk afstandbedieningssysteem.
• Oppervlakken gemarkeerd met dit
logo kunnen heet worden tijdens gebruik.
• Plaats niets boven op het apparaat en zorg
ervoor dat er altijd 10cm vrije ruimte rondom
het apparaat is om verstoring van de
luchtstroom te voorkomen.
• Na het bakken moet het apparaat afkoelen.
Dit koelproces wordt automatisch
geactiveerd na afloop van de timer.
Verwijder de stekker pas na voltooiing van
het koelproces uit het stopcontact, omdat de
resterende hete lucht het apparaat kan
beschadigen.
• Dit apparaat is bedoeld voor huishoudelijk en
soortgelijk gebruik, zoals:
• Personeelskeukens in winkels, kantoren en
andere werkomgevingen.
• Door gasten in hotels, motels en andere
residentiële omgevingen.
• Bed&Breakfast-type omgevingen.
• Boerderijen.
BEWAAR DEZE INSTRUCTIES
ALLEEN VOOR HUISHOUDELIJK GEBRUIK
Reiniging en onderhoud
• Verwijder voor reiniging de stekker uit het
stopcontact en wacht tot het apparaat is
afgekoeld.
• Dompel het apparaat nooit onder in water of
andere vloeistoffen. Het apparaat is niet
vaatwasserbestendig.
• Reinig de pan en aero-plaat (het
verwijderbare rooster) met heet water, wat
afwasmiddel en een niet-schurende spons.
De pan en aero-plaat (het verwijderbare
rooster) zijn niet vaatwasserbestendig.
• Als er resten vastzitten op de aero-plaat (het
verwijderbare rooster) of de onderkant van
de pan, vult u de pan met heet water en wat
afwasmiddel. Plaats de aero-plaat (het
verwijderbare rooster) in de pan en laat de
pan en het rooster ongeveer 10minuten
weken.

Gebruiksaanwijzing
11
• Maak het apparaat schoon met een vochtige
doek. Gebruik nooit krassende en
schurende schoonmaakmiddelen,
schuursponzen of staalwol, aangezien deze
het apparaat kunnen beschadigen.
ONDERDELENBESCHRIJVING
1. Luchtinlaat
2. Display
3. Verwijderbaar rooster (niet gebruiken zonder dit rooster)
4. Pan
5. Handgreep
6. Luchtuitlaatopeningen
VOORAFGAAND AAN HET EERSTE GEBRUIK
• Verwijder alle verpakkingsmateriaal.
• Verwijder eventuele stickers of etiketten van het apparaat.
• Reinig de onderdelen grondig met heet water, een beetje
afwasmiddel en een niet-schurende spons.
• Reinig de binnenkant en de buitenkant van het apparaat met een
vochtige doek.
• Plaats het apparaat op een stabiele, horizontale en vlakke
ondergrond. Plaats het apparaat niet op een niet-hittebestendige
ondergrond.
• Wanneer het apparaat voor de eerste keer wordt ingeschakeld,
zal het een lichte geur afgeven. Dit is normaal. Zorg voor
voldoende ventilatie. Deze geur is slechts tijdelijk en zal spoedig
verdwijnen.
• Plaats het uitneembare rooster op de juiste wijze in de pan. LET
OP: Gebruik het apparaat niet zonder dit rooster.
•Dit is een heteluchtfriteuse die werkt op hete lucht. Vul de
pan niet met olie of frituurvet.
•Plaats niets boven op het apparaat en zorg ervoor dat er
altijd 10 centimeter vrije ruimte rondom het apparaat is om
verstoring van de luchtstroom te voorkomen.
FUNCTIES EN GEBRUIK VAN PICTOGRAMMEN
AAN/UIT STARTEN/
STOPPEN
MODUS TIMER
• Druk op het aan/uit-pictogram om het apparaat in of uit te
schakelen, of om een instelling te annuleren.
• Druk op het start/stop-pictogram om een programma te starten of
te onderbreken. Druk opnieuw op het pictogram om te stoppen.
Het apparaat wordt na 20 seconden uitgeschakeld.
NL

Gebruiksaanwijzing
12
• Druk op het moduspictogram om een van de programma's te
selecteren. Er zijn 8 bakprogramma's beschikbaar:
[VOORVERWARMEN], [FRIET], [VLEES], [KIPDRUMSTICKS],
[SCHELPDIEREN], [BRAADSTUK], [VIS] EN [TAART]. Druk op
het moduspictogram, gevolgd door het gewenste bakprogramma
en druk op het startpictogram.
De aerofryer gebruiken
• Steek de stekker in een geaard stopcontact.
• Haal de pan voorzichtig uit de aerofryer.
• Plaats de ingrediënten in de pan. Controleer voordat u de
ingrediënten in de pan doet of het uitneembare rooster is
geplaatst.
• Schuif de pan terug in de aerofryer.
• Raak de pan tijdens en enige tijd na het gebruik niet aan,
aangezien deze erg heet wordt. Houd de pan alleen vast aan de
handgreep.
• Druk op de aan/uit-toets om het apparaat in te schakelen. Kies
vervolgens handmatig de gewenste instelling of kies een
geprogrammeerde instelling.
Handmatige instellingen voor tijd en temperatuur
Tijd: 1-60minuten
• U kunt de tijd aanpassen met de pictogrammen voor
timerregeling. Druk op de omhoog- en omlaagpictogrammen voor
de tijd om de baktijd met één minuut te verlengen of verkorten.
Houd een van de pictogrammen ingedrukt om de tijd sneller aan
te passen. U kunt de timer instellen tussen de 1 en 60 minuten.
Als u de timer gebruikt, kunt u de tijd met 30minuten verlengen of
verkorten door op de omhoog- en omlaagpictogrammen voor de
tijd te drukken.
Temperatuur: 80-200°C
• U kunt de temperatuur aanpassen met de pictogrammen voor
temperatuurregeling. Druk op de omhoog- en
omlaagpictogrammen om de temperatuur met 5 graden te
verhogen of verlagen. Houd een van de toetsen ingedrukt om de
temperatuur sneller aan te passen. U kunt de temperatuur
instellen tussen de 80 en 200 graden.
• Wanneer de gewenste tijd en temperatuur zijn ingesteld, drukt u
op het startpictogram om te beginnen met bakken.
Min.-
max.
hoeveel
heid (g)
Tijd
(min.)
Temperatuur
(°C)
Schu
dden
Extra
informatie
Friet 300-900 10-18 200 schud
den
Zelfgemaa
kte friet
300-800 16-20 200 schud
den
1/2 eetlepel
olie
toevoegen
Diepvriesvi
ssticks
100-400 6-10 200 Ovenklare
producten
gebruiken
Drumsticks 100-500 18-22 180
Hamburger 100-500 13-15 180

Gebruiksaanwijzing
13
Loempia's 100-400 8-10 200 schud
den
Ovenklare
producten
gebruiken
Gebak 300 20-25 160 Bakblik
gebruiken
Quiche 300 20-25 160 Bakblik
gebruiken
Muffins 300 15-18 200 Bakblik
gebruiken
Programma's
# Symbool Programma Temperatuur
(°C)
Tijd (min.)
1 Voorverwarm
en
190 3
2 Aerofryer-friet 200 20
3 Vlees 180 10
4 Kip 200 20
5 Schelp- en
schaaldieren
180 12
6 Braadstuk 180 23
7 Vis 180 15
8 Taart 170 16
• Druk op het moduspictogram. Het eerste programma en het
startpictogram knipperen herhaaldelijk.
• Blijf op het moduspictogram drukken tot het gewenste pictogram
knippert.
NL

Gebruiksaanwijzing
14
• Druk op het startpictogram om het bakken te starten. Het
bijbehorende programma wordt gestart op de aerofryer.
• Als u een programma wilt annuleren, drukt u één keer op de aan/
uit-toets. Vervolgens kunt u een andere functie selecteren. U kunt
het gekozen programma ook wijzigen door de tijd en temperatuur
aan te passen.
• Als u de pan tijdens het frituren verwijdert, schakelt het apparaat
automatisch binnen 5 seconden uit. Als u het apparaat
terugplaatst, zal het programma hervatten.
• Onderin de pan hoopt zich overmatige olie uit de ingrediënten op.
• Sommige ingrediënten moeten halverwege de bereidingstijd
worden omgeschud. Als u de ingrediënten wilt omschudden, haalt
u de pan met de handgreep uit het apparaat en schudt u de pan.
Schuif de pan vervolgens terug in de aerofryer.
• Wanneer u het timersignaal hoort, is de ingestelde bereidingstijd
verstreken. Het apparaat wordt na 20 seconden uitgeschakeld.
Haal de pan uit het apparaat en plaats deze op een
hittebestendig oppervlak.
• Controleer of de ingrediënten klaar zijn. Als de ingrediënten nog
niet klaar zijn, schuift u de pan gewoon terug in het apparaat en
stelt u een paar extra minuten in op de timer.
De timer gebruiken
• Selecteer het gewenste programma of kies handmatig de
gewenste instellingen.
• De tijd en temperatuur van het desbetreffende programma
worden weergegeven.
• Als u de begintijd voor het gekozen programma wilt instellen,
drukt u op het timerpictogram op de onderste rij van het display.
• Er wordt een klein timerpictogram weergegeven in de buurt van
het tijdindicatiedisplay. De timer, tijd omhoog, tijd omlaag en het
tijddisplay knipperen drie keer.
• Gebruik de omhoog- en omlaagpictogrammen voor de tijd om de
timer in te stellen. De timer kan worden ingesteld om het
programma over 30 minuten tot 12 uur te laten starten.
• Door op de omhoog- en omlaagpictogrammen voor de tijd te
drukken in de timermodus, wordt de tijd met 30minuten verlengd
of verkort.
• Druk op het startpictogram. Het timerpictogram knippert en het
aftellen tot de begintijd wordt weergegeven.
• Het programma wordt gestart wanneer het aftellen is voltooid.
• Tijdens het aftellen kunt u teruggaan naar de normale modus
door op het startpictogram te drukken. De geprogrammeerde
instellingen worden weergegeven op het display. Druk opnieuw
op het timerpictogram om terug te gaan naar de ingestelde timer.
Tips
• Het halverwege de bereidingstijd schudden van kleinere
ingrediënten verbetert het eindresultaat en kan ongelijkmatig
gefrituurde ingrediënten helpen voorkomen.
• Voeg wat olie toe aan verse aardappelen voor een krokant
resultaat. Frituur uw ingrediënten in de heteluchtfriteuse binnen
een paar minuten nadat u de olie heeft toegevoegd.
• Bereid geen extreem vette ingrediënten zoals worsten in de
heteluchtfriteuse.
• Plaats een bakblik in de pan als u een taart of quiche wilt bakken
of als u kwetsbare of gevulde ingrediënten wilt bakken.

Gebruiksaanwijzing
15
• U kunt de aerofryer ook gebruiken om ingrediënten opnieuw op
te warmen. Als u ingrediënten opnieuw wilt opwarmen, stelt u de
temperatuur gedurende 10minuten in op 150°C.
MILIEU
Dit apparaat mag aan het einde van de levensduur niet bij het
normale huisafval worden gedeponeerd, maar moet bij een speciaal
inzamelpunt voor hergebruik van elektrische en elektronische
apparaten worden aangeboden. Het symbool op het apparaat, in de
gebruiksaanwijzing en op de verpakking attendeert u hierop. De in
het apparaat gebruikte materialen kunnen worden gerecycled. Met
het recyclen van gebruikte huishoudelijke apparaten levert u een
belangrijke bijdrage aan de bescherming van ons milieu. Informeer bij
uw lokale overheid naar het inzamelpunt.
Support
Alle beschikbare informatie en gegevens over reserveonderdelen zijn
te vinden op www.edenappliances.com.
NL

Manuel d'instructions
16
SÉCURITÉ
• Si vous ignorez les consignes de sécurité, le
fabricant ne peut être tenu pour responsable
des dommages.
• Si le cordon d'alimentation est endommagé,
il doit être remplacé par le fabricant, son
réparateur ou des personnes qualifiées afin
d'éviter tout risque.
• Ne déplacez jamais l'appareil en tirant sur le
cordon et veillez à ce que celui-ci ne
s'enroule pas.
• L'appareil doit être posé sur une surface
stable et nivelée.
• Cet appareil est uniquement destiné à des
utilisations domestiques et seulement dans
le but pour lequel il est fabriqué. Dans le pire
des cas, les aliments peuvent prendre feu.
(N'utilisez pas plus d'une cuillère à café
d'huile, aucune viande pouvant diffuser trop
de graisse ou d'eau pour l'ébullition des
aliments.)
• Cet appareil ne doit pas être utilisé par des
enfants de moins de 8 ans. Cet appareil peut
être utilisé par des enfants de 8 ans ou plus
et des personnes présentant un handicap
physique, sensoriel ou mental voire ne
disposant pas des connaissances et de
l'expérience nécessaires en cas de
surveillance ou d'instructions sur l'usage de
cet appareil en toute sécurité et de
compréhension des risques impliqués. Les
enfants ne doivent pas jouer avec l'appareil.
Maintenez l'appareil et son cordon
d'alimentation hors de portée des enfants de
moins de 8 ans. Le nettoyage et la
maintenance utilisateur ne doivent pas être
confiés à des enfants sauf s'ils ont 8 ans ou
plus et sont sous surveillance.
• Afin de vous éviter un choc électrique,
n'immergez pas le cordon, la prise ou
l'appareil dans de l'eau ou autre liquide.
• Branchez l'appareil sur une prise électrique
munie d'une connexion à la terre (pour les
appareils de catégorie I).
• AVERTISSEMENT: Si la surface est
fissurée, arrêtez l'appareil pour éviter tout
risque de choc électrique.
• Maintenez l'appareil et son cordon
d'alimentation hors de portée des enfants de
moins de 8 ans.
• La température des surfaces accessibles
peut devenir élevée quand l'appareil est en
fonction.

Manuel d'instructions
17
• L'appareil n'est pas destiné à fonctionner
avec un dispositif de programmation externe
ou un système de télécommande
indépendant.
• Les surfaces indiquées par ce
logo risquent de devenir chaudes à l'usage.
• Pour éviter les perturbations du flux d'air, ne
placez rien sur l'appareil et assurez-vous de
préserver systématiquement un
dégagement de 10 cm autour de l'appareil.
• Après le processus de cuisson, l'appareil
doit refroidir. Ce processus de
refroidissement s'active automatiquement
une fois la minuterie terminée. Évitez de
débrancher l'appareil du secteur avant la fin
du processus de refroidissement. L'air
chaud résiduel risquerait d'endommager
l'appareil.
• Cet appareil est destiné à une utilisation
domestique et aux applications similaires,
notamment:
• Coin cuisine des commerces, bureaux et
autres environnements de travail.
• Hôtels, motels et autres environnements de
type résidentiel.
• Environnements de type chambre d’hôtes.
• Fermes.
CONSERVEZ CES INSTRUCTIONS
USAGE DOMESTIQUE UNIQUEMENT
Nettoyage et maintenance
• Avant le nettoyage, débranchez l'appareil et
attendez qu'il refroidisse.
• N'immergez pas l'appareil dans de l'eau ou
dans d'autres liquides. L'appareil ne sont
pas lavables au lave-vaisselle.
• Nettoyez le panier et l'aeroplate (la grille
amovible) avec de l'eau chaude, un peu de
liquide vaisselle et une éponge non
abrasive. Le panier et l'aeroplate (la grille
amovible) ne sont pas prévus pour un
lavage au lave-vaisselle.
• Si des saletés sont collées à l'aeroplate (la
grille amovible) ou au fond du panier,
remplissez le panier d'eau chaude avec du
liquide vaisselle. Mettez l'aeroplate (la grille
amovible) dans le panier et laissez les deux
tremper pendant 10minutes environ.
FR

Manuel d'instructions
18
• Nettoyez l'appareil à l'aide d'un chiffon
humide. N'utilisez jamais de nettoyant
abrasif ni de tampon à récurer ou de laine
d'acier, ce qui pourrait endommager
l'appareil.
DESCRIPTION DES PIÈCES
1. Entrée d'air
2. Écran
3. Grille amovible (ne pas utiliser sans cette grille)
4. Friteuse
5. Poignée
6. Ouvertures d'évacuation d'air
AVANT LA PREMIÈRE UTILISATION
• Retirez tout l'emballage.
• Retirez tout autocollant ou étiquette de l'appareil.
• Nettoyez soigneusement les pièces à l'eau chaude avec un peu
de liquide vaisselle et une éponge non abrasive.
• Nettoyez l'intérieur et l'extérieur de l'appareil avec un chiffon
humide.
• Placez l'appareil sur une surface stable, horizontale et de niveau
et évitez les surfaces non thermorésistantes.
• À la première mise en marche de l'appareil, une légère odeur est
perceptible. C'est normal : assurez une ventilation adéquate.
Cette odeur est seulement temporaire et disparaît rapidement.
• Placez la grille amovible correctement dans la cuve. NOTE :
n’utilisez pas l’appareil sans cette grille.
•Cette friteuse à air chaud fonctionne à l'air chaud. Ne
remplissez pas la cuve avec de l'huile ou de la graisse de
friture.
•Pour éviter les perturbations du flux d'air, ne placez rien sur
l'appareil et assurez-vous de préserver systématiquement un
dégagement de 10 cm autour de l'appareil.
FONCTION ET UTILISATION DES ICÔNES
ALLUMÉ/
ÉTEINT
MARCHE/
ARRÊT
MODE MINUTERIE
• Appuyez sur l'icône ALLUMÉ/ÉTEINT pour allumer ou éteindre
l'appareil, ou annuler un réglage.
• Appuyez sur l'icône MARCHE/ARRÊT pour démarrer ou
interrompre un programme. Pour arrêter un programme, appuyez
une nouvelle fois sur l'icône. L'appareil s'éteint après
20secondes.
• Appuyez sur l'icône MODE pour sélectionner un programme.
L'appareil propose 8programmes de cuisson:
[PRÉCHAUFFAGE], [FRITES], [VIANDE], [PILONS DE

Manuel d'instructions
19
POULET], [FRUITS DE MER], [ROSBIF], [POISSON] et
[GÂTEAU]. Appuyez sur l'icône MODE puis sur le programme de
cuisson souhaité, puis appuyez sur MARCHE.
Utilisation de l'Aerofryer
• Branchez la fiche secteur dans une prise murale reliée à la terre.
• Retirez avec précaution le panier de l'Aerofryer.
• Placez les ingrédients dans la cuve en vous assurant que la grille
amovible est en place avant de le faire.
• Remettez le panier en place en le faisant glisser dans l'appareil.
• Ne touchez pas le panier pendant et un certain moment après
son utilisation, car il devient très chaud. Ne tenez le panier que
par la poignée.
• Appuyez sur le bouton d'alimentation pour allumer l'appareil, puis
choisissez entre un réglage manuel ou un programme de
cuisson.
Réglages manuels de la durée et de la température
Durée de1 à 60minutes
• La durée de cuisson peut être réglée à l'aide des icônes de
réglage de la minuterie. Appuyez une fois sur l'icône
d'augmentation ou de diminution de la minuterie pour augmenter
ou réduire le temps de cuisson d'une minute. Appuyez sur une
icône et laissez le doigt appuyé pour régler plus rapidement la
durée. Vous pouvez régler la minuterie de 1 à 60 minutes.
Lorsque vous utilisez la minuterie, appuyer sur l'icône
d'augmentation ou de diminution de la minuterie augmente ou
réduit la durée de 30minutes.
Température 80°C - 200°C
• La température peut être ajustée avec les icônes de réglage de
la température. Appuyez sur l'icône d'augmentation ou de
diminution de la température pour augmenter ou réduire la
température de 5degrés. Appuyez sur une icône et laissez le
doigt appuyé pour régler plus rapidement la température. Vous
pouvez régler la température entre 80 et 200 degrés.
• Après avoir réglé la durée et la température souhaitées, appuyez
sur l'icône MARCHE pour lancer la cuisson.
Quantit
é min-
max (g)
Durée
(min)
Température
(°C)
Seco
uer
Information
s
supplément
aires
Frites 300-900 10-18 200 secou
er
Frites
maison
300-800 16-20 200 secou
er
ajouter une
demie
cuillère à
café d'huile
Bâtonnets
de poisson
surgelés
100-400 6-10 200 Utiliser des
produits
prêts à cuire
Pilons 100-500 18-22 180
Hamburger 100-500 13-15 180
Rouleaux
de
printemps
100-400 8-10 200 secou
er
Utiliser des
produits
prêts à cuire
FR

Manuel d'instructions
20
Gâteau 300 20-25 160 Utiliser le
moule à
pâtisserie
Quiche 300 20-25 160 Utiliser le
moule à
pâtisserie
Muffins 300 15-18 200 Utiliser le
moule à
pâtisserie
Modes programmés
# Symbole Programme Température
(°C)
Durée
(min)
1 Préchauffage 190 3
2 Frites
Aerofryer
200 20
3 Viande 180 10
4 Poulet 200 20
5 Fruits de mer 180 12
6 Rosbif 180 23
7 Poisson 180 15
8 Gâteau 170 16
• Appuyez sur l'icône MODE. Le premier programme et l'icône
MARCHE se mettent à clignoter.
• Continuez d'appuyer sur l'icône MODE jusqu'à ce que le
programme souhaité clignote.
Table of contents
Languages:
Other Eden Fryer manuals
Popular Fryer manuals by other brands

Defy
Defy DAF 2244 B instruction manual

Henny Penny
Henny Penny 600 Operator's manual

Tower Hobbies
Tower Hobbies T17061BLK user manual

Falcon
Falcon F900 SERIES User, installation and servicing instructions

Linea 2000
Linea 2000 DOMO DO1061FR Instruction booklet

ULTRAFRYER
ULTRAFRYER PAR-3-H Operation instructions