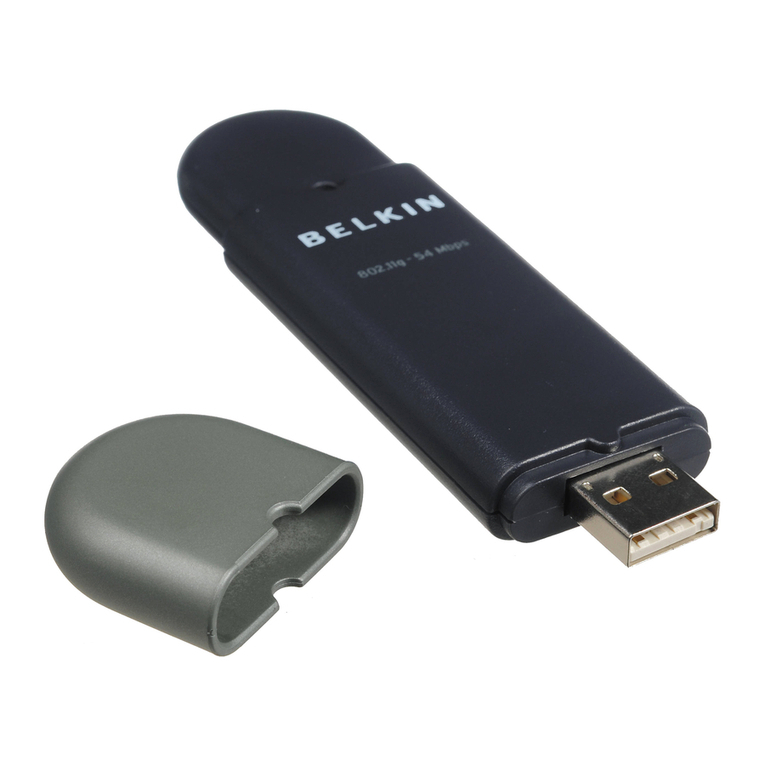
Edimax EW-7722UTn V2 User manual

EW-7722UTn V2
EW-7612UAn V2
User Manual
10-2011 / v1.0

Copyrightby Edimax Technology Co, LTD. all rights reserved. No part of this
publication may be reproduced, transmitted, transcribed, stored in a retrieval system,
or translated into any language or computer language, in any form or by any means,
electronic, mechanical, magnetic, optical, chemical, manual or otherwise, without the
prior written permission of this Company .
This company makes no representations or warranties, either expressed or implied,
with respect to the contents hereof and specifically disclaims any warranties,
merchantability or fitness for any particular purpose. Any software described in this
manual is sold or licensed "as is". Should the programs prove defective following their
purchase, the buyer (and not this company, its distributor, or its dealer) assumes the
entire cost of all necessary servicing, repair, and any incidental or consequential
damages resulting from any defect in the software. Further, this company reserves the
right to revise this publication and to make changes from time to time in the contents
here of without obligation to notify any person of such revision or changes.
The product you have purchased and the setup screen may appear slightly different
from those shown in this QIG. For more detailed information about this product, please
refer to the User Manual on the CD-ROM. The software and specifications are subject
to change without notice. Please visit our web site www.edimax.com for the update.
All rights reserved including all brand and product names mentioned in this manual
are trademarks and/or registered trademarks of their respective holders .

Federal Communication Commission
Interference Statement
This equipment has been tested and found to comply with the limits for a Class B
digital device, pursuant to Part 15 of FCC Rules. These limits are designed to
provide reasonable protection against harmful interference in a residential installation.
This equipment generates, uses, and can radiate radio frequency energy and, if not
installed and used in accordance with the instructions, may cause harmful
interference to radio communications. However, there is no guarantee that
interference will not occur in a particular installation. If this equipment does cause
harmful interference to radio or television reception, which can be determined by
turning the equipment off and on, the user is encouraged to try to correct the
interference by one or more of the following measures:
1. Reorient or relocate the receiving antenna.
2. Increase the separation between the equipment and receiver.
3. Connect the equipment into an outlet on a circuit different from that to which the
receiver is connected.
4. Consult the dealer or an experienced radio technician for help.
FCC Caution
This device and its antenna must not be co-located or operating in conjunction with
any other antenna or transmitter.
This device complies with Part 15 of the FCC Rules. Operation is subject to the
following two conditions: (1) this device may not cause harmful interference, and (2)
this device must accept any interference received, including interference that may
cause undesired operation.
Any changes or modifications not expressly approved by the party responsible for
compliance could void the authority to operate equipment.
Federal Communication Commission (FCC) Radiation Exposure Statement
This EUT is compliance with SAR for general population/uncontrolled exposure limits
in ANSI/IEEE C95.1-1999 and had been tested in accordance with the measurement
methods and procedures specified in OET Bulletin 65 Supplement C.
The equipment version marketed in US is restricted to usage of the channels 1-11
only.
R&TTE Compliance Statement
This equipment complies with all the requirements of DIRECTIVE 1999/5/EC OF THE
EUROPEAN PARLIAMENTAND THE COUNCIL of March 9, 1999 on radio
equipment and telecommunication terminal Equipment and the mutual recognition of
their conformity (R&TTE)
The R&TTE Directive repeals and replaces in the directive 98/13/EEC
(Telecommunications Terminal Equipment and Satellite Earth Station Equipment) As
of April 8, 2000.
Safety
This equipment is designed with the utmost care for the safety of those who install and
use it. However, special attention must be paid to the dangers of electric shock and
static electricity when working with electrical equipment. All guidelines of this and of
the computer manufacture must therefore be allowed at all times to ensure the safe
use of the equipment.
EU Countries Intended for Use
The ETSI version of this device is intended for home and office use in Austria,
Belgium, Denmark, Finland, France, Germany, Greece, Ireland, Italy, Luxembourg,
the Netherlands, Portugal, Spain, Sweden, and the United Kingdom.
The ETSI version of this device is also authorized for use in EFTA member states:
Iceland, Liechtenstein, Norway, and Switzerland.
EU Countries Not intended for use
None.

CONTENTS
1 INTRODUCTION ....................................................................................1
1.1 Features ......................................................................................................... 1
1.2 Specifications.................................................................................................. 1
1.3 Package Contents .......................................................................................... 2
2 INSTALLATION PROCEDURE................................................................3
3 CONFIGURATION UTILITY .................................................................. 17
3.1 Utility Overview............................................................................................. 18
3.2 Available Network......................................................................................... 20
3.3 General......................................................................................................... 21
3.4 Profile ........................................................................................................... 23
3.4.1 Configure the Profile ............................................................. 24
3.5 Status............................................................................................................ 29
3.6 Statistics ....................................................................................................... 30
3.7 Wi-Fi Protect Setup (WPS)........................................................................... 31
3.8 Software AP.................................................................................................. 35
3.8.1 AP Properties Setting ............................................................ 37
3.8.2 AP Advanced ........................................................................ 40
3.8.3 AP Statistics.......................................................................... 41
3.8.4 SoftAP .................................................................................. 42
4 TROUBLESHOOTING .......................................................................... 43

1
1 Introduction
Thank you for purchasing this high-speed wireless network card! Excepting common
wireless standards 802.11b/g, this wireless network card is also able to access
802.11n wireless networks - data transfer rate is 300Mbps!
For WLAN security issues, this adapter supports 64/128-bit WEP data encryption that
protects your wireless network from eavesdropping. It also supports WPA (Wi-Fi
Protected Access) feature technology. Client users are required to authorize before
accessing to APs or AP Routers, and the data transmitted in the network is
encrypted/decrypted by a dynamically changed secret key. Furthermore, this adapter
supports WPA2 function, WPA2 provides a stronger encryption mechanism through
AES (Advanced Encryption Standard), which is a requirement for some corporate and
government users.
This adapter is cost-effective, together with the versatile features; it is the best
solution for you to build your wireless network.
1.1 Features
Work with 802.11b/g/n wireless network devices.
High-speed transfer data rate - up to 300 Mbps.
Supports Green WLAN to reduce power consumption.
Supports hardware/software WPS button
High throughput supports multi-media data bandwidth requirement.
Support 64/128-bit WEP Data Encryption, WPA, WPA2.
Automatic fallback increases data security and reliability.
Supports the most popular operating system: Windows XP/Vista/7.
Supports USB 2.0 interface.
1.2 Specifications
Standard: IEEE 802.11b/g/n
Interface: USB 2.0 Type A
Frequency Band: 2.4000 ~ 2.4835GHz (Industrial Scientific Medical Band)
Data Rate:
11b: 1/2/5.5/11Mbps
11g: 6/9/12/24/36/48/54Mbps
11n (20MHz): MCS0-15 (up to 150Mbps)
11n (40MHz): MCS0-15 (up to 300Mbps)
Security: 64/128-bit WEP Data Encryption, WPA, WPA2

2
Antenna: Chip Antenna (EW-7722UTn V2)
High-Gain 3dBi Antenna (EW-7612UAn V2)
Hardware WPS button
Drivers: Windows XP/Vista/7
LEDs: Link/Activity
Temperature: Operating 32~104°F (0 ~40°C), Storage -13~149°F (-25~65°C)
Humidity: Max. 95% (Non-Condensing)
1.3 Package Contents
Before you begin the installation, please check the items of your package. The
package should include the following items:
One USB Adapter (EW-7722UTn V2 / EW-7612UAn V2)
One USB Cable
One CD (Utility / Multi-Language QIG / User‟s Manual)
One Quick Guide
If any of the above items is missing, contact your supplier as soon as possible.

3
2 Installation Procedure
Before you proceed with the installation, please notice following descriptions.
Note1: The following installation was operated under Windows XP.
(Procedures are similar for Windows Vista/7.)
Note2: If you have installed the Wireless PC Adapter driver & utility before,
please uninstall the old version first.
Hardware Installation
EW-7722UTn V2
1. Link/Activity LED (Under the case)
2. WPS Button
LED Name
Light Status
Description
Link/
Activity
Off
No wireless network card is installed.
On
Solid light 5 seconds means WPS connection is
established successfully.
Blinking
Wireless network card is normally installed
/Linked to a wireless access point .
Transferring or receiving data.
Fast Blinking three times per second means
WPS is activated. The network card will wait for 2
minutes to establish WPS connection.
1
2

4
EW-7612UAn V2
1. USB connector
2. Link/Activity LED (Under the case)
3. WPS Button
LED Name
Light Status
Description
Link/
Activity
Off
No wireless network card is installed.
On
Solid light 5 seconds means WPS connection
is established successfully.
Blinking
Wireless network card is normally installed
/Linked to a wireless access point /
Transferring or receiving data.
Fast Blinking three times per second means
WPS is activated. The network card will wait
for 2 minutes to establish WPS connection.
1
2
3

5
Insert the USB wireless network card into an empty USB 2.0 port of your computer
when computer is switched on .
EW-7722UTn V2
EW-7612UAn V2
Never use force to insert the card, if you feel it’s stuck, flip the card over
and try again.

6
The following message will appear on your computer, click „Cancel‟
Software Installation
This wizard can be run in Windows XP/Vista/7.
You can install the Wireless Adapter by EZMAX Setup Wizard in the CD-ROM
including in the package. The wizard is an easy and quick configuration tool for
internet connection with series process. When you start EZMAX Setup Wizard, you
will get the following welcome screen. Please choose the language to start the
configuration. The wizard will guide you to finish your network connection. We will not
provide any instruction for the EZMAX Setup Wizard here.
If you lose the CD ROM or you prefer the traditional setup procedure, please follow
the instruction as following step in user manual.

7
I. Install the Driver and Utility
If you prefer the traditional setup procedure. Please insert the installation CD to your
CD-ROM Drive, and click “Exit “to disable EZmax Wizard.
If your OS is Windows Vista/7. Please execute the “Utility \ Setup.exe “program as
follows.

8
Click “Next”to go to the next step.

9
Now you‟ll see the following message, please click „Install‟to begin the installation.
The system starts to install the driver and utility.
Click “Finish”to complete the driver and utility installation.

10
II. Connect to Wireless Access Point
A. To start configuring the adapter, double click the icon in the system tray or right click
the icon and select open configuration utility.
B. The utility of the adapter is displayed. Click “Available Network”and double-click on
the wireless access point you want to connect to.
If the wireless access point you wish to connect does not appear here, you can click
„Refresh‟ button to scan for wireless access points again; if the wireless access point
you‟re looking for still not appear, try to move the computer closer.
When the access point you‟re looking for is on the list, left-click it and then double click
it or click „Add to Profile‟
If a password (a.k.a. „Network Key‟) is required to access the wireless access point,
please input it in „Network key‟ (and input it again in „Confirm network key‟ for
confirmation). Click „OK‟ when password is properly inputted.

11
NOTE: Network security type (‘Network Authentication’and ‘Data encryption’) will be
selected automatically based on wireless access point’s security setting. It’s not required to
change these settings by yourself.
C. Input the security setting (WEP key) and click “OK”to start network connection.
All options in this page will be filled automatically according to the access point you
wish to add to profile. However, you can still modify any of them to meet your
requirement.
Profile name
You can give a name to this profile, so you can
remember its purpose easily. It can be any
phrase to help you remember.
Network Name (SSID)
The SSID (Service Set ID entifier, i.e. access
point‟s name). This field will be filled as the
access point you selected when SSID is not
hidden and grayed out. If SSID is hidden, you
have to input correct SSID you yourself.
This is a
computer-to-computer
(ad hoc) network
Check this box if you wish to connect to another
computer / network device by ad hoc method.
When not accessing to wireless access point,
you have to check this box.
Channel
Select wireless channel for ad hoc connection.
This option only appears when you‟re using ad

12
hoc connection.
Network
Authentication
Select the network authentication type from
drop-down menu. This setting must be identical
with the setting of wireless access point you with
to connect.
Data encryption
Select the data encryption type from drop-down
menu. This setting must be identical with the
setting of wireless access point you with to
connect.
ASCII / PASSPHRASE
When the encryption type is „WEP‟, it‟s required
to input a set of „passphrase‟ to connect to
wireless access point. Check „ASCII‟ or
„PASSPHRASE‟ depends on the security setting
of access point, and input it in the box; if you
select „PASSPHRASE‟ you also need to select
the length of the key.
The passphrase must be identical with the setting
of wireless access point you with to connect.
Key index
Select WEP key index. For most of access points
you can select „1‟, but please refer to the setting
of the access point.
Network key / Confirm
network key
When the encryption type is „WPA‟ or
„WPA2-PSK‟, it‟s required to input a set of
„passphrase‟ to connect to wireless access point.
Please input the same passphrase in two boxes
for confirmation.
EAP TYPE / Tunnel /
Provision Mode
When authentication type is any of 802.1X, you
have to select EAP type, tunnel, and provision
mode from dropdown menu. This setting must be
identical with your 802.1x authentication server.
Username / Identity /
Domain / Password
Please input 802.1x related authentication
information here.
Certificate
If certification is required to authenticate with
802.1x authentication server, please select a
local certificate from dropdown list.
PAC
Check this box and PAC (Privilege Access
Certificate) will be automatically selected.
Please click „OK‟ when ready.
Network card will attempt to connect to access point now, this may require few
seconds to minutes, please be patient. When the „Status‟ become „Associated‟,
your computer is connected to access point you selected. Click „Close‟ to close
configuration menu.

13
NOTE: If you connected to an access point but the connection has been dropped soon, please
check security settings and re-check password spelling.

14
* Use Windows Zero Configuration on Windows Vista:
A. For Windows Vista user, you can use Windows Zero Configuration to connect to
wireless access point.
Click „Start‟button, then click „Control Panel. Click „Network and Internet‟in Control
Panel.
B. Click „Connect to a network‟ under „Network and Sharing Center‟

15
C. Click the access point you want to use if it‟s shown, then click „Connect‟.
D. If it‟s an unnamed access point (i.e. the SSID of this wireless access point is
hidden), you‟ll be prompted to input it‟s name, and the name must be identical to
the SSID setting of the wireless access point you‟re connecting to.
Other manuals for EW-7722UTn V2
2
This manual suits for next models
1
Table of contents
Other Edimax Network Card manuals

Edimax
Edimax WAP1200 User manual

Edimax
Edimax HP-5102 User manual

Edimax
Edimax EN-9235TX-32 User manual

Edimax
Edimax EW-7612PIn V2 User manual

Edimax
Edimax LAN USB Adapter User manual

Edimax
Edimax EW-7106PC User manual

Edimax
Edimax EW-7104PC User manual

Edimax
Edimax EW-7612PIn V2 User manual

Edimax
Edimax EW-7306Pg User manual

Edimax
Edimax USB VoIP Gateway Box None User manual