Edision MULTI-FINDER User manual

User’s Guide
Satellite, Terrestrial, Cable & CCTV Testing Instrument

2
CONTENTS
►OVERVIEW .................................................... 3
►FEATURES ................................................... 3
►PRODUCT OVERVIEW ................................. 4
►PACKAGE CONTENTS ................................. 4
►FRONT PANEL KEYS .................................... 5
►FRONT PANEL LED INDICATIONS .............. 5
►TECHNICAL SPECIFICATIONS ................ 6 - 7
►OSD MENU ............................................. 8 - 12
►SAFETY REQUIREMENTS .......................... 13

3
►OVERVIEW
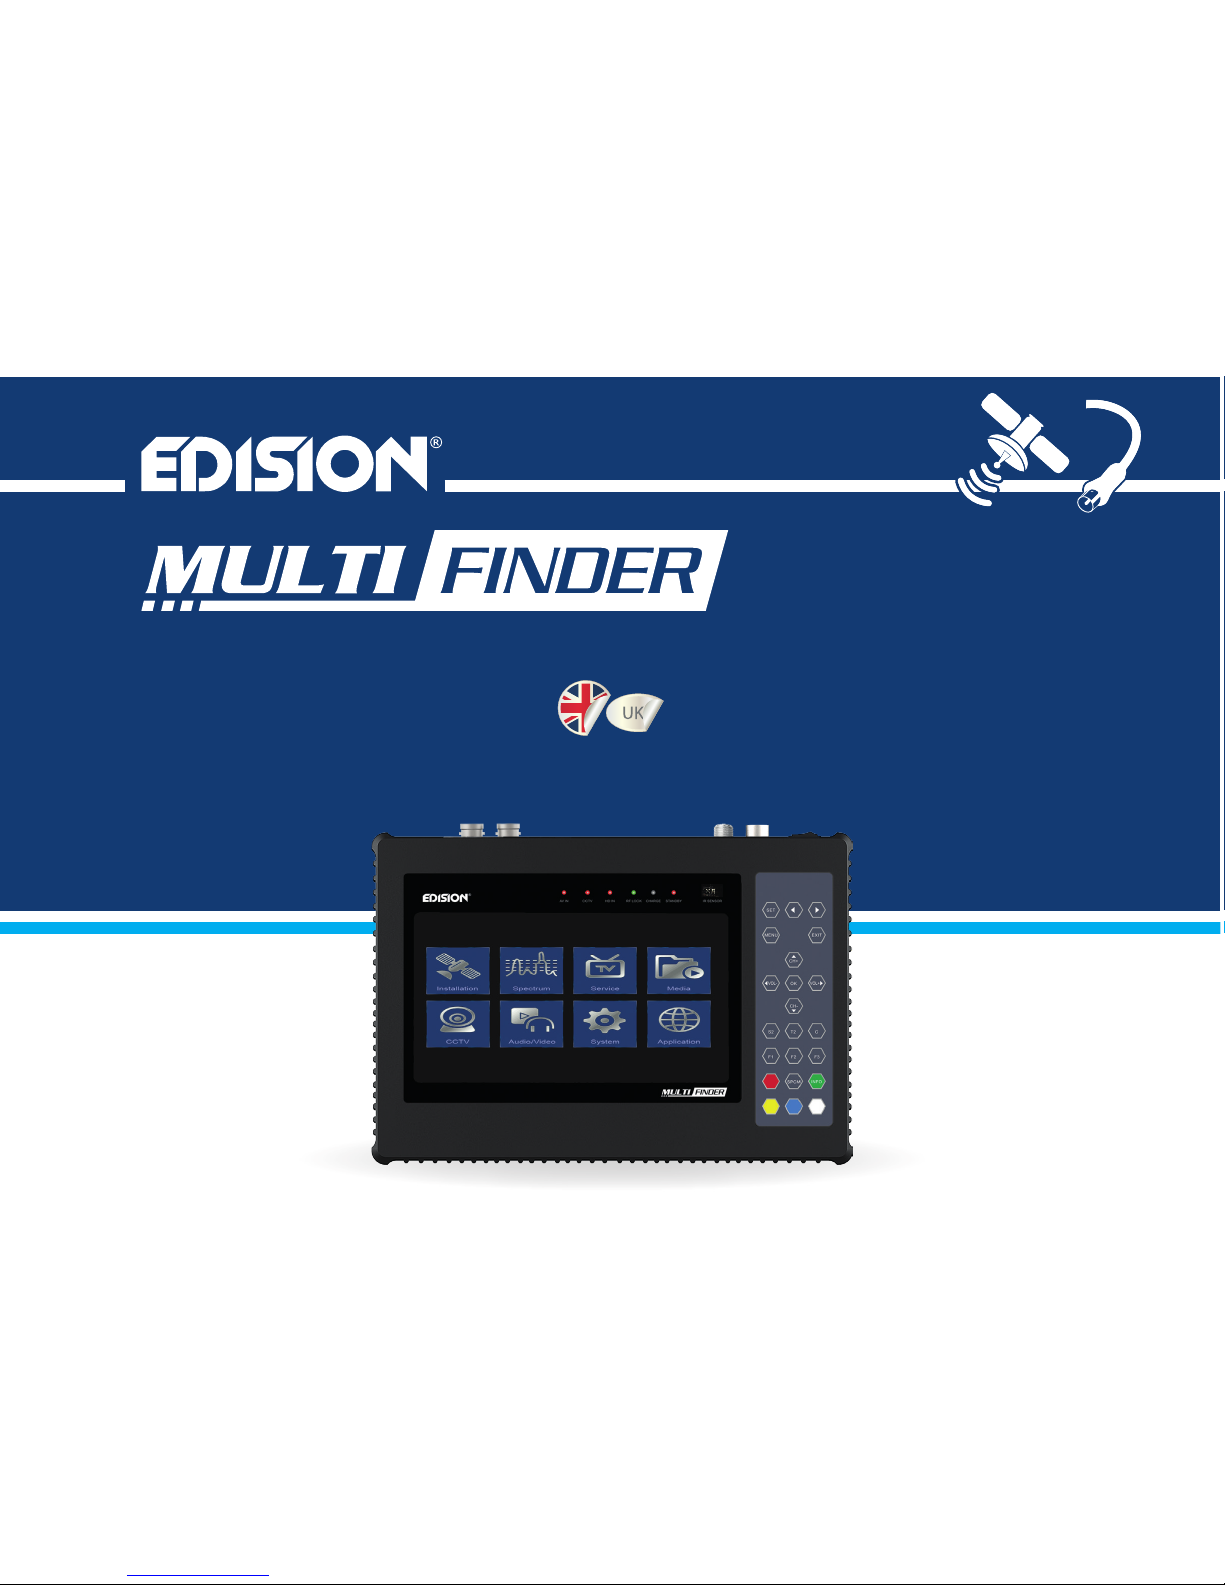
A brand new testing instrument, designed to meet the technical needs of DVB & CCTV installations. The EDISION MULTI-FINDER is a
compact, 100% portable tester, complete with all the necessary features for testing devices and signals in installations, as well as examining
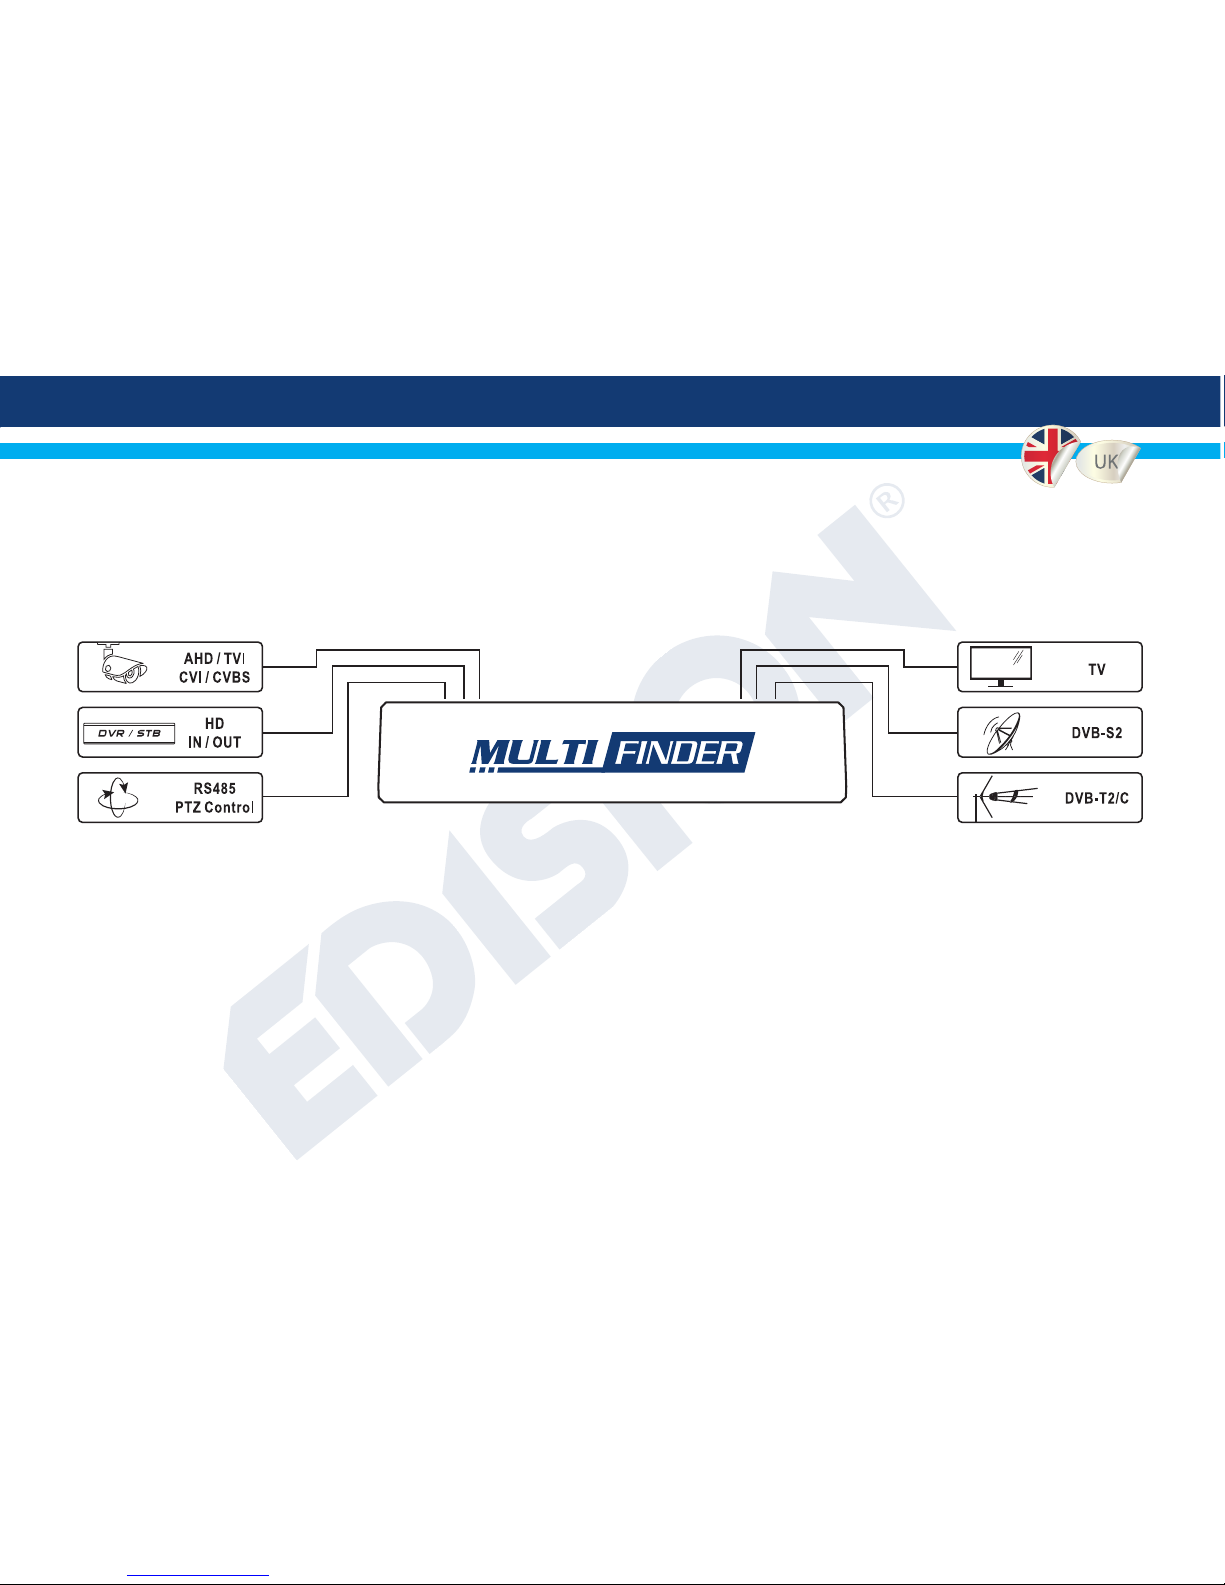
any problems in signal reception and distribution. It features H.265 TV signal decoding, HD IN/OUT ports, AV IN/OUT, BNC IN/OUT and
RS485 for PTZ Control. It covers television systems using DVB-S/S2,T/T2/C digital modulations, and the most widely used CCTV signals
such as AHD/CVI/TVI/CVBS.
►FEATURES
• All in one: Satellite, Terrestrial, Cable & CCTV Testing Instrument
• Digital Combo Finder for DVB-S2, DVB-T2 and DVB-C
• H.265 HEVC decoding support
• DiSEqC 1.0, 1.1, 1.2, USALS and Unicable
• Fast Spectrum Analyzer
• Transponder Data parsing on DVB-S/S2
• Constellation Chart on DVB-S/S2
• Azimuth, Elevation & LNB skew tilt calculator
• 6000 channels TV & Radio programmable
• Favorite Channel list editing
• CCTV Cameras support: AHD/TVI/CVI/CVBS
• DC out support: 12V/1A
• RS485 PTZ Control
• HDMI & AV input/output support
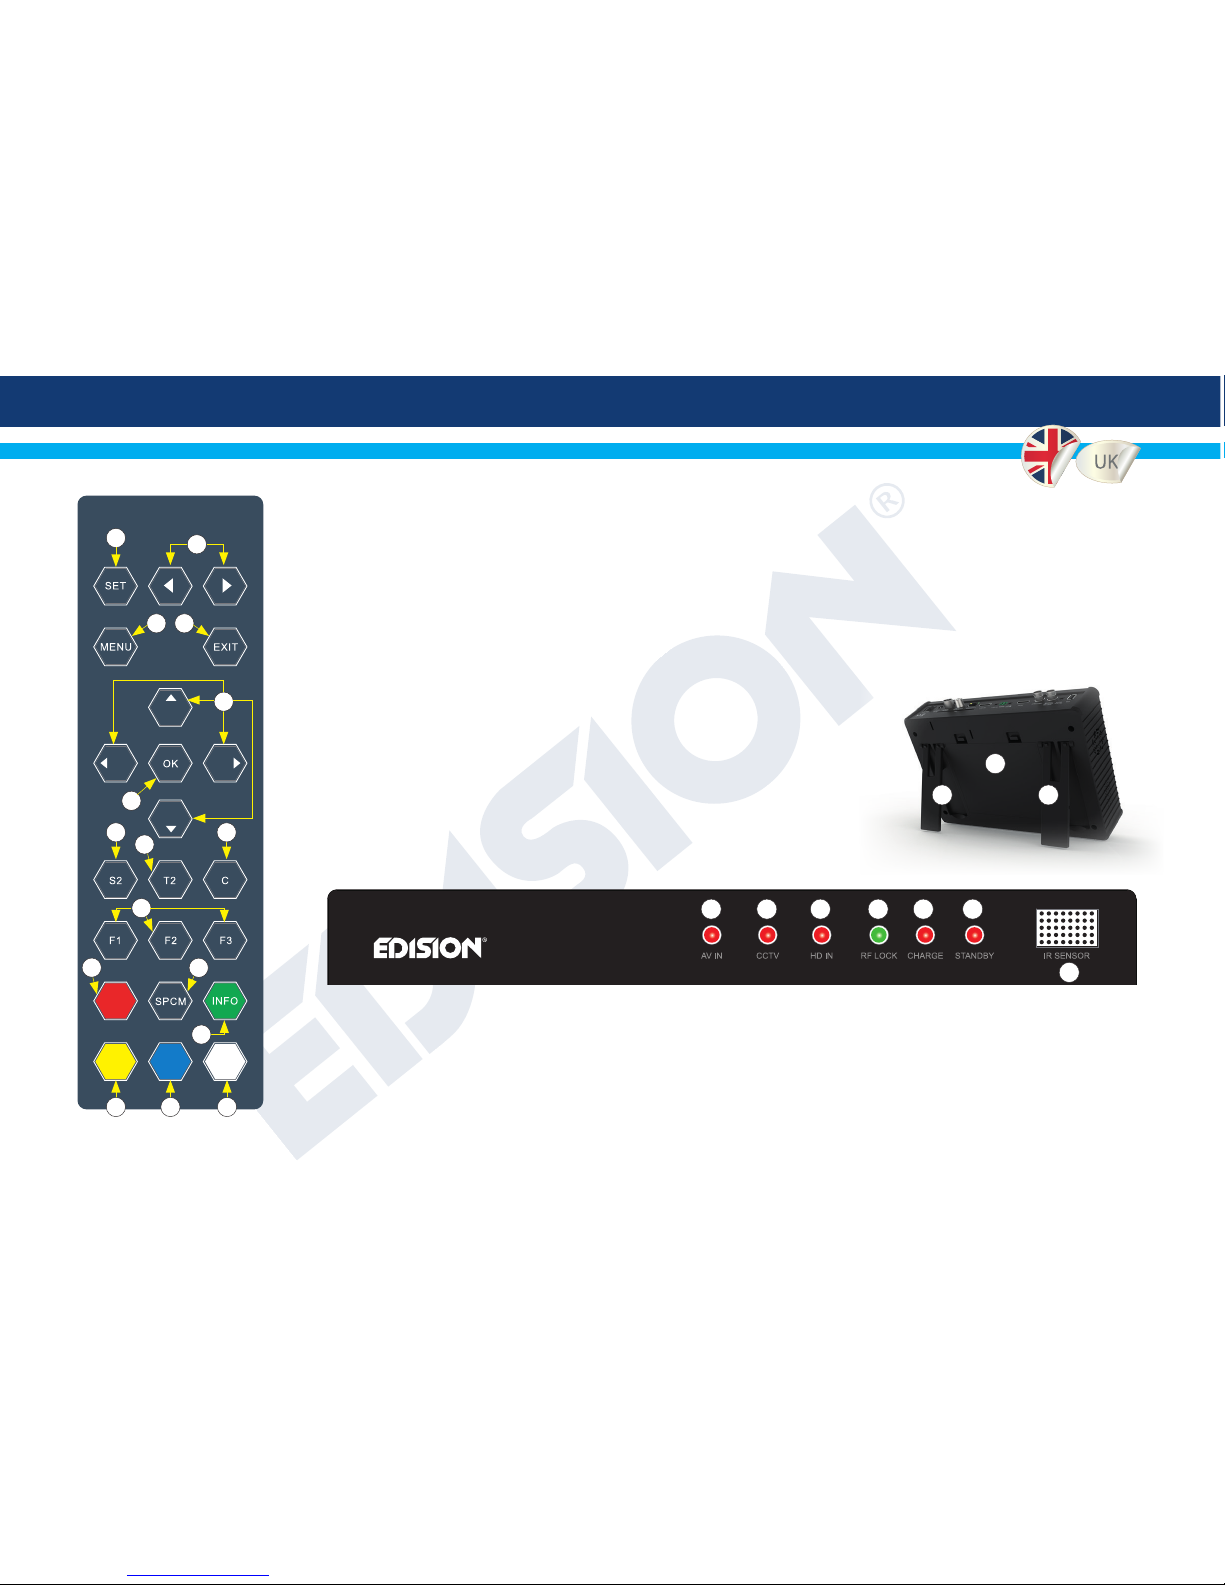
• 7” LCD Display
• Display Buttons with quick access function
• Detachable Lithium Battery 6300mAh
• USB Wi-Fi Support
• Apps: YouTube, RSS Reader, Weather Forecast
• Ports: DC IN, ANT IN, LNB IN, LAN, HD OUT, AV OUT, RS485,
RS232/AV IN, HD IN, BNC OUT, BNC IN, DC OUT, USB
• Smart Card Reader
• Software Upgrade by USB & HTTP

4
►PRODUCT OVERVIEW
1. USB: Connection for USB storage devices
2. DC OUT: Connection for camera power supply
(DC 12V1.0A)
3. VIDEO IN: Connection for camera video input
4. VIDEO OUT: Connection for analog video output
5. HD IN: Connection for external HDMI sources
6. RS 232: Connection for analog video input
& RS232 com port
7. RS 485: Connection terminals for PTZ control
8. AV OUT: Connection for analog video output
9. HD OUT: Connection for external HDMI monitor
10. CA: Embedded card reader
11. ETHERNET: Ethernet port RJ45 10/100 Mbps
12. LNB IN: Input for satellite signal
13. ANT IN: Input for terrestrial or cable signal
14. DC IN: Connection for power adapter (DC 12V4.5A)
15. POWER: ON/OFF power switch
►PACKAGE CONTENTS
1. MULTI-FINDER
2. Transportation Βag
3. Protective Bag
4. Remote Control
5. Car Charger
6. Jack to AV Cable
7. Jack to RS232 Cable
8. BNC to BNC Cable
9. DC-OUT Adaptor Cable
10. PSU
10
11 12 13 14 15
23
456 7 8 91

5
►FRONT PANEL KEYS
►FRONT PANEL LED INDICATIONS
1. Enter monitor OSD menu
2. Monitor OSD menu adjustment keys
3. Enter the main menu
4. Exit or back
5. Navigation, CH & VOLUME keys
6. Enter or submit
7. Start sattellite installation
8. Start terrestrial installation
9. Start cable installation
10. User programmable function keys
F1 default: CVBS Video input
F2 default: Camera Video Input
F3 default: HDMI input
11. Audio menu or other function
12. Start spectrum analyzer
13. Subtitle or user dened
14. Teletext or user dened
15. Change output video resolution
or user dened
16. TV / Radio or user dened
1. Indicates that AV input is in operation
2. Indicates that CCTV input is in operation
3. Indicates that HDΜΙ input is in operation
4. Indicates locking of selected RF channel
5. Indication for charging status
6. Indication for device status
7. IR sensor window
CH+
VOL- VOL+
CH-
1
3 4
2
5
6
7
14 15 16
9
8
10
12
13
11
1 2 3 4 5 6
7
►BACK PANEL
1. Detachable
battery
2. Flat surface stand 2 2
1

6
►TECHNICAL SPECIFICATIONS
SYSTEM
Main Processor
Flash Memory
DDR SDRAM
TUNER/FRONT-END
Tuner Type
Input Connector
Frequency Range
Signal Level
LNB Power
Demodulation
Input Symbol Rate
Forward Error Correction (FEC)
Tuner Type
Input Connector
Signal Level
Forward Error Correction (FEC)
Input Frequency
Constellation
Guard Interval
FFT Mode
Channel Bandwidth
Antenna power output
Demodulation
FEC Decoder
Tuner Type
Input Connector
Frequency Range
Signal Level
Bandwidth
Demodulation
Constellations
Input Symbol Rate
800M Hz based CPU
128M bits
256MB
DVB-S / DVB-S2
F-type, Connector, Female
950 MHz ~ 2150 MHz
-65 to -25 dBm
Current: Max. 400mA with Overload Protection
QPSK, 8PSK
1-45 Mbps, Convolutional Code Rate
1/2, 2/3, 3/4, 5/6, 7/8, 1/4, 1/3, 2/5, 3/5, 4/5, 8/9, 9/10 and Auto
DVB-T/DVB-T2
IEC-Type, Connector, Female
Nordig Compliant DBOOK Compliant
DVB-T: Viterbi + Reed Solomon 1/2, 2/3, 3/4, 5/6, 7/8.
DVB-T2: LPDC + BCH 1/2, 3/5, 2/3, 3/4, 5/6.
QPSK, 16-QAM, 64-QAM, 256-QAM Both rotated and non-rotated
1/4, 19/256, 1/8, 19/128, 1/16, 1/32, 1/128
1k, 2k, 4k, 8k normal and extended, 16k normal and extended, 32k normal and extended.
6/7/8 MHz
12V/24V,50mA max
COFDM 2K/8K
1/4, 2/3, 3/4, 5/6, 7/8, k=7
DVB-C
IEC-Type, Connector, Female
47-862MHZ
-20dBmV to +20dBmV
8MHZ
QAM
8,16,32,64,128,256
1.5 - 7Mbps

7
POWER SUPPLY
Input Voltage Adapter
Power Consumption
Power charger output
Battery
Battery standard charging/discharging time
MPEG TS A/V DECODING
Input Rate
Aspect Radio
Video Decoding
Video Resolution HDMI IN / OUT
Audio Decoding
Audio Mode
Sampling Rate
A/V & DATA INPUT/OUTPUT
A/V IN/OUT
RS-232C
Audio output
VIDEO OUT/IN
RS 485
DC OUT
RJ-45
USB
HDMI
PHYSICAL SPECIFICATION
LCD display
Size[W*H*D]
Net Weight
Operation Temperature
Storage Temperature
Storage Humidity
100~240V AC, 50/60Hz
20W MAX
12V DC 4.5A
Detachable 2 cell Lithium Battery 7.4 V/6300mAh
4H/6-7H
Max.120Mbit/s
4:3, 16:9, Letter Box
MPEG-2, MP@ML, MPEG-4 part 10/H.264/H.265
480p, 576p, 720p@50/60Hz, 1080i @50/60Hz, 1080p@50/60Hz
MPEG-1 layer I/II, MPEG-2 layer II, Dolby digital, Dolby digital plus
Left / Right / Stereo/ Mono
32KHz, 44.1KHz and 48KHz
Video CVBS input/output & Audio L/R input/output
Transfer rate up to 115.2Kbps 3.5mm”Phone Jack Type
Built-in speakers
BNC-Type, Video input/output AHD/ΤVI/CVI/CVBS
150~115200bps
12V 1A
10M/100M
USB 2.0
VER1.3 Type A
7 inch 640x480
233mmX 165mmX50mm
<2.0KG
0OC~+45OC
-10OC~+70OC
5%~95% RH (Non-Condensing)

8
1. Installation Menu
1.1 Satellite Installation - Congure, control, scan, measure,
edit or add satellites and transponders
1.2 Auto Installation - Automatically detects DiSEqC
connections
1.3 Satellite Guide - Calculate the appropriate values for Dish
calibration.
1.4 Constellation - Start a constellation chart.
1.5 Terrestrial Scan - Scan manually or automatically for
Terrestrial services.
1.6 Cable Full Scan - Scan manually or automatically for
Cable services.
1.7 Cable NID Fast-Scan - Scan and manage NID scan
tables.
►OSD MENU
1. Installation Menu
2. Spectrum
3. Services
4. Media
5. CCTV
6. Audio/Video
7. System
8. Application

9
4
Satellite Installation, here you can congure everything regarding
the satellite services, add new satellites or transponders, move a
motorized antenna and measure the received signal.
4
Constellation chart, will help you to detect a bad reception by
showing the representing on the screen with modulation dots.
Available
Satellites/TP List
Press
to scan
Constellation
diagram
Select tune
parameters
List of mea-
surements
Press to
switch list
Press to switch between
list and configuration mode
Use & key to configure
the DiseqC parameters
Press to
fetch SI info
List
of measure-
ments
Main satellite parameters
(user can change it using V- V+)

10
4
Terrestrial Scan, the user can perform a manual or automatic scan,
select the region and power the antenna if necessary.
4
Cable Full-Scan, starts a full scan and allow you to enter a providers
NIT frequency in order to nish the scan faster.
4
Cable NID Fast-Scan, can perform a fast scan for the congured
providers. You can also add manually new Providers depending on
your needs.
Select terrestrial
transponder
Configure the tuner
parameters
List of cable provid-
ers for fast scan
Add,delete or load
a backup a provid-
er backup list
Enable NIT Search,
if it is available
Use & key to scan

11
2. Spectrum
2.1 DVB-S2 - Start the spectrum view for satellite tuner.
2.2 DVB-T2/C - Start the spectrum view for terrestrial tuner.
4
DVB-T2/C spectrum, real time spectrum preview helps you observe
any malfunction,interference, ingress and other waveforms that
may be affecting the RF installation.
DVB-S2 spectrum, real time spectrum preview helps you quickly
and easily with no hassle to nish the satellite dish pointing
procedure with SI fetch capability which displays information about
the selected transponder.
Change span mode using
Menu key or OK key
Use keys (CH+) or (CH-) to
adjust reference level

12
4
DVB-S2 spectrum, real time spectrum preview with SI fetch
capability assures a hassle free satellite setup.
3. Services
3.1 Organize Services - Edit your channel list service.
3.2 Organize Favorites - Organize the favorite lists of your
choice.
3.3 Edivision - Show the EPG of the services.
Change span
mode using Menu
key or OK key
Use keys (CH+)
or (CH-) to adjust
reference level
Use & to switch band Press to fetch data from
the TP selected

13
4
Organizing Services, take complete control of how your services list
looks like easily with functions as move, rename, lock and delete.
4
Organizing Favourites, make your own favourites lists to enhance
your everyday working experience. Additionally you can fully control
the preinstalled favourites lists.
Select the desired
action (move, lock,
delete, rename)
Organize your favourite
channels
Press (V-) or (V+) to switch
between list mode and edit
mode

14
4. Media
4.1 File List - Browse the connected USB drives le system.
4.2 Storage Information - Display information about the
connected USB drives.
4.3 PVR Settings - Congure the PVR settings.
4.4 USB Speed Test - Start a speed test of the connected
USB drive.
4.5 Remove USB Device safely - Deactivates the USB drive
safely.
4
File List, browse and preview les stored in your connected USB
drive le system where you can lter out audio, image, video,
recordings and s/w les.
Use keys V- or V+ to switch
file type mode

15
5. CCTV
5.1 Display CCTV input.
5.2 PTZ Conguration.
4
PTZ Conguration, take control of your PTZ camera by setting
the necessary connection details and use the remote control to
Pan, Tilt, Zoom the camera and additionally control the Focus and
Aperture size.
Use keys 1 and 4 to control focus, keys 2 and 5 to
control zoom and keys 3 and 6 to control the Aperture
size.
Select the protocol type,
the baud rate and camera
address accordingly

16
6. Audio/Video
6.1 Display HDMI input.
6.2 Display A/V input.
6.3 A/V Output Settings
4
A/V Output Settings, control output video resolution and adjust the
video Brightness, Contrast and Satturation. You can also select the
OSD transparency.
Select video output mode
using keys V- or V+

17
7. System
7.1 Language - Set your preferred OSD & Audio language.
7.2 Ethernet Settings - Congure your network interfaces.
7.3 Time Settings - Congure the system time.
7.4 Miscellaneous settings - Various general settings.
7.5 Software Update - Update or backup your rmware.
7.6 Default settings - Restore the default conguration.
7.7 Hotkey conguration - Congure the hotkey function.
7.8 Information - Display general information about the
device.
7.9 Battery Information - Display battery status.
7.10 Conditional Access - Show CA information about your
card.
4
Software Upgrade, get the best user experience and stay up to date
by upgrading frequently the installed software in your MultiFinder.
Additionally you can wipe channels, make your own rmware
backups and overwrite default values. Please note that it is very
important during rmware update to connect external power supply
to avoid power loss!
Update software using USB
drive and perform a factory
defaults setting

18
4
Hotkey Setting, several keys can be programmed with different
functionality depending on how each user likes to operate them.
Please note, when at the very bottom of the OSD menu appears
color button indications the colored Hotkeys dened are not in
operation!
8. Application
8.1 YouTube - Start YouTube application.
8.2 RSS Reader - Show or add RSS feeds.
8.3 Weather forecast - Display the weather forecast of the
selected cities.
8.4 Web TV - Start Web TV application.
Configure the desired action
for the hotkeys available

19
4
YouTube, enjoy cable-less(requires external wi adapter) video
streaming service over IP. You can set the desired region to lter
the displayed featured videos.
4
RSS reader, stay up to date with the latest news by using RSS
feeds from various sites. Additionally, users can add their own
desired feeds.
4
Web TV, access Web-TV streams by using this application. It is
required from you to add any desired streams manually using the
Web-TV list le in order to load it from USB by pressing the white
key or manually through OSD.
RSS Reader application
available
Web TV application
available
YouTube application
available

20
Product inspection: Inspect the equipment for shipping
damage. If you have discovered any damage,
immediately le a claim to the carrier.
Read and Follow All Instructions: All the safety and
operating instructions should be read prior to and
followed while operating this product.
Attachments: Do not use attachments that are not approved
by the product manufacturer.
Water and Moisture: This product is not waterproof.
Power Sources: This product should be operated only from
the type of power source specied.
Wire Protection: Ensure all connected wiring is routed
correctly to avoid damage including pinching, excessive
bends, or compression.
Power Lines: Always use caution and avoid operating this or
any connected equipment near uninsulated power lines
or any other hazards.
Servicing: There are no user serviceable parts except the
battery (replacement only). Do not attempt to service this
product or remove covers other than the battery cover.
Heat: The product should be operated away from heat
sources such as radiators, heat registers, stoves, or
other products that produce heat.
Maximum input Voltage: Ensure that the voltage applied
to the power connector does not exceed 12V. Higher
voltages may damage the equipment!
Replace battery only with a new one of the same type.
Recycle or dispose used electrical and electronic devices
properly.
►SAFETY REQUIREMENTS
Table of contents