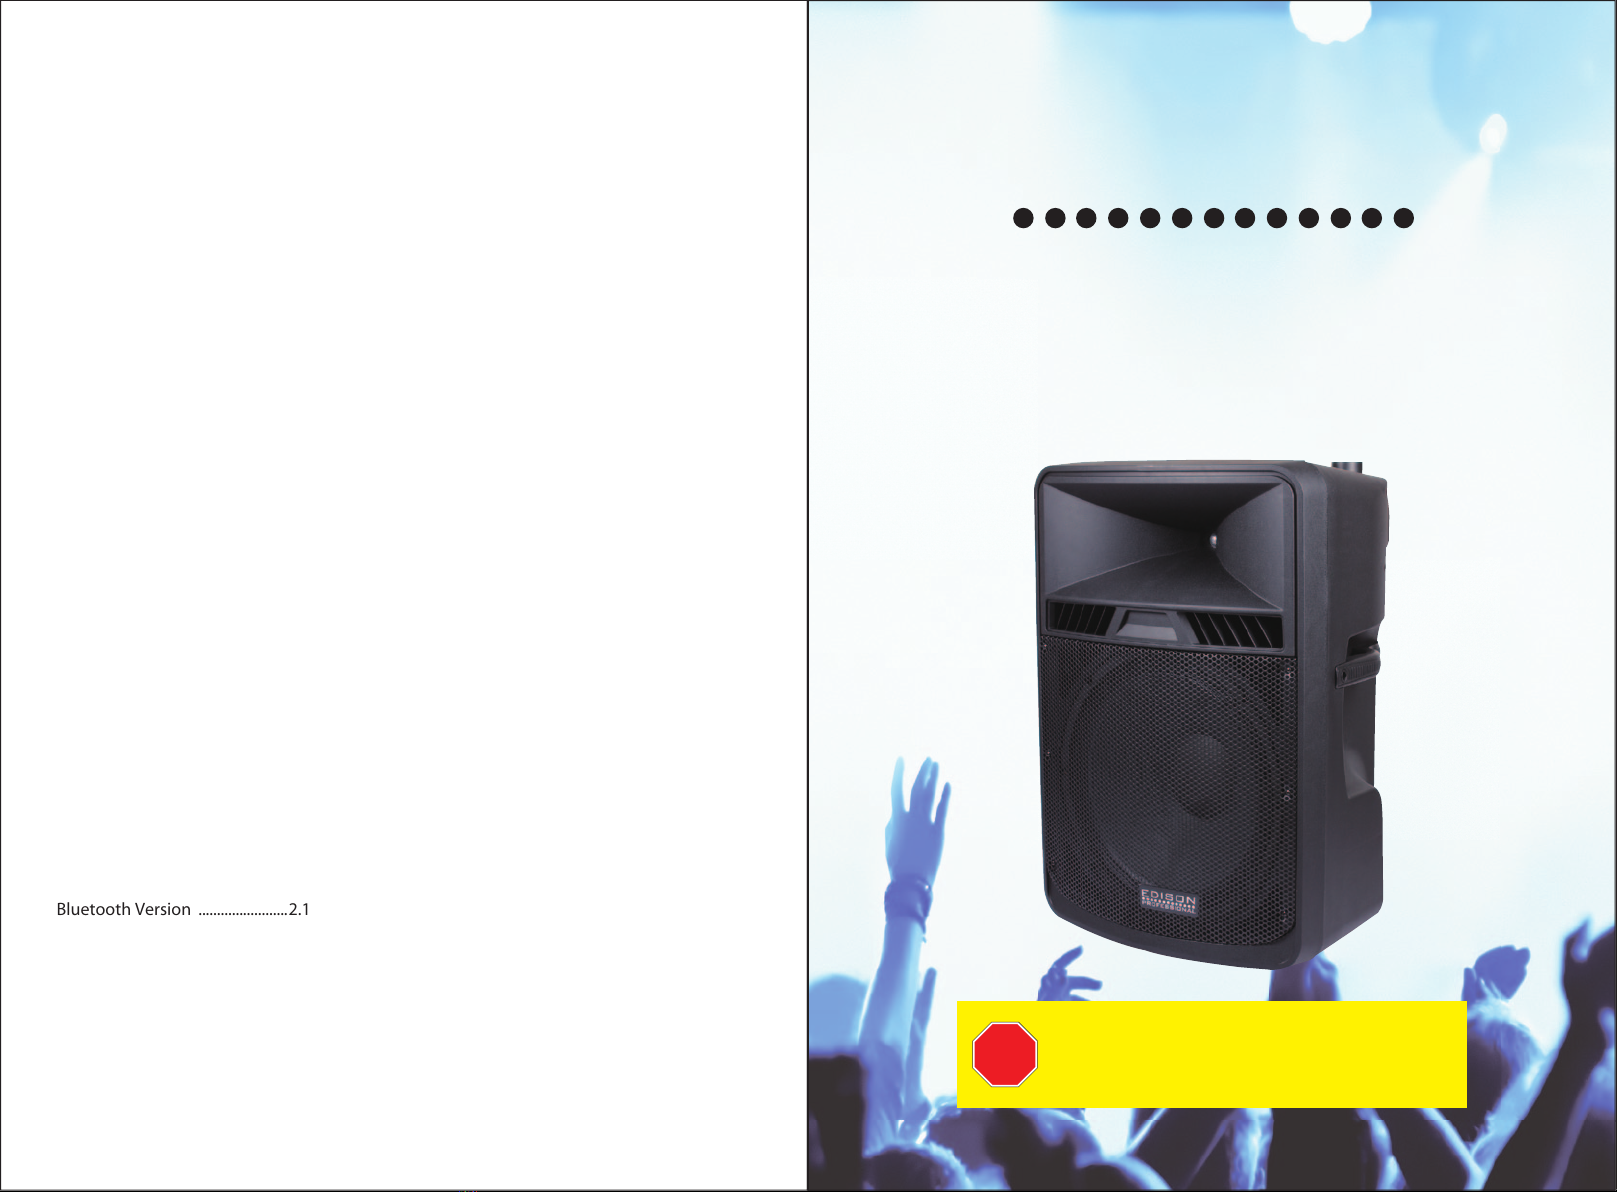
EDISON Professional ST-5000MKII User manual
SPECIFICATIONS:
Input source ....................................Line
Line / MIC IN ....................................1/4" TRS or XLR
Control Buttons .............................
Power,
Bluetooth pairing,
Volume knob, EQ Controls,
....................................................................AUX / MP3 Level, Line Level, 6pcs
LED indicator ..................................Peak indicator / Power indicator
Battery ..............................................No
Power Input ....................................AC120V, 60Hz
Auto Standby..................................No
Auto Power off ..............................No
Speaker Output wattage ...........800W
Speaker Driver size ......................18" (woofer) + 4.5”(Tweeter)
Speaker Grill Finishing ................Metal
Full Range .......................................Yes
MAX SPL............................................120dB/128dB(peak)
THD+Noise.......................................<10%
S/N ......................................................>75dB
Cabinet Material ...........................Plastic
Dimension .......................................24.2”x21.6”x34.3”
Weight(KG) .....................................63lbs
Operating Temperature
Operating Temperature Range 32F to 104F
Operating Humidity Range ......40~90%
Storage Temperature Range ....-13F to 158F
Key
power On/Off key..........................Power on:Switch "Power"Key to "I"
.............................................................Power off: Switch "Power"Key to "0"
Bluetooth
Bluetooth Version ........................2.1
Bluetooth Profile............................A2DP,AVRCP
Bluetooth Frequency Branc.......2.402GHz~2.480GHz
Bluetooth Range............................15m
Connections
XLR or 1/4"Jack Mic / Line In......Yes
AC Out ...............................................No
ST-5000MKII User Manual
EDISON
PROFESSIONAL
TM
STOP
FOR QUESTIONS OR TECHNICAL SUPPORT
Please call:
(888)604-8881
Please do not return this product to the store.
-8-

LIMITED WARRANTY ........................................................................................................................ 2
IMPORTANT SAFETY INSTRUCTIONS ............................................................................................ 3
UNPACKING ........................................................................................................................................ 4
PARTS .................................................................................................................................................... 5
CONNECTING A MICROPHONE OR OTHER DEVICE ................................................................ 6
CONNECTION USING MIC INPUT.................................................................................................... 6
TROUBLESHOOTING ........................................................................................................................ 7
SPECIFICATIONS ................................................................................................................................ 8
TABLE OF CONTENTS
Limited Warranty
This Limited Product Warranty is provided by BriteLite Enterprises. BriteLite
warrants to Customer that the product is free from defects in materials and
workmanship under normal use during the Warranty Period of 90 days for parts
and 1-year labor. If the product fails to conform to the warranty then BriteLite
or its authorized service will either repair or replace any nonconforming
product, provided that Customer gives notice of noncompliance within the
310-363-7110 (Mexico customers can call 0155 4624 0251). Please retain the
original dated receipt as evidence of proof of purchase.
Please do not return the product to the dealer or place of purchase.
Contact BriteLite directly for warranty support.
Telephone: (888)604-8881
Troubleshooting
No Power
• First check to make sure the speaker is plugged in to a live AC outlet.
• Make sure the POWER switch is on.
No Sound
• Make sure input LEVEL control turned up.
• Make sure signal source is working and the connecting cables are in good shape and
securely connected at both ends. Make sure the output volume control on the mixing
console is turned up.
• Make sure the preamp or mixer does not have a Mute button engaged.
Bad Sound – Noise - Humming
• If the sound is loud and distorted, verify that the levels are set properly on the speaker
and mixing console.
• Make sure all connectors are secure and they are plugged in to the proper connecter
(i.e., Mic cable plugged in to MIC input, Line level source plugged in to Line Level Input.
• It is a good idea to periodically clean all electrical connections with a non-lubricating
electrical contact cleaner.
• Make sure none ofthe signal cables are routed near AC cables, power transformers or
other electrical power cords.
• If humming occurs,turn the LEVEL control ofthe speaker all the way down. Ifthe
noise disappears, its coming fromthe signalsource. If not, try disconnectingthe cable
connected to the INPUT jack. Ifthe noise disappears, it could be a ground loop, the
following ideas:
o Use balanced connections throughout your systemfor best noise rejection. (XLR
cables, balanced jacks; RCA cables are not balanced)
o Whenever possible, plug all the audio equipments power cords into the same outlet.
o The hummay appear when using an unbalanced source (CD player, iPod, etc.).You
can use an RCA to XLR adapter to turn an unbalanced cable to a balanced cable.
o If the hum persists, try removing components one at a time from the back of the
mixer and check each for hum.Reducing the Bass or Treble levels may reduce
humming.
Care and Maintenance
Your active speakers will provide many years ofreliable service if you follow these
guidelines:
• Avoidexposing the loudspeakerto moisture. If they are set up outdoors, be sure they
are under cover if you expect rain.
• Avoidexposure to extreme cold.If you must operate loudspeakers in a cold environ-
ment,warm up the voice coils slowly by sending a low-level signal through them for
about 15 minutes prior to high-power operation.
• Use a dry cloth to clean the cabinets. Only do this when the power is turned off.
• Avoidgetting moisture into any of the openings ofthe cabinet, particularly wherethe
drivers are located.
-2- -7-
IMPORTANT SAFETY INSTRUCTIONS:
TO PREVENT FIRE OR SHOCK HAZARD, DO NOT USE THIS PLUG WITH AN EXTENSION
CORD, PRCEPTACLE OR OTHER OUTLET UNLESS THE BLADE SCAN BE FULLY
INSERTED TO PREVENT BLADE EXPOSURE. TO PREVENT FIRE OF SHOCK HAZARD, NO
NOT EXPOSE THIS APPLIANCE TO RAIN OR MOIST.
Important Safety Instructions:
1) Read these instructions.
2) Keep these instructions.
3) Heed all warnings.
4) Follow all instructions.
5) Do not use this apparatus near water.
6) Clean only with dry cloth.
7) Do not block any ventilation openings. Install in accordance with the manufac-
turer's instructions.
8) Do not install near any heat sources such as radiators, heat registers, stoves, or
other apparatus (including amplifiers) that produce heat.
9) Do not defeat the safety purpose of the polarized or grounding-type plug. A polar-
ized plug has two blades with one wider than the other. A grounding type plug has
two blades and a third grounding prong. The wide blade or the third prong are
provided for your safety. If the provided plug does not fit into your outlet, consult an
electrician for replacement of the obsolete outlet.
10) Protect the power cord from being walked on or pinched particularly at plugs,
convenience receptacles, and the point where they exit from the apparatus.
11) Only use attachments/accessories specified by the manufacturer.
12) Use only with the tripod sold with the apparatus.
13) Unplug this apparatus during lightning storms or when unused for long periods
of time.
14) Refer all servicing to qualified service personnel. Servicing is required when the
apparatus has been damaged in any way, such as power-supply cord or plug is
damaged, liquid has been spilled or objects have fallen into the apparatus, the appa-
ratus has been exposed to rain or moisture, does not operate normally, or has been
dropped.
CAUTION
RISK OF ELCCTRIC SHOCK
DO NOT OPEN
The Lightning flash with arrow-head
symbol, within an equilateral triangle is
intended to alert the user to the presence
of insulated” dangerous voltage” within
the product’s enclosure that may be of
sufficient magnitude to constitute a risk of
electric shock to persons.
WARNING: TO REDUCE THE RISK OF
ELECTRIC SHOCK DO NOT REMOVE COVER
(OR BACK), NO USER SERVICEABLE PARTS
INSIDE REFER SERVICING TO QUALIFIED
SERVICE PERSONNEL
The exclamation point within an
equilateral triangle is intended to alert the
user to the presence of important
operating and maintenance (servicing)
instruction in the literature accompanying
the appliance.
• If you don’t search the Bluetooth, press and hold button for 3 seconds to make a new pair.
• If the computer needs to be connected to the device, it is necessary to install the bluetooth
manage ment software. If not, it only can connect and can not transmit the audio. Also, if fail
to find the “Bluetooth”, pls press the button for two or three seconds, then you can find it.
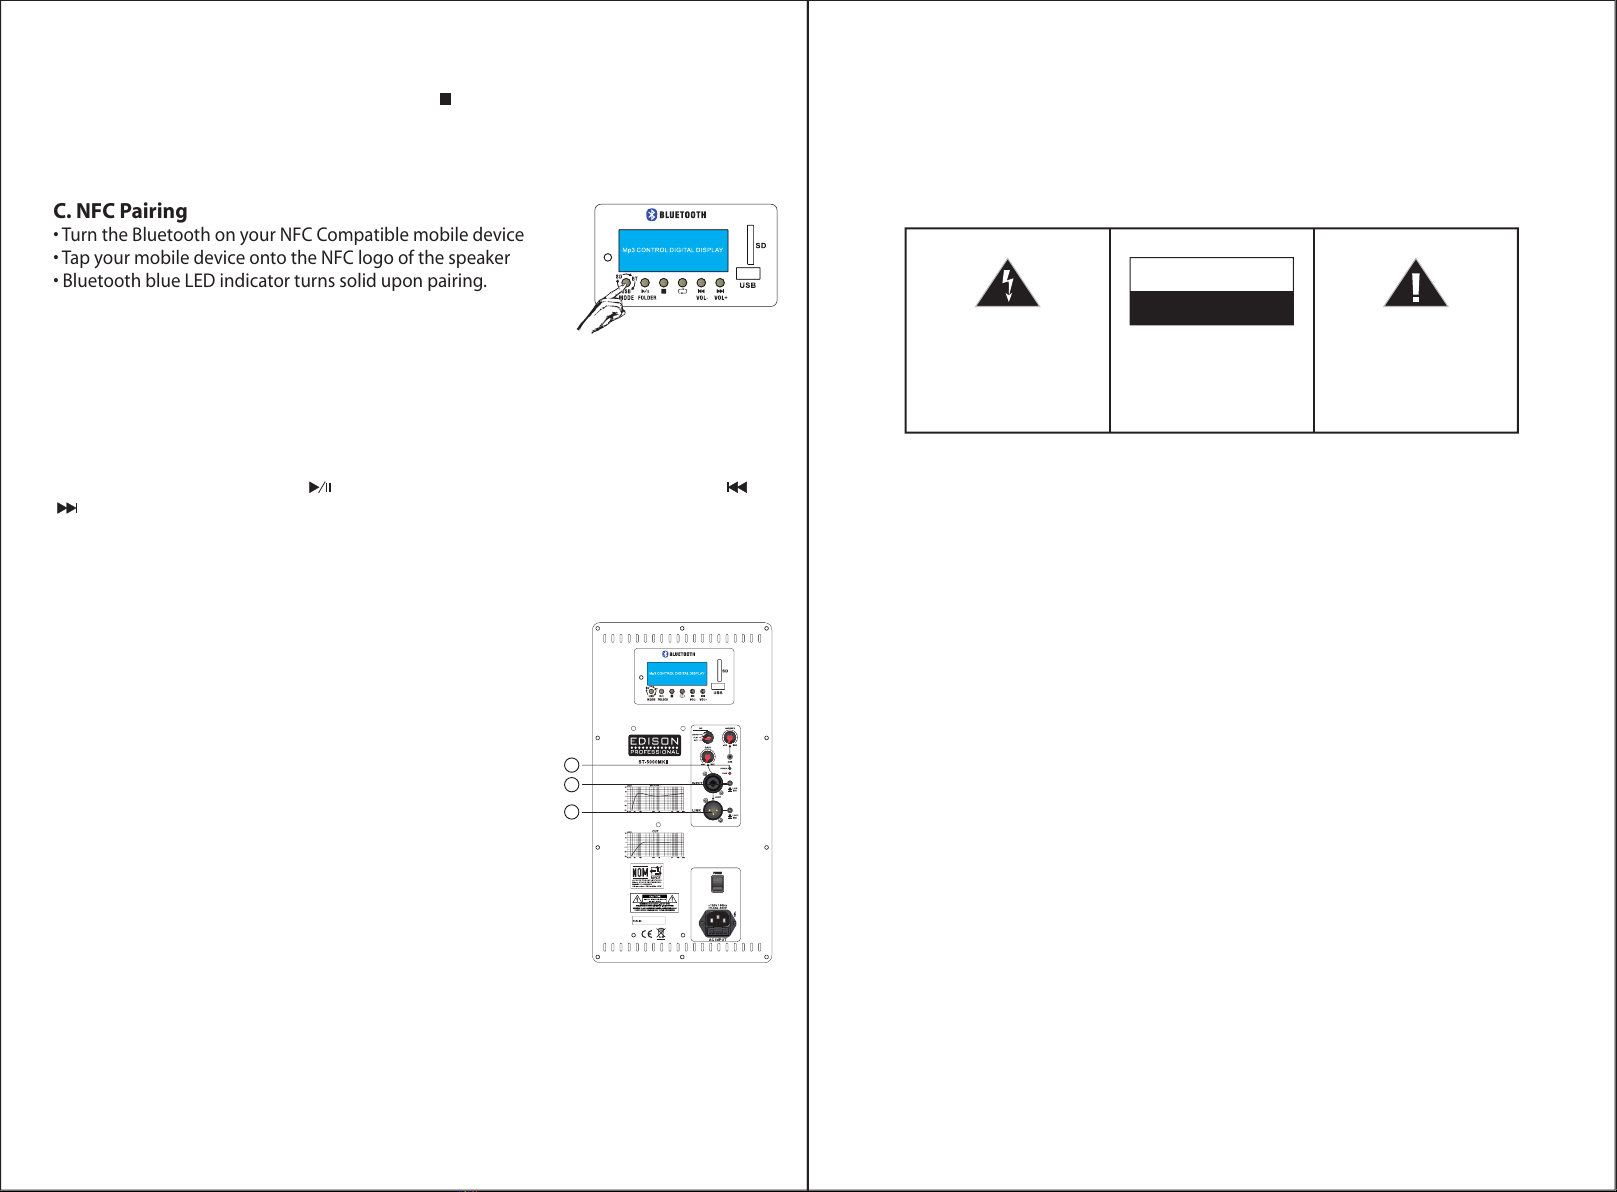
C. NFC Pairing
• Turn the Bluetooth on your NFC Compatible mobile device
• Tap your mobile device onto the NFC logo of the speaker
• Bluetooth blue LED indicator turns solid upon pairing.
USB Charging / Folder function
A.USB Charging mobile device
The ST-5000MKII Has a built in USB battery bank. In order to use this feature you must use your
mobile device’s USB cable (iphone or Android) and connect it to the USB port on the
ST-5000MKII.
B. Folder function
In USB / SD mode, long press the button to enter the folder selection page, press the &
button to toggle the folder selection
CONNECTION USING MIC INPUT
• These balanced inputs accepts a standard XLR and a 1/4” Jack phone plug.
• A board range of signals from microphones, audio(CH1) mixing consoles and electronic mu-
sical instruments may be connected here.
• The sensitivity of these inputs are controlled by the MIC/LINE
switch.drivers are located.
EQ
Boost: setting low frequency and high frequency equalization is
applied.
Flat: the neutral setting with no extra EQ applied and should be
utilized in most typical PA applications.
Cut:it cuts away low frequency from the systems response.
CONNECTING A MICROPHONE OR OTHER DEVICE
• For this unit you can connect a mixer or microphone directly
into your speaker. To connect a microphone use an XLR or ¼” jack
connector to connect to the MIC (1) input.
• To connect a CD player, turntable or mixer use an XLR or 1/4”
Jack connector to connect to the LINE IN (1) input. If connecting a powered mixer use the
mixers line level signals only.
• You can LINK additional speakers using the LOOP/MIX OUT(2) connection. The amplifier on
your speaker will only power this speaker. If you LINK to additional speakers those speakers
must be self amplified.
• Turn on your mixer/microphones or other signal source, then turn on your unit, the Power
Indicator (3) will be lit. Now you can adjust your volume controls to a reasonable level
3
1
2
-6- -3-
15. Mains plug is used as the disconnect device, the disconnect device shall remain
readily operable.
16. Do not install this equipment in a confined or building-in space such as a book case or
similar unit, and remain a well ventilation conditions at open site. The ventilation should
not be impeded by covering the ventilation openings with items, such as newspapers,
table-cloth, curtains, etc.
17 The apparatus shall not be exposed to dripping or splashing and that no objects filed
with liguids, such as vases, shall be placed on the apparatus.
18. Protective earthing terminal. The apparatus should be connected to a mains socket
outlet with a protective earthing connection.
19. Minimum distances 10mm around the apparatus for sufficient ventilation.
20. The ventilation should not be impeded by covering the ventilation openings with
items, newspapers, table-cloths, curtains, etc.
21. No naked flame sources, such as lighted candles, should be placed in the apparatus
22. The use of apparatus in moderate climates.
WARNING: To reduce the risk of fire or electric shock, do not expose this apparatus to
rain or moisture
Unpacking
Check that you have all of the following items.
If any item is missing, please contact the customer service hotline for assistance. The
hotline number is printed on the cover page of this user manual.
-ST-5000MKII -AC Power Cable
-User Manual(with Warranty Statement)
-Quick Start Guide -Speaker Stand
Stand Instruction
1. Tube Height 2. Locking Pin
3. Securing bolt height tube 4. Retaining bolt tripod foot
5. Stand Height: 63” (1.6M) 6. Three detachable legs
Stand Mounting: the speakers are compatible with standard 1-½” (38mm) stands.
• Speaker stands must only be used on smooth level surfaces.
• Be certain you select a stand rated for at least 40lb. Contact your dealer for recommen-
dations.
• Never mount more than one speaker on a stand.
• Add weight (i.e. sandbags) to the base of the stand for added stability. In a windy out-
door location this is vitally important!
• Do not attempt to mount the speaker on a stand without an assistant.
1.Mount the speaker on its stand prior to making any electrical connections.
2.Check that the set screw in the speaker base is backed out enough to clear the stand post.
3.After placement, verify that the stand post is fully seated in the speaker base.
4.Tighten the set screw (by hand) to lock the speaker in place. Failure to do so may
result in injury or equipment damage.
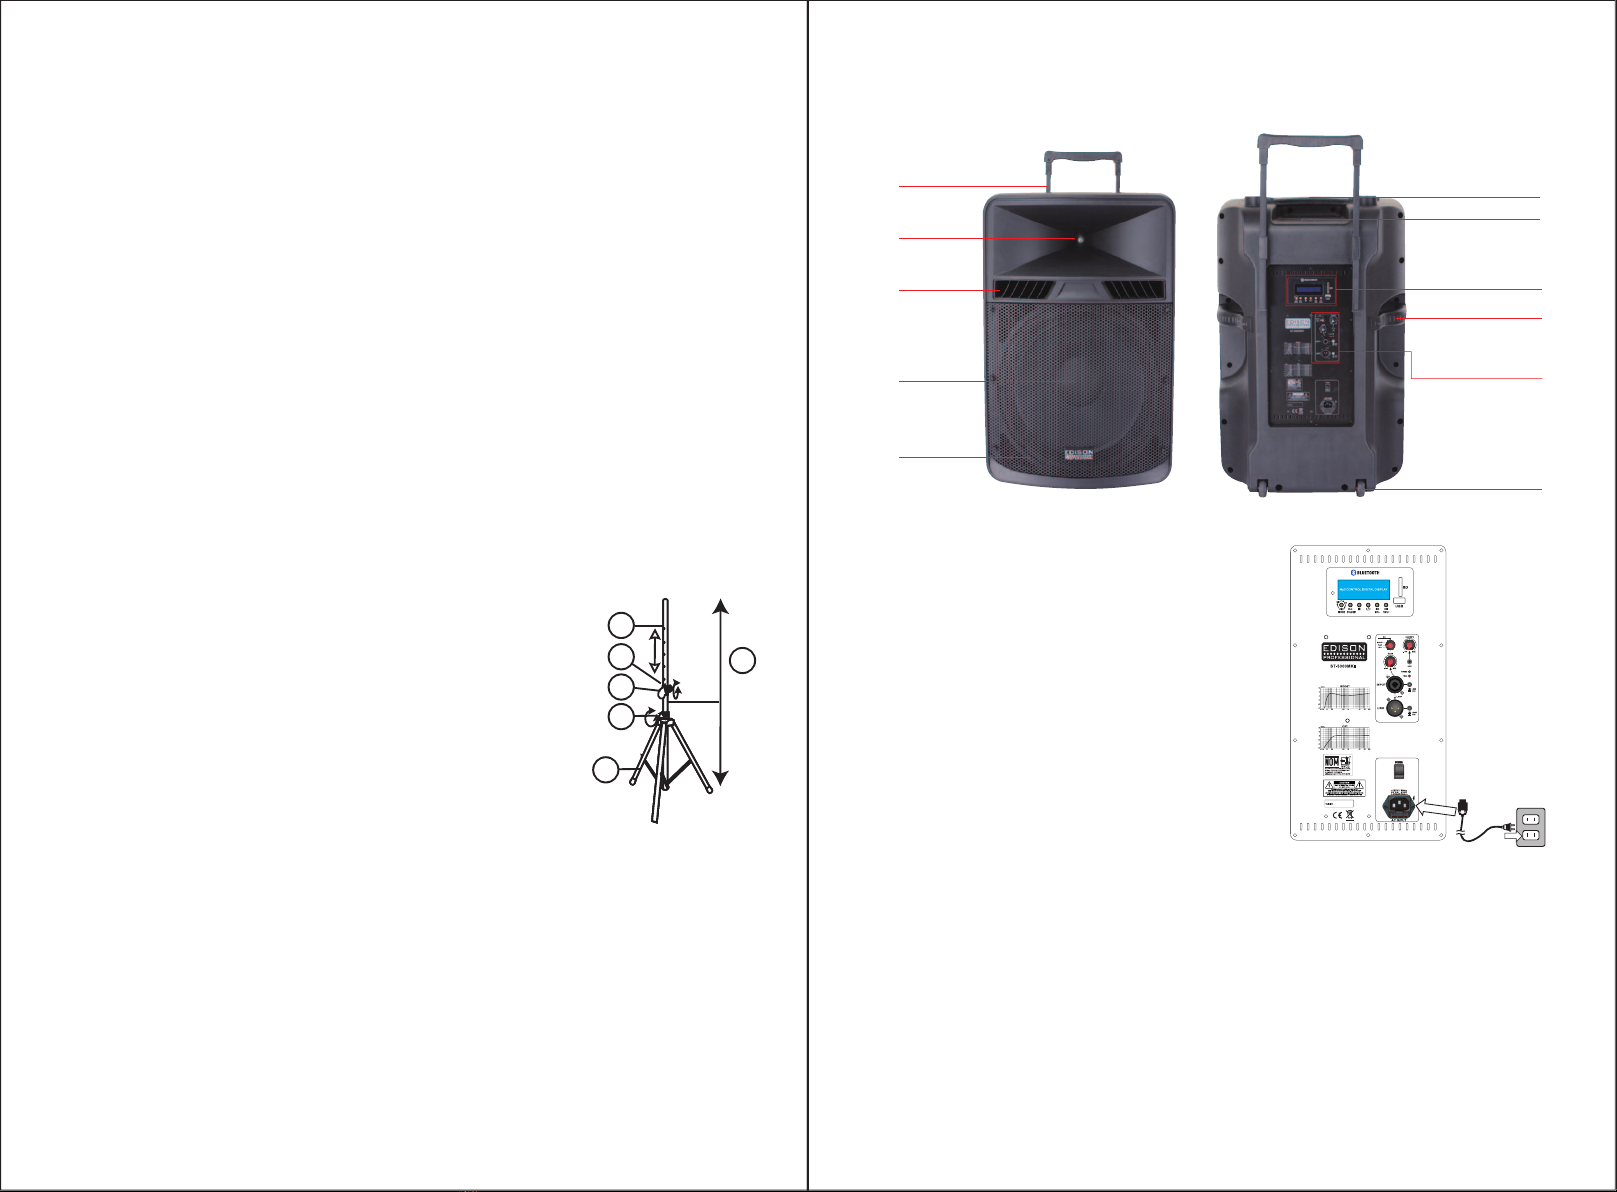
media player with
Bluetooth, USB/SD
4.5”Titanium
Driver
Air port
Telescopling handle
18” woofer
Steel grill
top handle
Side handle
NFC
Luggage wheels
EQ(Equalizer)
GAIN / AUX / MP3 level
Mic / Line in / AUX: XLR,
or 1/4” Jack, 3.5mm Jack
Link out: XLR
WARNING! BE CAREFUL OF THE UNFOLDER STAND TO PREVENT THE SERIOUS INJURY IN
CASE OF TIP OVER.
Part Description:
1
2
3
4
6
5
GETTING STARTED
Power On/Off Switch
•Power on the mechanical
•Turn Power switch on
•The power LED will turn on
Power connection
• Connect the supplied A/C cord to the speaker
• Plug the A/C cord into the wall outlet
• The unit will enter into Bluetooth mode,
Bluetooth LED will flash blue.
Bluetooth Connection / Pairing / NFC
A. Bluetooth Connection
• Make sure device (iPod, MP3 player, etc.) Bluetooth function is enabled.
• On the speaker, press the M button to select Bluetooth function, then your device and
speaker should be connected.
• Make sure to choose BLUETOOTH from your device to complete the connection.
• Only one Bluetooth device can be connected to the ST-5000MKII speaker at a time.
B. Bluetooth Pairing
• Please search Bluetooth device on your mobile device, which name is “BLUETOOTH”,
after searching with it, you can click the “connection” and enter into “0000” if required.
Wall outlet
-4- -5-

FCC Warning
This device complies with Part 15 of the FCC Rules. Operation is sub ect to the following two
conditions
(1) this device may not cause harmful interference, and
(2) this device must accept any interference received, including interference that may cause
undesired operation. Changes or modifications not expressly approved by the party responsible
for compliance could void the user’s authority to operate the equipment.
Note 1: This equipment has been tested and found to comply with the limits for a Class B digital
device, pursuant to part 15 of the FCC Rules. These limits are designed to provide reasonable
protection against harmful interference in a residential installation. This equipment generates,
uses and can radiate radio frequency energy and, if not installed and used in accordance with the
instructions, may cause harmful interference to radio communications. However, there is no
guarantee that interference will not occur in a particular installation. If this equipment does
cause harmful interference to radio or television reception, which can be determined by turning
the equipment off and on, the user is encouraged to try to correct the interference by one or
more of the following measures:
—Reorient or relocate the receiving antenna.
—Increase the separation between the equipment and receiver.
—Connect the equipment into an outlet on a circuit different from that to which the receiver is
connected.
—Consult the dealer or an experienced radio/TV technician for help.
Table of contents
Other EDISON Professional Speakers System manuals


