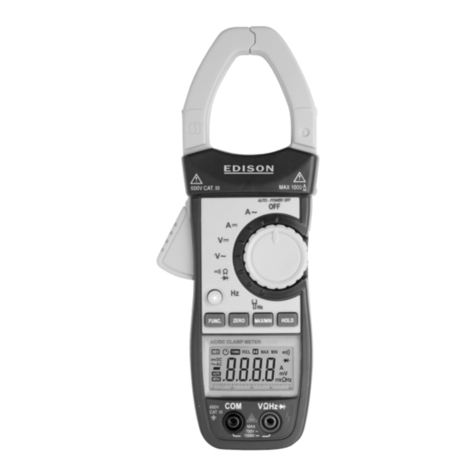
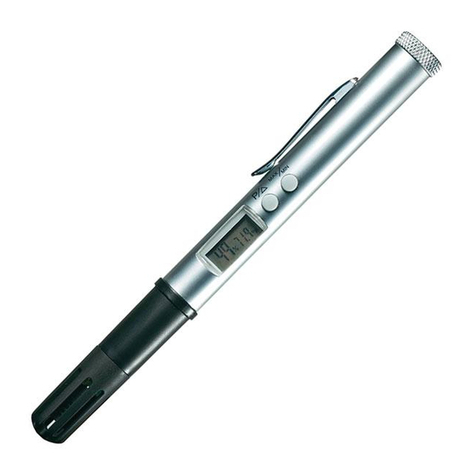
Edison TNC150 User manual

Non-Contact Digital Tachometer
OPERATING MANUAL
Functions
•MMeeaassuurree::rrppmmaannddrrppss..
•RRaannggee::110000ttoo3300000000rrppmm//
11..77ttoo550000rrppss..
•RReessoolluuttiioonn::00..11rrppmm((110000~~999999..99rrppmm)),,
00..11ppmmss((11..77~~1177rrppss))..
•FFuunnccttiioonnssiinncclluuddee::DDaattaahhoolldd,,66ddiiggiitt
LLCCDDddiissppllaayy,,ooppttiioonnaallbbaacckk--lliigghhttaanndd
AAuuttooppoowweerr‘‘ooffff’’..
•CCoommpplleetteewwiitthhmmeetteerrhheeaaddccoovveerr,,
wwrriissttssttrraapp,,22xx3300ccmmrreefflleeccttiivveessttrriippss
aannddhhaarrddccaarrrryyccaassee..
ORDER CODE: EDI-315-4200K
MODEL TNC150
EDI-315-4200K_Instructions.qxd 16/04/2010 14:09 Page 1

2
Content
1. GENERAL INSTRUCTIONS ......................................................................................2
2. TECHNICAL SPECIFICATIONS ..................................................................................3
3. DESCRIPTION ..........................................................................................................4
4. OPERATION INSTRUCTIONS ................................................................................5-6
5. MAINTENANCE......................................................................................................6-7
6. PACK CONTENT........................................................................................................7
1. GENERAL INSTRUCTIONS
Thank you for purchasing the Digital Tachometer. This meter is for measuring
rotational speed. It is more commonly used by engineers and operators of all
types of rotating plane and machinery across a wide range of industries involving
motors, pumps, compressors and hydraulic. This meter can also be used to
measure the speed of anything that requires a stable or regular rotation such as
a grinding wheel or fan.
Using a precise red LED light source (laser beam) together with a reflective strip,
non-contact measurements can be made safely up to 40cm (15 3/4”) from the
target.
1.1. Precautionary safety measures
To get the best service from this meter, please read this manual carefully and
observe the detailed safety precautions strictly.
Warning!
• Keep a safe distance from the objects being measured!
• Danger of injury from rotating parts!
• The Class II laser beam can potentially cause severe damage
to eyes. Never look directly into the laser beam or point the
laser beam at people either directly or indirectly through reflective surfaces.
1.2. During use
• For reliable measurements it is necessary to use reflective markers. To apply
the reflective markers, wait until the object to be measured has come to a
standstill.
• The ideal distance to the measurement object is between 10 to 40cm. During
the measurement, always aim at the reflective marker from an angle of
approx. 30°. This avoids multiple reflections from the surface.
EDI-315-4200K_Instructions.qxd 16/04/2010 14:09 Page 2

3
Non-Contact Digital Tachometer
• If no reflective marker can be attached, it must be checked whether the
reflective properties of a reflective point on the measurement object are
sufficient for rpm measurement. In this case, aim at the measurement object
from the vertical, and check whether a value is displayed. If the measurement
object displays several reflections per revolution, the number of ventilator
vanes must be set (e.g. reflective ventilator with 5 vanes) in order to obtain
correct rpm measurements.
• If the ‘OL’ symbol appears on the LCD, it means the reading is outside the
measuring range. Please keep to the permitted measuring range.
• NEVER store the product together with solvents, acids or other aggressive
substances.
• When the battery voltage is under a sufficient operation level, the symbol
will show on the LCD. The batteries will need to be replaced with new.
1.3. Maintaining the product
• DO NOT measure at a high temperature, high humidity places.
• When not using the instrument for a long time, please remove the batteries
and avoid storing in high temperature and high humidity.
2.
TECHNICAL SPECIFICATIONS
Display: 6 digits LCD display.
PPaarraammeetteerrss::rpm, rps.
RReessoolluuttiioonn::0.1 rpm (100 ~ 999.9 rpm),
0.1 rps (1.7 ~ 100 rps),
1 rpm (1000 ~ 30000 rpm),
1 rps (100 ~ 500 rps).
RRaannggee::100 ~ 30000 rpm, 1.7 ~ 500 rps.
AAccccuurraaccyy::±0.1% reading (100.0 ~ 9,999rpm)
±0.02% reading (10,000 ~ 30,000rpm).
SSaammpplleerraattee::1 time/sec.
AAuuttooppoowweerrooffff::Approx. 2 minutes.
OOppeerraattiinnggeennvviirroonnmmeenntt::-10~ +50°C, +14 ~ +122°F.
SSttoorraaggeeeennvviirroonnmmeenntt: -20 ~ +60°C, -4 ~ +140°F.
Dimension: 30(H) x 60(W) x 157(L)mm.
Weight: 140g.
Accessories:
DC1.5V (AAA) ....................................x 3
Strap ..................................................x 1
Users manual ..................................x 1
Reflective markers............................x 2
Hard carry case ................................x 1
EDI-315-4200K_Instructions.qxd 16/04/2010 14:09 Page 3

4
3. DESCRIPTION
3.1. Instrument Familiarisation
11..Sensor cover.
22..Photo Transistor (Laser sensor).
33..LCD display.
44Unit key.
55..(On) key.
66..Function key.
3.2. LCD Display
7
SYMBOL FUNCTION DESCRIPTION
Indicates it is now in the data-holding state
Indicates the maximum values since the instrument was
last switched on or last reset.
Indicates the minimum values since the instrument was
last switched on or last reset.
Measure values counter.
rotational speed units
Indicates the calibration mode.
Indicates low power of batteries.
Batteries should be replaced.
HOLD
MAX
MIN
CAL
rpm, rps
7
1
2
3
4
5 6
EDI-315-4200K_Instructions.qxd 16/04/2010 14:09 Page 4

5
Non-Contact Digital Tachometer
4. Operation Instruction
1. Before you start to use the meter cut out a part of the reflective marker and
attach it to the object which is under test. Then start this rotating object.
(Make sure to stop the rotating object before attaching the reflective marker).
4.1. Key
1. First remove the meters protective sensor cover.
2. Press the key to turn the power ‘ON’.
3. The LCD will display ‘‘00..00’’as the current value and ‘‘rrppss’’(rotations per second)
by default.
4. Measuring: Keep pressing the key to activate the laser beam.
Warning!
DO NOT look directly into the red laser beam or point it at other
peoples eyes.
5. Line the laser beam up to the position where the rotating objects affixed with
a reflective marker and maintain the fixed location. Adjust the distance
between the instrument and rotating body to 10 to 40cm, the distance is
based on the reliable and stable value which can be read by the instrument.
At this point you can read the speed of the rotating body.
6. Once the reading has become stable release the key and the LCD will
maintain the value last measured by displaying the ‘HOLD’ symbol.
NNOOTTEE::There is no key for power off. When the meter is not used for 2 minutes
the meter will automatically shutdown.
4.2. Unit key
This key sets the type of rotary speed required for testing.
1. When the meter is switched ‘on’ p
ress the UUNNIITTkey to change between the 2
speed type
settings available for measuring. These units are:
rrppss= revolutions per second (Default) and rrppmm= revolutions per minute.
2. BBaacckklliigghhttffuunnccttiioonn::By holding down on the
UUNNIITT
key for 2 seconds the back
light will be turned ‘on’. Press the key
UUNNIITT
key for 2 seconds again and the
back light will be turned ‘off ’.
If the back light is not turned off within 60 sec. it will turn off automatically.
This will save battery power.
EDI-315-4200K_Instructions.qxd 16/04/2010 14:09 Page 5

MAXHOLD
6
MINHOLD MAX
MIN
4.3. Func. key
1. When the meter is switched ‘on’ and the required unit (rps or rpm) has been
set p
ress the FFUUNNCC..key to
display the Maximum or Minimum value settings.
This is acknowledged with the symbol on the LCD
display.
3. The
FFUUNNCC..key also shows the number of impeller setting available.
To activate the settings follow this rotation course.
press
FFUUNNCC..
key press
FFUUNNCC..
key
press
FFUUNNCC..
key The number of impeller setting press
FFUUNNCC..
key
no. 1 - 9 (select)
4. Using the numbers in the impeller setting mode:
- When the meter is switched ‘on’ and the required unit (rps or rpm) has been
set p
ress the FFUUNNCC..key until the
impeller number ‘
no. 1
’ appears on the LCD.
- Press the key to increase the number of impeller (numbers range from
1-9) and then press the
FFUUNNCC..
key again to exit the state of setting.
5. Maintenance
5.1. CLEANING INSTRUCTIONS
The meter may be wiped down with a damp (not wet) or cloth using a mild water
based detergent or anti-bacterial soap and rinsed under a gentle stream of cold
water.
NNOOTTEE::This unit is not designed for complete submersion or washing in water.
EDI-315-4200K_Instructions.qxd 16/04/2010 14:09 Page 6

7
Non-Contact Digital Tachometer
5.2. BATTERY REPLACEMENT
Use the following procedure:
When the battery voltage drops below the required operation range the
symbol will appear on the LCD display and the battery need to be replaced.
1. On the back of the meter, slide the battery cover in the direction of the
arrowhead to open the battery cover.
2. Replace batterys with 3 new 1.5V batteries (AAA).
3. Replace the battery cover.
6.
PACK CONTENTS
• Digital Tachometer
• Wrist strap
• Instruction manual
• DC1.5V x3 AAA batteries (installed)
• 2x 30cm Reflective Strips
• Carry Case
EDI-315-4200K_Instructions.qxd 16/04/2010 14:09 Page 7

Edison Products are continuously being developed and improved.
All details and illustrations are for guidance and may be subject to change.
EDISON
The Power Factory, PO Box 14, Wigston, Leicester, England.
ISO 9001 Registered Company
EDI-315-4200K_Instructions.qxd 16/04/2010 14:09 Page 8
Table of contents
Other Edison Measuring Instrument manuals

