EDP i-BOX Operation manual

Installation & User Guide
i-BOX Installation And User Guide_V4.2.6 Page 1of 57
Installation&
UserGuide
Kalkenstraat 91-93 B-8800 Roeselare (Roulers) - Belgium
Tel. +32(0)51/25.06.10 Fax +32(0)51/24.02.57

Installation & User Guide
i-BOX Installation And User Guide_V4.2.6 Page 2of 57
Trade Mark Information
Microsoft® is a registered trademark of Microsoft Corporation.
Windows™is a registered trademark of Microsoft Corporation.
i-BOX version 2.0
Revision 3.5
Based on software release V4.2.6
Document Title: i-BOX Installation And User Guide_V4.2.6
This document contains proprietary information of Axxess Identification. Unauthorised reproduction of any
portion of this manual without the written authorisation of Axxess Identification is prohibited. The information in
this manual is for informational purposes only. It is subject to change without notice. Companies, names and
data used in examples herein are fictitious unless otherwise noted.
Cooper B-Line assumes no responsibility for incorrect information this manual may contain.
Kalkenstraat 91-93 B-8800 Roeselare (Roulers) - Belgium
Tel. +32(0)51/25.06.10 Fax +32(0)51/24.02.57

Installation & User Guide
i-BOX Installation And User Guide_V4.2.6 Page 3of 57
License Agreement
NOTICE TO USER: THIS SOFTWARE PACKAGE IS A CONTRACT. BY INSTALLING THE SOFTWARE YOU
ACCEPT ALL THE TERMS AND CONDITIONS OF THIS AGREEMENT.
1. Use of the Software. You may install and use the software only for the purpose intended.
2. Copyright. You may not duplicate or copy the software or documentation, except that you may make one
backup copy of the software. All copies must bear copyright notices as contained in the original copy.
3. Limited Warranty. Axxess Identification warrants that the software will perform substantially in
accordance with the printed documentation when correctly installed on a properly configured computer
for which it is intended. Axxess Identification warrants the compact disc upon which this product is
recorded to be free from defects in materials and workmanship under normal use for a period of five
years from the date of purchase. During the warranty period Axxess Identification will replace compact
discs which prove to be defective.
4. Axxess Identification does not warrant and cannot warrant the performance or results you obtain by
using the software or documentation. In no event will Axxess Identification be liable to you for any
consequential, incidental or special damages. For further warranty information, please contact Axxess
Identification.
Kalkenstraat 91-93 B-8800 Roeselare (Roulers) - Belgium
Tel. +32(0)51/25.06.10 Fax +32(0)51/24.02.57

Installation & User Guide
i-BOX Installation And User Guide_V4.2.6 Page 4of 57
Contents
Cover 1
Trade Mark Information. 2
License Agreement. 3
Contents Pages. 4, 5, 6, 7& 8
Guide Overview. 9
System Introduction. 10
i-BOX System Features and Benefits. 11
Computer Requirements. 11
System Architecture. 12
Typical Network Schematic 12
Power Supply 12
i-PAL Overview 12
Cards or Key Fobs 13
Hardware Installation 13
AX200 Software 14
Operating Systems 14
Software Installation 14
Starting the I-BOX Software 17
Password Reminder 17
Language Selection 17
Windows™Classic or Graphic Style (XP) Screen 18
Backup & Restore 18
Standard Query Language (SQL) 18
Database Integrity Check 18
Kalkenstraat 91-93 B-8800 Roeselare (Roulers) - Belgium
Tel. +32(0)51/25.06.10 Fax +32(0)51/24.02.57

Installation & User Guide
i-BOX Installation And User Guide_V4.2.6 Page 5of 57
www.cooperbline.co.uk
Contents
Configuring Your Network 19
Adding A New i-BOX To Your Network 21
Communication Between The I-BOX Software and Controller 23
Plug & Play Devices 24
Controller Status & Control 25
High Security Mode (HSM) 25
Door Unlocked Mode 25
Date and Time 25
Transaction Screen 26
Save on Exit 26
Test Wizard 26
Cardholder 30
Main Settings 30
Card Number 30
Imprint Number 30
Employment 30
Department 30
Access Group 30
Card Type 31
Card Status 31
Pin code 31
Photo 31
Add Wizard 32
Replace Wizard 32
Diagnostic 33
Card 0 Function 33
Print Current Card Details 34
Database Fields per Cardholder 34
Kalkenstraat 91-93 B-8800 Roeselare (Roulers) - Belgium
Tel. +32(0)51/25.06.10 Fax +32(0)51/24.02.57

Installation & User Guide
i-BOX Installation And User Guide_V4.2.6 Page 6of 57
Contents
Main Settings Tab 35
Other Info Tab 36
Personal Info Tab 37
Vehicle Info Tab 38
Access Point Configuration 39
Access Identity 39
Access Point Name 39
Door Comments 39
CCTV 39
Door Schedule 39
Door Release Time 40
Start-up Mode Settings 40
Door Contact Settings 41
PIN Settings 42
Device Parameters 43
Device Group 43
Device Type 43
Hardware Version 43
Firmware Version 43
Batch Number 43
Serial Number in Batch 43
Database Stamp 43
Access Groups 43
System Settings 44
Site Info 44
Installer Info 45
Test Wizard 45
E-Mail Facilities 46
E-Mail Unknown Format to Axxess ID 46
Kalkenstraat 91-93 B-8800 Roeselare (Roulers) - Belgium
Tel. +32(0)51/25.06.10 Fax +32(0)51/24.02.57

Installation & User Guide
i-BOX Installation And User Guide_V4.2.6 Page 7of 57
Contents
Database Maintenance 46
Compact Database 46
Backup Settings 46
Database Restore 46
Export Cardholders 46
Import Cardholders 46
General Settings 47
Maximum PIN Number 1~6 47
Number of Lines in Screen 47
Transaction Screen Pause 47
Function Settings 47
COM Port Settings 48
Multiple/Single Card Format 48
Default Access Level 48
Default 48
SNMP Configuration 49
Format & Statistics 50
Card Type Information 50
Facility Code 50
Card Matching 51
Security 51
Adding a New User 51
Adding a New Authorisation Group 52
Report 53
Log File 54
Quick View 54
Printing 54
Format Types 54
Destination 55
Kalkenstraat 91-93 B-8800 Roeselare (Roulers) - Belgium
Tel. +32(0)51/25.06.10 Fax +32(0)51/24.02.57

Installation & User Guide
i-BOX Installation And User Guide_V4.2.6 Page 8of 57
Contents
Removing the AX200 Program 56
User Notes 57
Kalkenstraat 91-93 B-8800 Roeselare (Roulers) - Belgium
Tel. +32(0)51/25.06.10 Fax +32(0)51/24.02.57

Installation & User Guide
i-BOX Installation And User Guide_V4.2.6 Page 9of 57
Guide Overview
The i-BOX User Guide is intended to provide the user and operator with enough guidance to get the AX200
software installed and operating in a basic configuration. This Guide will show you how to:
Perform a typical installation of the AX200 software.
Set-up the system hardware.
Connect an i-BOX controller to the network.
Configure the PC and controller to start communicating.
Add and configure cardholders.
Add sensors.
Test what you’ve set up.
The i-BOX system is a network addressable controller, supplied with plug and play Windows software. It has
been designed to provide comprehensive yet easy to use access control and environmental monitoring.
The i-BOX is available as a complete kit or as component parts to allow you to configure your own system as
required.
Fig. 8
Kalkenstraat 91-93 B-8800 Roeselare (Roulers) - Belgium
Tel. +32(0)51/25.06.10 Fax +32(0)51/24.02.57

Installation & User Guide
i-BOX Installation And User Guide_V4.2.6 Page 10of 57
System Introduction
The i-BOX is a compact, IP addressable environmental monitoring device with the ability to control up to two i-
PAL access control devices. Supplied with AX200 Windows™Plug and Play software up to 256 i-BOX units can
be configured on one network PC offering the ability to programme up to 4,000 cards per access control device
(i-PAL handle or similar). The i-BOX can be offered with a range of other latching mechanisms and can be
adapted for all cabinet environments where both security control and environmental monitoring is a requirement.
Each i-PAL handle is designed to allow up to 4,000 user cards to be associated to the handle and is designed to
offer a retrofit upgrade option on a range of cabinets including Cooper B-Line’s Access Cabinet. The i-BOX is
supplied to mount in either a 1U rack mount space or in a 0U mount position utilising the optional magnetic feet.
One standard multi region12V power supply can be used to power the i-BOX, which in turn powers up to two i-
PAL handles, and ancillary environmental sensors. The i-BOX controller and i-PAL handles can be configured to
also offer door status contact to signal unauthorised entry (door forced), door left open and other enhanced
features. In the event of total power loss the i-PAL handle is designed to remain in the state it was in when
power was lost. In this scenario and in the event of the handle being latched, emergency access can be gained
using the i-PAL manual override facility. This override facility importantly provides a visible indication of manual
opening as well as an alarm function when power is re-established and the system comes back on line.
Initial set up requires that the AX200 software be loaded onto a network PC. The next step is to populate the
software with the network PC’s IP address ensuring that all applicable firewalls and other network security
systems are configured to allow the addition of other IP addressable units. Once this is complete the i-BOX units
can then be added to the network using the “Device searching” tool under the “Device manager” screen. This will
be covered in more detail further on in this user guide.
Once the system is configured the network administrator has the ability to define user card parameters allowing
a host of options, including the ability to associate a card with a given time zone. This allows the network
administrator to grant the user access into the cabinet during pre defined time periods, i.e. Monday to Friday
8.00am to 5.00pm. The network administrator can also allow authorised users to use the latch function, which
permanently unlocks/locks the door by presenting that card twice consecutively. Additionally users can also be
authorised by the network administrator to locally set the high security mode by simply presenting the
appropriate card four times consecutively. This facility disables the lower access group of cards whilst still
providing access for those in the higher access group.
The graphical user interface is easy to use, even for those not familiar with the Windows™interface. Lost or
stolen cards can in real time be quickly cancelled and/or replaced using the Card Replacement Wizard, thus
avoiding the need to re-enter all the cardholder data, and also to keep track of previously issued cards. The
AX200 software is configured with over 60 database fields per cardholder including photograph, company
details, department, personal data and vehicle details, with search and quick search facilities.
Kalkenstraat 91-93 B-8800 Roeselare (Roulers) - Belgium
Tel. +32(0)51/25.06.10 Fax +32(0)51/24.02.57

Installation & User Guide
i-BOX Installation And User Guide_V4.2.6 Page 11of 57
i-BOX System Features and Benefits.
Combining the i-BOX and i-PAL systems together provides a new generation of access control and monitoring
solution designed with installer and end-user in mind. The system design (sensors, controllers, readers etc)
incorporates cutting edge technologies allowing units to be small and compact. The system structure is modular,
which means you only pay for what you need.
The system has true plug and play (PnP) functionality allowing easy intuitive configuration even for the first time
user. For instance i-BOX automatically recognises when a new sensor or handle is connected and opens a “New
Item Wizard” to guide you through the setup. A key development driver was the goal of reducing installation
times and therefore reducing the total cost of ownership.
Consideration has been given to everyday issues such as electrical spikes or incorrect wiring and wherever
possible these concerns or issues have been engineered out of the design.
This document describes many of the hidden automated features of the AX200 Series software – you would only
normally realise their existence if you have experienced some of the issues with other systems. If you have then
we are sure that you will realise the amount of time and frustration you will save by using the i-BOX Series of
plug and play access control systems.
Computer Requirements.
We support only the following minimum system configuration for the i-BOX.
Minimum Software and Hardware Requirements
CPU: Intel Pentium PII or higher (400Mhz)
RAM: Memory 128MB Minimum
CD-Drive: 16x or faster
Hard Drive: 500MB hard-disk space
Operating System: Windows 98SE, 2000, NT, ME
Display – Classic Mode: 800 x 600 or higher
Graphics Mode XP: 1024 x 768 65,535 colours
Printer: Supports all Windows compatible printers
NOTE: The faster the PC, the better the application will respond.
PC’s not meeting the above specification are excluded from technical support and the software will not install.
The i-BOX has been extensively tested on Windows 95, 98SE, 2000, NT, ME & XP in combination with other
software packages e.g. Microsoft Office 2000. No responsibility can be accepted for conflicting software running
on the same PC.
Kalkenstraat 91-93 B-8800 Roeselare (Roulers) - Belgium
Tel. +32(0)51/25.06.10 Fax +32(0)51/24.02.57

Installation & User Guide
i-BOX Installation And User Guide_V4.2.6 Page 12of 57
System Architecture
An i-BOX installation comprises of two basic components, these being;
A network PC with the AX200 software installed and running.
Between 1 – 256 i-BOX controllers plugged into the network via RJ45 patch leads.
Typical Network Schematic.
Power Supply.
Each i-BOX controller is powered by a single 12-volt DC power supply. The single power supply into the i-BOX is
sufficient to power to up to two i-PAL handles, four internal sensors and fourteen ancillary external sensors per
unit.
Optional Additional Hardware.
1 or 2 x i-PAL handles per i-BOX device.
1 x i-PAL door contact set per i-PAL device.
Up to 4,000 User Cards / User Fobs per i-PAL access control device.
Up to 14 external sensors per i-BOX.
Overview
i-PAL stands for Integrated Proximity and Locking. An i-PAL handle decodes the data from the card and passes
this data onto the i-BOX controller, which then determines whether the door is to open or remain closed. Other
handle options as well as pin code only reader can be configured as long as the keypad supports Wiegand
Dorado output. The i-BOX has two DIN connections on the rear of the unit allowing an i-PAL handle to be
connected to each socket.
Example
Server IP : 192.168.0.1
i-BOX – Cabinet 1
Unit IP : 192.168.0.2 i-BOX – Cabinet 2
Unit IP : 192.168.0.3 i-BOX – Cabinet 3
Unit IP : 192.168.0.4
Fig. 11
Kalkenstraat 91-93 B-8800 Roeselare (Roulers) - Belgium
Tel. +32(0)51/25.06.10 Fax +32(0)51/24.02.57

Installation & User Guide
i-BOX Installation And User Guide_V4.2.6 Page 13of 57
For network critical appliactions it is recommended that the i-BOX is connected to an
Uninterruptible Power Supply system (UPS system). In the event of a mains power failure the i-
BOX would draw it’s power from the UPS maintaining both access control and environmental
monitoring functionality.
User Cards or User Key Fobs
A variety of cards are supported:
Proximity i-BOX key fobs, i-BOX proximity cards suitable for photo ID
The i-BOX controller supports up to 4,000 cardholders, 2,000 if used in conjunction with a pin code. The AX200
software supports up to a maximum of 65,535 cardholders.
Hardware Installation
1. Install the i-BOX controller into the cabinet.
2. Plug the 12v DC universal power supply into the power distribution strip mounted in the cabinet (in
accordance with current electrical regulations). Plug the DC jack end of the 12v DC universal power
supply into the power jack socket on the rear of the i-BOX.
3. Install the i-PAL into the cabinet doors, ideally one handle into the front door and one handle into the
rear door in which the i-BOX is housed.
4. Plug the i-PAL handle in to the “Access Control Point Connection” sockets on the rear of the i-BOX (see
fig 12.)
Fig. 12
Kalkenstraat 91-93 B-8800 Roeselare (Roulers) - Belgium
Tel. +32(0)51/25.06.10 Fax +32(0)51/24.02.57
Installation & User Guide
i-BOX Installation And User Guide_V4.2.6 Page 14of 57
AX200 Software
The AX200 software is where all the programming data and cardholder information is entered.
It consists of the following:
Cardholder
Access Point
System Settings
Format & Statistics
Security
Reports
Environment
Operating Systems
The AX200 software supports a wide range of operating systems and can run on Windows NT Workstation, NT
Server, 2000 Professional, Advanced and XP without the need for different CD’s or drivers. A number of checks
are implemented within the software to ensure that the correct files for the operating system are present. The
installation process automatically detects the operating system and installs the correct files and drivers.
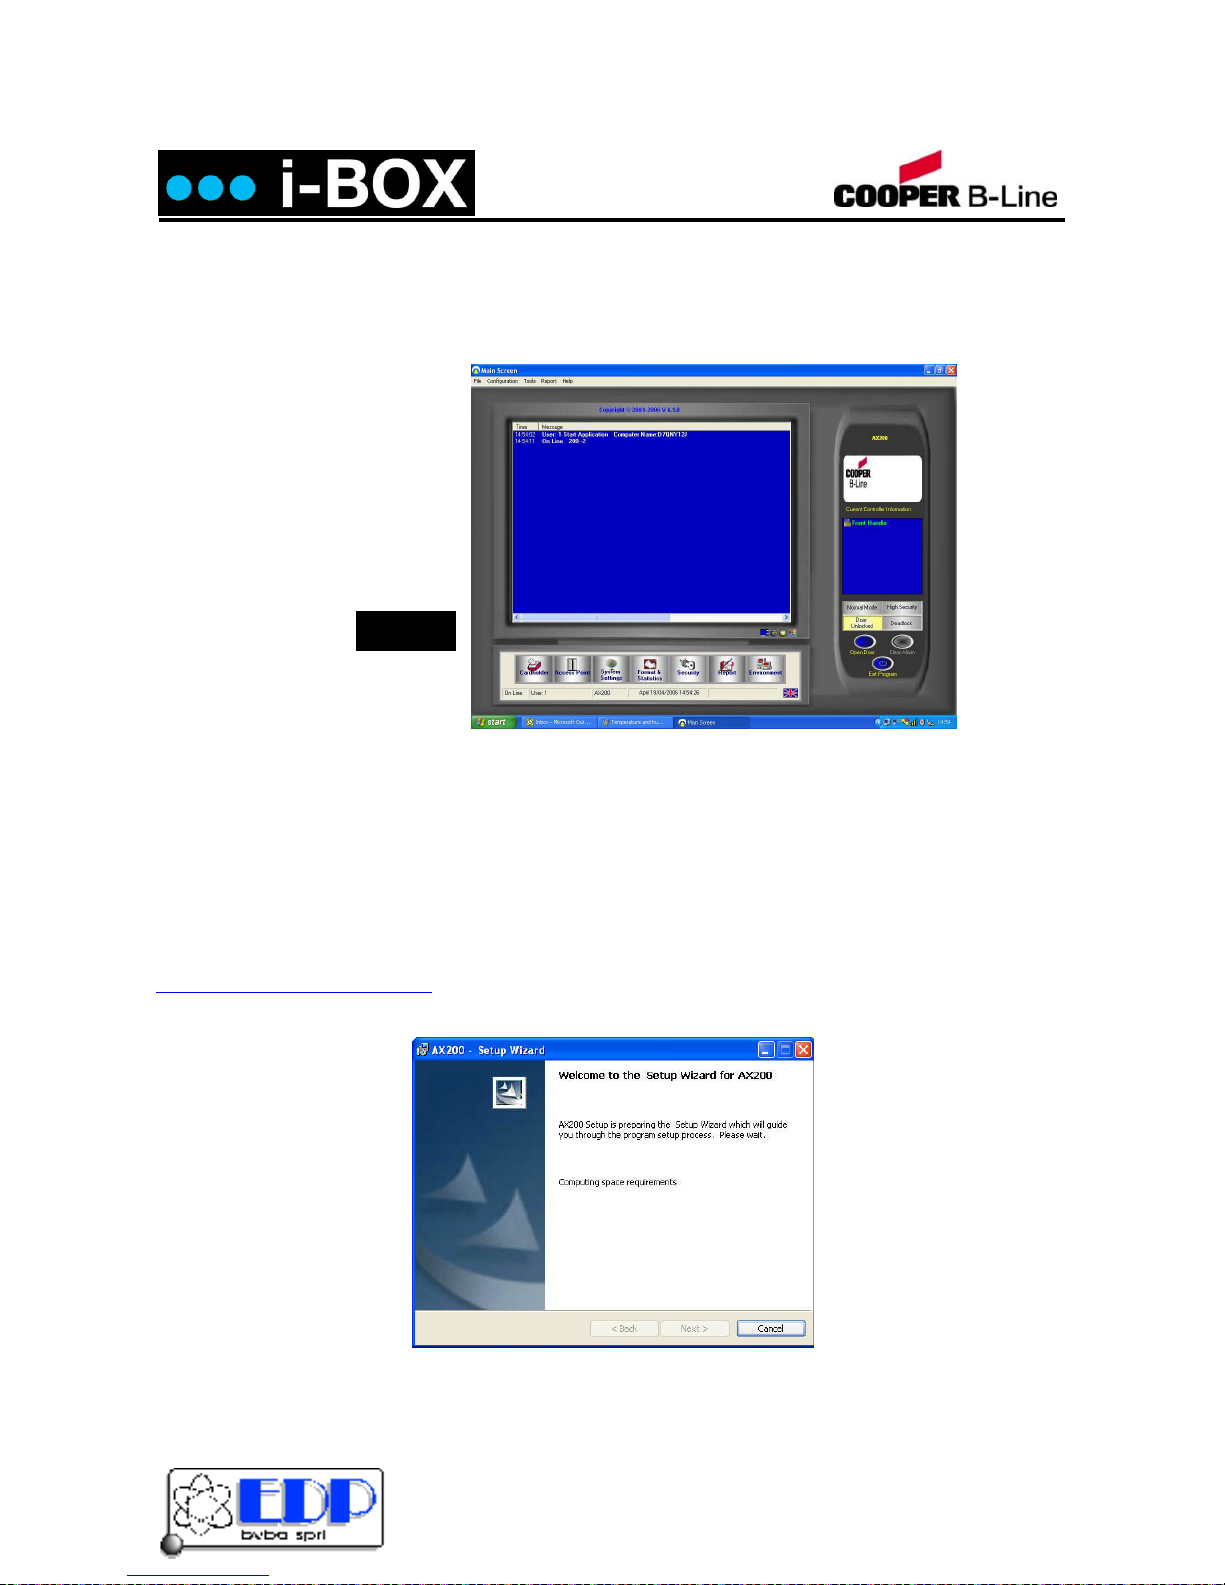
Software Installation
You can either load the AX200 software from the supplied CD or download the latest version from
www.cooperbline.co.uk/dowloads/. Either way locate the media on your PC and double click the Setup icon.
ClickNext > to continue with the AX200 Setup Wizard.
Fig. 13
Kalkenstraat 91-93 B-8800 Roeselare (Roulers) - Belgium
Tel. +32(0)51/25.06.10 Fax +32(0)51/24.02.57

Installation & User Guide
i-BOX Installation And User Guide_V4.2.6 Page 15of 57
Please read the License Agreement, to accept the terms select I accept… then click on Next >.
Enter User Name and Organisation details and Click on Next >.
The default directory where program files are installed is c: \Program Files\AX200\ If required, click on Change
to choose a different folder. Click on Next > to accept the default, or when you’ve entered a different destination
folder.
Kalkenstraat 91-93 B-8800 Roeselare (Roulers) - Belgium
Tel. +32(0)51/25.06.10 Fax +32(0)51/24.02.57

Installation & User Guide
i-BOX Installation And User Guide_V4.2.6 Page 16of 57
The AX200 program files will now be installed.
The i-BOX installation is now complete. Select Finish to exit the setup wizard.
Some operating systems also require Microsoft Data Access Components to support SQL. This is automatically
installed if required. Please follow the on-screen instructions.
Kalkenstraat 91-93 B-8800 Roeselare (Roulers) - Belgium
Tel. +32(0)51/25.06.10 Fax +32(0)51/24.02.57
Installation & User Guide
i-BOX Installation And User Guide_V4.2.6 Page 17of 57
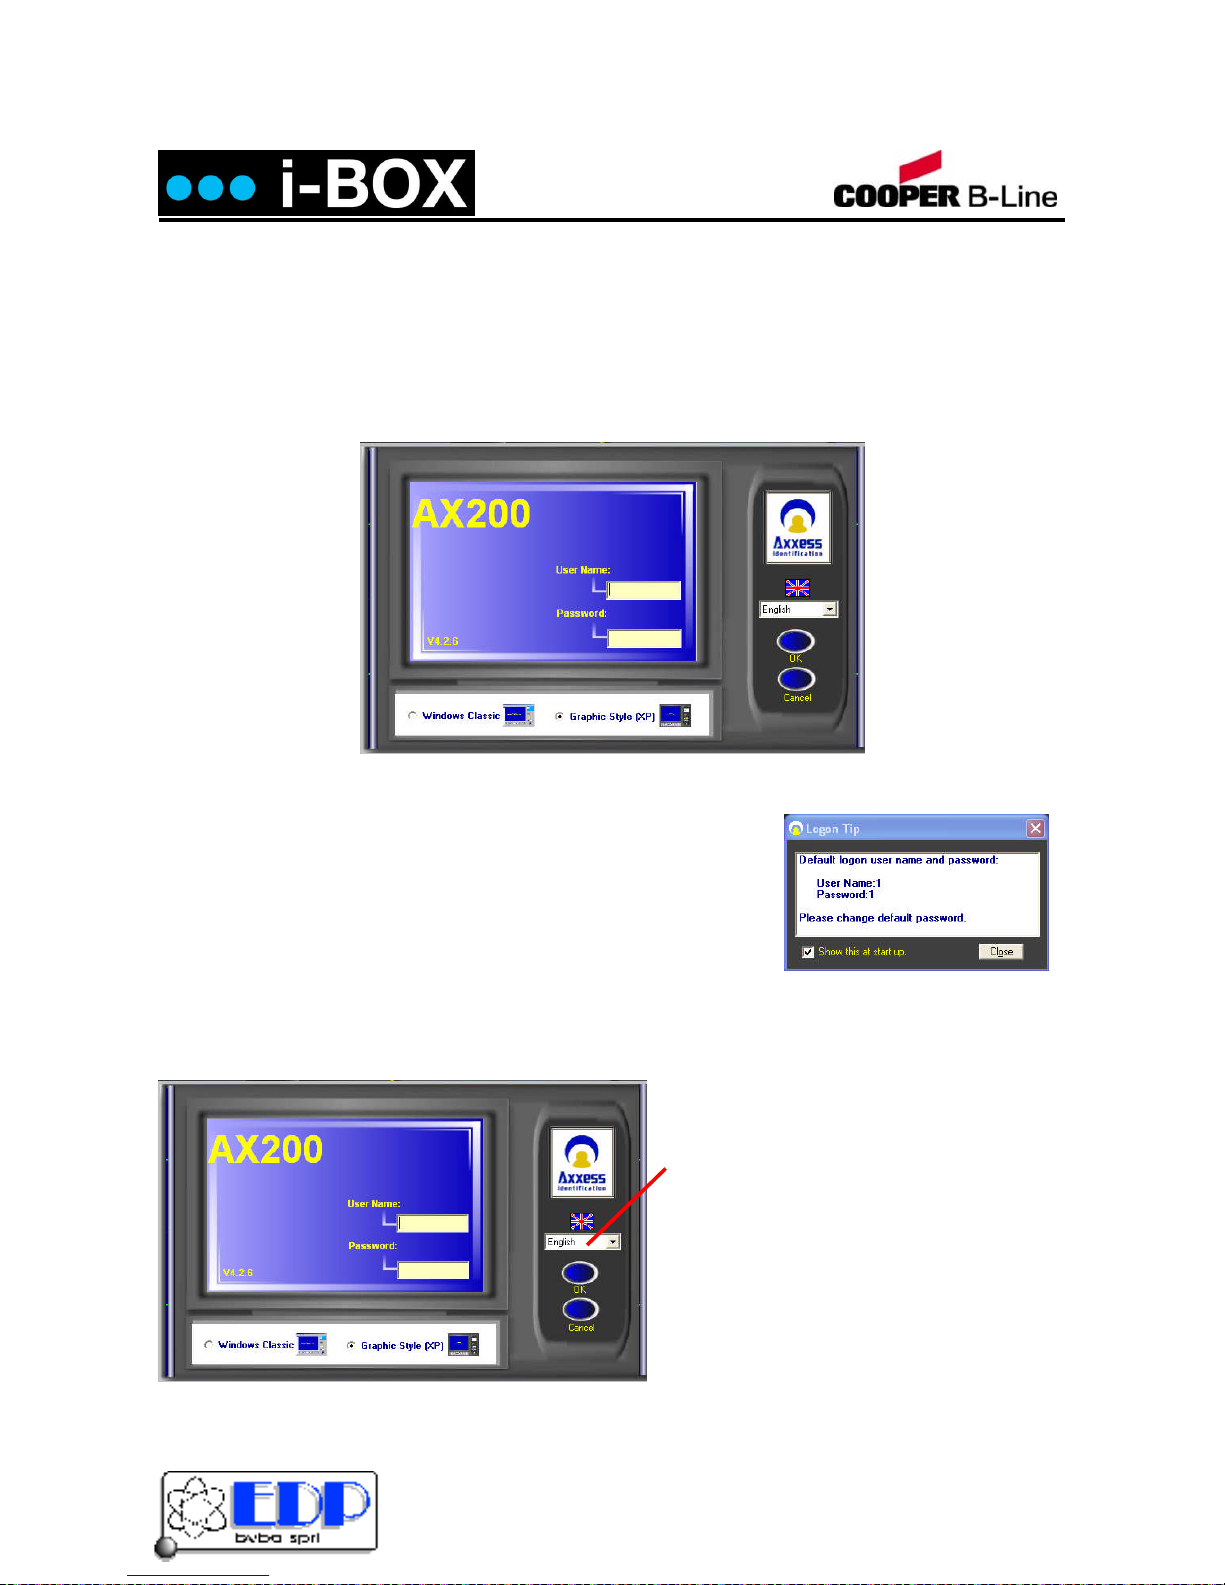
Starting the AX200 Software
Now connect your i-BOX controller either direct to the PC (using an RJ45 cross over patch lead) or to the
network that your PC is on using a standard RJ45 patch cord.
Go to Start>Programs>AX200 Access Control System and left click AX200 Access Control System and it
will launch the AX200 software, alternatively double click the AX200 logo from the Windows desktop.
The AX200 default user name is1and the default password is 1. The user names and passwords are not case
sensitive. Enter the default user name and password and select OK.
Password Reminder
A password reminder box displaying the factory default reminds the user to
change the default password. This reminder box disappears automatically
when the default password has been changed.
Language Selection
Installation and operation of the software can be selected in different languages. Changing the language can be
done from the login screen as well as within the program on the main screen, without the need to restart the
software or the computer.
Simply choose your preferred language from the
drop down options and the system language
changes.
Current languages include;
English
Dutch
French
Kalkenstraat 91-93 B-8800 Roeselare (Roulers) - Belgium
Tel. +32(0)51/25.06.10 Fax +32(0)51/24.02.57

Installation & User Guide
i-BOX Installation And User Guide_V4.2.6 Page 18of 57
Windows™Classic or Graphic Style (XP)
Screen
Users can select the type of interface on the main login
screen. Windows™Classic is most suitable for older
PC’s and laptops with only 64MB of RAM and 800 x
600 video resolution. Graphic Style (XP) has been
optimised for the Windows™XP operating system.
The graphical user interface makes it easy to use and
operate. The specification of the PC is automatically
checked and will only allow installation or selection of
the user interface if sufficient resources are available.
Backup & Restore
The AX200 software has a built-in backup utility. Backups can be done automatically at preset times and days,
or manually with network backup support. Backups from older software versions are automatically converted
avoiding the need for multiple steps to restore the software.
A backup can be restored in one single step. Automatic
backups are numbered using the date and time the backup
took place. If you wish to delete older backups, highlight the
appropriate file by clicking on it and press Delete>,
confirmation of this action is requested. It is useful to create
a complete system backup as soon as all the system
settings have been entered. Create a backup as normal, go
to restore, highlight the newly created file and right click with
the mouse and select Rename> – rename the file e.g.
master settings. This backup will allow you to restore the
system back to its original programmed settings, if required.
Standard Query Language (SQL)
The database structure is based on Microsoft SQL. This ensures stability and a high data throughput with easy
interfacing to other applications. The database handles up to 65,525 cardholder records with over 60 fields per
cardholder. Card numbering is up to 10 digits allowing support for a wide variety of formats e.g. existing cards or
multi-purpose cards (vending machines etc.)
Database Integrity Check
A mains failure or system crash with an open database normally requires running a separate application to repair
the data. All data in the AX200 database is automatically checked on start up and repaired if necessary. If the
data is corrupted a message will be displayed on the screen during initialisation.
To rectify the problem simply open and close the database until the error message is no longer displayed during
initialisation.
Kalkenstraat 91-93 B-8800 Roeselare (Roulers) - Belgium
Tel. +32(0)51/25.06.10 Fax +32(0)51/24.02.57

Installation & User Guide
i-BOX Installation And User Guide_V4.2.6 Page 19of 57
Configuring Your Network.
Before configuring an i-BOX onto your network you must either define or confirm your network PC’s IP address.
Before doing this please contact your system administrator to ensure that you have suitable access rights and
authorisation. Please note details below denote the method for obtaining this information on Windows XP
(systems may vary).
To find out or to set the PC’s IP address simply go to Start> then Control Panel>.
Then double click on Network Connections>
Now double click on Local Area Connection>
Kalkenstraat 91-93 B-8800 Roeselare (Roulers) - Belgium
Tel. +32(0)51/25.06.10 Fax +32(0)51/24.02.57

Installation & User Guide
i-BOX Installation And User Guide_V4.2.6 Page 20of 57
Now click on Properties>
Select TCP/IP> and click Properties>
This should now show details of your PC’s IP address and Subnet Mask details. Make a note of the PC’s IP
address, as you will need to allocate an IP address to each i-BOX within the same IP address range.
Kalkenstraat 91-93 B-8800 Roeselare (Roulers) - Belgium
Tel. +32(0)51/25.06.10 Fax +32(0)51/24.02.57
Table of contents
Popular Recording Equipment manuals by other brands


Behringer
Behringer U-PHORIA UMC1820 quick start guide

Extron electronics
Extron electronics Inline CIA116-1 Operation manual

DSC
DSC GS3060-RF installation manual

urmet domus
urmet domus 1058/010 Installation and user manual

Cochlear
Cochlear Baha BP100 user manual

Advanced Bionics
Advanced Bionics Marvel CI quick start guide