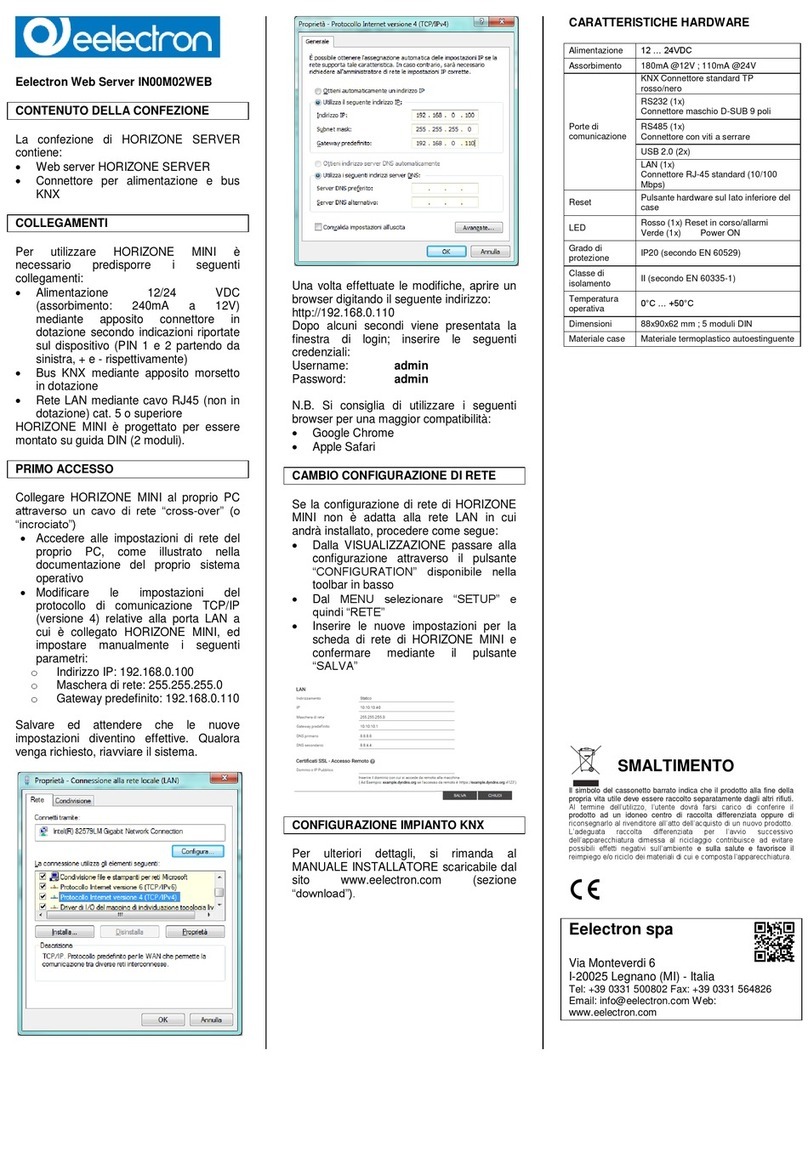
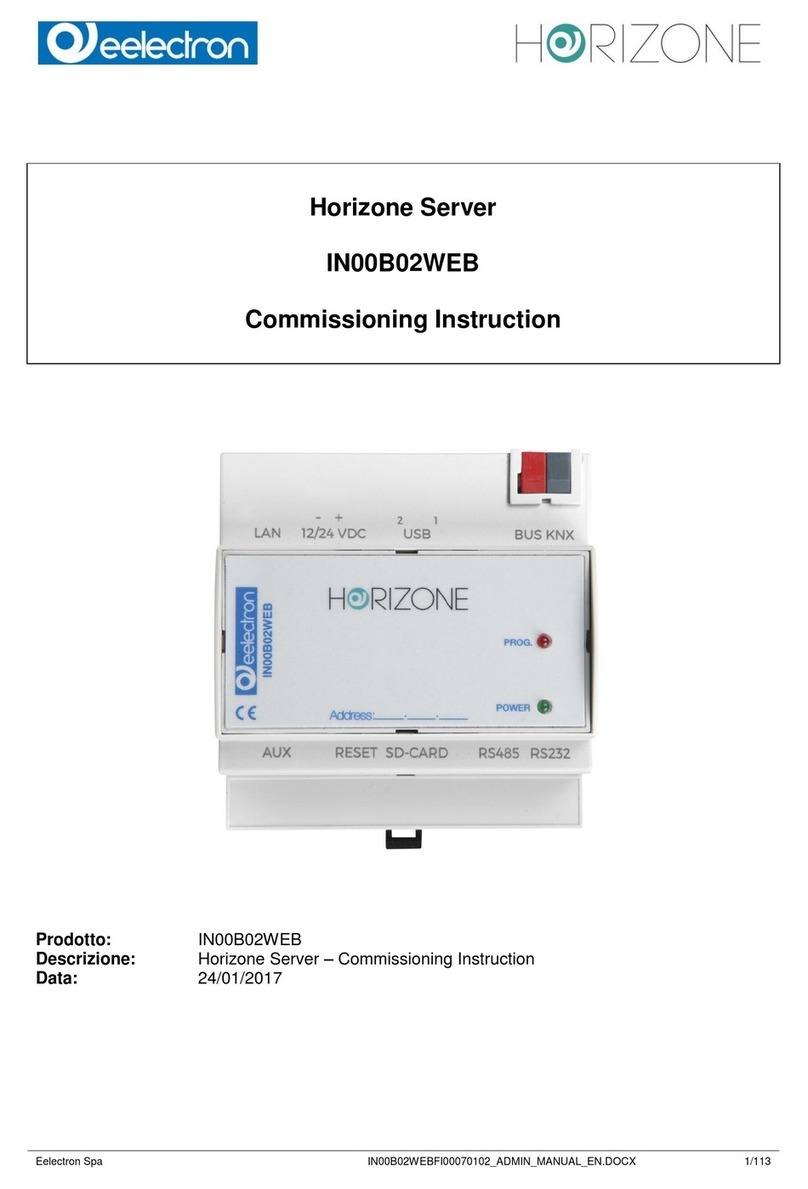
Eelectron IN00B02WEB User manual

Eelectron Spa
IN00B02WEBFI00060140_ADMIN_MANUAL.DOCX
1/108
HORIZONE SERVER
IN00B02WEB
INSTALLATION MANUAL
Product: IN00B02WEB
Description: Horizone Server - Installation Manual
Date: 10/04/2020
Version: 1.4

Eelectron Spa
IN00B02WEBFI00060140_ADMIN_MANUAL.DOCX
2/108
Any information in this manual may be changed without notice.
This manual can be downloaded free of charge from the website: www.eelectron.com
Exclusion of responsibility:
Although the contents of this manual have been checked to ensure that they correspond to the
hardware and software indicated in the title, changes may, however, be made. Therefore, Eelectron
assumes no responsibility therein.
© 2020 Eelectron SpA. All rights reserved.
Microsoft, Windows, Windows 2000, Windows XP, Windows 2003, Windows Vista, and Internet
Explorer are either registered trademarks or trademarks of Microsoft Corporation in the USA and
other countries. Java is a trademark of Sun Microsystems, Inc. in the USA and other countries.
All other product names mentioned herein are trademarks or registered trademarks of their
respective manufacturers.

Eelectron Spa
IN00B02WEBFI00060140_ADMIN_MANUAL.DOCX
3/108
Summary
INTRODUCTION 7!
Safety Information 7!
Copyright 7!
FIRST INSTALLATION 8!
Introduction 8!
Assembly and Connections 8!
Network connection 9!
First login 11!
HTTPS safe browsing 13!
Administration and frontend 14!
Restoring the factory IP Address 16!
Factory Restore 16!
OVERVIEW 17!
Introduction 17!
Graphic administration interface 17!
Toolbar 18!
Navigation Menu 19!
Search 21!
Workspace 23!
SETUP 24!
Introduction 24!
Language 24!
Network 24!
Access with QR code 26!
Backup / Restore 29!
Updating 30!
Date/Time 31!
Email 32!
Managing licenses and modules 33!
Maintenance 33!
TECHNOLOGIES 35!
Introduction 35!
Field bus 35!
Video surveillance 36!
NFC address 36!
Reporting and accounting 36!

Eelectron Spa
IN00B02WEBFI00060140_ADMIN_MANUAL.DOCX
4/108
CUSTOMISATION 37!
Graphic themes 37!
Navigation Menu 37!
Managing Favourites 38!
Customise Rendering 39!
Creating a custom rendering 40!
ROOMS 45!
Introduction 45!
Creating a new room 45!
Choosing the background 47!
Inserting Objects 48!
Removing a room 49!
Customizing the graphic map 50!
FUNCTIONS 52!
Introduction 52!
Assigning the function to an object 52!
Customising features 52!
Frontend functions 53!
WIDGET 55!
Introduction 55!
Creating a Widget 55!
Assigning Objects 57!
Generic Template 58!
RGB light management 60!
SCENARIOS 61!
Introduction 61!
Creating a new scenario 61!
Adding actions to a scenario 63!
Timed Scenarios 63!
Customising delays 65!
Frontend scenarios 66!
LINKS 68!
Introduction 68!
Create a new link 68!
Frontend management 69!
ADVANCED FEATURES 70!
Introduction 70!

Eelectron Spa
IN00B02WEBFI00060140_ADMIN_MANUAL.DOCX
5/108
Programmable events 70!
Logics 70!
Conditions 71!
Variables 72!
On-screen notifications 73!
Email notifications 75!
Push notifications 75!
Mathematical operators 76!
Clocks 78!
Pilot Strings 78!
Schedules 79!
Status bytes 81!
Repeaters 82!
EVENTS 83!
Introduction 83!
Programmable events 83!
Adding Objects 84!
Connections 86!
Widgets in programmable events 89!
Removing objects or connections 90!
Multiple selection 90!
Deleting an event 90!
Single connections 90!
CLOUD SERVICES 92!
Registration 92!
Remote cloud accessibility 94!
Cloud Sync 95!
Voice Assistant Control 97!
USERS AND PERMISSIONS 100!
Introduction 100!
Users and User Groups 100!
Creating a new user 100!
User groups and access rights 101!
OPTIONS 103!
Home 103!
Notifications 104!
Advanced 105!

Eelectron Spa
IN00B02WEBFI00060140_ADMIN_MANUAL.DOCX
6/108
REMOTE ACCESS 106!
Introduction 106!
REVISIONS 108!

Eelectron Spa
IN00B02WEBFI00060140_ADMIN_MANUAL.DOCX
7/108
INTRODUCTION
Safety Information
This manual contains the information necessary to safely operate the device. Anyone interacting
with the device must first have read this documentation, especially this safety information. This
document supplements and does not replace any safety laws or directives.
The device has been developed using state-of-the-art technologies and following current safety
regulations; it is, however, not possible to totally exclude all possible damage or interaction with other
devices during its operation. The device complies with EMC guidelines and harmonised European
standards; any changes to the device may affect EMC compatibility.
The supply voltage must be strictly within the range indicated in this manual and on the device;
danger of fire or explosion if power is supplied outside this range. The equipment shall be powered
by a limited power supply circuit whose isolation from the mains shall be not less than that between
the primary and secondary circuits of a safety transformer according to IEC 61558-2-6 or equivalent.
The CE declaration of conformity of the device can be requested from Eelectron SpA, at the contacts
on the website www.eelectron.com
In accordance with Directive 2002/96/EC, electronic devices must be disposed of in
dedicated facilities and not in the collection of municipal solid waste.
Copyright
HORIZONE SERVER technical instructions, manuals and software are subject to copyright; all rights
are reserved. Copying, reproduction, translation and/or modification, even partial, are expressly
prohibited unless approved in writing by Eelectron SpA.

Eelectron Spa
IN00B02WEBFI00060140_ADMIN_MANUAL.DOCX
8/108
FIRST INSTALLATION
Introduction
HORIZONE SERVER is a supervision webserver for home & building automation systems based on
the global KNX standard and on some of the most popular proprietary technological systems on the
market. The HORIZONE SERVER is configured and used entirely through web pages, through a
common browser from any type of device or operating system.
Assembly and Connections
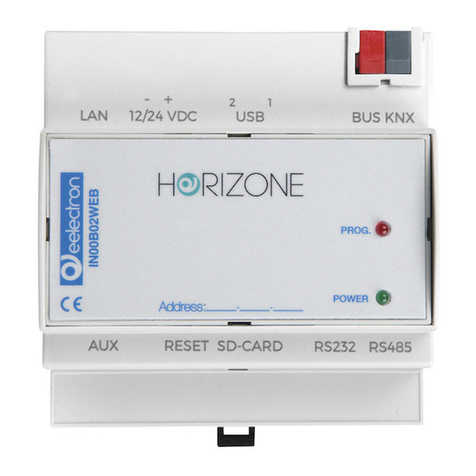
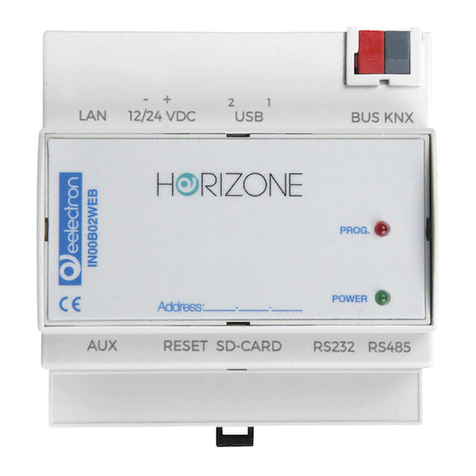
HORIZONE SERVER is designed to be mounted on a DIN rail, like most electrical devices.
the following connections must be provided to ensure the correct operation of HORIZONE SERVER:
● 12V/24V DC power supply (240mA at 12V absorption) using the specific terminal supplied.
● KNX bus with standard red-black terminal supplied
● LAN network using cat. 5 or higher cable and standard RJ45 connector
The front LED identified as “POWER” indicates that power is available, while the “SERVICE” LED
normally remains off, unless it indicates specific operations in progress.
HORIZONE SERVER also features the following ports:
● SD Slot: for the insertion of SD/SDHC memory cards to increase storage space
● RS232, RS485 and 2 USB Serial Ports: available for integrations and advanced applications
connection to the KNX bus is not essential for the configuration of HORIZONE SERVER,
however, it is preferable because it is not possible to verify its correct operation without
this connection.
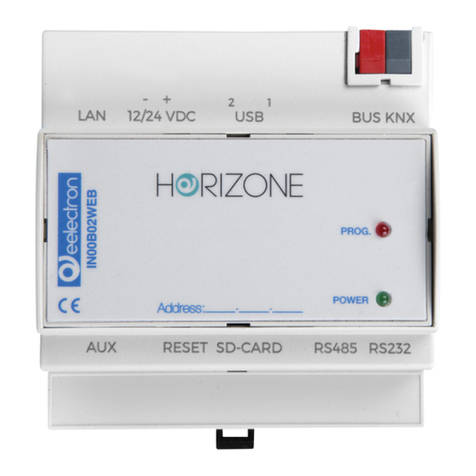
The following figures show the location of the ports on both sides of the device.

Eelectron Spa
IN00B02WEBFI00060140_ADMIN_MANUAL.DOCX
9/108
Network connection
The configuration and use of HORIZONE SERVER provide a connection to the home or company
network. For the initial configuration of HORIZONE SERVER and if there is no network available
during the installation phase, proceed as follows:
● Connect HORIZONE SERVER to your PC via a “cross-over” network cable
● Access your PC's network settings, as described in your operating system documentation
● Change the TCP/IP (version 4) communication protocol settings for the LAN port to which
HORIZONE SERVER is connected and manually set the following parameters:
o IP Address: 192.168.0.100
o Network mask: 255.255.255.0
o Default gateway: 192.168.0.110
o Save and wait for the new settings to take effect. If prompted, reboot the system.
The following illustrations give an example of the network configuration windows for a PC running
Windows.

Eelectron Spa
IN00B02WEBFI00060140_ADMIN_MANUAL.DOCX
10/108
When these operations have finished, open an Internet browser and type the following in the address
bar:
http://192.168.0.110
For the best experience, we recommend using the following browsers:
● Google Chrome
● Apple Safari
HORIZONE SERVER is also compatible with the following browsers:
● Mozilla Firefox
● Microsoft Edge
● Opera
Finally, we do not recommend using the following browsers as they are not fully
compatible with the functions provided by HORIZONE SERVER:
● Internet Explorer (version 9.0 or higher, however)
Compatibility with browsers is constantly evolving; it is advisable to periodically consult
the updated documentation for any news.

Eelectron Spa
IN00B02WEBFI00060140_ADMIN_MANUAL.DOCX
11/108
First login
The first time you access HORIZONE, the browser must load some data into the local cache to
speed up the next browsing session; during this phase, the percentage of progress is shown, as
shown in the following figure:
HORIZONE caching mechanisms may not be compatible with all browsers; in some
cases, you may be prompted for permission to store caches locally, in which case you
must consent to allow correct operation. You can disable caches as shown in the section
of this manual.

Eelectron Spa
IN00B02WEBFI00060140_ADMIN_MANUAL.DOCX
12/108
You are prompted to enter login credentials when the upload has finished:
HORIZONE SERVER presents the following default users in the factory:
USERNAME
PASSWORD
DESCRIPTION
admin
admin
Building automation system administrator user. This user has
the rights to create users, manage their rights and to configure
supervision
manager
manager
User dedicated to the installation and configuration of
supervision. This user has the rights to configure the project, but
does not have the right to perform system configurations.
user
user
Basic user for PC connections. This user has the rights to view
the status of the system, browse the WEBSERVER pages and
perform the basic commands on the building automation system
Enter the credentials of the “admin” user and confirm to access the main screen of the HORIZONE
SERVER administration environment.

Eelectron Spa
IN00B02WEBFI00060140_ADMIN_MANUAL.DOCX
13/108
HTTPS safe browsing
When accessing HORIZONE remotely, it is mandatory to use the secure HTTPS protocol. You can
also force secure HTTPS navigation on the local network by specifying it in the address:
https://192.168.0.110
In this case, to make browsing safer, it is advisable to generate a unique SSL certificate, and install
the Eelectron SpA CA certificates on your PC/device, as detailed in the chapter. Otherwise,
abnormalities or malfunctions may occur due to the security mechanisms of the browser or plug-ins
used for specific functions.
If you're using your Google Chrome browser, you should also browse HTTPS locally to
take full advantage of the features offered by your voice assistant.

Eelectron Spa
IN00B02WEBFI00060140_ADMIN_MANUAL.DOCX
14/108
Administration and frontend
HORIZONE SERVER is divided into two distinct environments for its configuration and use by the
end user:
● ADMINISTRATION: working environment with which it is possible (according to the user
access rights) to configure all aspects of the WEBSERVER and building automation
supervision
● FRONTEND: graphic environment designed for daily use of supervision by the end user, with
which you can navigate through the pages included in the CONFIGURATION section, send
commands to building automation devices and view their status in real time
Both environments are based on web technology, so they can be managed entirely through a web
browser; however, the graphical setting is different:
The CONFIGURATION environment has been
optimized to offer the most graphical tools and
information, with simple and functional graphics
Vice versa, every graphical detail of the
FRONTEND environment has been taken care of
to offer the inexperienced user a pleasant and
intuitive browsing and use experience
To switch between sections:
From ADMINISTRATION to FRONTEND
Top right button in toolbar
From to FRONTEND to ADMINISTRATION
Bottom-right button in toolbar (not available within apps)

Eelectron Spa
IN00B02WEBFI00060140_ADMIN_MANUAL.DOCX
15/108
Alternatively, simply “append” the following entries to the address:
SECTION
WRITING
EXAMPLE
Administration
context=configuration
http://192.168.0.110/horizone/modules/system/external
frame.php?context=configuration
Frontend
context=runtime
http://192.168.0.110/horizone/modules/system/external
frame.php?context=runtime
To optimize configuration times, you can simultaneously open the two sections in the
same number of browser TABS, and switch between them to preview the result of the
configuration work.
NOTE: In some cases, you need to update your FRONTEND environment by simply
pressing the UPDATE button on your browser.

Eelectron Spa
IN00B02WEBFI00060140_ADMIN_MANUAL.DOCX
16/108
Restoring the factory IP Address
If necessary, you can reset the factory IP address of HORIZONE SERVER using the “RESET” button
available on the side of the WEBSERVER. To do this:
● Locate the “RESET” button and use a screwdriver or another tool with the correct diameter
to press the button through the hole in the case
● Press the button for at least 10 seconds, until the “SERVICE” LED on the front of the device
starts flashing, then release the button
● Within the next 5 seconds, press the button for 1 second and release; within a couple of
seconds the front LED will light up steadily for a couple of seconds
● When the LED turns off, the WEBSERVER can be reached at the factory IP address
(192.168.0.110)
If the LED turns off after pressing for a prolonged period (10 seconds) before pressing it for a short
period, repeat the entire procedure.
Factory Restore
If the set configuration makes it impossible to access or correctly use HORIZONE, factory conditions
can be restored by resetting the IP address and clearing the supervision project using the “RESET”
button located on the side of the WEBSERVER.
To do this, with respect to the recovery procedure for the IP address, proceed as follows:
● Locate the “RESET” button and use a screwdriver or another tool with the correct diameter
to press the button through the hole in the case
● Press the button for at least 10 seconds, until the “SERVICE” LED on the front of the device
starts flashing, then release the button
● Within the next 5 seconds, press and hold the button for at least 10 seconds
● When the LED turns on steadily, release the button and wait for it to turn off
● When the LED turns off, disconnect and restore power
● Wait about one minute and access HORIZONE with factory IP address (192.168.0.110)

Eelectron Spa
IN00B02WEBFI00060140_ADMIN_MANUAL.DOCX
17/108
OVERVIEW
Introduction
This chapter presents an overview of the HORIZONE SERVER configuration environment,
describing in detail the various tools made available and allowing you to familiarize yourself with the
working environment of the web server.
Graphic administration interface
The ADMINISTRATION screen is divided into the following sections:
SEARCH
Always available at the top left, allowing you to quickly search for objects
based on one or more keywords
MENU
A tree menu that provides access to each page or section of the software,
as well as to create, edit, or delete objects
TOOLBAR
Always available at the top, providing a series of buttons to perform the
most common operations
WORKSPACE
Main section of the page; initially empty, it hosts object tabs or software
configuration pages. You can use multiple tabs at the same time by
toggling between them with the “TABS” available at the top, when at least
one page has been opened.
TOOLBAR
SEARCH
MENU
WORKSPA

Eelectron Spa
IN00B02WEBFI00060140_ADMIN_MANUAL.DOCX
18/108
Toolbar
The toolbar provides the following buttons at any time:
SAVE ON FLASH
Allows you to force the database to be saved to the HORIZONE
SERVER persistent flash memory, ensuring the persistence of
the data even when the system shuts down. The button turns red
to indicate the presence of unsaved changes; persistent saving
occurs automatically every 5 minutes, so it is not necessary to
force the save unless the system needs to be shut down before
this happens.
CLOUD MANAGER
Allows access to the cloud services integrated with HORIZONE
SERVER, subject to registration (free of charge).
In particular, it allows you to synchronise supervision objects
which can then be monitored through remote services, such as
voice assistants
CLEAR CACHE
Force all cache mechanisms to be cleared. Use this button only
if necessary, if the video content does not reflect the configuration
made.
BASIC/ADVANCED
Allows you to set the visibility level of the functions and properties
of objects within the pages; the BASIC level offers access to the
most commonly used items and only to those set as "VISIBLE”;
the ADVANCED level allows you to manage all parameters and
access hidden objects
When “ADVANCED” mode is active, this button is red
SHOW PANELS
These buttons allow you to show or hide the side panels,
respectively left (containing MENU and SEARCH) and right
(additional information depending on the WORKSPACE page)
LOGOUT
Allows you to close the work session and login as a different user
FRONTEND
Allows you to switch to the end-user monitoring environment and
see the result of the configuration

Eelectron Spa
IN00B02WEBFI00060140_ADMIN_MANUAL.DOCX
19/108
Navigation Menu
The navigation menu allows you to access all the admin sections of the WEBSERVER and perform
the main operations on the objects. The menu is divided into the following main sections:
SETUP
Contains the configuration and general management pages of the
WEBSERVER
TECHNOLOGIES
Allows you to configure the technologies that the WEBSERVER
manages: KNX, video surveillance, VoIP, multimedia and security
systems, etc.
CUSTOMISATION
Contains the pages with which to customize the graphic appearance
of supervision and the specific behaviour of the WEBSERVER
SUPERVISION
Allows you to configure the graphical supervision by the end user:
environments, functions, scenarios
ADVANCED FEATURES
Allows you to create and edit different types of objects that can
perform advanced logical operations
ENERGY
Allows access to specific functions related to energy and load control
SERVICES
Allows you to control some services used by the WEBSERVER to
operate it
USERS AND
PERMISSIONS
Allows you to configure system access accounts and determine what
rights they have over the different supervision functions and sections
CHANGE PASSWORD
Page that allows anyone, even with basic rights, to change their
password
OPTIONS
Allows customisation of some WEBSERVER operation options
The menu has the tree menu structure; when loading the administration environment, it displays the
first level sections, while the upper level sections can be accessed by “expanding” the sections that
contain them. All navigation operations within the menu can be done with the mouse.
By clicking on a menu item, it is highlighted in blue; if the item includes sub-items, they are loaded
and shown below, effectively expanding the selected item. To close the section, click on it again
(when it has been selected).
If the selected menu item includes one or more operations, they are made available in the
“TOOLBAR” at the bottom of the screen through special buttons; the operations include (from left to
right):
CREATE NEW
Creates a new object within the selected section. Specific types of objects
can be created depending on the specific section; if more than one type is
available, a context menu is displayed
EDIT
Allows you to edit the properties of the selected object by opening the
relevant tab in the “WORKSPACE”

Eelectron Spa
IN00B02WEBFI00060140_ADMIN_MANUAL.DOCX
20/108
DELETE
Deletes the selected item from the project
DUPLICATE
Allows you to copy the selected object and create a new one with the same
characteristics and relationships with the other objects
If the selected item allows editing, when it is selected, three “dots” appear on the right, which
represent a shortcut instead of pressing the relevant edit button in the TOOLBAR.
When an item is open in the WORKSPACE, an arrow appears on the right; when the corresponding
TAB is closed, the arrow is hidden and the three edit dots appear next to the menu item again, if
selected.
Some sections of the menu allow you to create new objects within them; an “ADD” button is available
in the toolbar at the bottom of the screen for this purpose: when you press it, a new object is created
(the type depends on where you are located in the tree) and automatically selected; if you press the
“EDIT” button now (or the “three dots” next to the menu item), you access the relevant tab to change
its properties.
To create a new room, for example, simply select “ROOMS” and press the “ADD” button; the new
room is created and placed at the bottom of the list of rooms that may already exist.
In the case of rooms (as detailed below), it is also possible to create sub-rooms of entries already
present in the project, simply by selecting them and then pressing the “ADD” button.
You can delete previously created objects by selecting them and pressing the “DELETE” button; this
is not allowed by selecting system entries.
Other manuals for IN00B02WEB
2
Table of contents
Other Eelectron Server manuals
Popular Server manuals by other brands
Compaq
Compaq 195294-001 - ProLiant - ML370R Quick install guide
Acrosser Technology
Acrosser Technology ANR-C236N1-K2D00 user manual
Osram
Osram e:cue LCE2-mx Setup manual
Dell
Dell PowerEdge C6220 Hardware owner's manual
LG
LG PCS400R Pro:Centric Installation & setup guide

QNAP
QNAP TS-401T Turbo Server Quick installation guide
