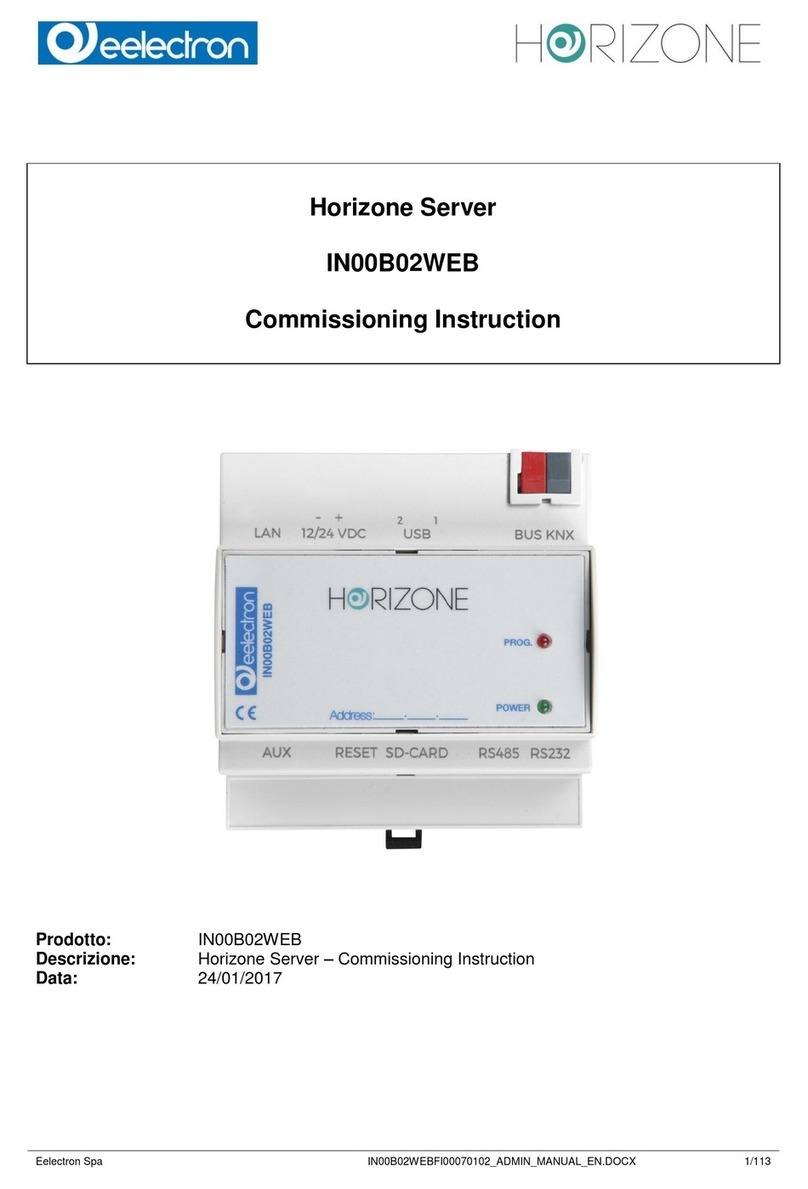
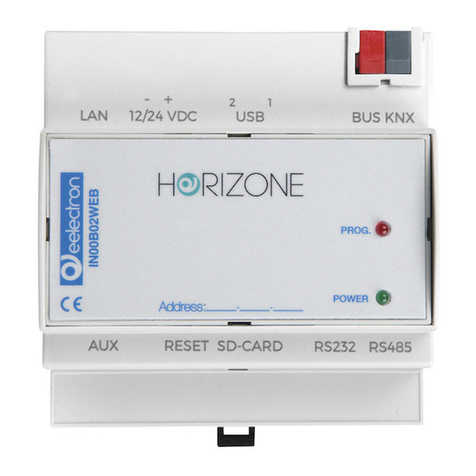
Eelectron IN00B02WEB Instruction sheet

Eelectron Spa
IN00B02WEBFI00060140_KNX_MANUAL.DOCX
1/42
HORIZONE SERVER
IN00B02WEB
KNX CONFIGURATION MANUAL
Product: IN00B02WEB
Description: Horizone Server - KNX Configuration Manual
Date: 10/04/2020
Version: 1.4

Eelectron Spa
IN00B02WEBFI00060140_KNX_MANUAL.DOCX
2/42
Any information in this manual may be changed without notice.
This manual can be downloaded free of charge from the website: www.eelectron.com
Exclusion of responsibility:
Although the contents of this manual have been checked to ensure that they correspond to the
hardware and software indicated in the title, changes may, however, be made. Consequently,
Eelectron assumes no responsibility therein.
© 2020 Eelectron SpA. All rights reserved.
Microsoft, Windows, Windows 2000, Windows XP, Windows 2003, Windows Vista, and Internet
Explorer are either registered trademarks or trademarks of Microsoft Corporation in the USA and
other countries. Java is a trademark of Sun Microsystems, Inc. in the USA and other countries.
All other product names mentioned herein are trademarks or registered trademarks of their
respective manufacturers.

Eelectron Spa
IN00B02WEBFI00060140_KNX_MANUAL.DOCX
3/42
Summary
INTRODUCTION 5!
Safety Information 5!
Copyright 5!
OVERVIEW 6!
Introduction 6!
Purpose of this document 6!
Requirements 6!
Installation 7!
IMPORT FROM ETS 8!
Introduction 8!
Supported formats 8!
ETS Rules 10!
Importing the project 12!
Starting the procedure 12!
Finding status feedback 13!
Importing 16!
Application of ETS rules 17!
Selective import 18!
KNX OBJECTS 20!
Creating objects manually 20!
Searching for objects 21!
Detail tab 22!
Group addresses 25!
Rooms and scenarios 26!
Connections 26!
Programmable events 27!
Schedules 27!
KNX SCENARIOS 28!
Introduction 28!
Configuring a KNX scenario 28!
PHYSICAL DEVICES 30!
Introduction 30!
Device List 30!

Eelectron Spa
IN00B02WEBFI00060140_KNX_MANUAL.DOCX
4/42
Polling enquiry 30!
Detail tab 31!
SETTINGS 32!
Introduction 32!
REMOTE CONTROL OF ETS 33!
Introduction 33!
Local network usage 33!
Remote use 36!
REVISIONS 42!

Eelectron Spa
IN00B02WEBFI00060140_KNX_MANUAL.DOCX
5/42
INTRODUCTION
Safety Information
This manual contains the information necessary to safely operate the device. Anyone interacting
with the device must first have read this documentation, especially this safety information. This
document supplements and does not replace any safety laws or directives.
The device has been developed using state-of-the-art technologies and following current safety
regulations; it is, however, not possible to totally exclude all possible damage or interaction with other
devices during its operation. The device complies with EMC guidelines and harmonised European
standards; any changes to the device may affect EMC compatibility.
The supply voltage must be strictly within the range indicated in this manual and on the device;
danger of fire or explosion if power is supplied outside this range. The equipment shall be powered
by a limited power supply circuit whose isolation from the mains shall be not less than that between
the primary and secondary circuits of a safety transformer according to IEC 61558-2-6 or equivalent.
The CE declaration of conformity of the device can be requested from Eelectron SpA, at the contacts
on the website www.eelectron.com
In accordance with Directive 2002/96/EC, electronic devices must be disposed of in
dedicated facilities and not in the collection of municipal solid waste.
Copyright
HORIZONE SERVER technical instructions, manuals and software are subject to copyright; all rights
are reserved. Copying, reproduction, translation and/or modification, even partial, are expressly
prohibited unless approved in writing by Eelectron SpA.

Eelectron Spa
IN00B02WEBFI00060140_KNX_MANUAL.DOCX
6/42
OVERVIEW
Introduction
HORIZONE SERVER is able to supervise a KNX home and building automation system through
direct connection to the TP twisted pair, thanks to its integrated KNX interface. HORIZONE SERVER
also supports connections to the KNX bus via KNX IP ROUTER in the case of systems with IP
backbones.
All the power and flexibility of HORIZONE SERVER are available to the installer and end user to
manage home and building automation functions freely from any device, both locally and remotely;
KNX commands can be entered into graphics pages, scenarios, logics, schedules, etc. and interact
with other technologies managed by HORIZONE SERVER, helping to create a unique browsing
experience of the smart building.
Purpose of this document
This manual contains all the information you need to install, configure and use the specific features
of KNX technology onboard HORIZONE SERVER.
It assumes a good knowledge of both KNX technology and HORIZONE SERVER. Some sections of
this document refer to general concepts of supervision that can be found in the following manuals,
all freely available for download on the company website.
● HORIZONE - INSTALLATION MANUAL
● HORIZONE – USER MANUAL
Requirements
In order to manage a KNX system with HORIZONE SERVER, you must have:
● A HORIZONE SERVER (upgraded to version 1.0 or higher)
● A physical connection to the KNX twisted-wire bus cable or, alternatively, the ability to
communicate via TCP/IP with an IP router

Eelectron Spa
IN00B02WEBFI00060140_KNX_MANUAL.DOCX
7/42
Installation
HORIZONE SERVER can be connected to a KNX system in two ways:
● Direct connection to the twisted-wire bus cable
● IP backbone connection via a KNX IP ROUTER
For direct connection, use the standard red-black terminal provided to connect to the bus, taking
care to respect the correct polarity.
For communication via KNXNET/IP, HORIZONE SERVER and IP router must be on the same
network, and multicast/broadcast traffic must be enabled.

Eelectron Spa
IN00B02WEBFI00060140_KNX_MANUAL.DOCX
8/42
IMPORT FROM ETS
Introduction
HORIZONE SERVER can import the project created in ETS completely automatically to speed up
the creation of KNX objects. You can also import repeatedly in the same project after making
changes in ETS; HORIZONE SERVER interprets the changes and only makes the necessary
adjustments to the supervision, without losing any previous configurations.
Supported formats
You can import the project from ETS in the following formats:
FORMAT
DESCRIPTION
RESTRICTIONS
ESF + PHD
Export for OPC
CSV
Export group addresses
Contains only the list of group addresses; information on
the type of data to be entered by hand, if any
To generate export files in ESF / PHD format, select the “EXPORT TO OPC SERVER” entry in ETS.
This procedure generates two files with the following extension:
ESF
Contains group addresses, their labels, and relationships with other group addresses
PHD
Contains the physical addresses of the devices in the project
HORIZONE SERVER can import KNX addresses from a CSV file as follows:
● Tab as column separator
● Label of group addresses in the first column
● Group address in second column
● Bit length in third column
This type of file can be generated manually (for example, by using Microsoft Excel) or automatically
by ETS software. In the latter case, it is necessary to:
● Select the branch of group addresses that you want to export
● Select “EXPORT GROUP ADDRESSES” from the context menu

Eelectron Spa
IN00B02WEBFI00060140_KNX_MANUAL.DOCX
9/42
● Specify the following options:
◦ Data organized into 2 columns (label + address)
◦ Tab separation between columns

Eelectron Spa
IN00B02WEBFI00060140_KNX_MANUAL.DOCX
10/42
Importing from CSV can also be convenient to quickly create new KNX objects within
HORIZONE SERVER without necessarily going through ETS: simply fill in the label and
group address information in a new file and start the import procedure.
ETS Rules
To speed up the process of importing from ETS, HORIZONE SERVER uses a set of rules to
automatically customize objects created from information in your project.
Before importing the ETS project, you should take a few minutes to familiarize yourself with these
rules, because they can greatly reduce the time required for subsequent customization of objects.
To edit ETS rules, go to the TECHNOLOGIES section → KNX → ETS RULES: the following page is
displayed, containing the list of all the default rules for importing from ETS.

Eelectron Spa
IN00B02WEBFI00060140_KNX_MANUAL.DOCX
11/42
Rules search for one or more keywords within group address names and automatically assign the
correct data encoding (required for supervision to work properly) and graphical appearance of the
corresponding objects.
Each rule consists of the following information:
KEYWORDS
One or more words (or partial text) to be searched for within the names
assigned in ETS to group addresses. To specify more than one word, separate
them with a comma; the space is searched for within the ETS project, thus
allowing greater granularity in the composition of the rules
TYPE
Length (in bits/bytes) used in KNX addresses to be searched for within the ETS
project
ENCODING
Type of encoding to be used in HORIZONE SERVER to correctly interpret the
data in transit on the KNX bus (depends on the length of the data specified in
the “TYPE” field)
FUNCTION
Category in which to place objects created by HORIZONE SERVER when
importing KNX addresses that meet the ETS rule search criteria
ICON
Icon (or set of icons) to be used for graphical representation of objects that
meet the rule search criteria
The rule must be interpreted as follows: If HORIZONE SERVER finds a group address that contains
at least one of the KEYWORDS specified in the rule name, that has the data length specified as the
TYPE, it adopts the ENCODING specified in the rule for writing/reading information about the KNX
bus and automatically assigns the FUNCTION and ICON chosen for the graphical representation of
the corresponding object.

Eelectron Spa
IN00B02WEBFI00060140_KNX_MANUAL.DOCX
12/42
Importing the project
Starting the procedure
Whatever file format you want to use for importing, you must:
● Go to the HORIZONE SERVER ADMINISTRATION section
● Select TECHNOLOGIES → KNX → IMPORT FROM ETS
● Use the BROWSE button to select the file previously exported from ETS on your PC.
● Set the import options as outlined below, then press the “NEXT” button to start the procedure
The “BASIC” access level provides the following options:
CLEAR PRE-EXISTING KNX
OBJECTS
Deletes any previously imported KNX objects. Rooms,
scenarios, etc. are not removed.
SEARCH STATUS FEEDBACK
Enable automatic search for status feedback within the project,
as further detailed below
CHOOSE WHICH ADDRESSES
TO IMPORT
This entry allows you to selectively select which ETS project
addresses to import.
NOTE: This option is automatically activated if an ETS project,
containing more KNX addresses than your license allows, is
detected during import.
The “ADVANCED” access level also allows you to specify the following:
DELETE OBJECTS NOT IN THE
PROJECT
Selecting this item automatically deletes pre-existing objects in
HORIZONE SERVER that no longer have a match in the
imported ETS project
UPDATE LABELS
UPDATE ETS FLAG
When updating a previously imported project to HORIZONE
SERVER, these two options allow you to determine whether or
not read/write names and flags should be aligned with the new
project.
Unselect these options if, in the meantime, you have made
customisations, since the previous project import, that have not
also been reflected in the ETS project.
COMMUNICATION PORT
Allows you to determine which communication channel
HORIZONE SERVER should use to communicate with the new
imported KNX addresses. Only the KNX port built into the web
server is available as an option, except for special
configurations.

Eelectron Spa
IN00B02WEBFI00060140_KNX_MANUAL.DOCX
13/42
If you select an ESF file, you are automatically prompted to upload the corresponding PHD file as
well. It is not mandatory to upload the PHD file; if you do not, HORIZONE SERVER will not be able
to monitor the status of the physical devices present in the system, as detailed below.
Finding status feedback
As indicated, there may be group addresses within the ETS project that are intended solely for
sending status feedback on the bus, in the event of changes in the status of actuators or similar
devices.
These addresses do not usually have to be displayed in the supervision, but conversely, they should
be “associated” with the command group addresses of the corresponding actuators, so that
HORIZONE SERVER also remains aligned if changes are made to the status of the latter.
HORIZONE SERVER provides two distinct status feedback search algorithms:
● Automatically search for communication objects associated with multiple group addresses in
the ETS project
● Use rules based on group name and/or address
In the first instance, communication objects belonging to more than one group address are searched
for during import; a relationship is created, for each communication object, between the KNX object
representing the first group address (identified as “principal”, typically used for the command) and
the KNX objects associated with the other group addresses (typically, status feedback, but also any
multiple commands involving the same actuator).
The second method allows you to define a set of custom rules with which to search for associations
between group addresses and create the resulting relationships between KNX objects within the
supervision. Press the "CONFIGURE" button to define import rules: the following page is displayed...

Eelectron Spa
IN00B02WEBFI00060140_KNX_MANUAL.DOCX
14/42
... that allows you to create one or more rules, of two types:
NAME-BASED
RULES
Status feedbacks are searched for among objects whose names differ from
the command for one or more keywords.
ADDRESS-BASED
RULES
Feedbacks are searched for based on the KNX address, which must be
related to the respective command in some way
Rules can be defined and not activated by unselecting the appropriate “ENABLE” checkbox; in this
instance, their definition remains stored in the project, but is not used during import.
If you define (and activate) multiple rules, you can decide whether they should work in OR or in AND,
using the appropriate options at the beginning “RULE COMBINATION”; you can establish an
AND/OR criterion within the rules by name (if more than one), by address, and cumulatively between
the two types of rules, for maximum flexibility.
Name-based rules work like this: you can specify one or more words to be searched for in command
objects, which will be removed to search for their status; if these words are mandatory, the “required”
option must be selected. You must then specify one or more words to search for in status objects,
specifying (as in the case of command keywords) whether they should be at the beginning, end, or
anywhere in the ETS name.
The search automatically ignores a series of "special" characters:
● space
● -
● _
● +
● ,
● ;
● .

Eelectron Spa
IN00B02WEBFI00060140_KNX_MANUAL.DOCX
15/42
The rules based on the address, in the other hand, firstly provide a possible filter on the command
address; by choosing “any” then they are all good, otherwise it is possible to establish a filter on the
command address (based on the level - 1, 2 or 3 - of the KNX address on which the rule operates).
The status address can be “any”, “equal to command” or “offset on command”, in the latter instance,
a positive or negative offset must be chosen.
Here are some examples:
● same name with an extra “status” or “feedback” (possibly replacing “command” or “cmd”);
● KNX address shifted by 1 to an intermediate address with the same “main group" and
“address group” (i.e. the first and third address numbers).
By combining multiple rules, you can achieve more powerful filters: e.g. if you have a project in which
the statuses have been shifted by 1 as an intermediate address and 10 as a group address, i.e…
0/0/1 -> 0/1/10
0/0/2 -> 0/1/11
... you can create two address rules, putting AND as a combination.
Conversely, if you have different intermediate addresses that reason differently, you create rules in
OR by also putting a filter on the command address, e.g. if you have the intermediate address 0 that
has statuses in intermediate 1 and intermediate 2 that has them in 4…
The default configuration includes an active name-based rule, which typically searches for status
addresses with the same command name and the keywords “status” or “feedback”, in addition to
the command name or possibly replacing the keywords “command” or “cmd” (see previous
examples).
In addition, by way of example, an offset rule on group addresses is available, but not active.
In addition to choosing the status feedback search criteria, you can also set the following options:
AUTOMATICALLY HIDE STATUS
FEEDBACKS
Selecting this option automatically hides KNX objects
identified as status feedback from other KNX objects, so they
are not visible in supervision (but can still be searched for in
“ADVANCED" mode)
CLEAR PRE-EXISTING STATUS
RELATIONSHIPS
This option allows you to completely remove any previously
created status – command relationships and replace them
entirely with those identified in the new import.
Otherwise, previous relationships are maintained.

Eelectron Spa
IN00B02WEBFI00060140_KNX_MANUAL.DOCX
16/42
Importing
After configuring the general parameters and search criteria of the status feedback, pressing the
NEXT button starts the actual import procedure.
At the end, a detailed summary of all the status-command associations performed is proposed, with
the possibility of selectively deleting one or more of these relationships, if they do not respond to the
desired behaviour (the list is visible by selecting the “details” link):
The two columns on the right show the KNX objects interpreted as status feedback (label and group
address), while the two columns on the left show the relative command objects, to which the statuses
have been associated.

Eelectron Spa
IN00B02WEBFI00060140_KNX_MANUAL.DOCX
17/42
Application of ETS rules
If the ETS project contains group addresses that do not comply with ETS rules, they are listed in the
summary phase, so that they can be handled before you finish the procedure:
These objects have, therefore, been created within the project, but are provisionally marked as not
visible, to prevent them from being incorrectly displayed in supervision before they have been
properly configured.
If the ENCODING field contains more than one option, you must select the most appropriate one to
ensure proper communication of HORIZONE with KNX devices. Once you have made this choice,
you can:
● Specify a reference FUNCTION, which is the category in which the new object will be inserted
● Select the most appropriate ICON by pressing the corresponding preview button and
selecting the most appropriate one in the pop-up window that is displayed

Eelectron Spa
IN00B02WEBFI00060140_KNX_MANUAL.DOCX
18/42
If the list contains a large number of objects with a similar name that were not initially included in
ETS rules, you can still enter a new rule - or modify an existing rule - at this stage to automate the
recognition of new objects.
To do this:
● Press the “EDIT RULES” button; the ETS rules page opens in another TAB
● Modify ETS rules as needed
● Return to the ETS import TAB and press the “RECALCULATE RULES" button
● Repeat the procedure if necessary
Once all objects have been configured, press "NEXT” to finish importing.
The software allows you to end the import procedure without assigning a graphical icon to
one or more objects; however, this choice is not recommended, as these objects will not
be displayed correctly once they are entered in the supervision graphics pages. You can
still change the icon (and hence the graphic appearance) of the imported objects later,
through their tab.
At the end of the procedure, the imported objects are available in the section of the navigation tree
under TECHNOLOGIES → KNX → ETS PROJECT; the tree structure of this section replicates the
hierarchy of KNX addresses present in the ETS project and can be used to selectively access the
configuration tabs of KNX objects created in the software by the import procedure.
Selective import
You can import only a portion of an ETS project by manually choosing which KNX group addresses
to transform into HORIZONE SERVER objects. This can be useful when:
● The project has already been imported previously and only targeted changes have been
made to a subset of addresses and you do not want to lose any customisations applied to
the other addresses within the supervision
● Certain addresses in the ETS project should not be managed by supervision
● The number of addresses in the ETS project exceeds those which can be managed by
HORIZONE SERVER based on the version/ license
To enable this mode, select the CHOOSE WHICH ADDRESSES TO IMPORT option before starting
the procedure; a list of the group addresses in the project is shown, divided by intermediate group:

Eelectron Spa
IN00B02WEBFI00060140_KNX_MANUAL.DOCX
19/42
This import mode is automatically activated when the project exceeds the address limits which can
be managed by the version of HORIZONE SERVER.
At the beginning of this section, the number of selected addresses (plus any previously imported
ones) and the limit set by the version of HORIZONE SERVER are indicated; by selecting one or
more addresses (or the entire group of addresses), the counter is recalculated, showing how many
addresses are still available at all times.
Once the selection of the objects has been completed, pressing the “NEXT” button starts the import
procedure; if it is completed correctly, the summary and any list of objects not covered by the ETS
rules is presented, as previously seen.
Not all the KNX addresses may be selected for a successful import since some of the selected
objects depend on other unselected addresses (e.g. multiple commands, status feedback, etc.). In
this case, a message is displayed as in the following example:
You can then:
● Include all addresses automatically by clicking on the link at the bottom of the message
● Manually include some of them by locating them in the list of addresses in the project
● Enable ADVANCED access level and disable “CREATE AUTO-RELATIONS”

Eelectron Spa
IN00B02WEBFI00060140_KNX_MANUAL.DOCX
20/42
KNX OBJECTS
Creating objects manually
As an alternative to the ETS import procedure described above, you can manually enter KNX objects
into the supervision. This method is useful when you need to make minor changes to your project; if
you need to create a large number of objects, you should always use the import procedure.
To manually enter one or more KNX objects, go to the
TECHNOLOGIES → KNX → ADD KNX OBJECTS page
Pressing the ADD button creates a new row in the list of KNX objects (initially empty), in which you
can specify:
NAME
Text label that identifies the new address in the project
W / R
Enable flags for write and read respectively
Specifies whether the new group address to be created should be
enabled in command and/or read.
COMMAND ADDRESS
If the W flag is active, enter the group address for the command (towards
the KNX bus) in the 3-level format (X/Y/Z)
STATUS ADDRESS
If the R flag is active, enter the group address for reading from the KNX
bus in the 3-level format (X/Y/Z)
NOTE: this field is optional if the W flag is also active. In this case, it
means that the group address to be created must be used to send the
command, but also to read the status. (*)
LENGTH
Select the length, from those available, of the KNX telegram data for the
group address you want to create. (*)
ENCODING
Depending on the length you choose, select the most suitable encoding
for the data sent or received on the group address you want to create. (*)
FUNCTION
Choose a membership category for the objects you want to create, from
those available. Choosing the function also filters the list of available
renderings
RENDERING
Select a graphic to use to represent the objects you want to create within
supervision. The list of renderings depends on the encoding type chosen
Other manuals for IN00B02WEB
2
Table of contents
Other Eelectron Server manuals
Popular Server manuals by other brands
Grand
Grand IP VIDEO SERVER user manual
Digital Equipment
Digital Equipment Prioris HX MP user guide

Lenovo
Lenovo ThinkServer TS200v Información de garantía y soporte
Toshiba
Toshiba STRATA CS Communication Server Release 6 Quick reference guide

Asus
Asus RS720-E8-RS24-ECP user guide

Supermicro
Supermicro MicroBlade user manual
