Efergy Elite Classic User manual

Efergy Elite Classic
FW No. 4.0

1
CONTENT
INTRODUCTION
HOW IT WORKS
SAFETY INFORMATION
HARDWARE INSTALLATION
1. Find the main feed wires
2. Install the sensor(s) and transmitter
3. Link the transmitter and monitor
MONITOR SETUP
Setting time and date
Voltage
Currency
Tariff period
Tariff pricing
Carbon emissions ration
Maximum power alert
Temperature
Multiple tariff
GET FAMILIAR WITH THE DISPLAY
TECHNICAL DETAILS
CUSTOMER SUPPORT
2
3
4
6
7
9
10
11
12
12
13
13
13
14
14
14
15
16
19
20

INTRODUCTION
Energy metering and monitoring are at the heart of energy management, understanding when and where
your energy is consumed is key to saving money.
Efergy Energy Meters show the amount of energy that a household is consuming at the time the display
is read. The display can also give the user a reading showing usage in financial terms.
You can walk around the home with your monitor device, switching appliances on and off, to see the
difference that each one makes. With a few small changes in your consumption behaviour the monitor can
help you reduce your energy costs.
2

HOW IT WORKS
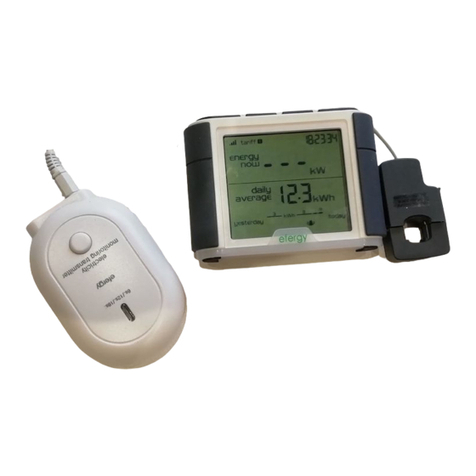
Our Wireless Energy Meters are simple to install and use. A CT sensor is clipped onto the live feed cable
of your breaker panel. A lead from the sensor is connected to the Efergy Transmitter. This Transmitter
wirelessly sends real-time data to the Energy Display.
3

4
SAFETY INFORMATION
WARNING! Your electric panel contains energized parts. This device must be installed by a
qualified electrician, unless otherwise permitted by local regulations.
It is important that you take some simple precautions before using this product. Incorrect use or
poor safety practices can result in injury or fatality. Whenever possible, turn off the main breaker
outside your home feeding power to your electricity panel.
When installing the Efergy Energy Meter you should find that everything is straight-forward. However,
there are a number of important health and safety issues which you need to be aware of:
The current sensors clip onto the supply cables inside the main electrical panel, which delivers
power to your home.
Do not touch any metallic connections during the installation of the sensors. Do not carry out
this installation if under the influence of alcohol or drugs.
Remember the device is not intrusive and does not require rewiring; no wires or cables need to
be cut, removed or modified to perform this installation. If you notice anything unusual about the
electricity supply such as loose wires, exposed cabling, burn marks, holes in the insulating
materials or damage to the electric wires in the service panel or where the sensor is to be
attached, stop immediately and report the findings to your supply company.

Efergy energy monitoring systems are considered plug and play devices that meet all regulatory
requirements for installation in the United States and Canada.
Do not force or bend the cables at any point during installation. If you are worried or have any
concerns about the installation, please contact a qualified electrician immediately.
The user does not need to remove the sensor throughout the working life of the unit. Battery
changes are performed on the transmitter and on the display. There are no batteries to change in
the sensor.
Even with the main breaker in the off position, the connection lugs where the main wires
terminate at the main breaker may still be live with potentially lethal voltage. Stay clear of these
connections during the installation of the sensors.
The sensors are insulated so do not be concerned if they slide down the main wires to the
breaker after being secured around the insulated wires. A plastic tie wrap (with 5cm of the tie not
cut off) secured to the main wire under the desired location for each sensor may be used to keep
them from sliding down the wires.
Millions of these systems have been installed world wide without incident but please follow safe
working practices as outlined during the installation.
5

HARDWARE INSTALLATION
The first thing you should do is unpack your Efergy Energy Monitor. Install the CT Sensor clamp into
your power meter fuse box. There are a couple of options here, you can install the clamp either onto
your incoming mains cable, this will check you overall power, or onto a separate individual circuit like a
hot tub, air conditioner or solar systems circuit to measure individual power for an appliance or solar
feed in.
6
1 2 3

1. Find the Main Feed Wires
You can normally find your main electrical panel
inside your home on the other side of the wall
from your electric utility meter. You may also
follow the conduit from your utility meter. In many
cases it is located in the garage, utility room,
laundry room or hallway inside your home. If you
live in an apartment, it may be in the kitchen, a
utility closet or hallway.
Remove the outside cover from your electrical
panel and locate the main feed wires. You should
find up to four feed wires entering your main
electrical panel: two black wires, one white wire
and one green wire (there may not always be a
green or bare ground wire). The two black wires
(or sometimes one black and one red) are the live
wires feeding the panel, these are the wires used
to measure the power being used in your home
or business.
7

ALWAYS SHUT DOWN THE POWER TO YOUR ELECTRICAL PANEL FIRST AND PROCEED WITH CAUTION!
For example, if you have a single tariff meter you should find four cables exiting the meter (see Diagram
A). The feed cable is the live cable exiting from the meter to the fuse box or main switch. Clip the
Sensor to Cable 4.
Diagram A Diagram B
Diagram C Diagram D
8

2. Install the sensor(s) and transmitter
__________________________________________________________
9
EFERGY RECOMMENDS THAT INSTALLATION IS
CARRIED OUT BY A QUALIFIED ELECTRICIAN
Place the sensors around the
feed wires of your electric panel.
Pull the clasp to open the
sensor, place it around the feed
cable and push the clasp to
shut.
Efergy recommends high
quality alkaline or lithium batteries
for the best product performance.
Battery life will depend on
environment (up to 12 months).
Insert the sensors jack into the
base of the transmitter.
Make sure you insert the
sensor(s) jack first, then power
on the Transmitter.
Open the Transmitter case and
insert three AA batteries (not
provided).
Mount the transmitter on the wall
next to or above the electric
panel.

Insert 3 AA batteries into the
battery compartment located
on the back of the monitor
(make sure you match the
negative and positive ends of
the batteries with the
markings inside).
Press the LINK button on the
back of the monitor and hold
for two seconds. The
transmission signal symbol
will flash for one minute
or until the transmitter and
monitor are linked.
While the transmission signal
symbol in the display
flashes, push the button on
the transmitter and wait until
the transmission signal
symbol becomes solid.
10
3. Link the transmitter and monitor
__________________________________________________________
LINK

MONITOR SET UP
The monitor needs to know the time, date, unit cost per kWh charged by your electricity supplier, along
with voltage and alarm settings. The following steps will move through each of these settings.
11
Humidity
Time and date
ForwardBackward
Temperature
Push HISTORY button at any
time, your settings will be
saved and you will exit the
function setting mode.
Press and hold down
MODE/SET button for three
seconds to enter the setting
mode.
Transmission
signal

Setting time and date
Press and hold for 2 seconds the TIME SET. button located on
the reverse of the monitor. The time setup will flash on the
display.
Use the BACKWARD and FORWARD buttons to set the hour.
Press the MODE/SET button once to save. Repeat the same
process to set the minutes. Once the correct time and date
have been set, push the MODE/SET button to save and move
onto the date setup.
Set the month by using the BACKWARD and FORWARD
buttons. Press the MODE/SET and move onto the day and year.
Repeat the same process and then press the MODE/SET button
to save and exit.
12
Voltage
Press and hold the MODE/SET button for 2 seconds. Adjust the
voltage using the BACKWARD and FORWARD buttons. Push
MODE/SET button to confirm and to move onto currency
selection set up.

Tariff pricing
On completing the above, pricing will appear next. Use the
BACKWARD and FORWARD buttons to increase or decrease
the cost and press the MODE/SET button to confirm. You have
now completed your manual tariff programming. Press
MODE/SET button to move onto the set-up for CARBON
EMISSIONS RATIO, ALARM, and TEMPERATURE.
Currency
There are 5 different world currencies available (£, €, $, Kr, R).
Press and hold the MODE/SET button for 2 seconds. Select the
currency using the BACKWARD and FORWARD buttons.
Default currency will be $. Push MODE/SET button to confirm
and to move onto tariff selection set up.
Tariff period
Select up to 4 different tariff cost settings. You will note that the
words TARIFF 1 will appear. The 1represents the tariff selected.
Use the BACKWARD and FORWARD buttons to choose
between tariff periods, then press the MODE/SET button to
confirm and will move to set tariff pricing.
13

Carbon emissions ratio
By default the carbon emissions ratio is 0.50 KgCO2. Use the
BACKWARD and FORWARD buttons to increase or decrease
the value and press the MODE/SET button to confirm. Press
MODE/SET button to move onto the set-up for ALARM.
Maximum power alert
The audio alert will sound if you go over your set maximum
power consumption target. Use the BACKWARD and FORWARD
buttons to increase or decrease the value and press the
MODE/SET button to confirm. Press MODE/SET button to move
onto the set-up for TEMPERATURE.
Temperature
Use the BACKWARD and FORWARD buttons to move between
different temperature scales (Celsius and Fahrenheit) and press
the MODE/SET button to confirm. You have now completed your
Energy Display set up. Press MODE/SET button to move onto
ENERGY NOW.
14

Multiple tariff
You will only need to use this setting if you have dual or multiple tariffs
Press and hold the MODE/SET button for 2 seconds. Press the MODE/SET button two more times to
find the tariff mode. Use the BACKWARD and FORWARD to choose between tariff periods 1, 2,3 or 4.
Press the MODE/SET button to confirm and will move to set the start and end of the tariff period. Use
the BACKWARD and FORWARD buttons to set the start time for tariff. Press the MODE/SET button to
set the end of the tariff using the BACKWARD and FORWARD buttons again. Press the MODE/SET
button to finish. Repeat this process to configure each tariff period.
15

When your monitor is in the
ENERGY NOW mode, this PEAK
symbol appears when the
most expensive tariff is in use.
The alarm icon appears when
your ENERGY NOW alarm is
enabled.
This icon displays the amount
of power left within the
display’s battery cells.
This icon displays the amount
of power left within the
transmitter’s battery cells.
GET FAMILIAR WITH THE DISPLAY
ENERGY NOW
The home screen of the display is the ENERGY
NOW, it displays accurate energy (KW) usage in
real-time. Push the MODE/SET button to change
information displayed from KW to cost
(displayed in $). The lower part of the screen
shows the estimated cost and carbon
emissions per hour.
16

HISTORY
The HISTORY mode displays the historical
consumption information for days, weeks and
months in kWh, $ and KgCO2. The lower part
of the screen shows the average information in
days, weeks, or months in kWh, $ and KgCO2.
Push the HISTORY button to access daily, weekly, and monthly stored data. Use the BACKWARD and
FORWARD buttons to scroll between dates and compare consumption data. Press the MODE/SET button
to change information from kWh to costs and Co2 emissions.
17
AVERAGE
The AVERAGE information is always visible,
and is displayed in the bottom half of the
screen. The information shown in this mode is
the average calculated since the monitor was
switched on for the first time.

18
Monitor
Walk around your home and switch appliances
on and off. You’ll see the monitor reading
increase when you switch on a new appliance.
Understand
Understand your home energy consumption,
how much energy you’re using and which
appliances are costing you most.
Save money
Use the real-time, average and historic
consumption information to help you change
habits and make cost-cutting decisions.
Reduce Footprint
Everyone has a responsibility to reduce their
individual carbon footprint, and energy saving is
a way to do so.

TECHNICAL DETAILS
Model:
Frequency:
Transmission time:
Transmission range:
Working voltage range:
Measuring current:
Carbon ratio:
Designed in the UK / Made in the PRC
Certifications:
ELITE 4.0
433.5MHz
10s
130-230ft (40-70m)
120/240V 60Hz
50mA - 120A nominal (200A Max.)
0.50 kgCO2/kWh
19
Other manuals for Elite Classic
1
Table of contents
Other Efergy Measuring Instrument manuals
