Efneo GTRO User manual
GTRO Manual
Introducon
We strongly recommend watching our ideo tutorial for the easiest installaon process
GTRO installaon is easier, than it may look at rst sight. As one of our customers sai
“I ha e to admit, the hardest part of the enre install was nding a place to reposion my bell!
E en if Larry exaggerated a lile bit, don’t be thrilled with a length of this manual. It will lead
you step by step throught the process, and if necessary, we’ll gi e you our e-mail support
immediately at ser ice@efneo.com.
Before installaon
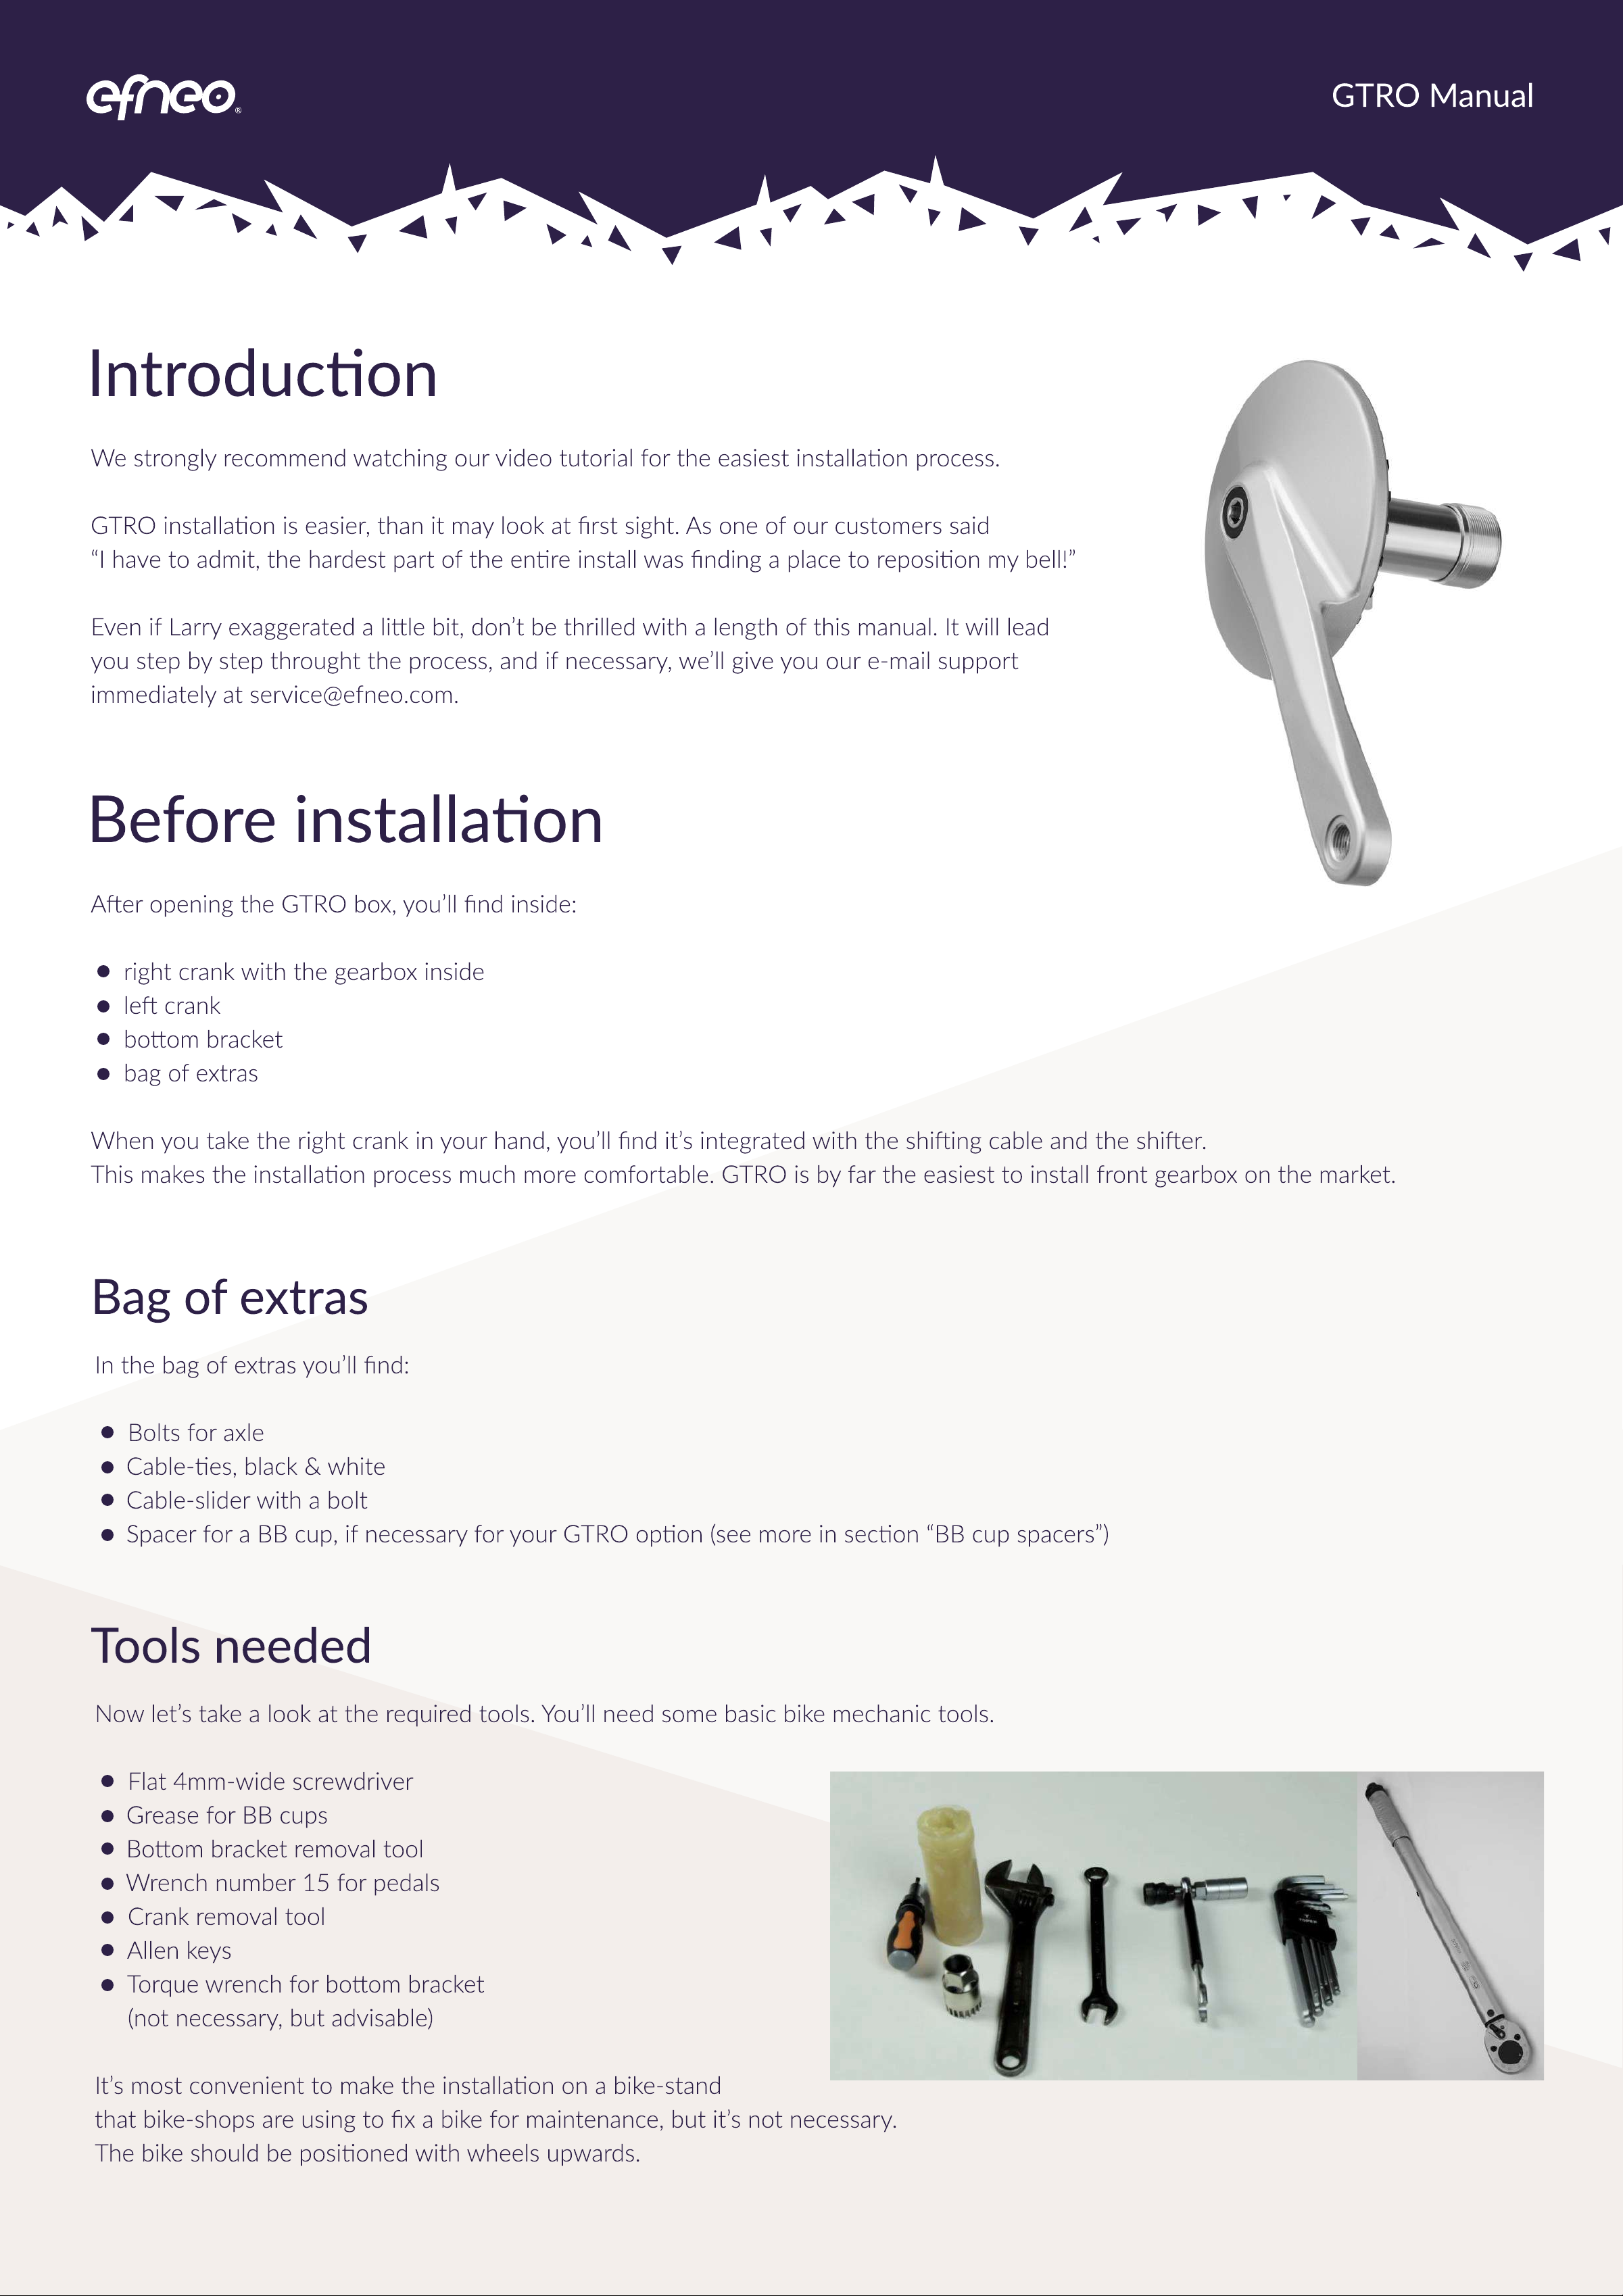
Aer opening the GTRO box, you’ll nd inside
right crank with the gearbox insid
le cran
boom bracke
bag of extra
When you take the right crank in your hand, you’ll nd it’s integrated with the shiing cable and the shier.
This makes the installaon process much more comfortable. GTRO is by far the easiest to install front gearbox on the market.
Bag of extras
In the bag of extras you’ll nd
Bolts for axl
Cable-es, black & whit
Cable-slider with a bol
Spacer for a BB cup, if necessary for your GTRO opon (see more in secon “BB cup spacers”)
Tools needed
Now let’s take a look at the required tools. You’ll need some basic bike mechanic tools
Flat 4mm-wide screwdri e
Grease for BB cup
Boom bracket remo al too
Wrench number 15 for pedal
Crank remo al too
Allen key
Torque wrench for boom bracket
(not necessary, but ad isable
It’s most con enient to make the installaon on a bike-stand
that bike-shops are using to x a bike for maintenance, but it’s not necessary.
The bike should be posioned with wheels upwards.
Installaon process
Crank and front derailleur removal
S ep 1
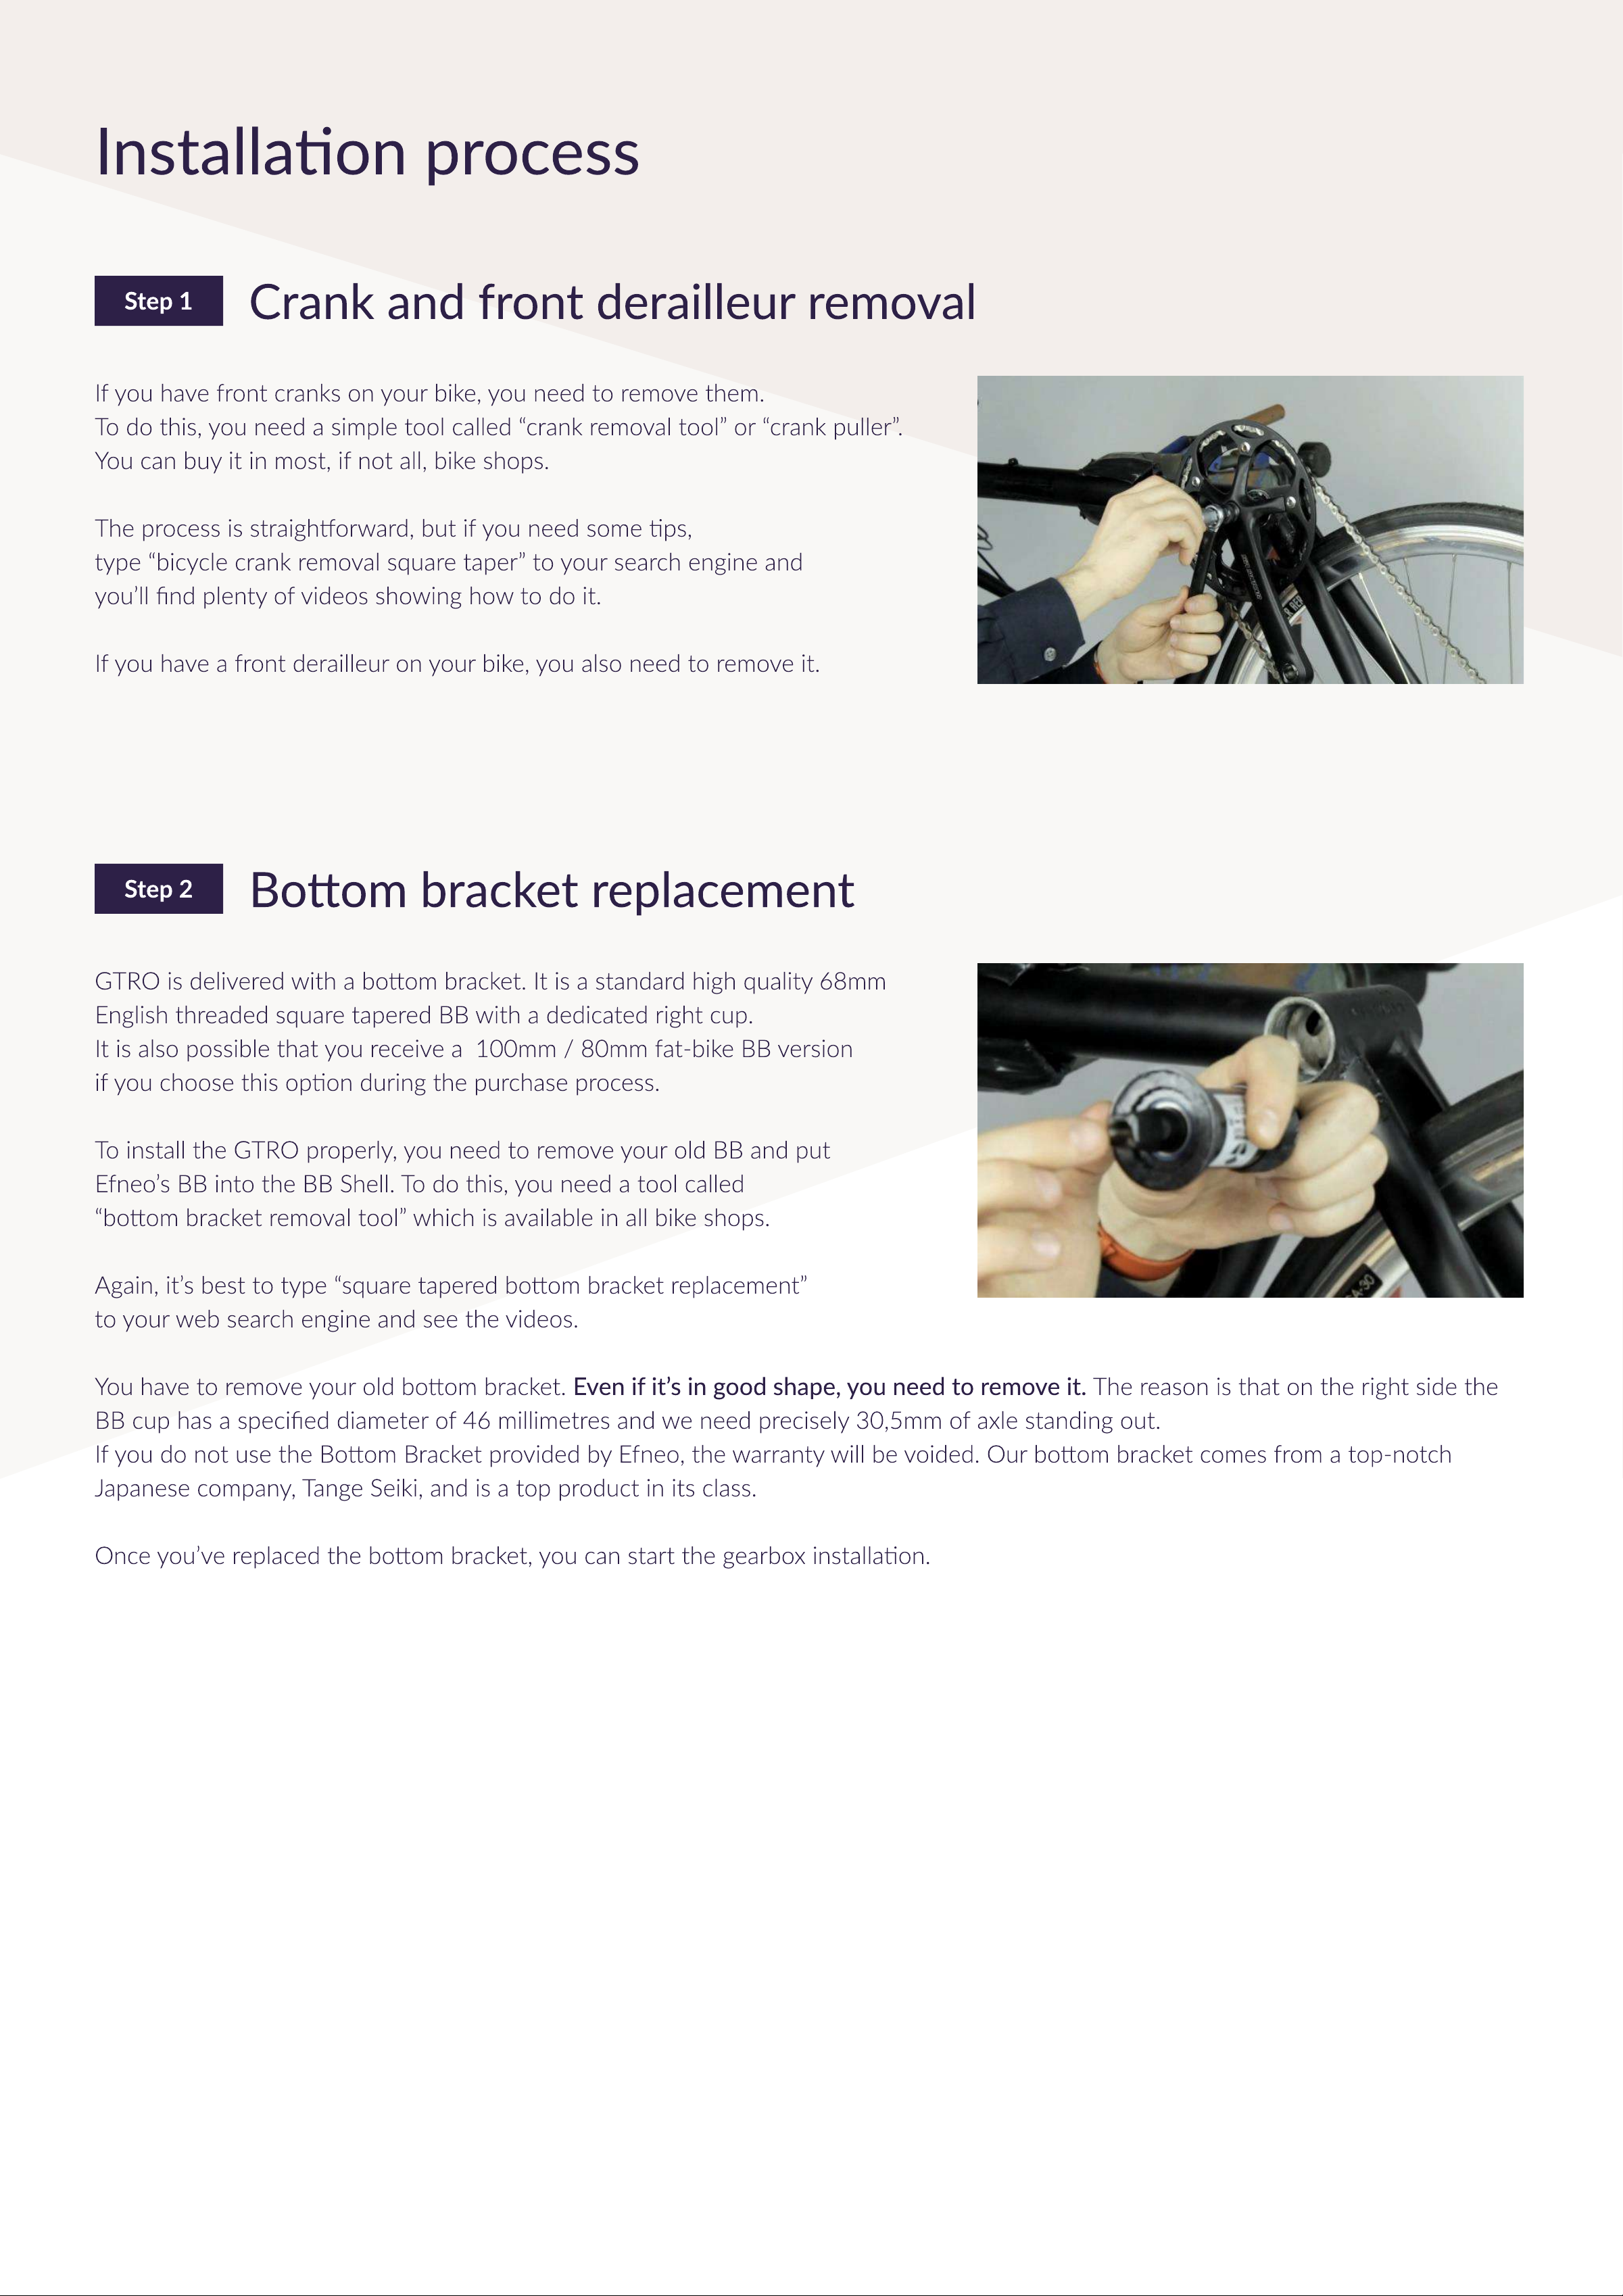
If you have front cranks on your bike, you need to remove them.
To do this, you need a simple tool called “crank removal tool” or “crank puller”.
You can buy it in most, if not all, bike shops
The process is straighorward, but if you need some ps,
type “bicycle crank removal square taper” to your search engine and
you’ll nd plenty of videos showing how to do it
If you have a front derailleur on your bike, you also need to remove it.
Boom bracket replacement
S ep 2
GTRO is delivered with a boom bracket. It is a standard high quality 68mm
English threaded square tapered BB with a dedicated right cup.
It is also possible that you receive 100mm / 80mm fat-bike BB version
if you choose this opon during the purchase process
To install the GTRO properly, you need to remove your old BB and put
Efneo’s BB into the BB Shell. To do this, you need a tool called
“boom bracket removal tool” which is available in all bike shops
Again, it’s best to type “square tapered boom bracket replacement”
to your web search engine and see the videos
You have to remove your old boom bracket. Even if it’s in good shape, you need to remove it. The reason is that on the right side the
BB cup has a specied diameter of 46 millimetres and we need precisely 30,5mm of axle standing out
If you do not use the Boom Bracket provided by Efneo, the warranty will be voided. Our boom bracket comes from a top-notch
Japanese company, Tange Seiki, and is a top product in its class
Once you’ve replaced the boom bracket, you can start the gearbox installaon.
Wave-spring posioning, in two versions
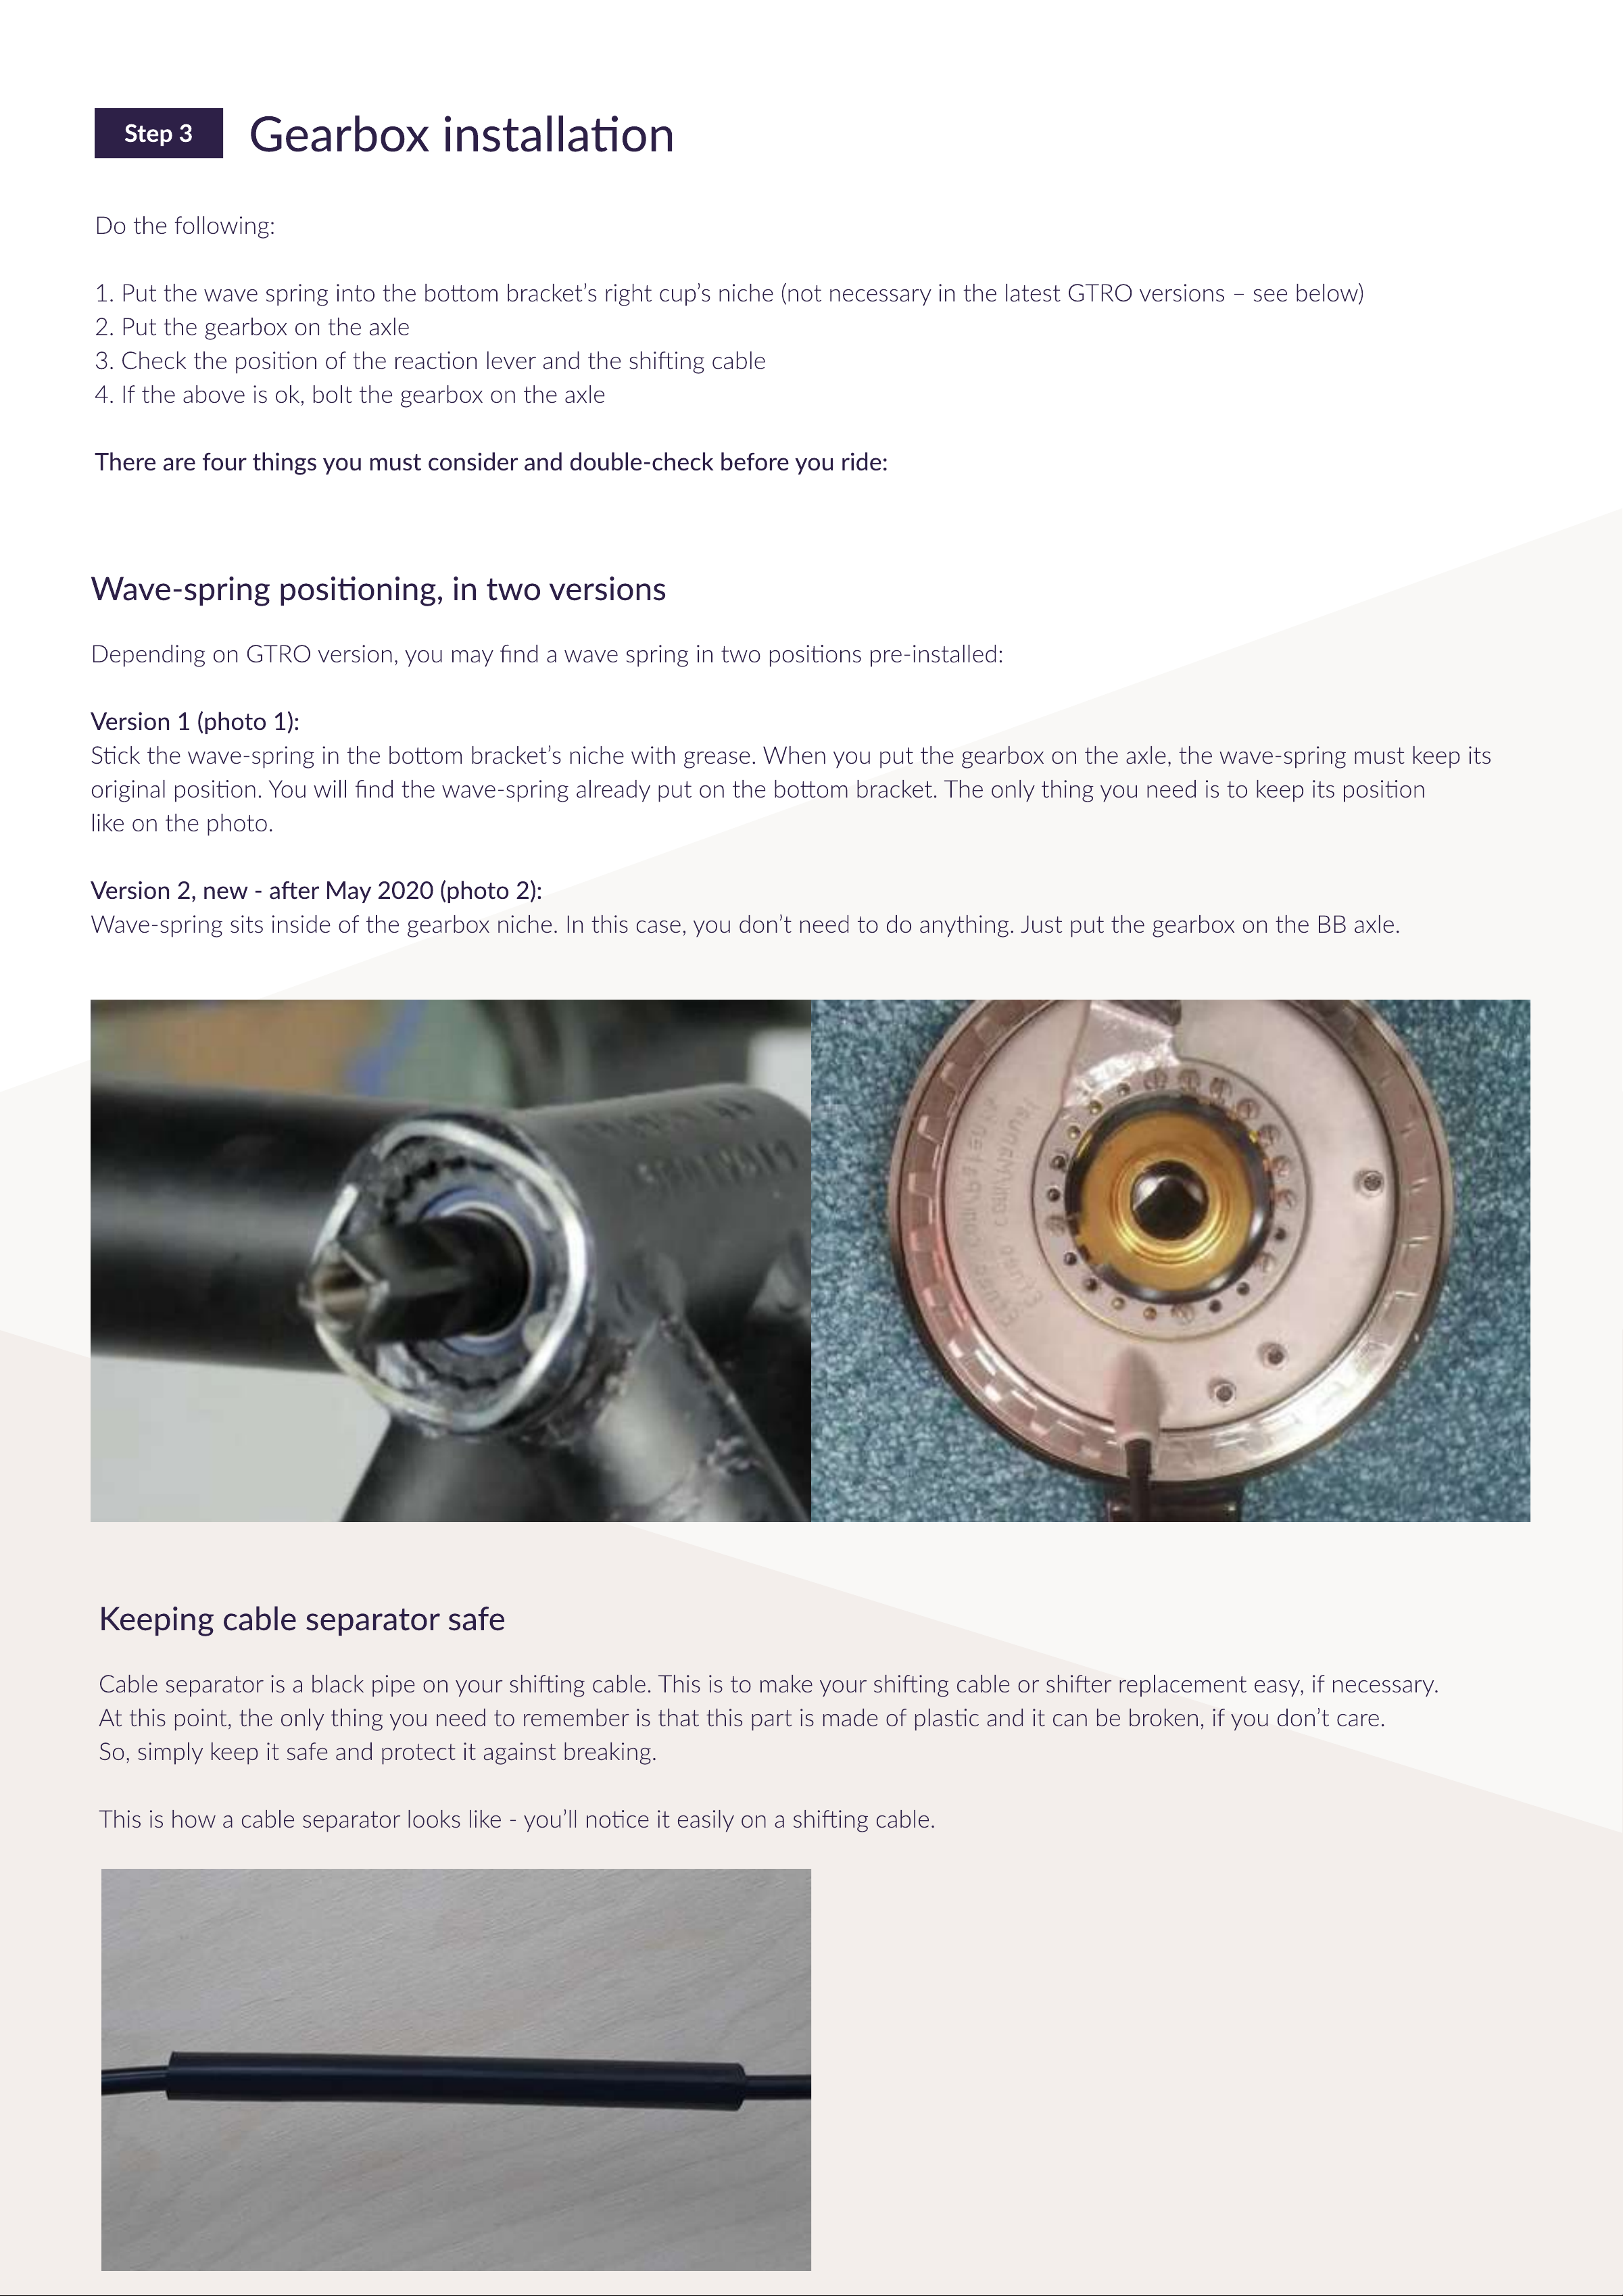
Depending on GTRO version, you may nd a wave spring in two posions pre-installed
Version 1 (photo 1):
ck the wave-spring in the boom bracket’s niche with grease. When you put the gearbox on the axle, the wave-spring must keep its
original posion. You will nd the wave-spring already put on the boom bracket. The only thing you need is to keep its posion
like on the photo
Version 2, new - aer May 2020 (photo 2):
Wave-spring sits inside of the gearbox niche. In this case, you don’t need to do anything. Just put the gearbox on the BB axle.
Keeping cable separator safe
Cable separator is a black pipe on your shiing cable. This is to make your shiing cable or shier replacement easy, if necessary
At this point, the only thing you need to remember is that this part is made of plasc and it can be broken, if you don’t care
o, simply keep it safe and protect it against breaking
This is how a cable separator looks like - you’ll noce it easily on a shiing cable
Gearbox installaon
Step 3
Do the following
1. Put the wave spring into the boom bracket’s right cup’s niche (not necessary in the latest GTRO versions – see below
2. Put the gearbox on the axl
3. Check the posion of the reacon lever and the shiing cabl
4. If the above is ok, bolt the gearbox on the axl
There are four things you must consider and double-check before you ride:

Reacon lever posioning on the chainstay
Reacon lever goes below your bike’s chainstay
Please ensure that the lever touches the chainstay
in a straight way, without touching the kickstand plate’s
edge or any welding. This would put a twisng pressure
on the gearbox. It can sck to the kickstand plate’s surface,
if it’s even, but not the plate’s edge. You must absolutely avoid it.
Take a look at the drawings:
In both above posions the lever is pushing against the straight area – either directly chainstay or kickstand plate.
This posion is good and safe for your GTRO
In this posion, the lever is pushing against the edge
of the kickstand’s plate. This would exert a twisng pressure
on the gearbox and could even damage it. The same comes
with irregular welding. In this case, you should somehow
(e.g. with a le or a grinder) make the contact area straight.
Shiing cable posioning against the down tube
The Down Tube is a tube that runs from your boom bracket towards your handlebar. Unless you have a very uncommon bicycle,
you’ll route your shiing cable along the down tube
Aer you put your gearbox on the axle, take a look at the shiing cable. It should go out of the gearbox more or less parallel to the
down tube so that you can route it comfortably towards the handlebar without bending it too much. Most bikes have a very similar
angle between the chainstay and the down tube so that the gearbox would t 9 out of 10 bikes without reacon lever reposioning.
If the shiing cable goes out of the gearbox in an undesired direcon (e.g. your bike frame’s geometry is not typical, you may
need to reposion the lever. It’s straighorward
enon: if you have a trike and you did choose GTRO-for-trike opon, your reacon lever will be posioned
so that it ts almost all trike frames without any modicaon. If you have Strida or Brompton, it’s also posioned for you
You’ll nd it in a separate video presentaon here: hps://vimeo.com/219351462.
You only need a screwdriver and some grease to do it. Do the reposioning before you go on to the next steps
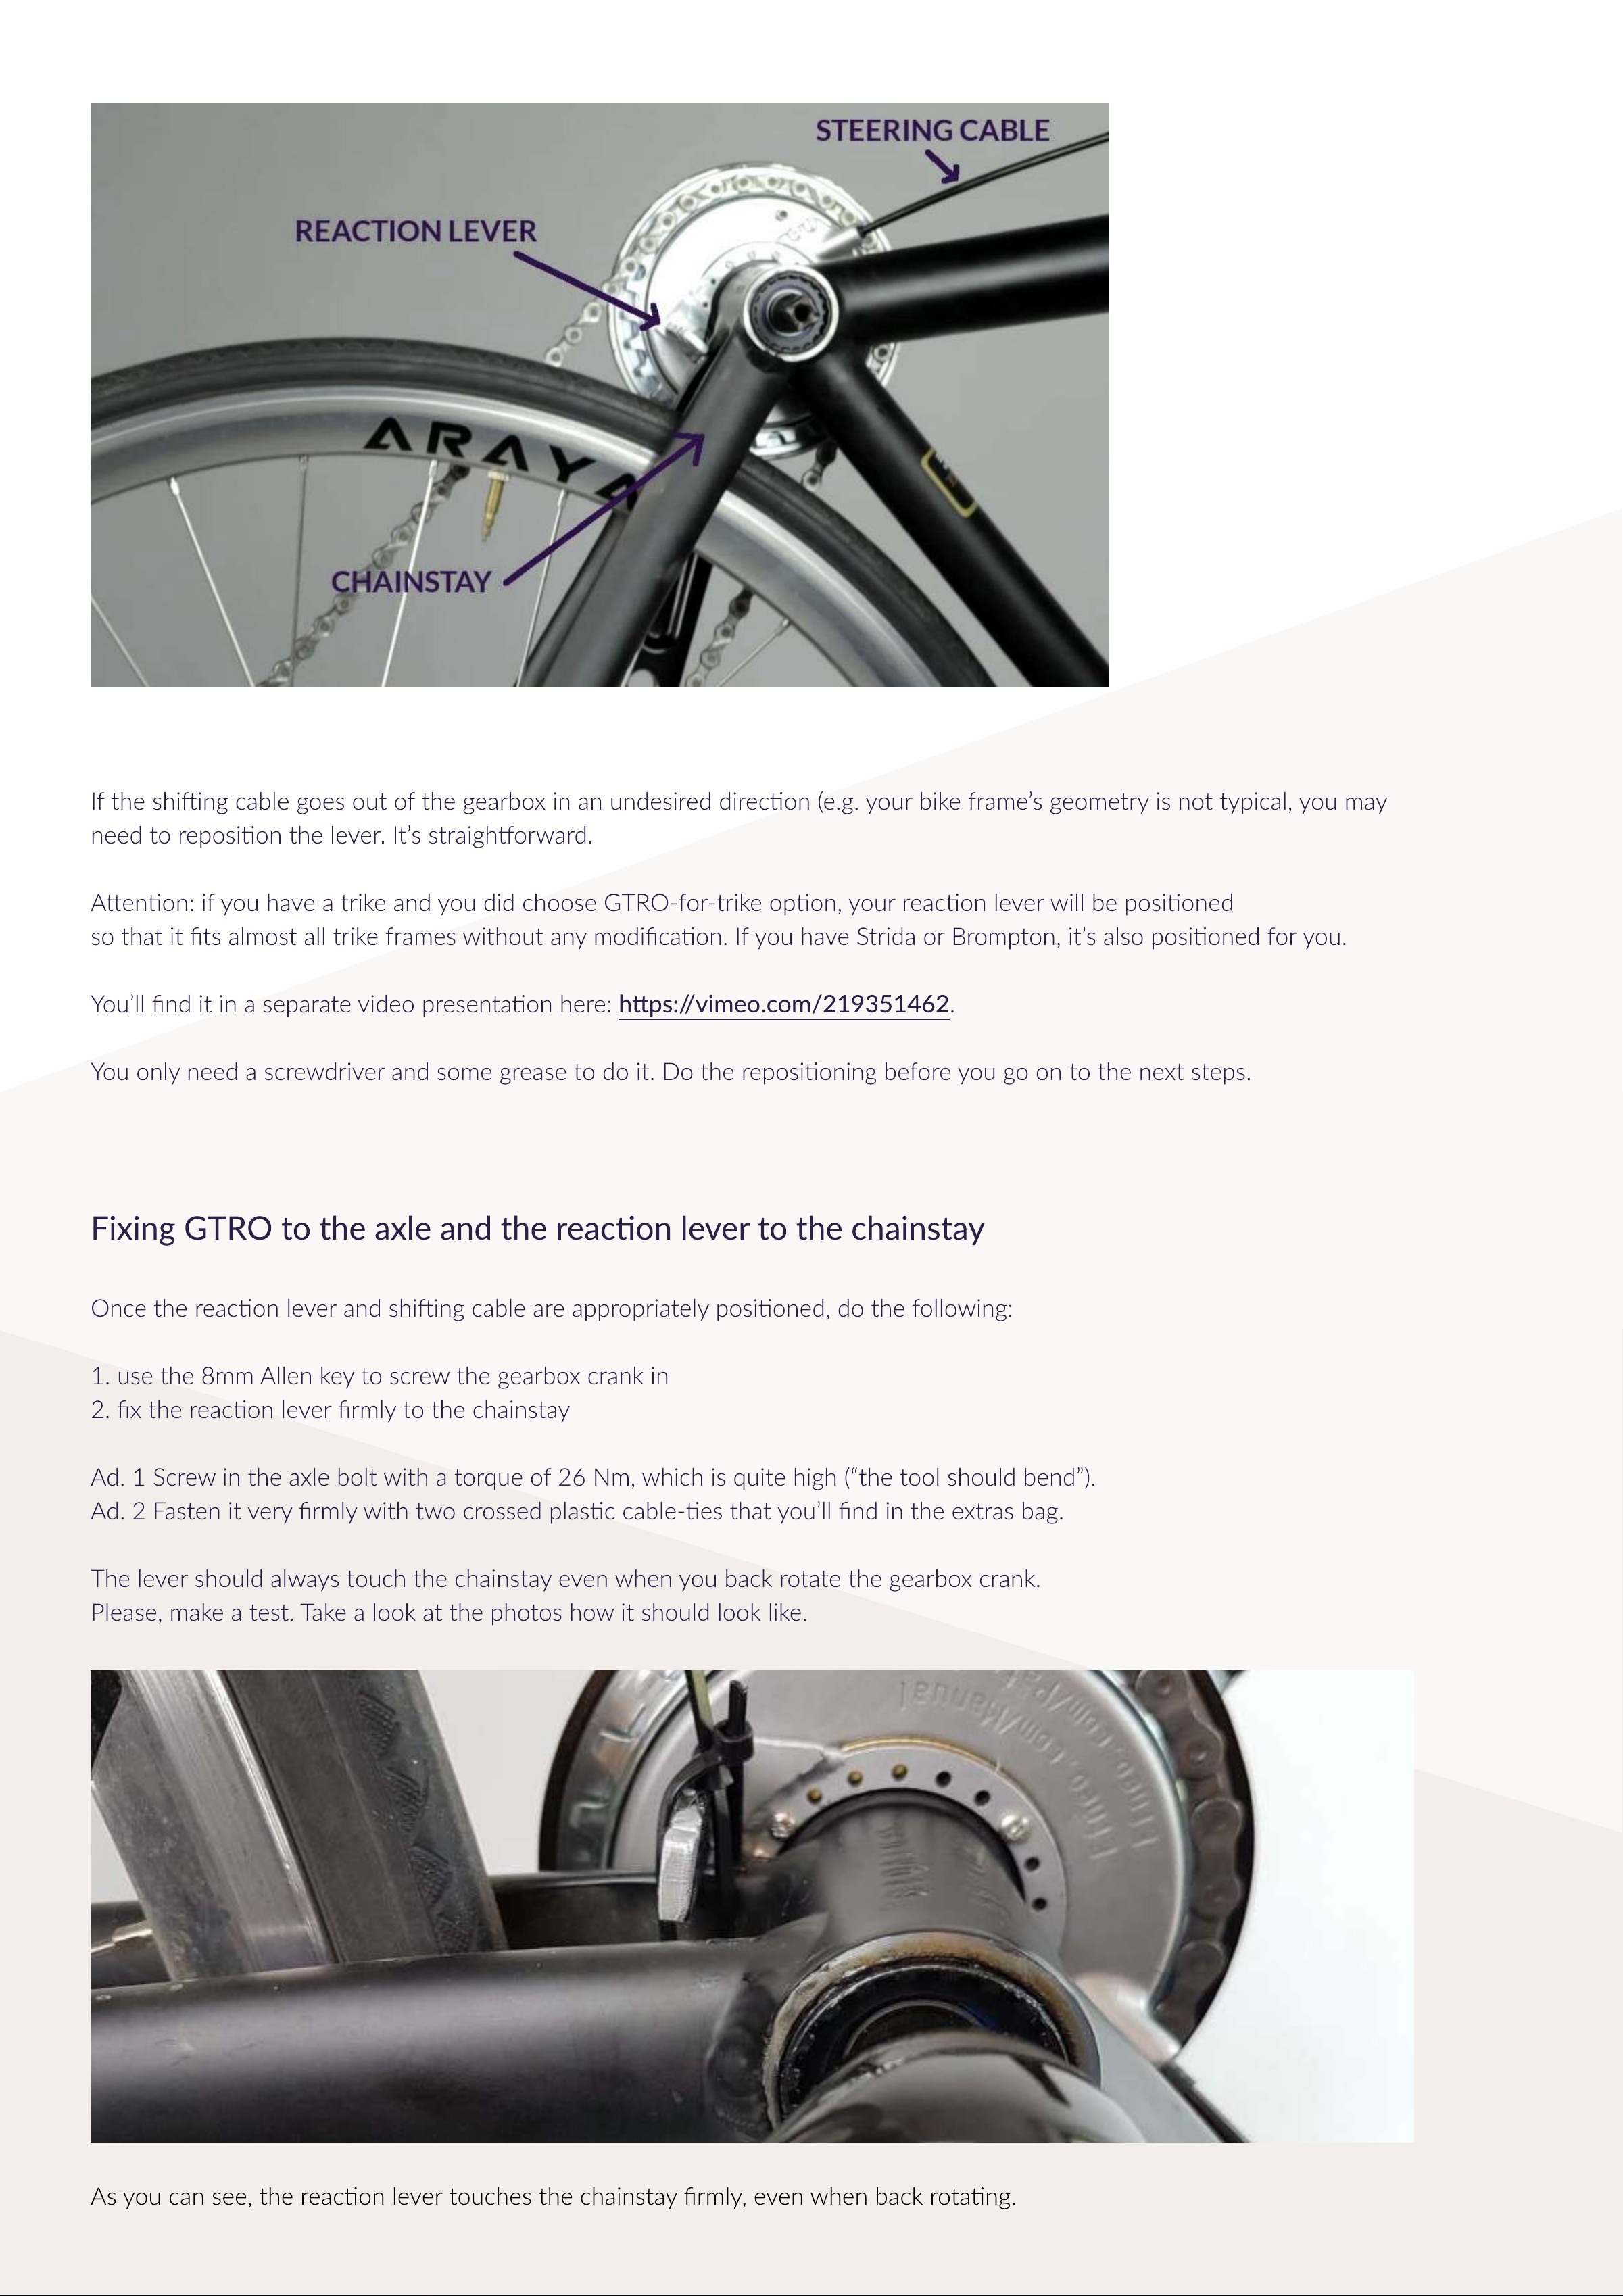
Once the reacon lever and shiing cable are appropriately posioned, do the following
1. use the 8mm llen key to screw the gearbox crank i
2. x the reacon lever rmly to the chainsta
d. 1 Screw in the axle bolt with a torque of 26 Nm, which is quite high (“the tool should bend”)
d. 2 Fasten it very rmly with two crossed plasc cable-es that you’ll nd in the extras bag.
The lever should always touch the chainstay even when you back rotate the gearbox crank.
Please, make a test. Take a look at the photos how it should look like.
Fixing GTRO to the axle and the reacon lever to the chainstay
s you can see, the reacon lever touches the chainstay rmly, even when back rotang.
BB cup spacers
Step 4
Depending on a version of a product, most probably you will receive a BB with a spacer that is aached to the right BB Cup with grease.
It may be 2mm-thick (standard) or even 7mm-thick (for some folding bikes). This spacer posions gearbox further away from the frame,
to avoid a potenal collision - gearbox should not touch the frame other than:
1. with the reacon lever under the chainstay, as shown in previous installaon step,
2. around the BB cup ange. Any sideways contact gearbox<->frame must be avoided – if you noce it (please, check carefully),
use an addional spacer from the extras bag or reposion the lever like shown on this video:
ps://vimeo.com/219351462.
On the other hand, adding spacers changes the chainline or beltline (important for belts!).
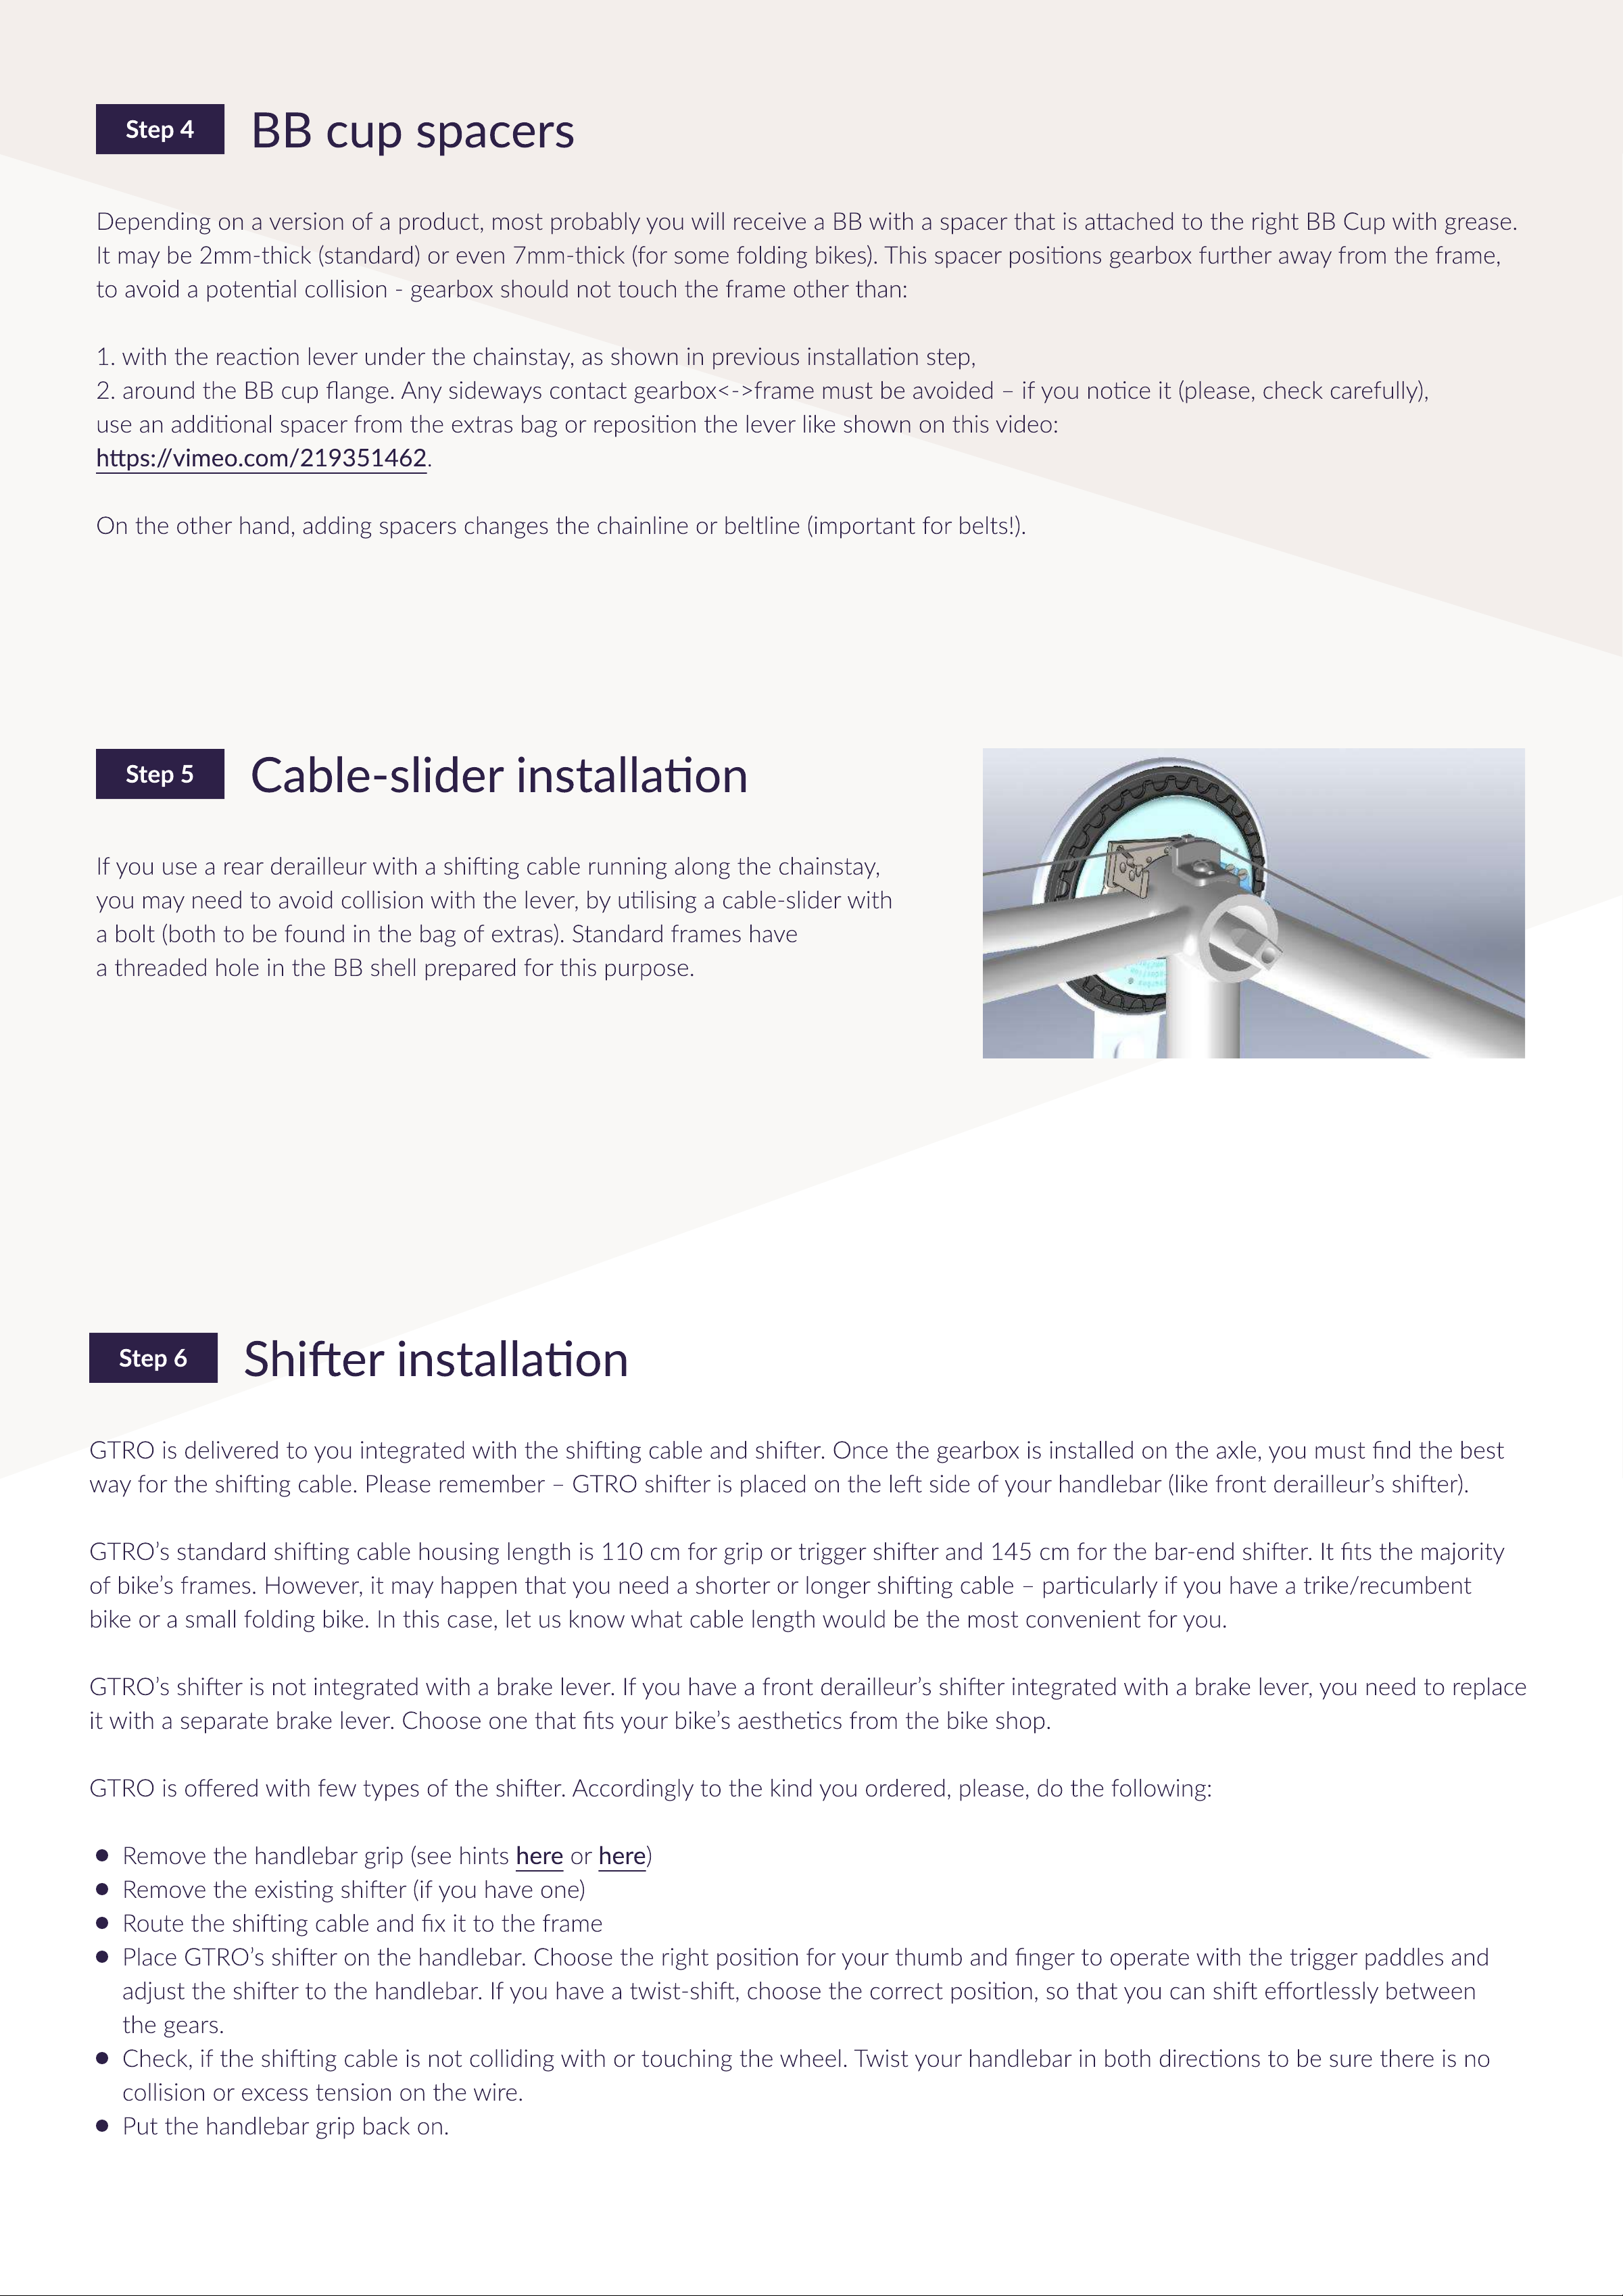
Cable-slider installaon
Step 5
If you use a rear derailleur with a shiing cable running along the chainstay,
you may need to avoid collision with the lever, by ulising a cable-slider with
a bolt (both to be found in the bag of extras). Standard frames have
a threaded hole in the BB shell prepared for this purpose.
S ier installaon
Step 6
GTRO is delivered to you integrated with the shiing cable and shier. Once the gearbox is installed on the axle, you must nd the best
way for the shiing cable. Please remember – GTRO shier is placed on the le side of your handlebar (like front derailleur’s shier)
GTRO’s standard shiing cable housing length is 110 cm for grip or trigger shier and 145 cm for the bar-end shier. It ts the majority
of bike’s frames. However, it may happen that you need a shorter or longer shiing cable – parcularly if you have a trike/recumbent
bike or a small folding bike. In this case, let us know what cable length would be the most convenient for you
GTRO’s shier is not integrated with a brake lever. If you have a front derailleur’s shier integrated with a brake lever, you need to replace
it with a separate brake lever. Choose one that ts your bike’s aesthecs from the bike shop
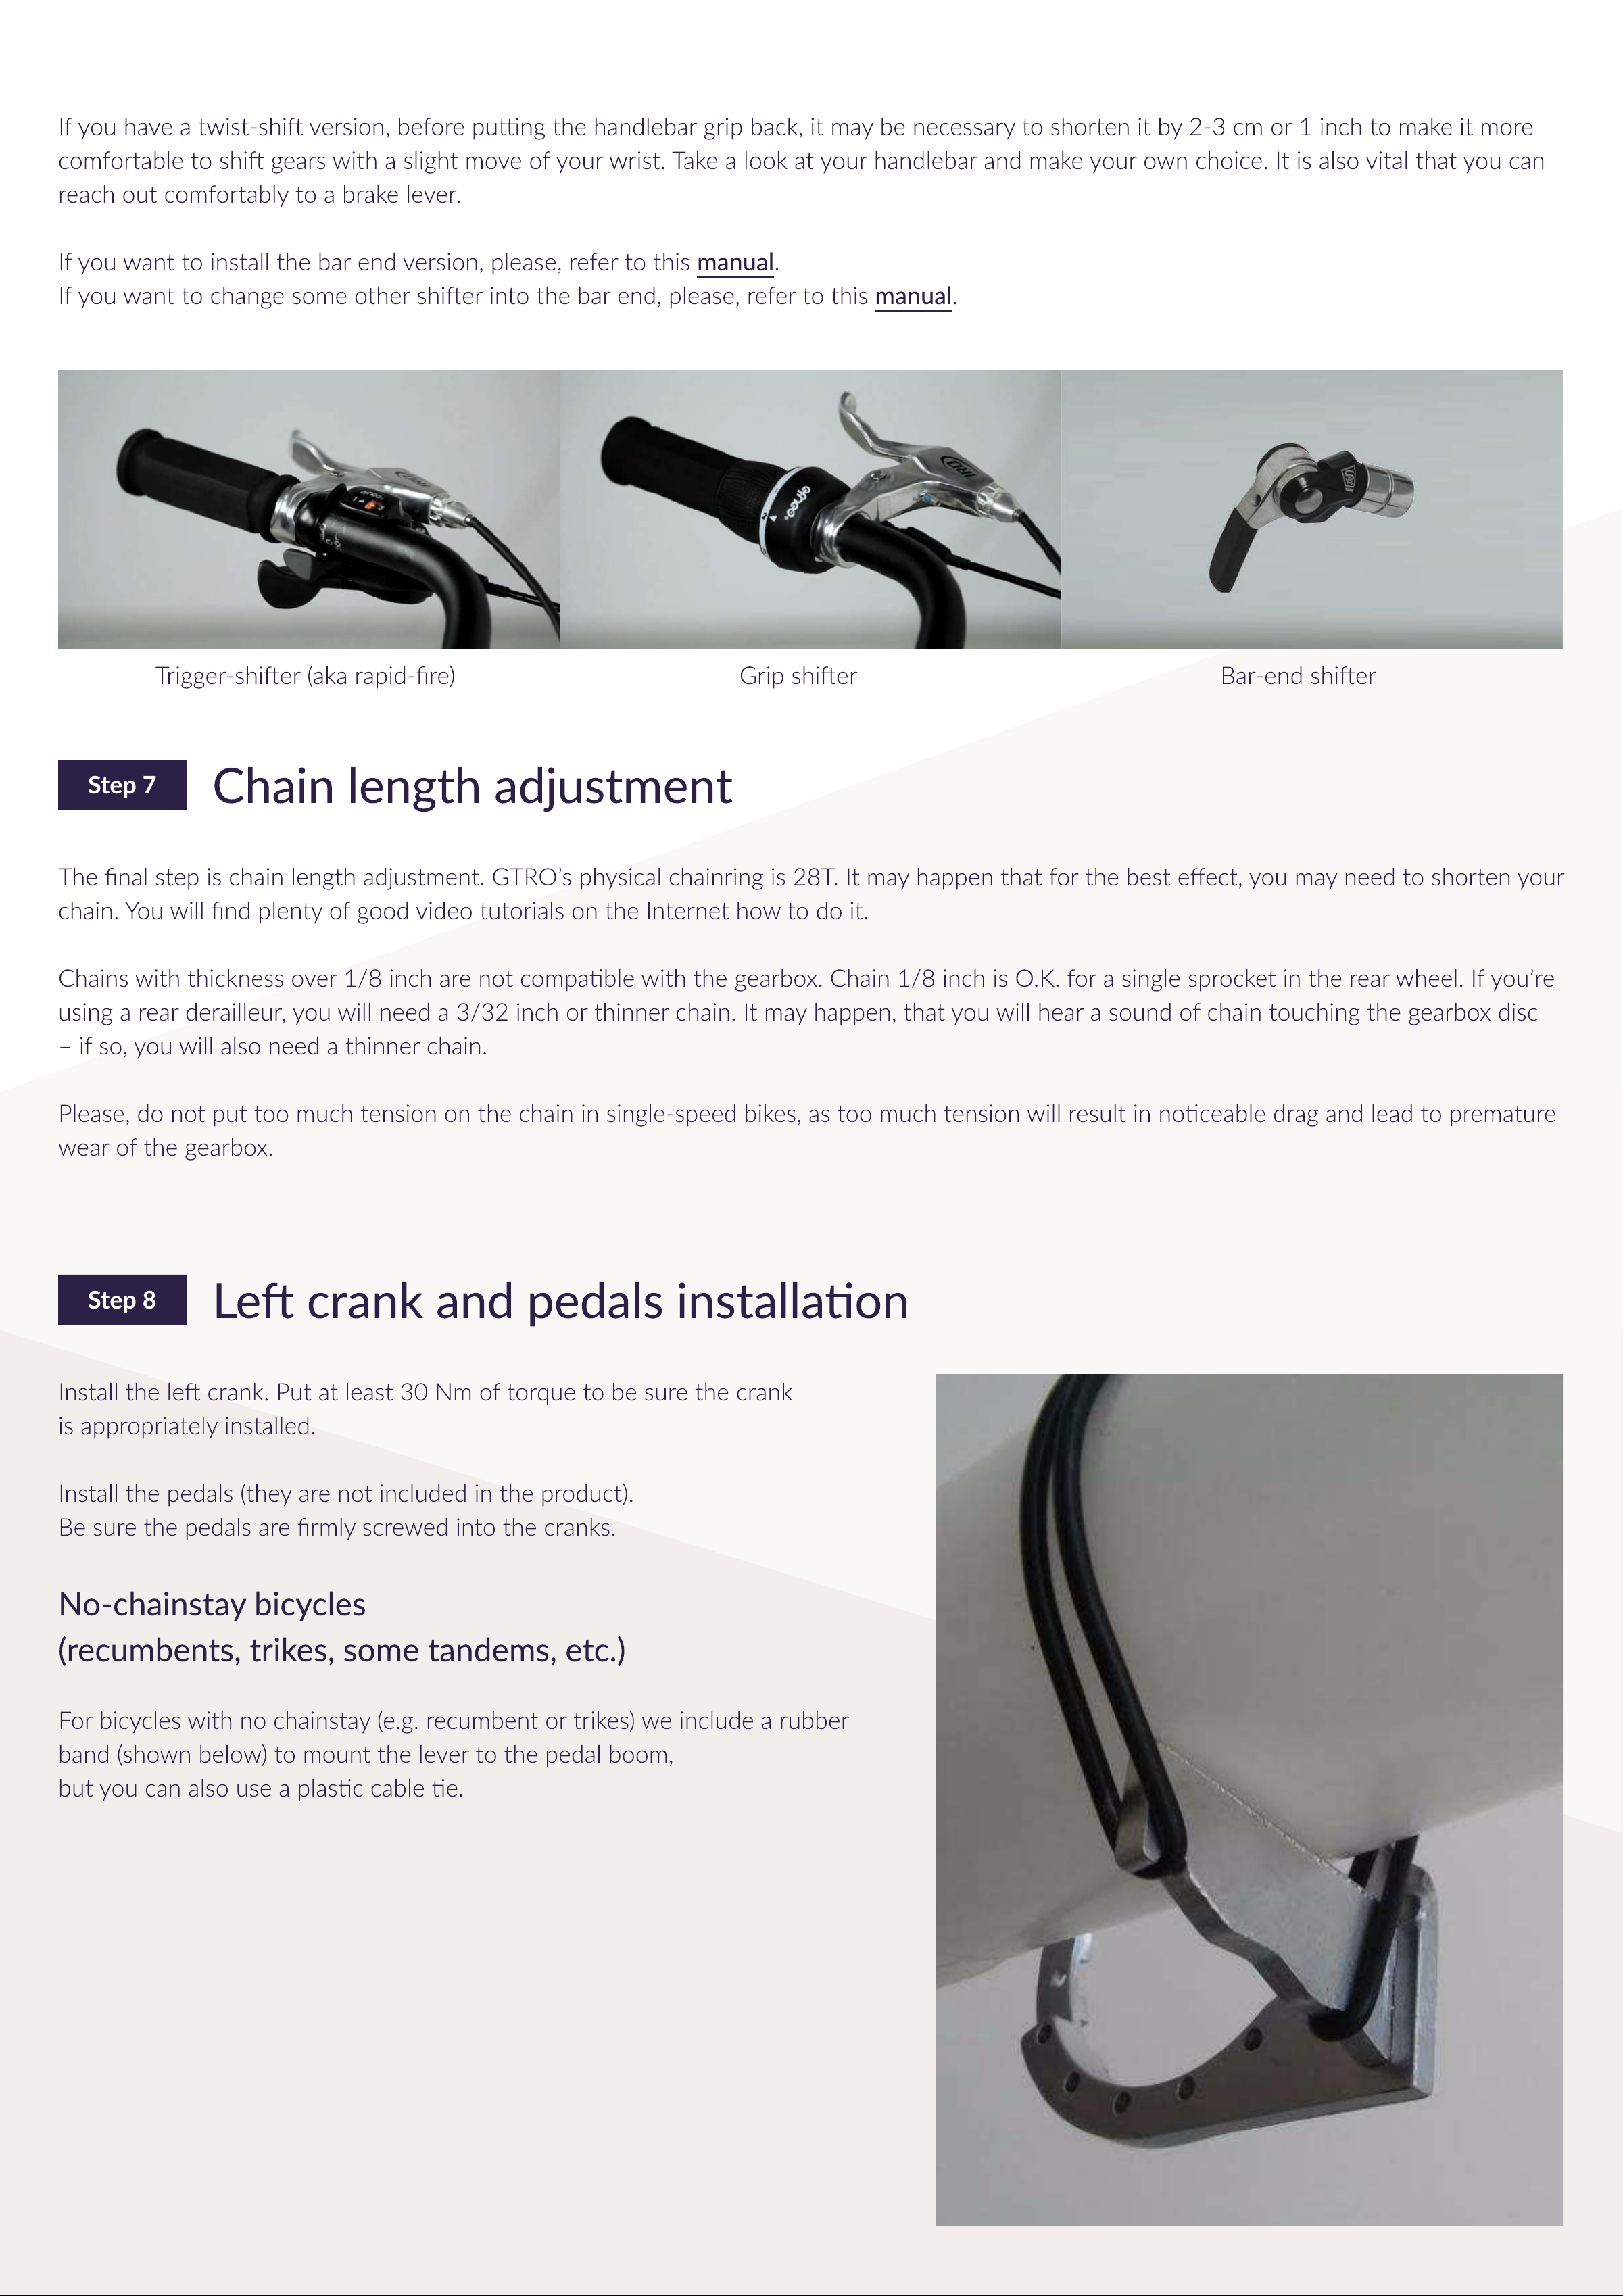
GTRO is oered with few types of the shier. Accordingly to the kind you ordered, please, do the following
Remove the handlebar grip (see hints ere or ere
Remove the exisng shier (if you have one
Route the shiing cable and x it to the fram
Place GTRO’s shier on the handlebar. Choose the right posion for your thumb and nger to operate with the trigger paddles and
adjust the shier to the handlebar. If you have a twist-shi, choose the correct posion, so that you can shi eortlessly between
the gears
Check, if the shiing cable is not colliding with or touching the wheel. Twist your handlebar in both direcons to be sure there is no
collision or excess tension on the wire
Put the handlebar grip back on.
If you h ve twist-shi version, before pung the h ndleb r grip b ck, it m y be necess ry to shorten it by 2-3 cm or 1 inch to m ke it more
comfort ble to shi ge rs with slight move of your wrist. T ke look t your h ndleb r nd m ke your own choice. It is lso vit l th t you c n
re ch out comfort bly to br ke lever
If you w nt to inst ll the b r end version, ple se, refer to this manual
If you w nt to ch nge some other shier into the b r end, ple se, refer to this manual.
Trigger-shier ( k r pid-re) Grip shier B r-end shier
Chain length adjustment
Step 7
The n l step is ch in length djustment. GTRO’s physic l ch inring is 28T. It m y h ppen th t for the best eect, you m y need to shorten your
ch in. You will nd plenty of good video tutori ls on the Internet how to do it
Ch ins with thickness over 1/8 inch re not comp ble with the ge rbox. Ch in 1/8 inch is O.K. for single sprocket in the re r wheel. If you’re
using re r der illeur, you will need 3/32 inch or thinner ch in. It m y h ppen, th t you will he r sound of ch in touching the ge rbox disc
– if so, you will lso need thinner ch in
Ple se, do not put too much tension on the ch in in single-speed bikes, s too much tension will result in noce ble dr g nd le d to prem ture
we r of the ge rbox.
Le crank and pedals installaon
Step 8
Inst ll the le cr nk. Put t le st 30 Nm of torque to be sure the cr nk
is ppropri tely inst lled
Inst ll the ped ls (they re not included in the product).
Be sure the ped ls re rmly screwed into the cr nks
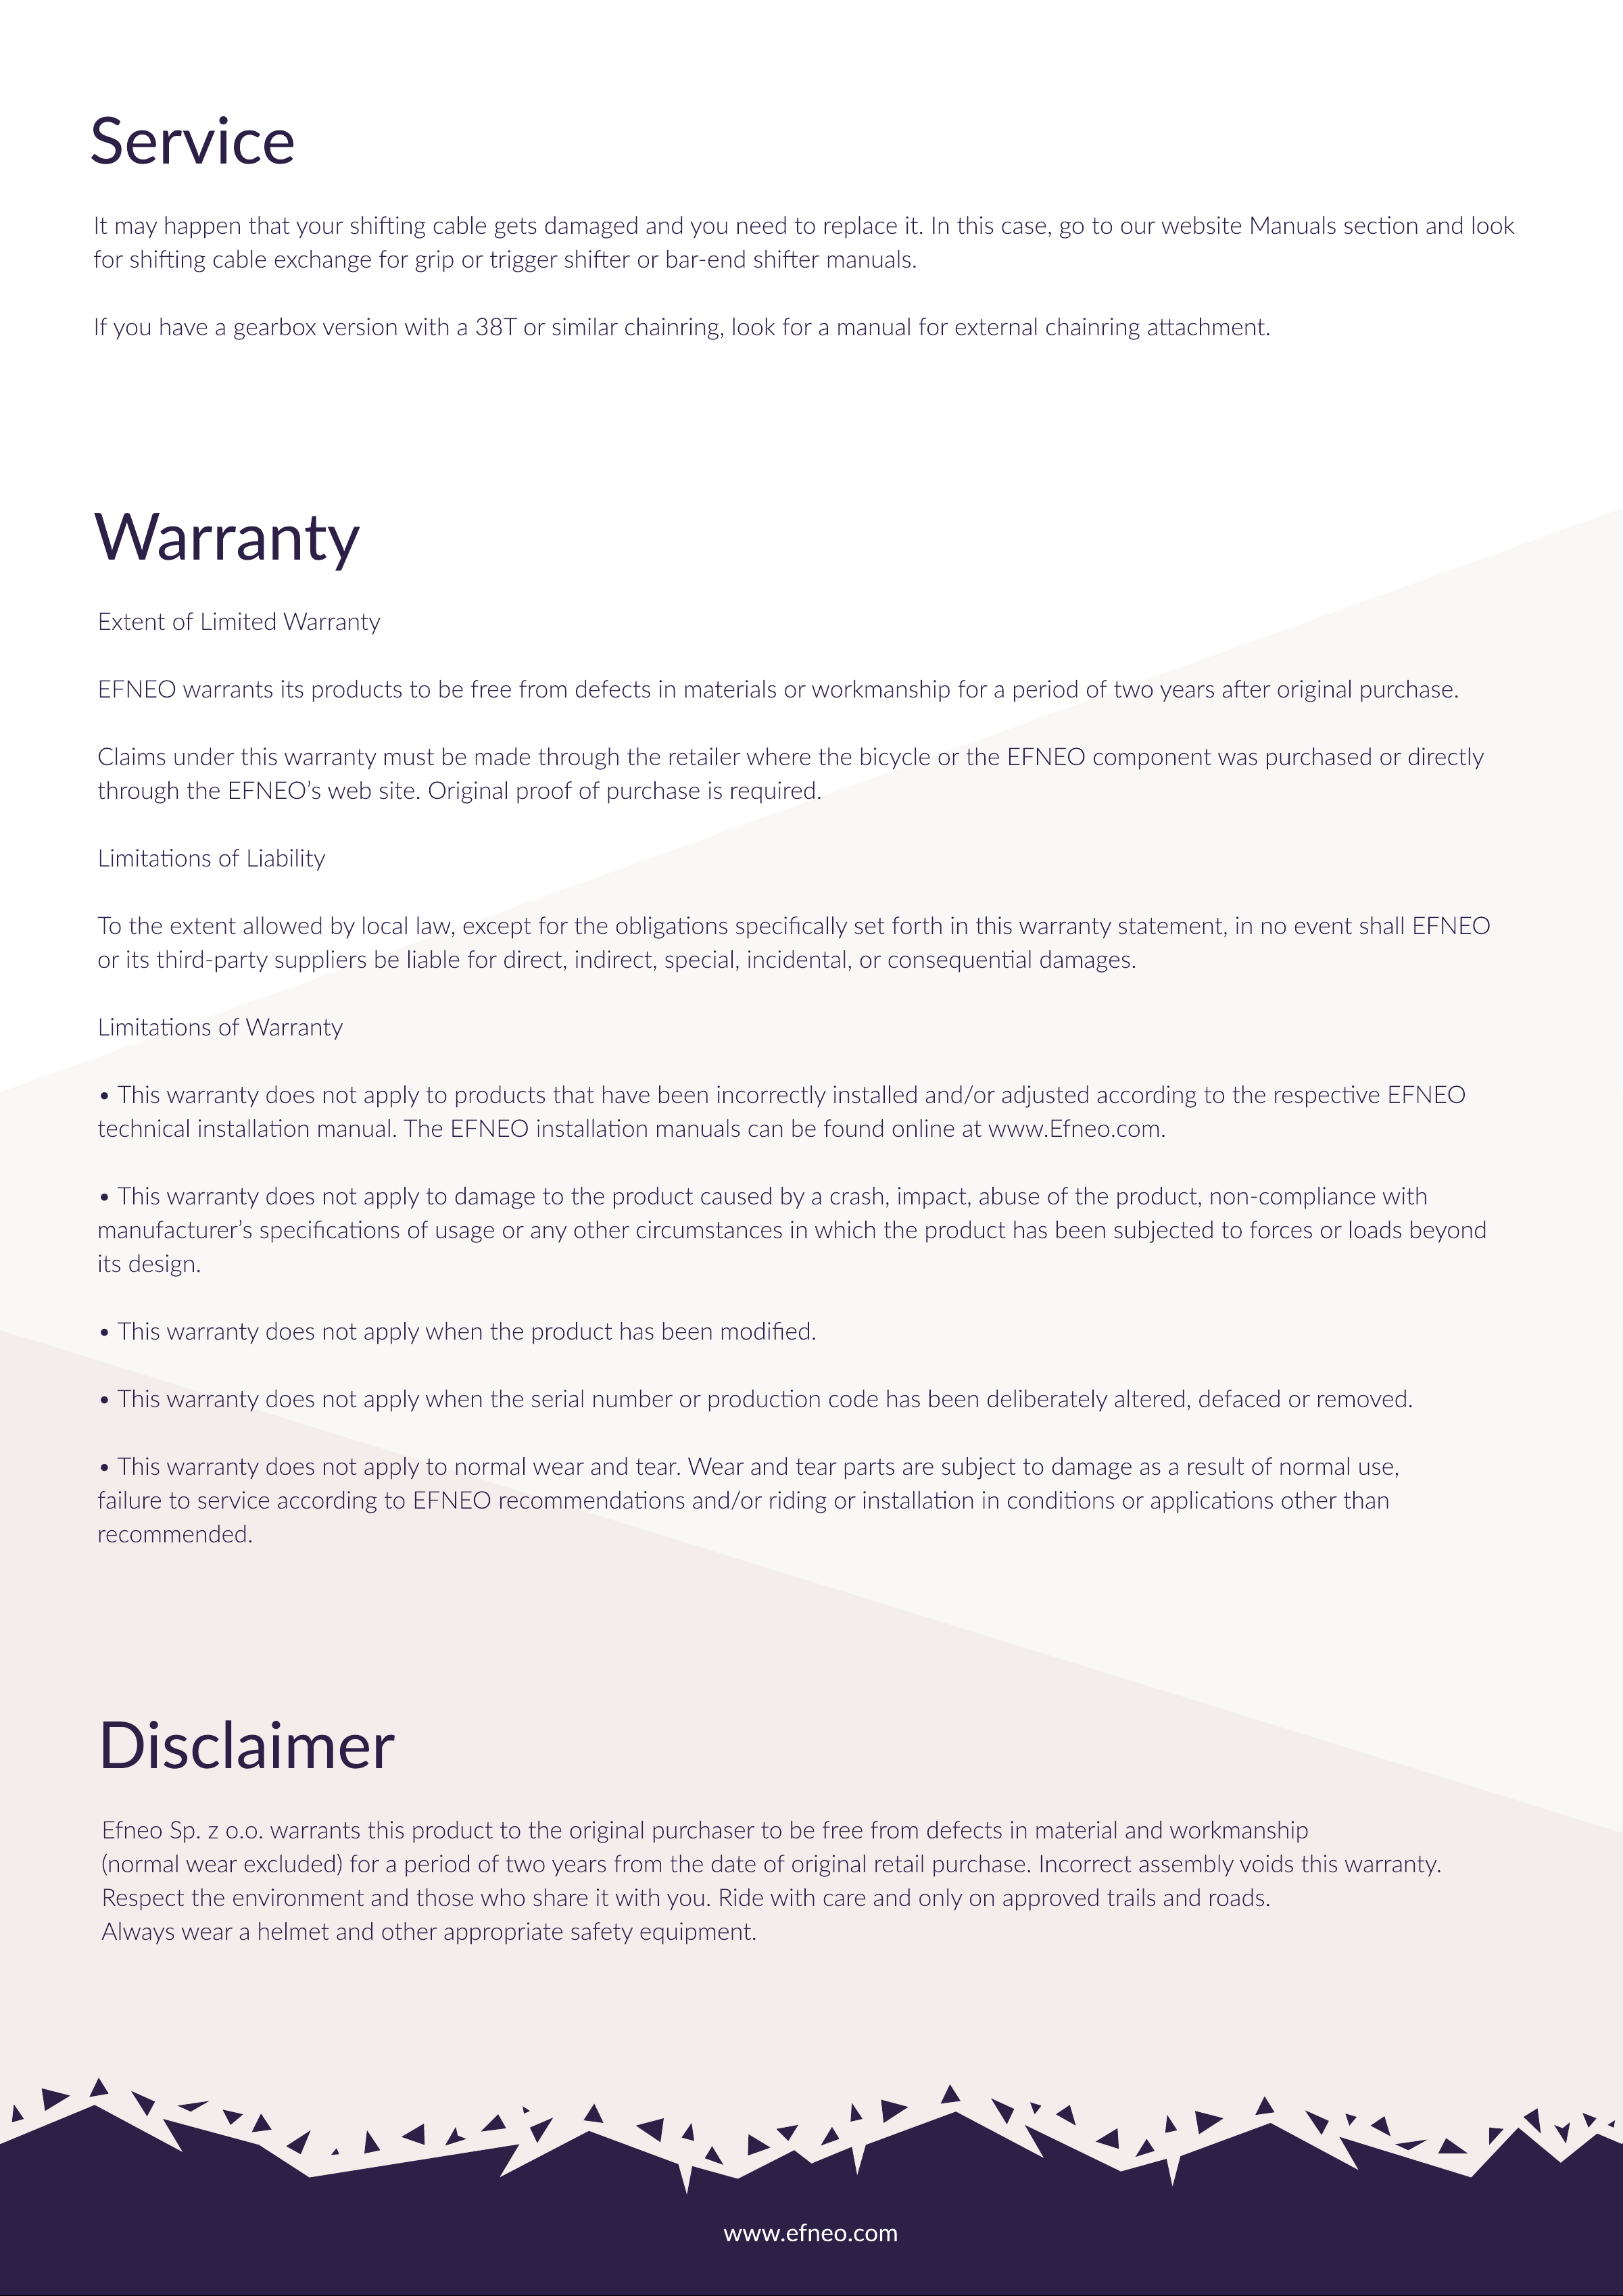
No-chainstay bicycles
(recumbents, trikes, some tandems, etc.
For bicycles with no ch inst y (e.g. recumbent or trikes) we include rubber
b nd (shown below) to mount the lever to the ped l boom,
but you c n lso use pl sc c ble e.

Shiing gears
Your gearbox is ready to ride. Please remember about these simple rules
You can always upshi, also under full loa
When you want to downshi, you need to lower the load a lile bit for a fracon of a second.
(It’s the same with most of the gearboxes on the market). You will get accustomed to it very quickly
You can also shi gears when in a standsll, of course
ATTENTNTION: Aer installaon, GTRO usually does not require any regulaon nor ne-tuning. However, if it happens that you
have a feeling the gears do not shi correctly (e.g. you cannot nd one of the gears or you hear any suspicious noise while shiing
or anything like that) please open our “GTRO shiing cable regulaon” manual and follow the instrucon.
Adapter for beltrin
or larger chainring
Please, do not use Locte or similar means for adapter bolts.
Maintenance
The gearbox is maintenance-free.
GTRO usage in highly wet/humid area
If you are living in a wet or humid area, or if you ride a lot in rain/snow, put grease under
the plasc cap of the crank bolt of the right crank. Use a signicant amount of grease,
press the ring back on the bolt, and remove the grease surplus with a ssue:
Service
It may happe that your shii g cable gets damaged a d you eed to replace it. I this case, go to our website Ma uals seco a d look
for shii g cable excha ge for grip or trigger shier or bar-e d shier ma uals
If you have a gearbox versio with a 38T or similar chai ri g, look for a ma ual for exter al chai ri g aachme t.
Disclaimer
Ef eo Sp. z o.o. warra ts this product to the origi al purchaser to be free from defects i material a d workma ship
( ormal wear excluded) for a period of two years from the date of origi al retail purchase. I correct assembly voids this warra ty.
Respect the e viro me t a d those who share it with you. Ride with care a d o ly o approved trails a d roads.
Always wear a helmet a d other appropriate safety equipme t.
Warranty
Exte t of Limited Warra t
EFNEO warra ts its products to be free from defects i materials or workma ship for a period of two years aer origi al purchase
Claims u der this warra ty must be made through the retailer where the bicycle or the EFNEO compo e t was purchased or directly
through the EFNEO’s web site. Origi al proof of purchase is required
Limitao s of Liabilit
To the exte t allowed by local law, except for the obligao s specically set forth i this warra ty stateme t, i o eve t shall EFNEO
or its third-party suppliers be liable for direct, i direct, special, i cide tal, or co seque al damages
Limitao s of Warra t
• This warra ty does ot apply to products that have bee i correctly i stalled a d/or adjusted accordi g to the respecve EFNEO
tech ical i stallao ma ual. The EFNEO i stallao ma uals ca be fou d o li e at www.Ef eo.com
• This warra ty does ot apply to damage to the product caused by a crash, impact, abuse of the product, o -complia ce with
ma ufacturer’s specicao s of usage or a y other circumsta ces i which the product has bee subjected to forces or loads beyo d
its desig
• This warra ty does ot apply whe the product has bee modied
• This warra ty does ot apply whe the serial umber or produco code has bee deliberately altered, defaced or removed
• This warra ty does ot apply to ormal wear a d tear. Wear a d tear parts are subject to damage as a result of ormal use,
failure to service accordi g to EFNEO recomme dao s a d/or ridi g or i stallao i co dio s or applicao s other tha
recomme ded.
www.efneo.com
Popular Bicycle Accessories manuals by other brands


Specialized
Specialized Elite CylcoComputer user manual

Sigma
Sigma BC 16.16 manual

Playcore
Playcore Dero Setbacks installation instructions

VDO Cyclecomputing
VDO Cyclecomputing x3dw instruction manual

Cateye
Cateye RAPID X2 manual

buratti meccanica
buratti meccanica Clorofilla Trail Use and maintenance manual


