Egoe Nestbox User manual
User Instructions
Egoé Nestbox

Please read these instructions carefully. They contain
impotant information on how to operate and handle
these devices. Always follow proper safety procedures.
Before getting stated, make sure that the voltage is
correct and that all pats are properly assembled. If
you have any questions, or are unsure about how to
operate the devices, please contact your vendor. Keep
these instructions in a safe place and, if necessary,
pass them on to third paties.

2
1. Nestbox Body
1.1 Description of the Nestbox Camper Car Assembly
1.2 Nestbox Body - Package Contents
1.3 Nestbox Body - Installation
1.4 Technical Data
2. Nestbox Cooker Module
2.1 Cooker Module Description
2.2 Cooker Module - Package Contents
2.3 Cooker Module - Instructions for Use
2.4 Technical Data
2.5 Maintenance
3. Nestbox Water Module
3.1 Water Module Description
3.2 Water Module - Package Contents
3.3 Water Module - Instructions for Use
3.4 Technical Data
3.5 Maintenance
4. Nestbox Sleeping Set
4.1 Sleeping Set Description
4.2 Package Contents
4.3 Intended Use
4.4 Sleeping Set - Installation
4.5 Technical Data
4.6 Independent Legs
4.6.1 Description of Independent Legs
4.6.2 Package Contents
4.6.3 Installation
4.6.4 Technical Data
5. Warranty and service
Nestbox is a camper car assembly designed for easy
insetion into the luggage compatment, transforming
your car into a camper car. It can be anchored in the car
using four anchor straps and unfolded within minutes.
!!!While driving, Nestbox must be anchored in
accordance with the installation instructions. In
the folded position, the mattress bed base must
be secured to the body using a strap to prevent
any movement of pats and accessories. For safety
reasons, the moving pats of Nestbox are equipped
with a lock that holds all pats together during
transpot. Any other use than the intended use
described in this manual constitutes grounds for
excluding warranty and liability. Same applies to
conversions and any changes.
Intended
Use

3 4
1.1 Description of the
Nestbox Camper Car
Assembly
The Nestbox camper car assembly consists of the
main body with space for the modules - cooker, water,
refrigerator, and removable drawers and textile pockets
(except the NST HI 300 and NST CA 200 models). The
main body is made of powder-coated iron profiles, birch
plywood with HPL surface, and melamine laminated
plywood, stainless steel fasteners, steel and the special
Batyline textile. The Nestbox camper car assembly is
equipped with a retractable locking mechanism that
prevents unwanted extension/retraction. The Nestbox
top plate also serves as the first pat of the foldable
grid. See: Sleeping Set
1. Nestbox
– Body
1× Nestbox Body
4× Yale strap with anchoring hooks and buckle
1× mattress strap
1× knife and cutting board (all models except NST HI
300)
1× cutlery tray (only models NST HI 300, NST RO 710)
1× axe (only model NST SU 500)
If the luggage compatment of your vehicle does not
contain anchor points (lugs, hooks), you can order them
from your supplier.
1.2 Nestbox Body -
Package Contents
65
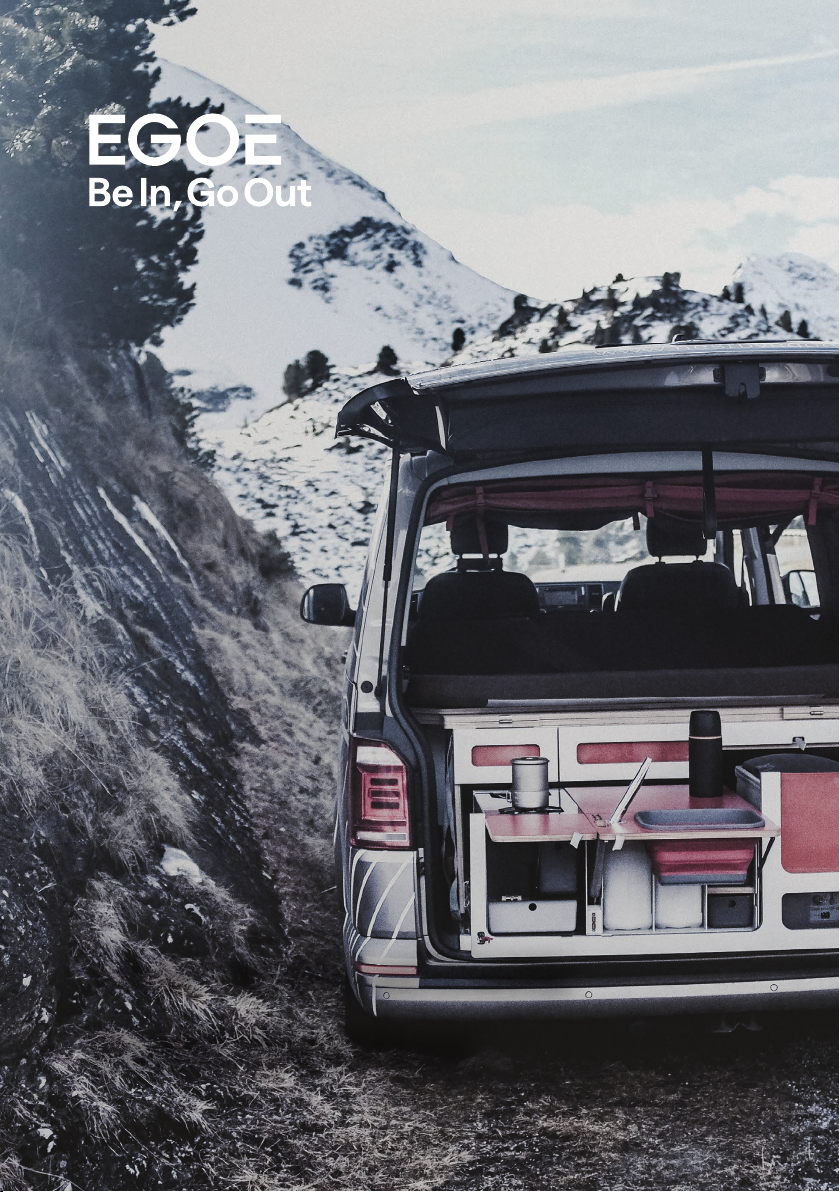
Before inseting Nestbox into the car, remove its
modules - the water module, the cooker module and
the refrigerator. Such bare assembly is easier to install
into the luggage compatment.
1.3 Nestbox Body -
Installation
Check that the package contents is complete and free
from damage immediately after unpacking.
Before inseting the Nestbox body into the car, make
sure that there are no third-paty accessories or
luggage on the floor of the luggage compatment
which would prevent proper installation and anchoring.
Inset the bare assembly into the luggage
compatment.
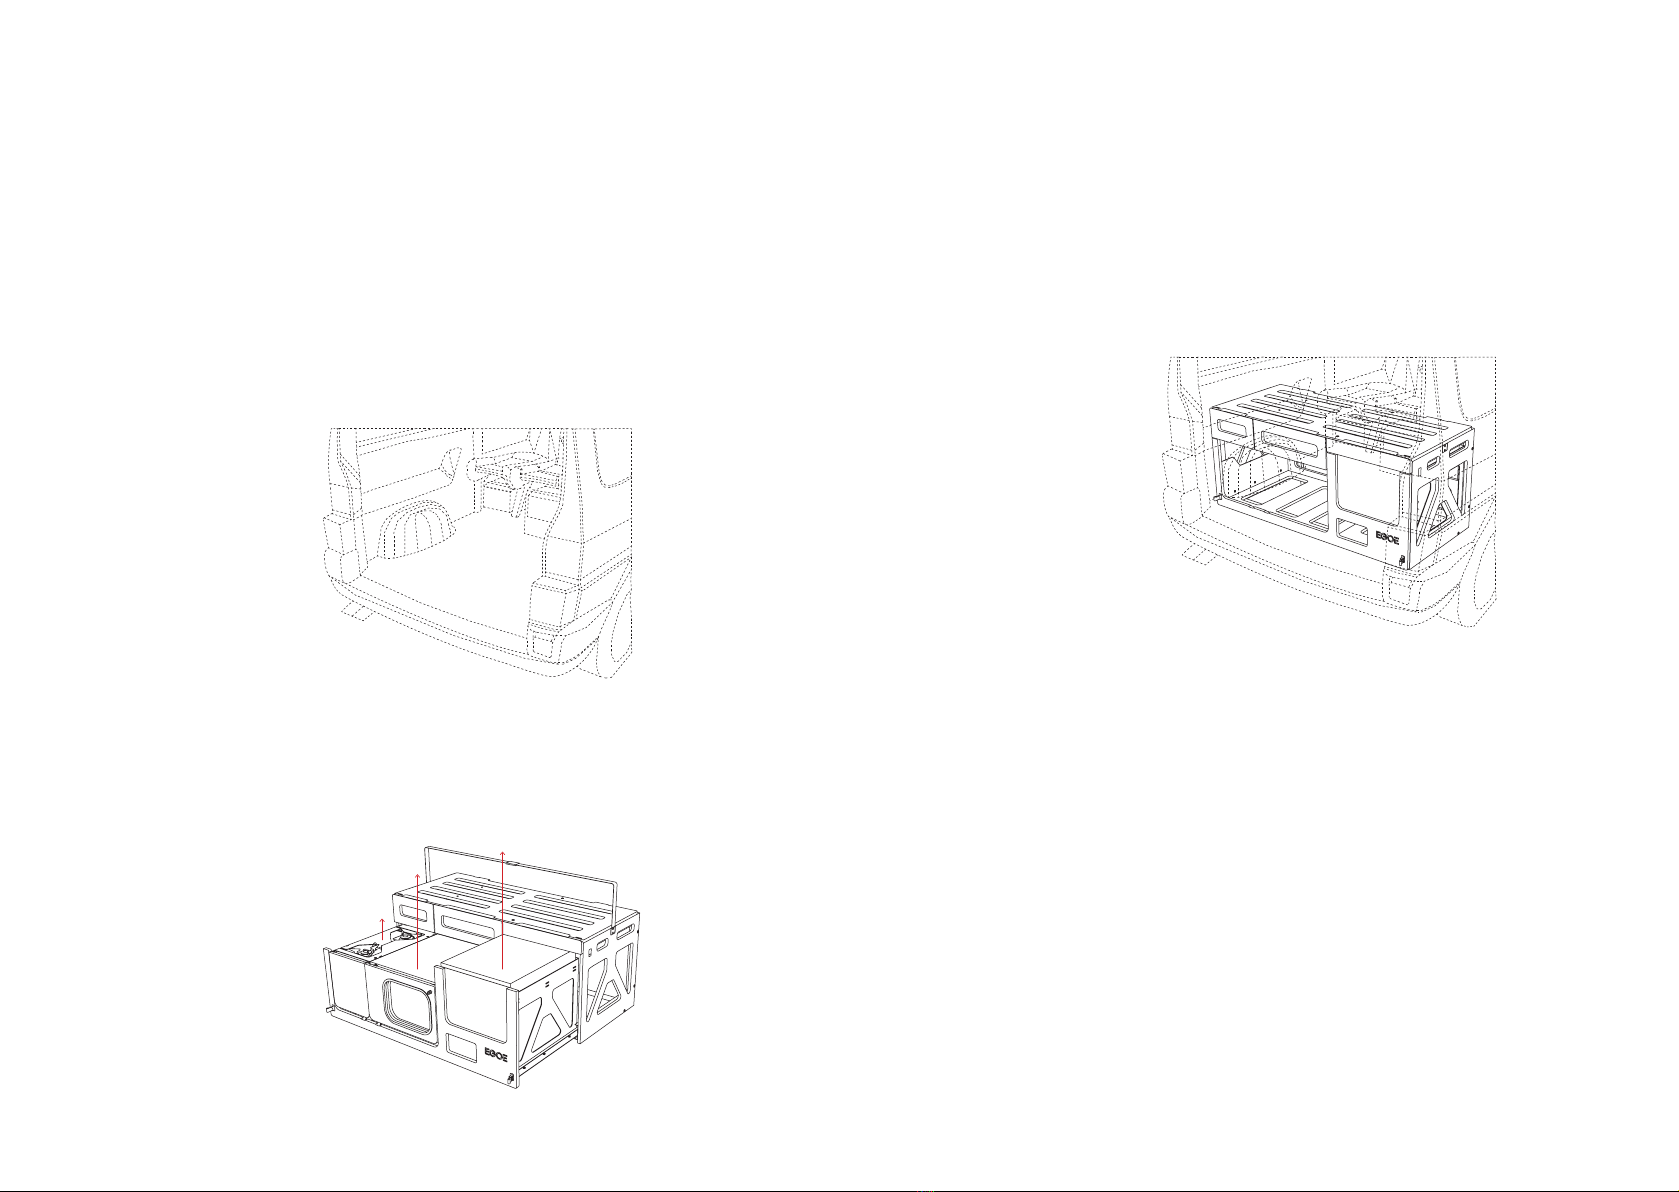
Then use the four Yale straps to anchor the Nestbox
body to the original anchor points. Various vehicles
compatible with the Nestbox camper car assembly
have anchor points (lugs, hooks, rails) to anchor the
assembly. If your cargo area does not contain original
lugs, you can order and then install them into the car
rails. The straps have Dekra cetification. That concerns
the stitching of the strap with each strap tested at
220kg. The cetification is marked with a blue label on
the strap.
When inseting and anchoring the Nestbox car
assembly, make sure that there is sufficient space
between the assembly and the rear doors to prevent
damaging them.
Anchoring is performed in both the rear and the side
or the front of the assembly. !!!Caution!!! The rear
pat of the assembly must be anchored first; only
then the front pat can be anchored.
Remove the
water module
Remove the
cooker module
Remove the refrigerator
87
The side pat of the Nestbox assembly: Is the anchor
of your car located on the sides of the car? If it is, use
the following procedure.
For anchoring, use the anchor points C on the car
assembly and the original anchoring lugs D in the rear
of the car on the sides of the assembly. Follow the
same procedure as for the rear pat of the assembly.
The strap is hooked by a hook sewn onto the strap into
anchor point C and the loose end of the strap is pulled
through the anchor point of the car D. After pulling it
through, return the loose end of the strap back to the
hook where the locking buckle is sewn. Pull the loose
end of the strap through this buckle, tighten the whole
strap, and lock it using the buckle. Follow the same
procedure on the opposite side.
The rear pat of the Nestbox assembly: hook the
strap using the hook sewn onto the strap into anchor
point A and pull the loose end of the strap is through
anchor point B (If your cargo area does not contain
original lugs, you can order and then install them into
the car rails.). After pulling it through, the loose end of
the strap comes back to the hook where the buckle is
sewn on. Pull the loose end of the strap through this
buckle, tighten the whole strap, and lock it using the
buckle. Follow the same procedure on the opposite
side.
anchor point Alocking buckle
anchor point B
anchor point C
anchor point D
109
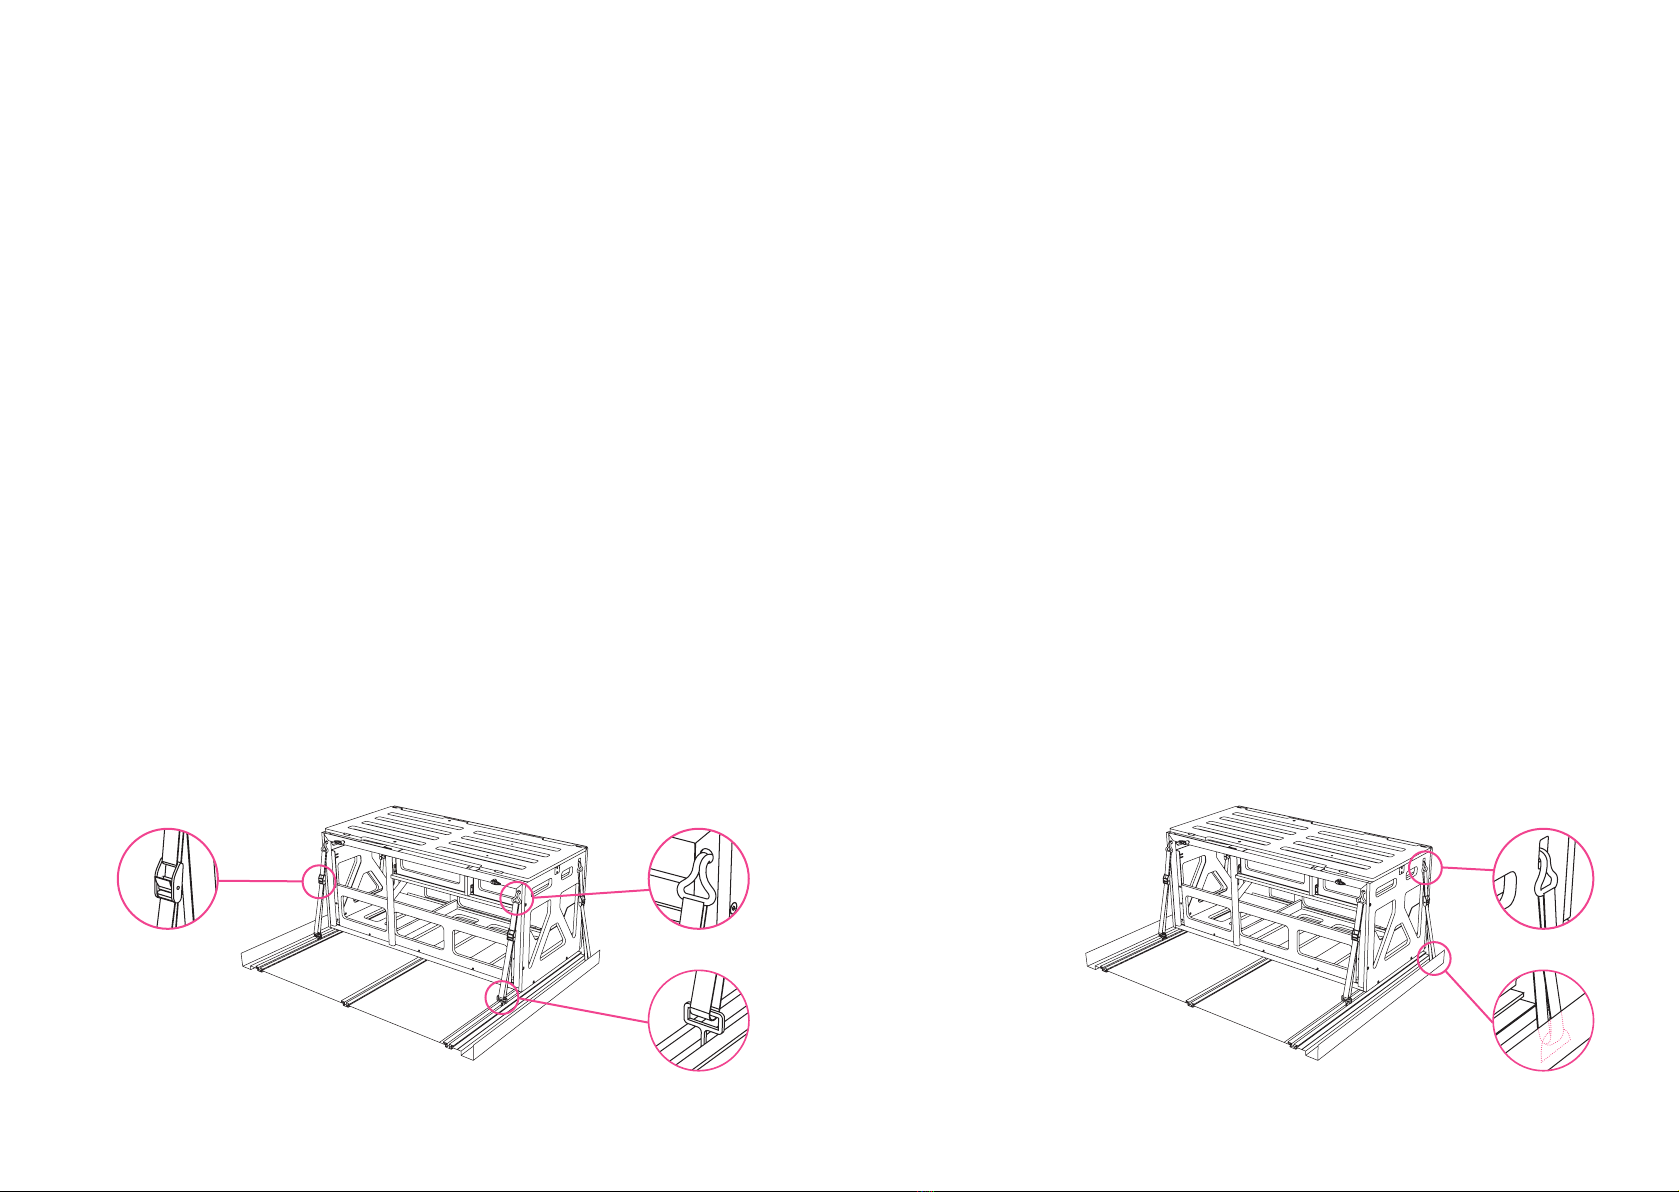
Wrap the end of the Yale strap with the buckle once
around the back of the frame so that the buckle runs
through the bottom.
Front of the Nestbox assembly: if your car‘s anchor
points are below Nestbox, in the rear of the vehicle,
then use the following procedure.
Make sure that you have the assembly anchored
properly in the rear; see anchoring the rear of the
Nestbox. Then open the empty main drawer which
provides easy access to the bottom of the Nestbox
metal frame and anchor points E.
anchor point E
The other side of the strap goes over the rear frame
structure towards the front where it must be wrapped
3times.
Then pass the strap under anchor point E and back
towards the buckle.
Pull the loose end of the strap through this buckle which
tightens the whole strap and lock it using the buckle.
Follow the same procedure on the opposite side.
anchor point E
1211
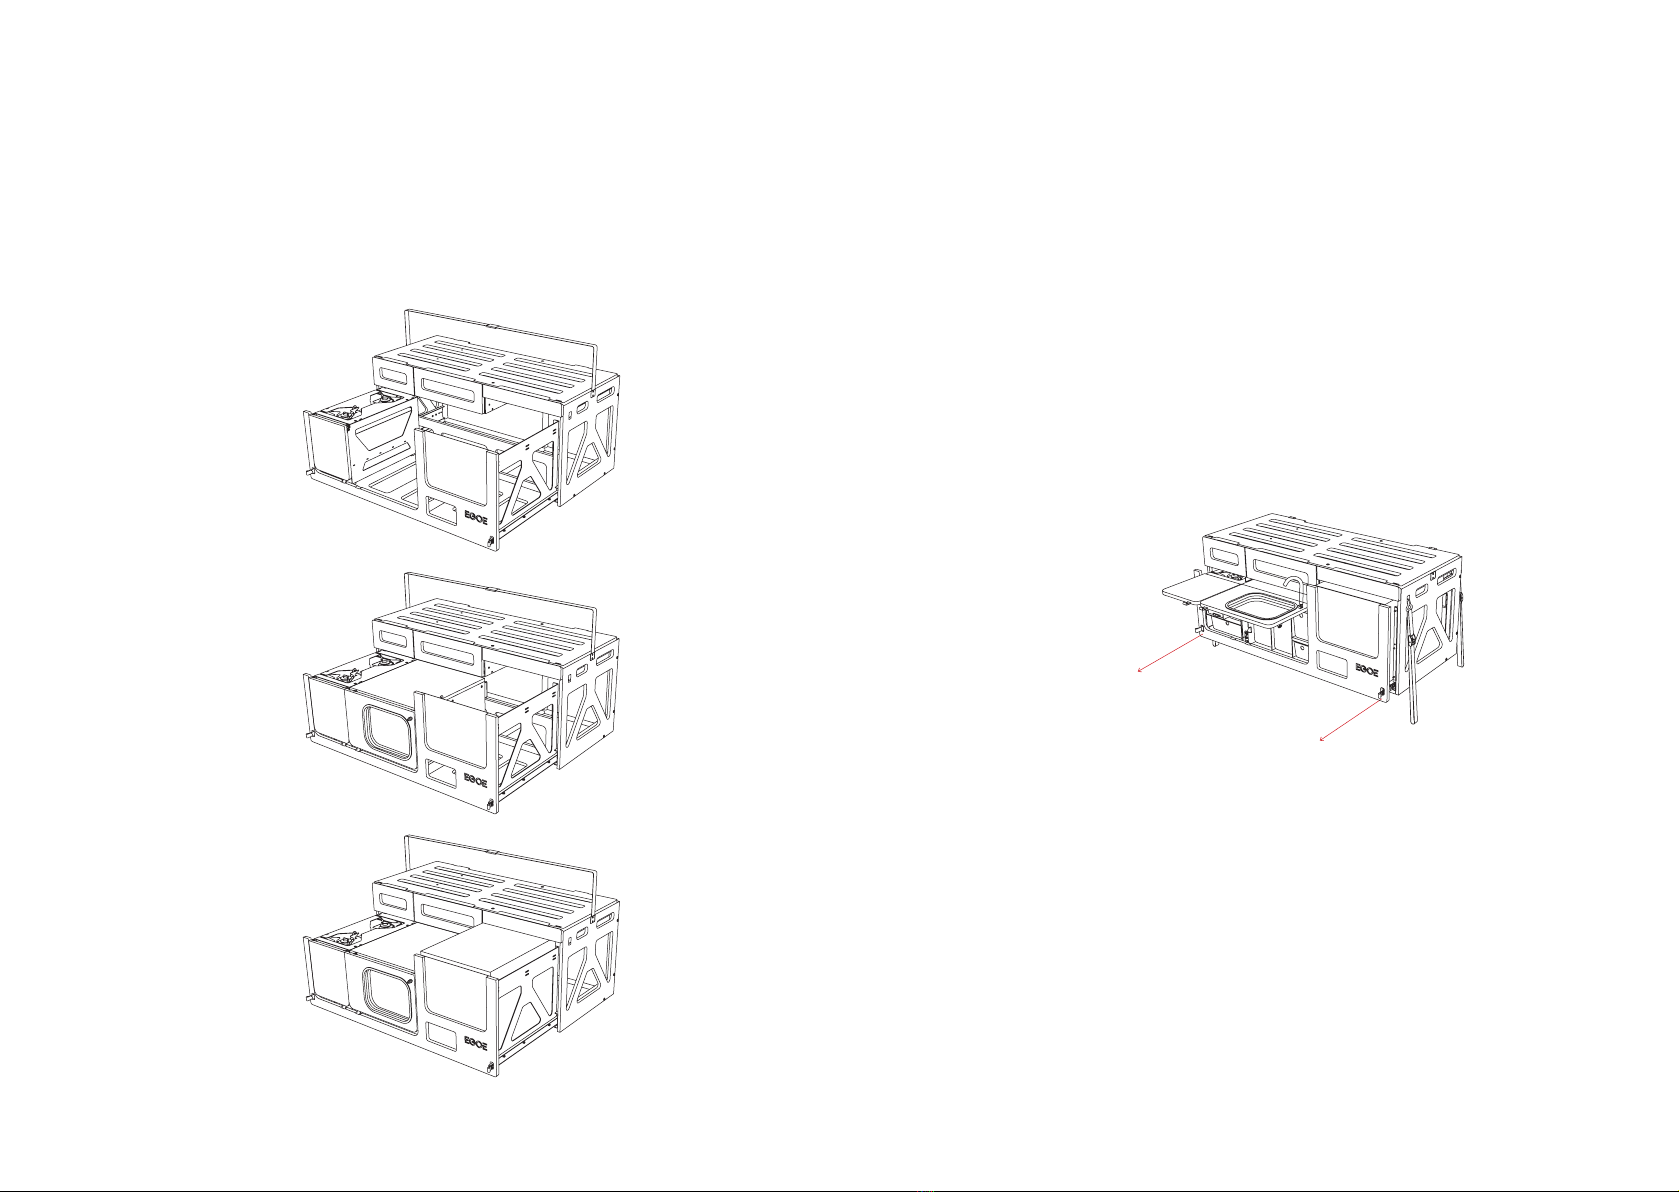
Now we can inset the modules into the properly
anchored car assembly by sliding the main lower
drawer of the car assembly, locking it and inseting the
modules stating from the left (facing the assembly) -
cooker, water, refrigerator.
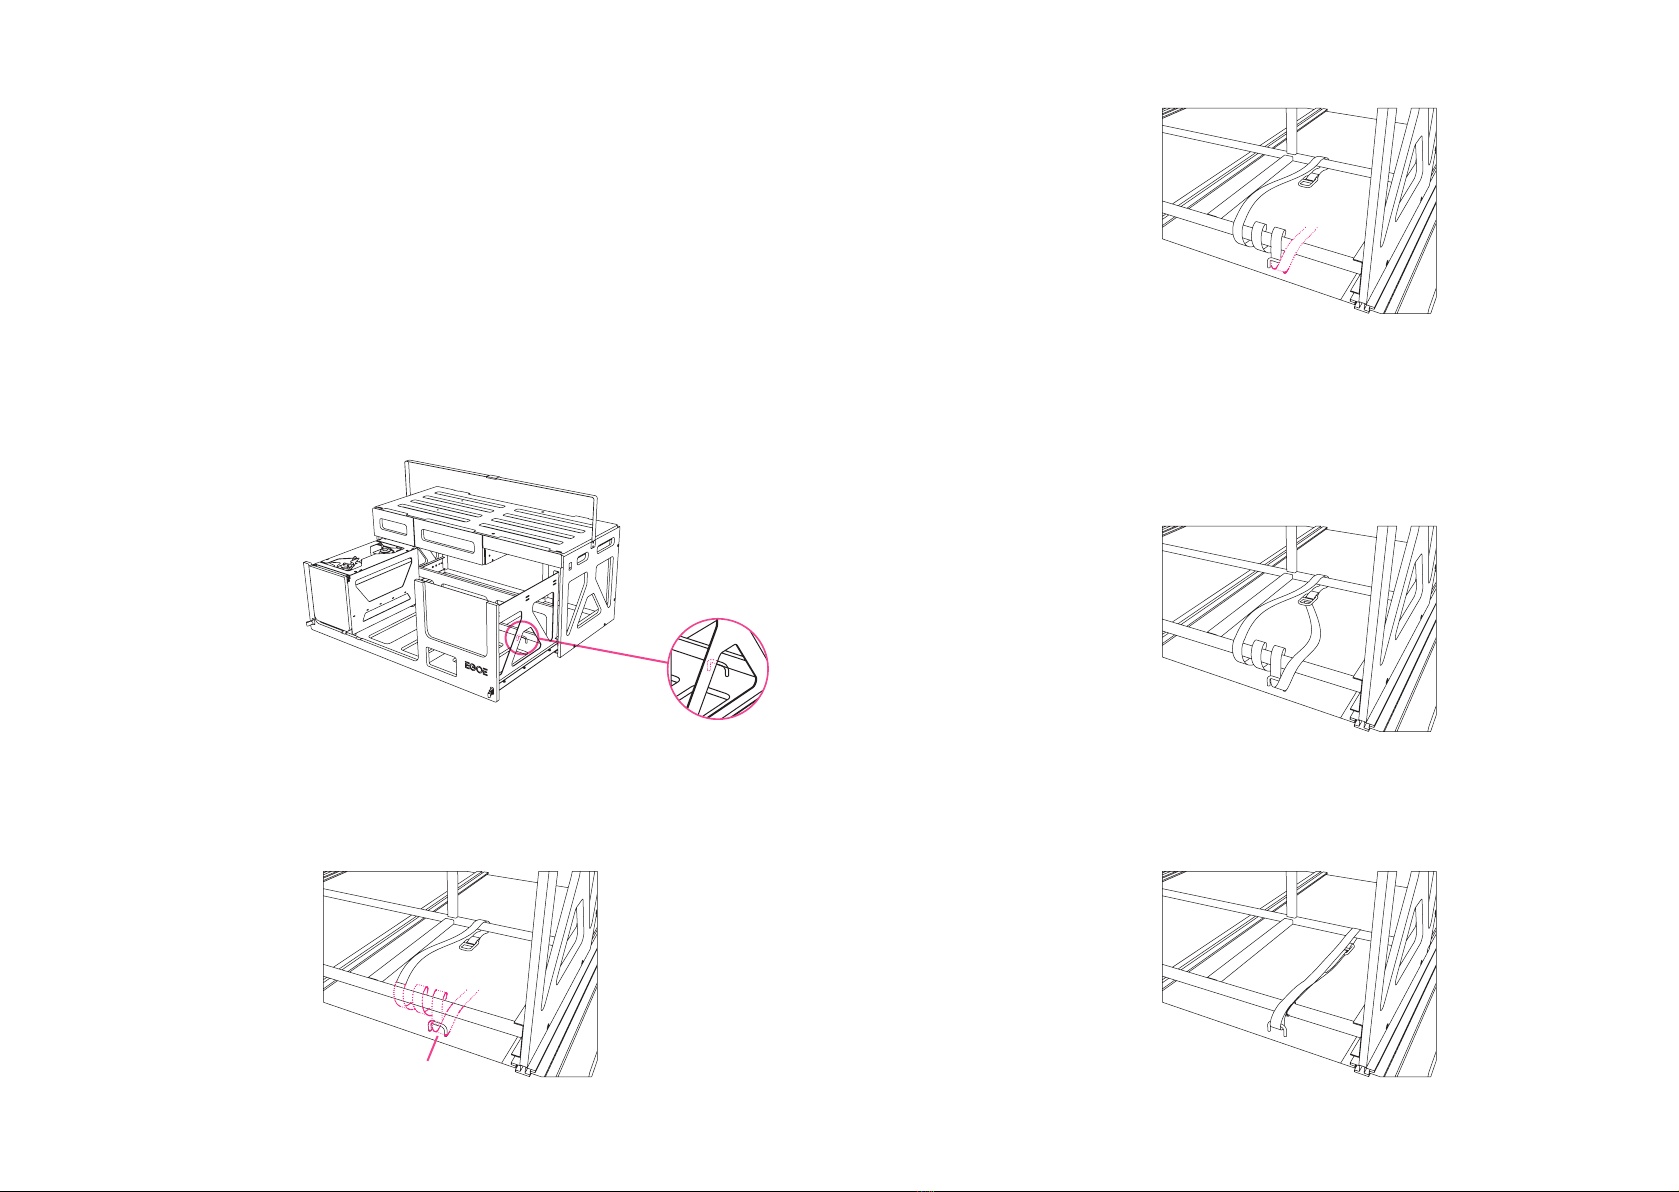
The main drawer is locked in both the retracted and
extended positions, and it can be unlocked by gently
pulling up on both tabs located on each underside of
the drawer.
The product is anchored in this way and everything can
be removed without the use of any tools; The load must
be secured during transpot.
1.4 Technical Data
The technical data is supplied together with the
instructions depending on the vehicle type.
If you have not found your car in the list, please contact
us at nest@egoe.eu.

1413
The Nestbox camper car assembly consists of individual
sets that fill the empty Nestbox body:
Nestbox kitchen set (cooker module, water module,
refrigerator), which is located in the lower main drawer.
Nestbox sleeping set (bed base, mattress, bed
brackets), which is attached using quick-release screws
to the top plate of the Nestbox assembly.
Nestbox sets
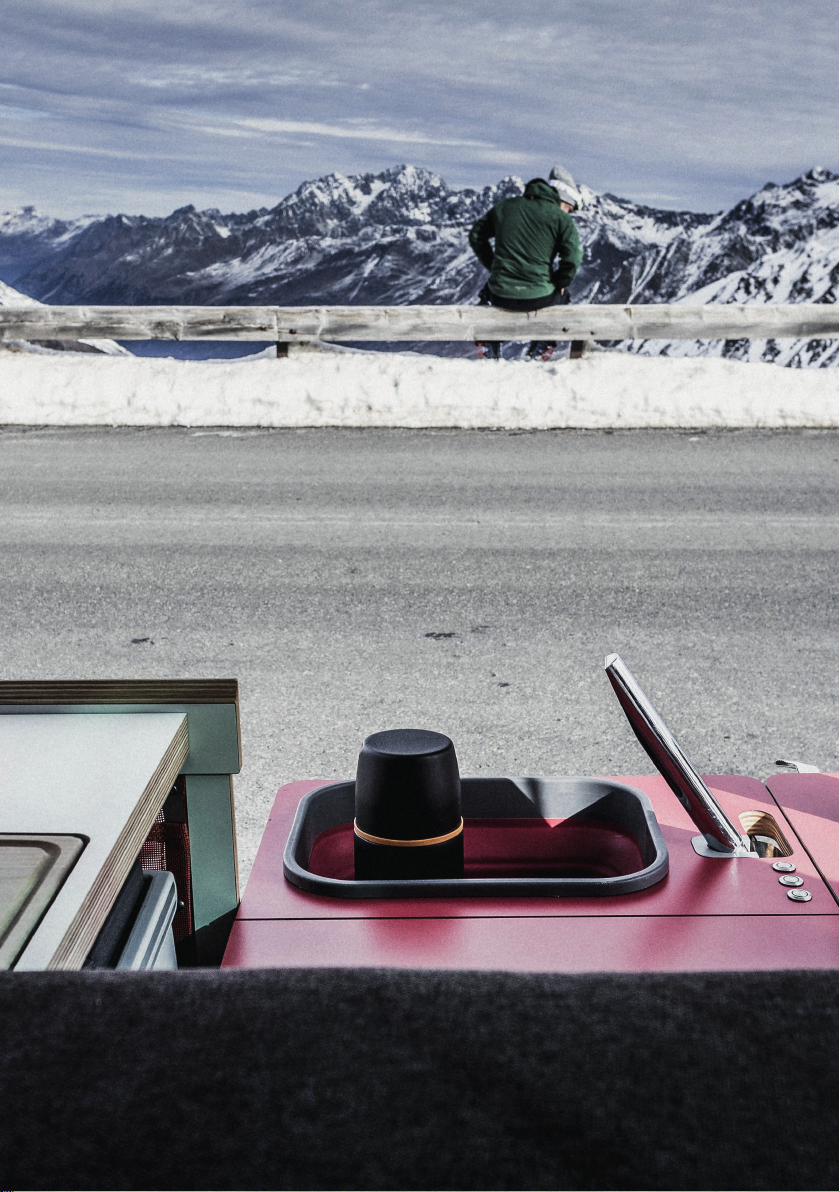
2.1 Cooker Module
Description
The cooker module is pat of the kitchen set and serves
to prepare food. It can be simply inseted into the main
drawer of the anchored Nestbox body. The module is
made of an aluminium frame with stainless steel pats
and birch plywood with HPL surface.
2. Nestbox
– Cooker Module
1× main frame
1× tall plastic drawer
1× wide plastic drawer
1× Batyline bag
2× gas catridge with neoprene cover
2× camping stove
3× stainless wind shields
2.2 Cooker Module
– Package Contents
1615
2.3 Cooker Module -
Instructions for Use
— The module can be simply inseted into the open
drawer of the Nestbox body.
— Grab the tab and pull it up to unfold the module.
— This unfolds the workspace.
— The cooker contains two propane-butane catridges
with burners.
— Turning the valve on the catridge releases gas and
ignites the burner.
— Hot objects (saucepans, mess kit, etc.) may only be
placed directly on the burners, not on the surface
of the cooker module or on any other surface of the
assembly made of plywood or HPL.
— The cooker module can be folded to its original state
by tilting the plate.
— The complete module is mobile. That means that
you can take it out and place it wherever needed.
It is possible to remove the individual burners with
catridges and use them separately for cooking, e.g.
while hiking.
2.4 Technical Data
Technical data varies for different types of the
assembly. The technical sheet is therefore supplied
separately for each specific car model.
2.5 Maintenance
The cooker module can be cleaned by hand using
a sponge, cloth, and soapy water. Other cleaning
methods may damage the product. The warranty does
not cover any defects caused by improper cleaning.
3. Nestbox –
Water Module
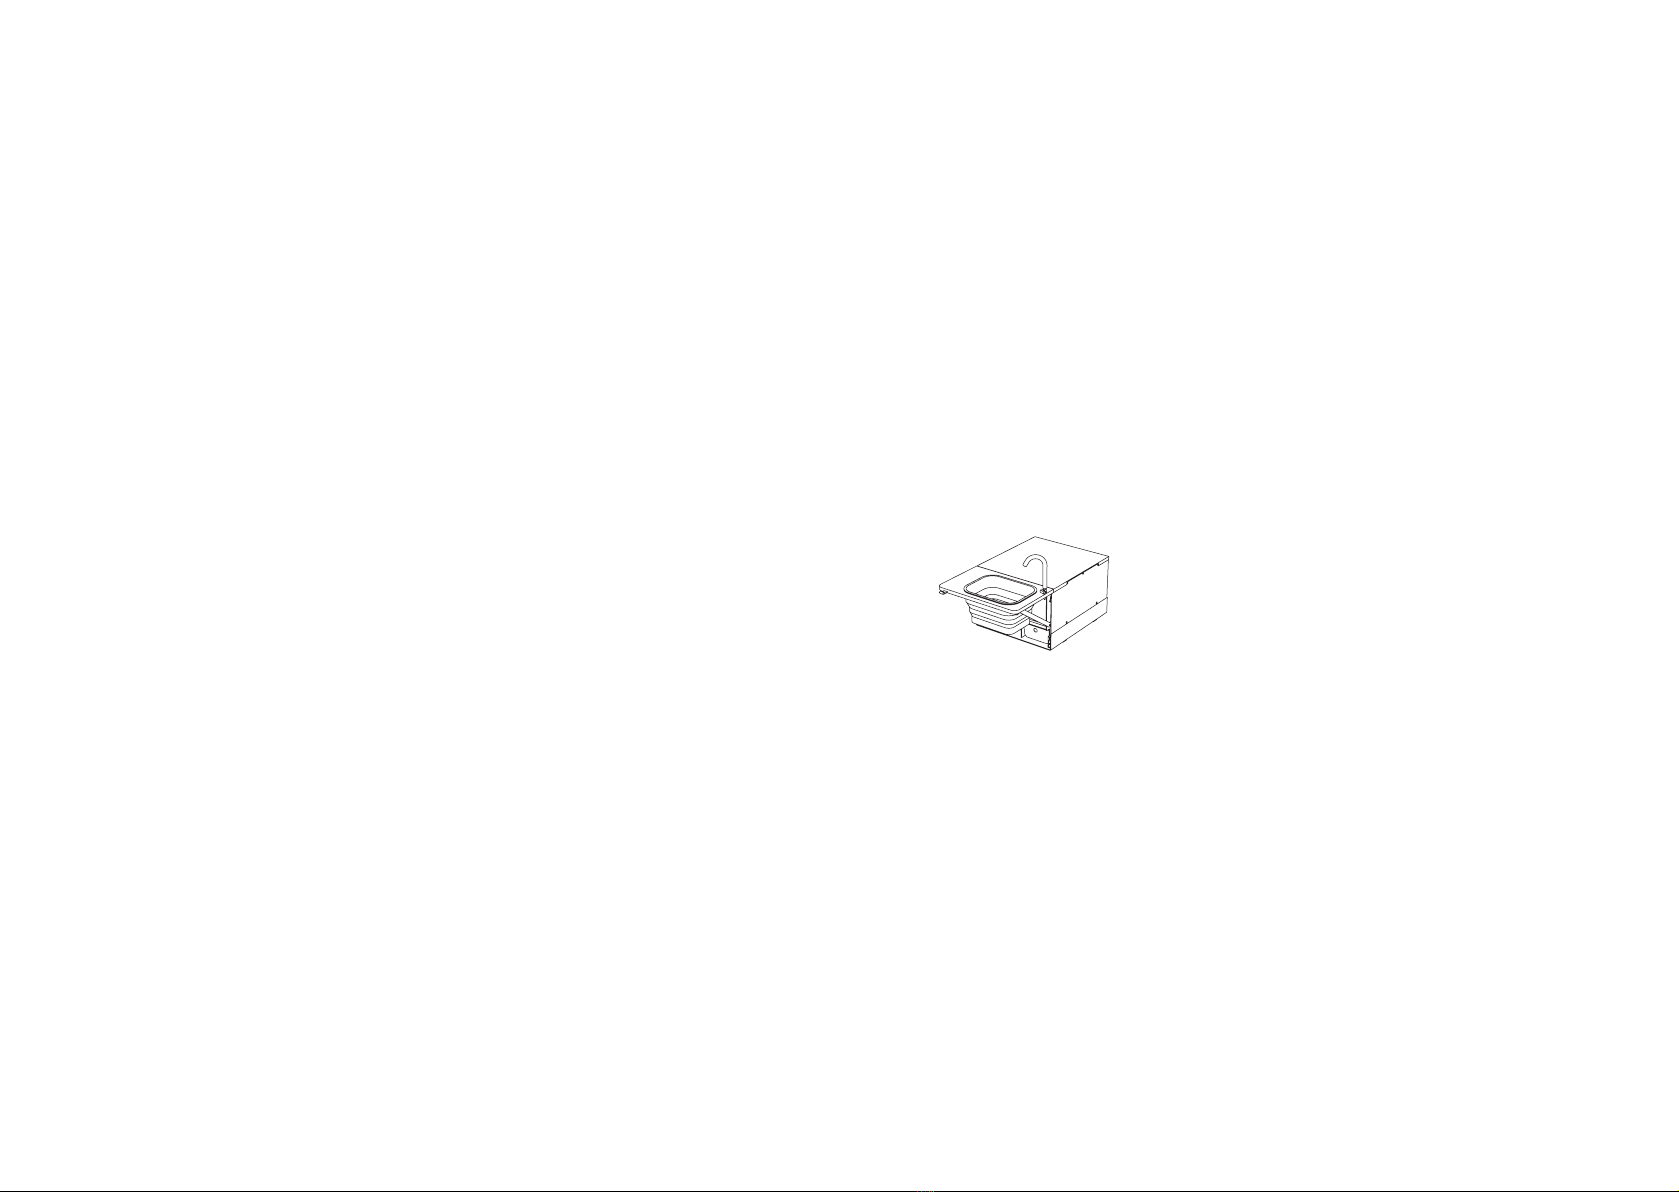
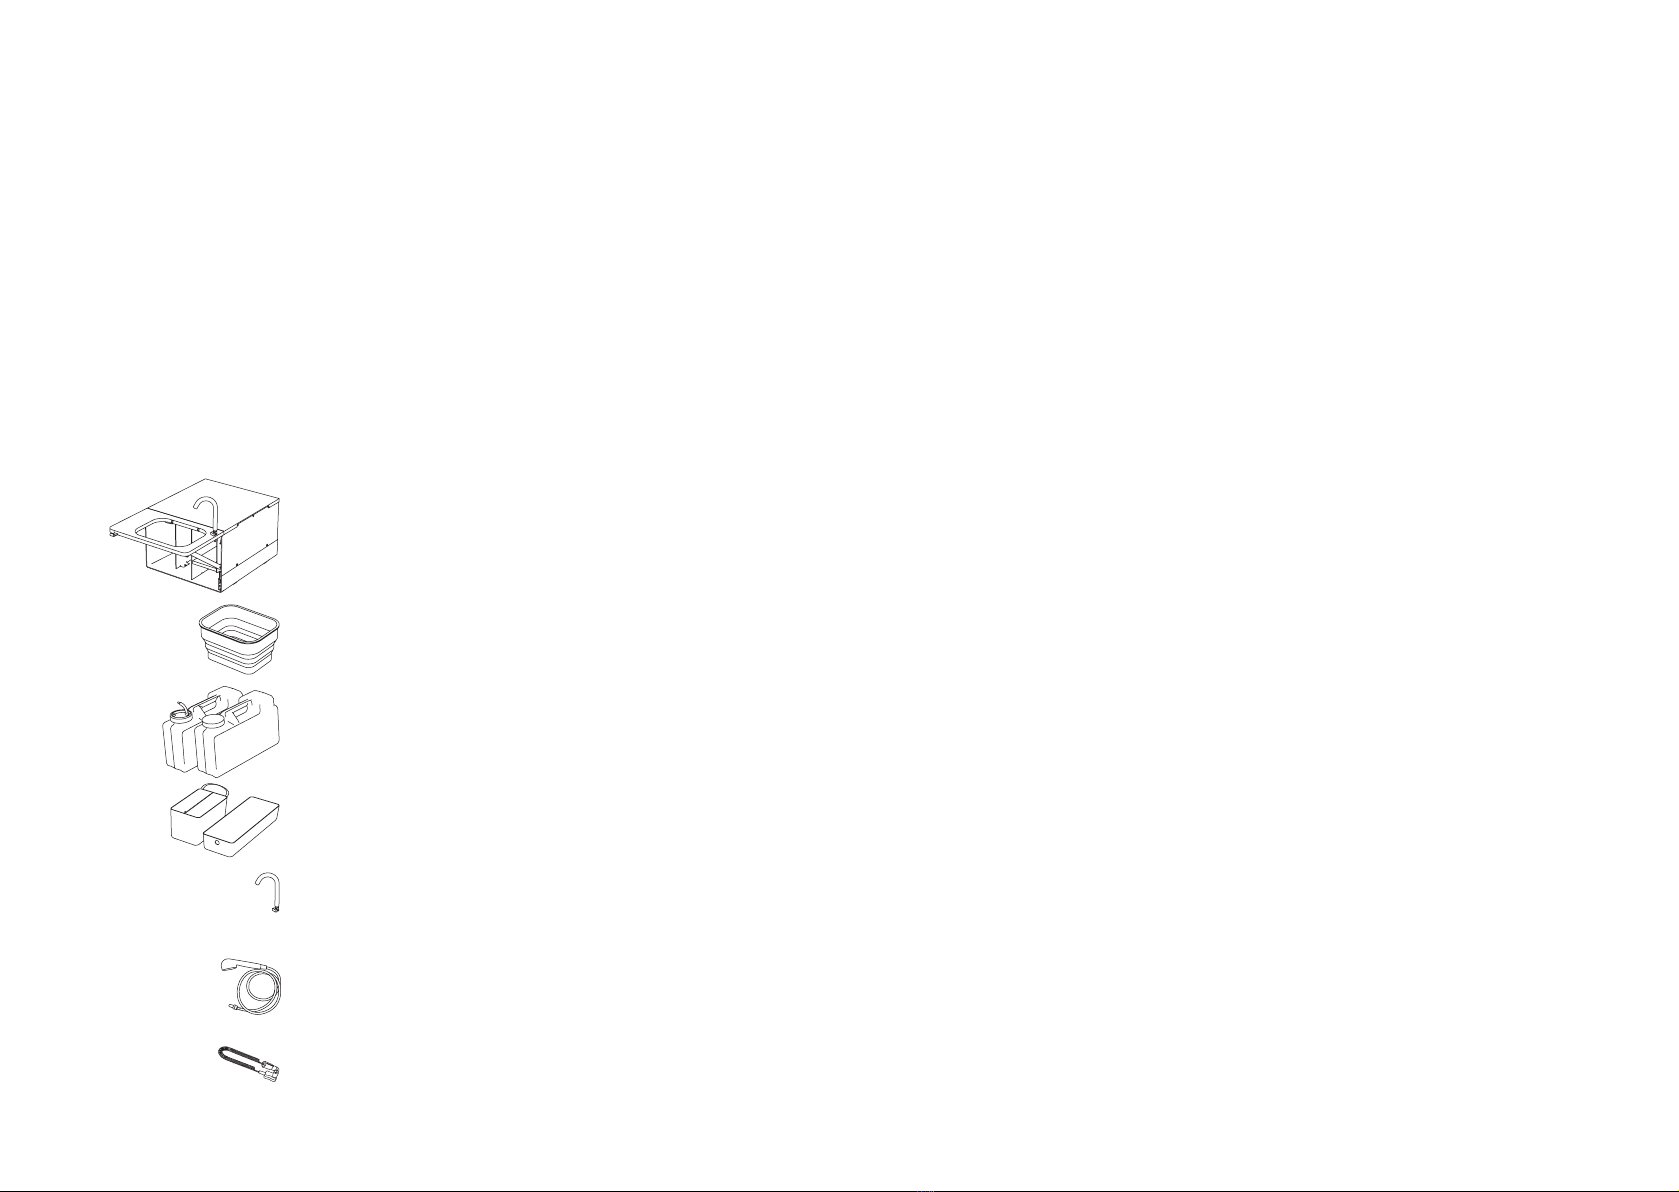
3.1 Water Module
Description
The water module is pat of the kitchen set and serves
to prepare food and for hygiene. The module can be
simply inseted into the main drawer of the locked
Nestbox car assembly. The module consists of an
aluminium frame and birch plywood with HPL. Water
flow is controlled by a tap.
!!! DO NOT EXPOSE TO FREEZING TEMPERATURE !!!
Empty all canisters and let the pump to run without
water until only air flows from the tap (approx. 30
seconds) before long-term storage.
We recommend cleaning the system regularly as
follows:
Fill the canister with clean water and add the
disinfectant (follow the instructions on the packaging).
Then let the water flow through the water module
system, including the basin mixer and shower hose.
Once the canister is empty, refill it with clean water and
rinse the entire system again.
1817
1× main frame with a pump and hose with a quick coupler
1x removable folding washbasin
2× 12-litre canister
1× Batyline bag
1× washbasin mixer
1× shower with 150 cm hose
1× spiral power cable
3.2 Package Contents
3.3 Water Module -
Instructions for Use
— The module can be inseted into the main drawer of
the locked Nestbox car assembly.
— In the back of the water module contains a socket
for the spiral power cable, which must be connected
to the 12V electrical socket or external power supply
at the rear of the car.
— Grab the tab and pull it up to unfold the module.
— Unfold the washbasin by pushing its bottom. Two
twelve-litre water canisters are included.
— Water is controlled by a tap. The water module
contains a suction pump that pumps water from the
canister and pressurizes it towards the tap. Water
pressure can be regulated using the tap.
— There are two options for how to run the water.
Either the basin mixer or the showerhead can be
connected to the quick coupler.
— The washbasin can be removed and the water can
be easily poured out.
— The water module can be folded to its original state
by tilting the washbasin plate.
3.4 Technical Data
Technical data varies for different types of the
assembly.
The technical sheet is therefore supplied separately for
each specific car model.
3.5 Maintenance
The cooker module can be cleaned by hand using
a sponge, cloth, and soapy water. Other cleaning
methods may damage the product. The warranty does
not cover any defects caused by improper cleaning.

2019
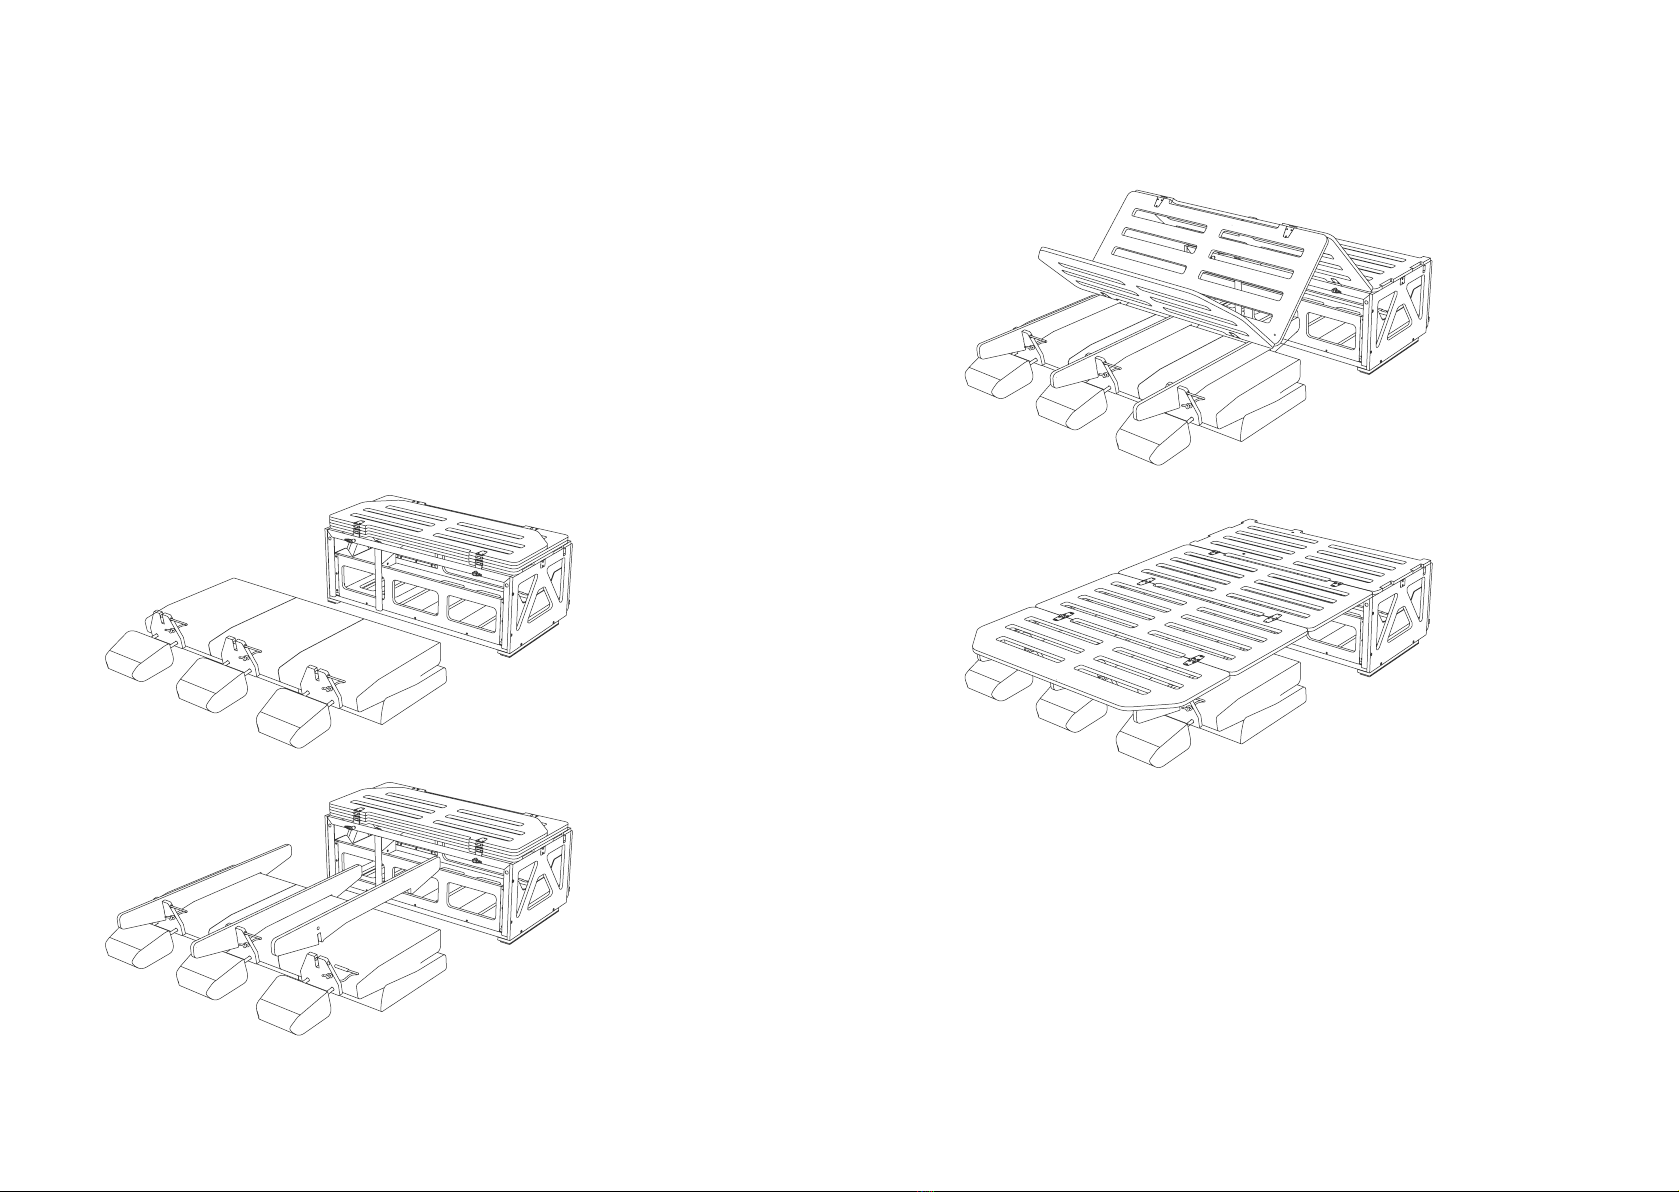
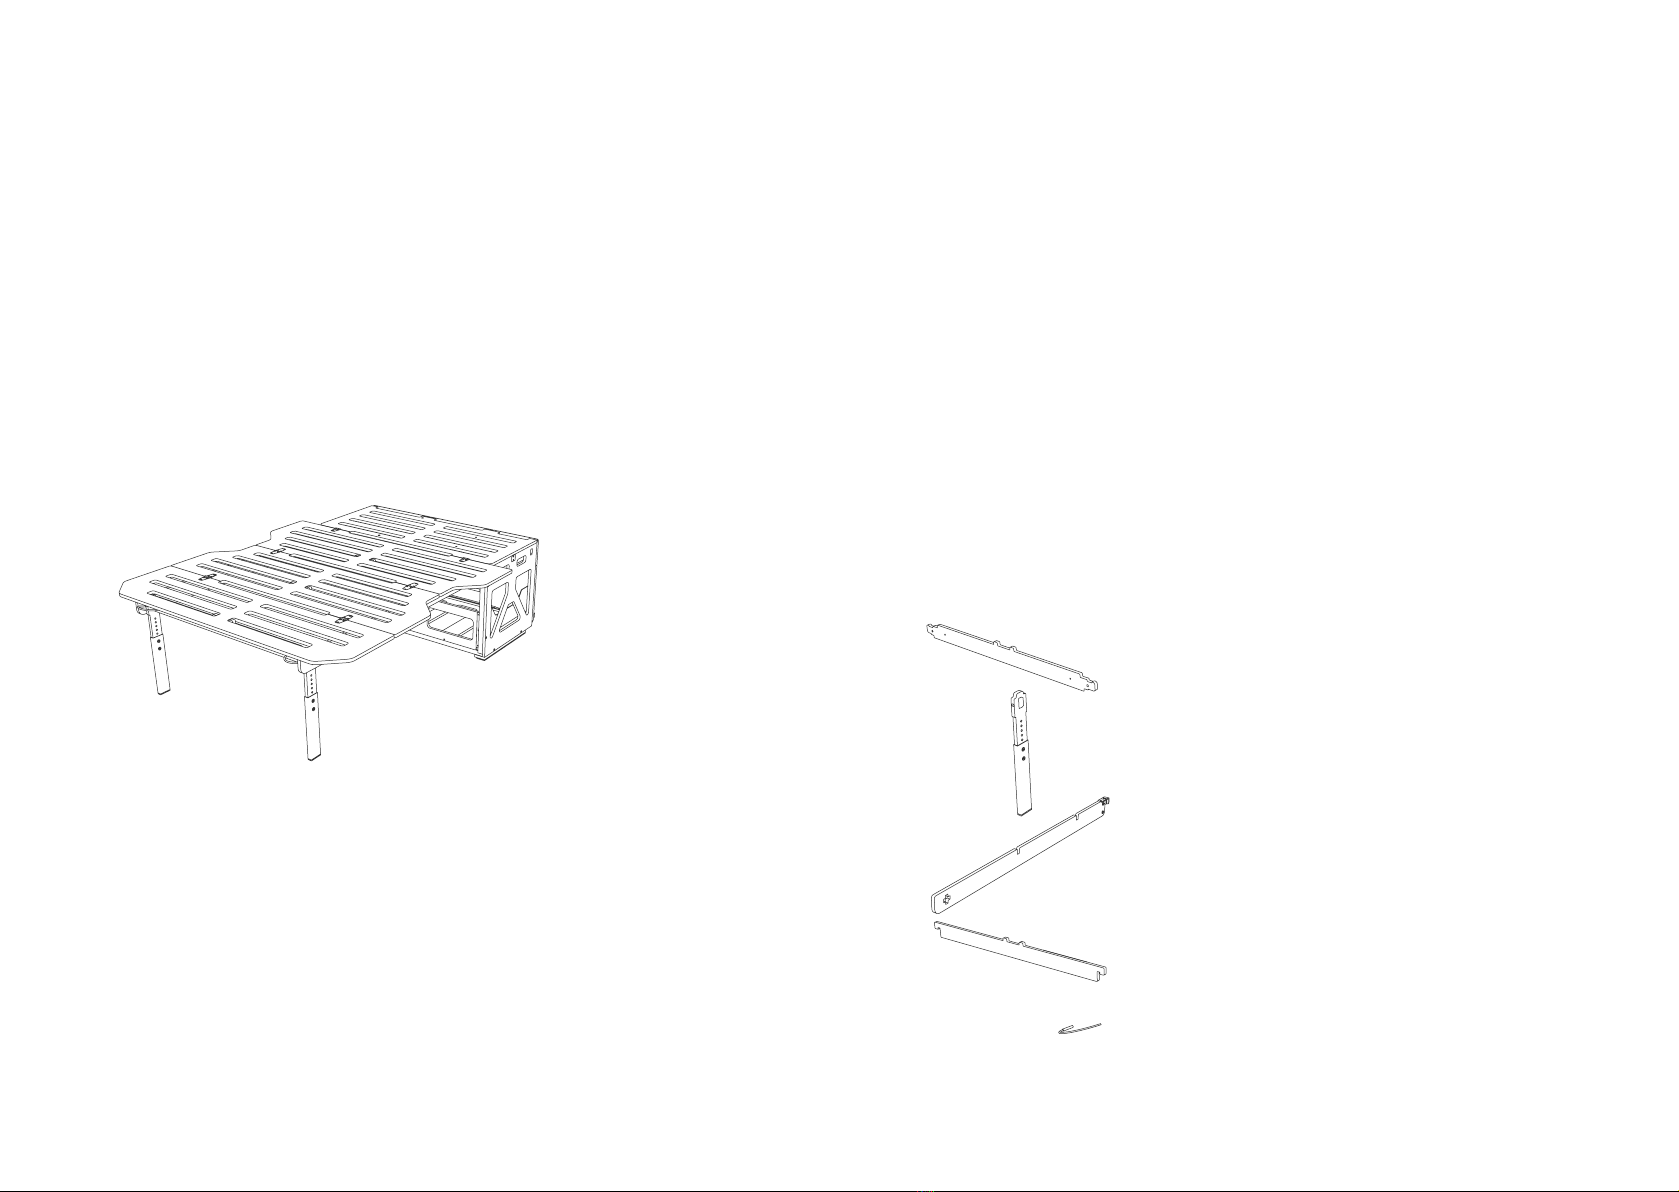
4.1 Sleeping Set
Description
The sleeping set is for sleeping and resting inside
and outside the car. It consists of a folding bed base,
suppoting bed brackets or a universal bed base
suppot (varies by type of car) and a mattress.
The folding bed base is made of birch plywood. It
consists of three pats connected by stainless steel
hinges. The bed base can thus be unfolded and folded.
The bed base extends horizontally in three ways:
using three bed brackets; using the bed brackets and
stabilizing elements; using universal bed base suppot.
See the separate manual.
The sleeping set includes a folding mattress made of
layered composite foam with anti-slip material on the
underside. It’s coated with high-quality upholstery cloth
that provides its softness. It has great maintainability
due to nano treatment by the Aquaclean® technology.
These mattresses are made in several colour options.
4.2 Sleeping Set
– Instructions for Use
!!!The whole sleeping set (bed base and mattress)
must be folded and locked to the body using a strap to
prevent any movement of pats and accessories while
driving.
4. Nestbox
– Sleeping Set
4.3 Package Contents
1× folding bed base
1× folding mattress
3× suppoting bed brackets or, optionally, a system of
independent legs
2× quick-release screws for fixing the bed base to the
body
3× stabilizing elements that to be placed on the
rear seat headrests and are designed to anchor the
suppoting bed brackets. They are only available for
cetain types of vehicles.
Some types of vehicles (NST HI 300, NST SU 500, NST
RO 710, NST CA 200) are supplied with a special pull-out
bed base in order to utilize the full width of the luggage
compatment. This type of bed base is also supplied
with special additional side pats of the mattress.

2221
4.4 Sleeping Set -
Installation
First, inset the Nestbox assembly into the car.
After anchoring it, place the folded bed base on the top
plate and secure it from the rear into the Nestbox frame
using two quick-release screws.
The way of unfolding the bed base varies according to
the type of car, assembly and cargo space; depending
on that, there are three ways to anchor it:
Using suppoting bed brackets: the bed brackets must
be unfolded to form horizontal suppot for the bed
base in a single plane while being sufficiently secured
against free movement. They typically connect the rear
of the assembly and the rear of the folded seats.
2423
Using suppot bed brackets secured by means
of stabilizing elements mounted on the rear seat
headrests: pull out the seat headrests and then attach
the stabilizing elements of the suppot bed brackets,
which must be also secured on their sides by means of
wooden pins to prevent unexpected extension.
Using the universal bed base suppot; see separate
instructions.
After preparing the suppot, the bed base can be
unfolded over it and the mattress put on the top.
4.5 Technical Data
See the Nestbox technical data sheets shipped with
your paticular vehicle type.
2625
4.6.2 Package Contents
4.6 Universal Bed Base
Suppot
First, inset the Nestbox assembly into the car.
After anchoring it, place the folded bed base on the top
plate and secure it from the rear into the Nestbox frame
using two quick-release screws.
4.6.1 Universal Bed Base
Suppot - Description
The universal bed base suppot suppots the unfolded
bed base and mattress. It is made of laminated birch
plywood and consists of four different pats. There
are two longitudinal bed brackets C, two transverse
bed brackets D and one transverse bed brackets A, on
which legs B are anchored.
1× transverse bed bracket A
2× adjustable legs B
2× longitudinal bed brackets C
2× transverse bed brackets A
2× wooden pins with rope

2827
4.6.3 Installation
First, place the folded bed base on the top plate of the
anchored assembly and secure it from the rear into the
Nestbox frame using two quick-release screws.
Take the first transverse pat A and slide the legs B onto
it.
Use the pin on the rope to secure these legs, preventing
their release.
Then attach the longitudinal bed brackets C equipped
with a hook to the transverse piece A. Depends on
how you drive with the car assembly. If you drive with
the rear bench folded down and you unfold the bed
base over it, then lay the longitudinal bed base flat. If
you drive without seats, then lay them perpendicular.
Attach the hook of the longitudinal bed bracket to the
assembly frame and tie the other end with a “cross
joint”. Use the same procedure for the opposite pat.
Tie the two longitudinal bed brackets C using the two
transverse bed brackets D.

3029
The whole structure is then reinforced and tied by
placing the bed base on the bed brackets. Then the
mattress can be unfolded.
4.6.4 Technical Data
Material: birch plywood with HPL
Dimensions: by type of vehicle and assembly
Weight: by type of vehicle and assembly
Colour scheme: white HPL or brown waterproof
plywood
Warranty
and Service
A 2-year Warranty applies to all egoé products, provided
that they have been operated and maintained in
accordance with the manufacturer‘s instructions and
applicable regulations. The Warranty stats from the
date of purchase and is valid only for the first buyer. The
Warranty is non-transferable.
The Warranty applies to damage caused by latent
material or manufacturing defects or damage caused by
such defects. It does not apply to pats subject to wear
and tear. Damage caused by improper handling, failure
to follow the operating instructions and unauthorised
modifications are excluded from the Warranty.
Unauthorised modification to the product shall void
the Warranty. Your legal rights are not limited by this
Warranty.
In the case of wishing to make a Warranty claim, contact
your dealer or manufacturer. This is the only means
of ensuring the free shipping of your product to be
serviced.
We will remove any material defects and manufacturing
defects during the Warranty period. A Warranty repair
shall not extend or renew the Warranty period. Liability
for defects of products under Warranty shall expire
unless they have been exercised during the Warranty
period.
Keep the Warranty card and purchase receipt for the
entire duration of the Warranty. The originals of these
documents will be requested from the claimant.

31
The Warranty shall not
apply to:
— defects caused by transpot, handling and storage
— defects caused by improper installation
— defects caused by improper use or maintenance
— mechanical or other damage to the product in an
unexpected situation (e.g. fire)
— defects caused by natural disasters or other
external climatic effects
— defects caused by normal wear and tear
— defects caused by using the product in improper or
extreme conditions
Address of manufacturer
Egoé nest s.r.o.
Bílovice 519, 687 12 Bílovice
Czech Republic
nest@egoe.eu
egoe.eu
Table of contents
Popular Automobile Accessories manuals by other brands

Link
Link 60K AIR LINK installation instructions

Whispbar
Whispbar K524W Fitting instructions

Arbor Technology
Arbor Technology ARTS-1450 user manual

SpaceCamper
SpaceCamper VanKid Assembly instructions

Metra Electronics
Metra Electronics 99-9103 installation instructions

VDO
VDO DTCO 1381 Operating instructions company & driver


