eHealthcare H100 User manual


Content
...........................................................................................................................................
....................................................................................................................................
.................................................................................................
.........................................................................
..............................................................
..............................................................
...............................................................................................
........................................................................
.........................................................................................
.............................................................................
..........................................................................
.....................................................................................................................
....................................................................................
.........................................................................
................................................................
..................................................................................
....................................................................................................................
....................................................................................
.........................................................................
................................................................
.................................................................................
....................................................................................................................
....................................................................................
.........................................................................
..............................................................
................................................................
.................................................................................
...........................................
..................................................................................
................................................................
......................................................................
........................................
.......................................................................................
...............................................................................
........................................................................................
...................................................................................................
.................................................................................................
.......................................................
.................................................................
.........................................................
...........................................................................
...................................................................................................

Preface
Product Information
CE mark
Statement
Manufacturer's Responsibility
⚫
⚫
⚫
About this manual


Chapter 1 Safety information
1.1 Signs in this manual
Warning:
Symbol
Symbol Note
Symbol
Symbol Note
ECG
Dangerous voltage
SpO2
Equipotentiality
Output
NIBP
Defibrillator
synchronization
SN
LOT
IPX1
REF
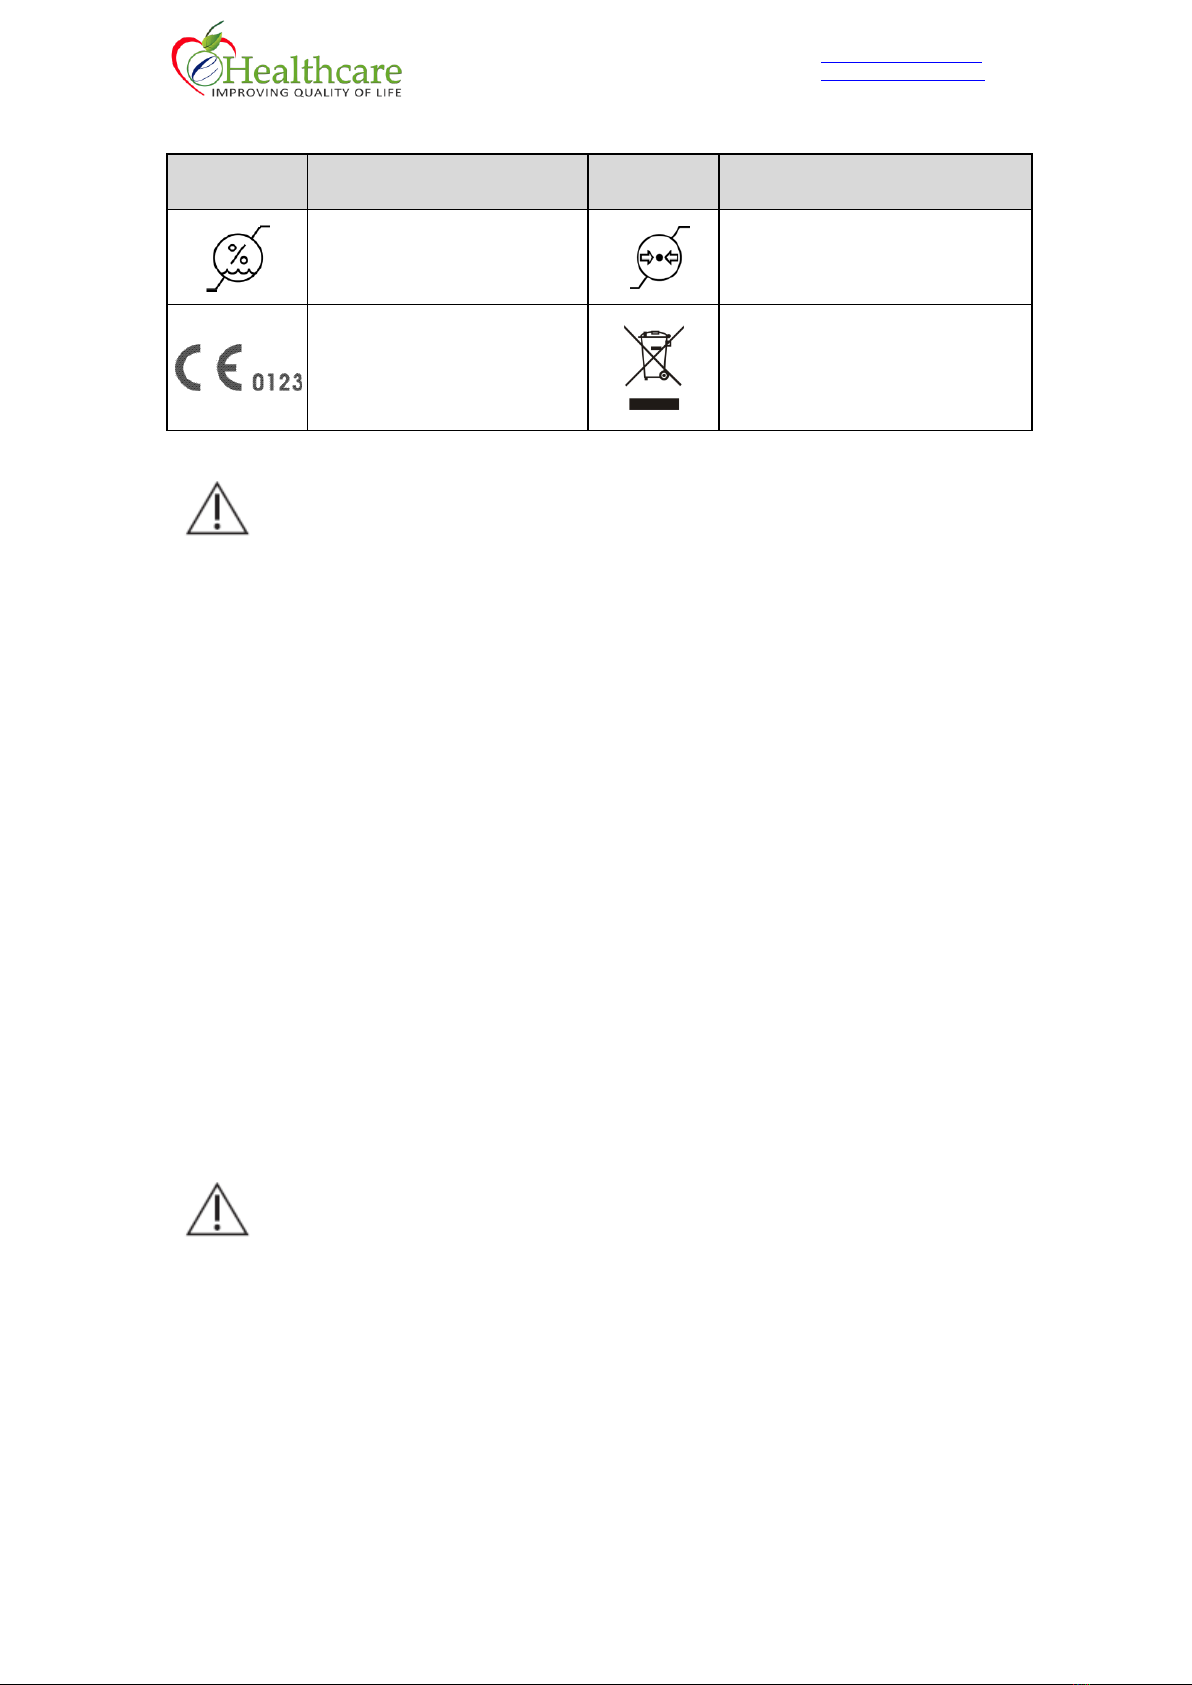
Symbol
Symbol Note
Symbol
Symbol Note
Warning:
◼Before putting the system into operation, verify that the recorder, connecting
cables and accessories are in correct working order and operating condition.
◼To avoid the risk of electric shock, this equipment must only be connected to
a supply mains with protective earth
◼Where the integrity of the external protective conductor in the installation or
its arrangement is in doubt, equipment shall be operated from its internal
electrical power source
◼To avoid explosion hazard, do not use the recorder in the presence of
flammable anesthetics or other flammable substance in combination with air,
oxygen-enriched environments, or nitrous oxide.
◼Do not open the recorder housings; electric shock hazard may exist. All
servicing and future upgrades must be carried out by the personnel trained
and authorized by manufacturer only.
◼When using the recorder with electrosurgical units (ESU), make sure the
patient is safe.
Caution:
◼To ensure patient safety, use only parts and accessories specified in this
manual.
◼At the end of its service life, the recorder, as well as its accessories, must be
disposed of in compliance with the guidelines regulating the disposal of such
products. If you have any questions concerning disposal of the recorder, please
contact us.

◼Magnetic and electrical fields are capable of interfering with the proper
performance of the recorder. For this reason make sure that all external
devices operated in the vicinity of the recorder comply with the relevant EMC
requirements. Mobile phone, X-ray equipment or MRI devices are a possible
source of interference as they may emit higher levels of electromagnetic
radiation.
◼Before connecting the recorder to the power line, check that the voltage and
frequency ratings of the power line are the same as those indicated on the
recorder’s label or in this manual.
◼Always install or carry the recorder properly to avoid damage caused by drop,
impact, strong vibration or other mechanical force.
1.2 Important Notes for Safety
◼Patient Number
◼Interference
◼Protection against ingress of liquid
◼Accuracy
◼Before Use

◼Cables
◼Disposal of package
◼Explosion hazard
◼Operating temperature
℃℃
◼Leakage current test
◼Battery
take out the battery,
so that the service life of the battery will not be shortened.
◼Functional Test
Caution
The recorder will display a notice when the battery in an enough low
situation which cannot support normally work.
◼Disposal of accessories and device
◼EMC

◼Instruction for use
1.3 Safe Operation Conditions
Maintenance and Cleaning
°
(non condensing)
:
°
(non condensing)
:
a.
Chapter 2 Product Description
2.1 General Introduction
Intended use
Caution
This product cannot be use for pregnant women and whose arm burn.
Classification:
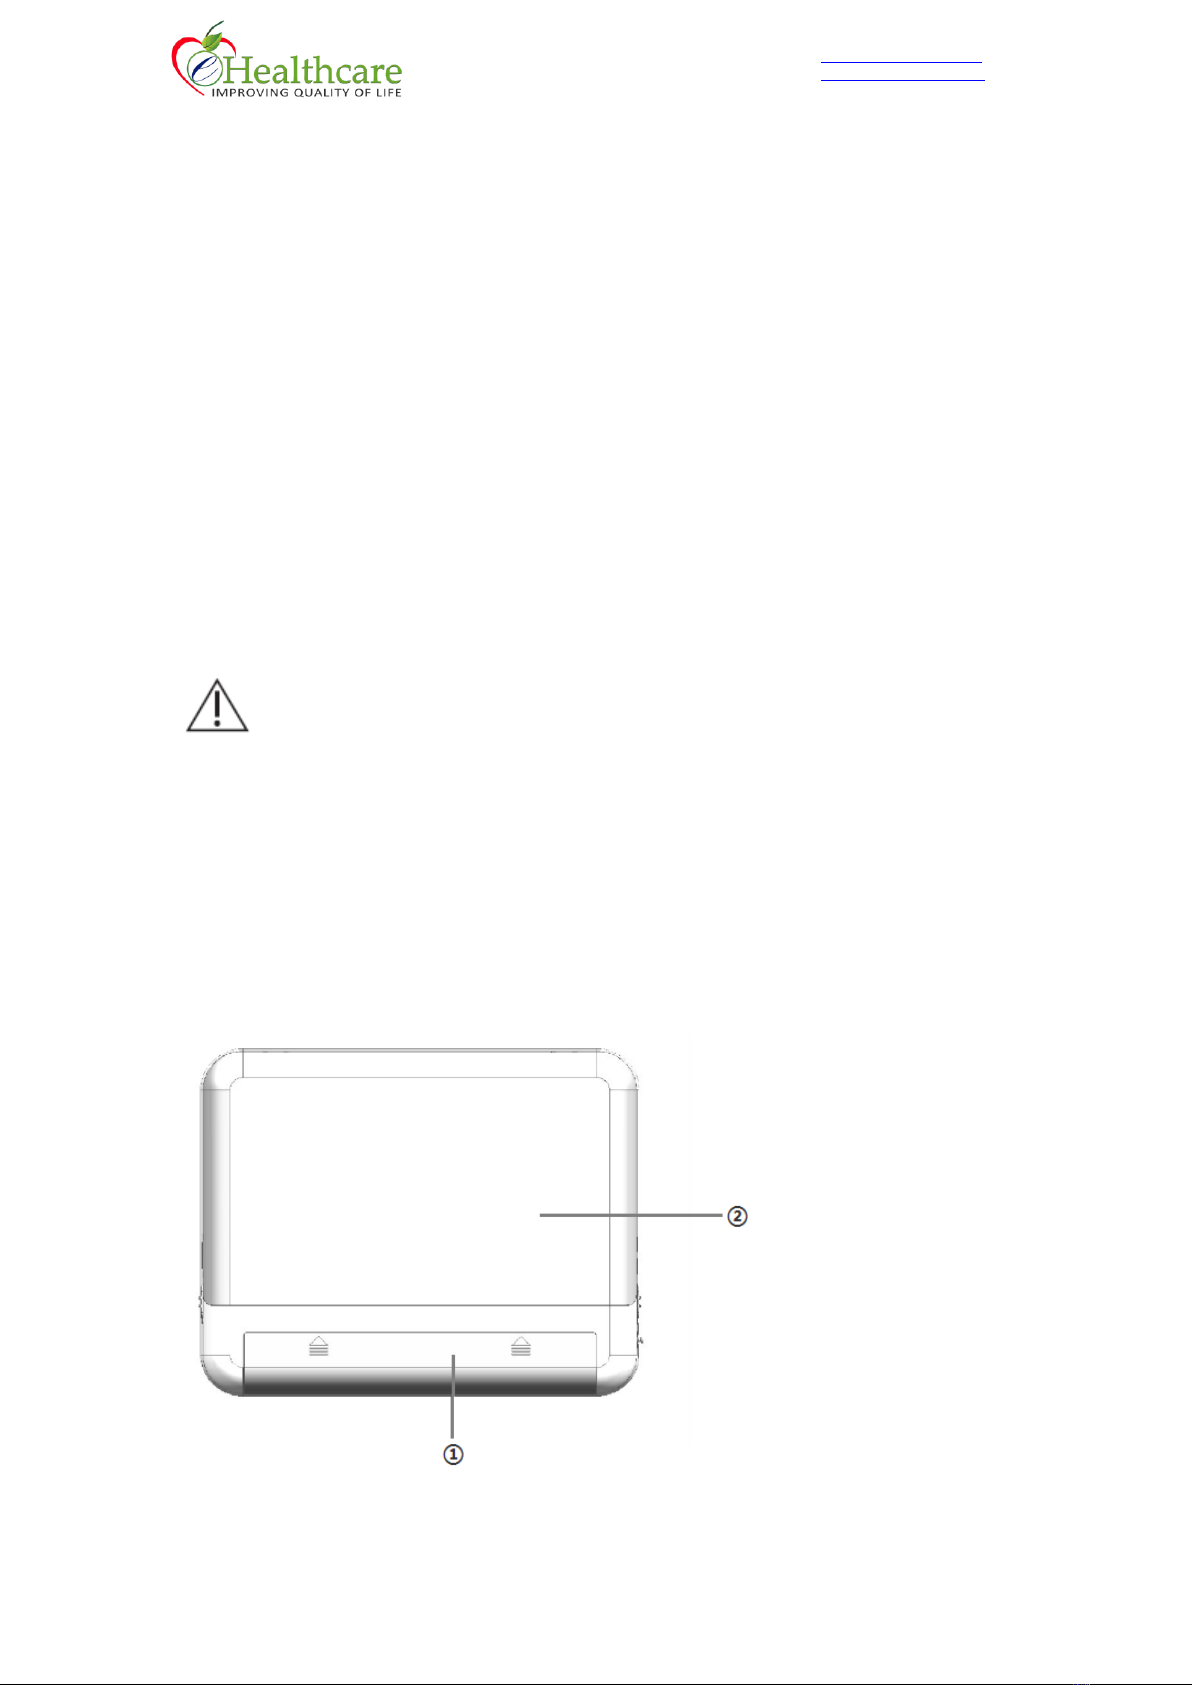
2.2 Main Unit
2.2.1 Basement
①

(IIa)
②
:
2.2.2 Side view
③BP cuff socket

④Spo2 cable socket
⑤ECG cable socket
2.3 Basic Operation
1)
2)
3)
2.4 Instruction of App
1) Power on H100 and APK will automatically run. Please connect the WIFI as required. After
WIFI connected successfully, click NEXT to continue the operations.

2)

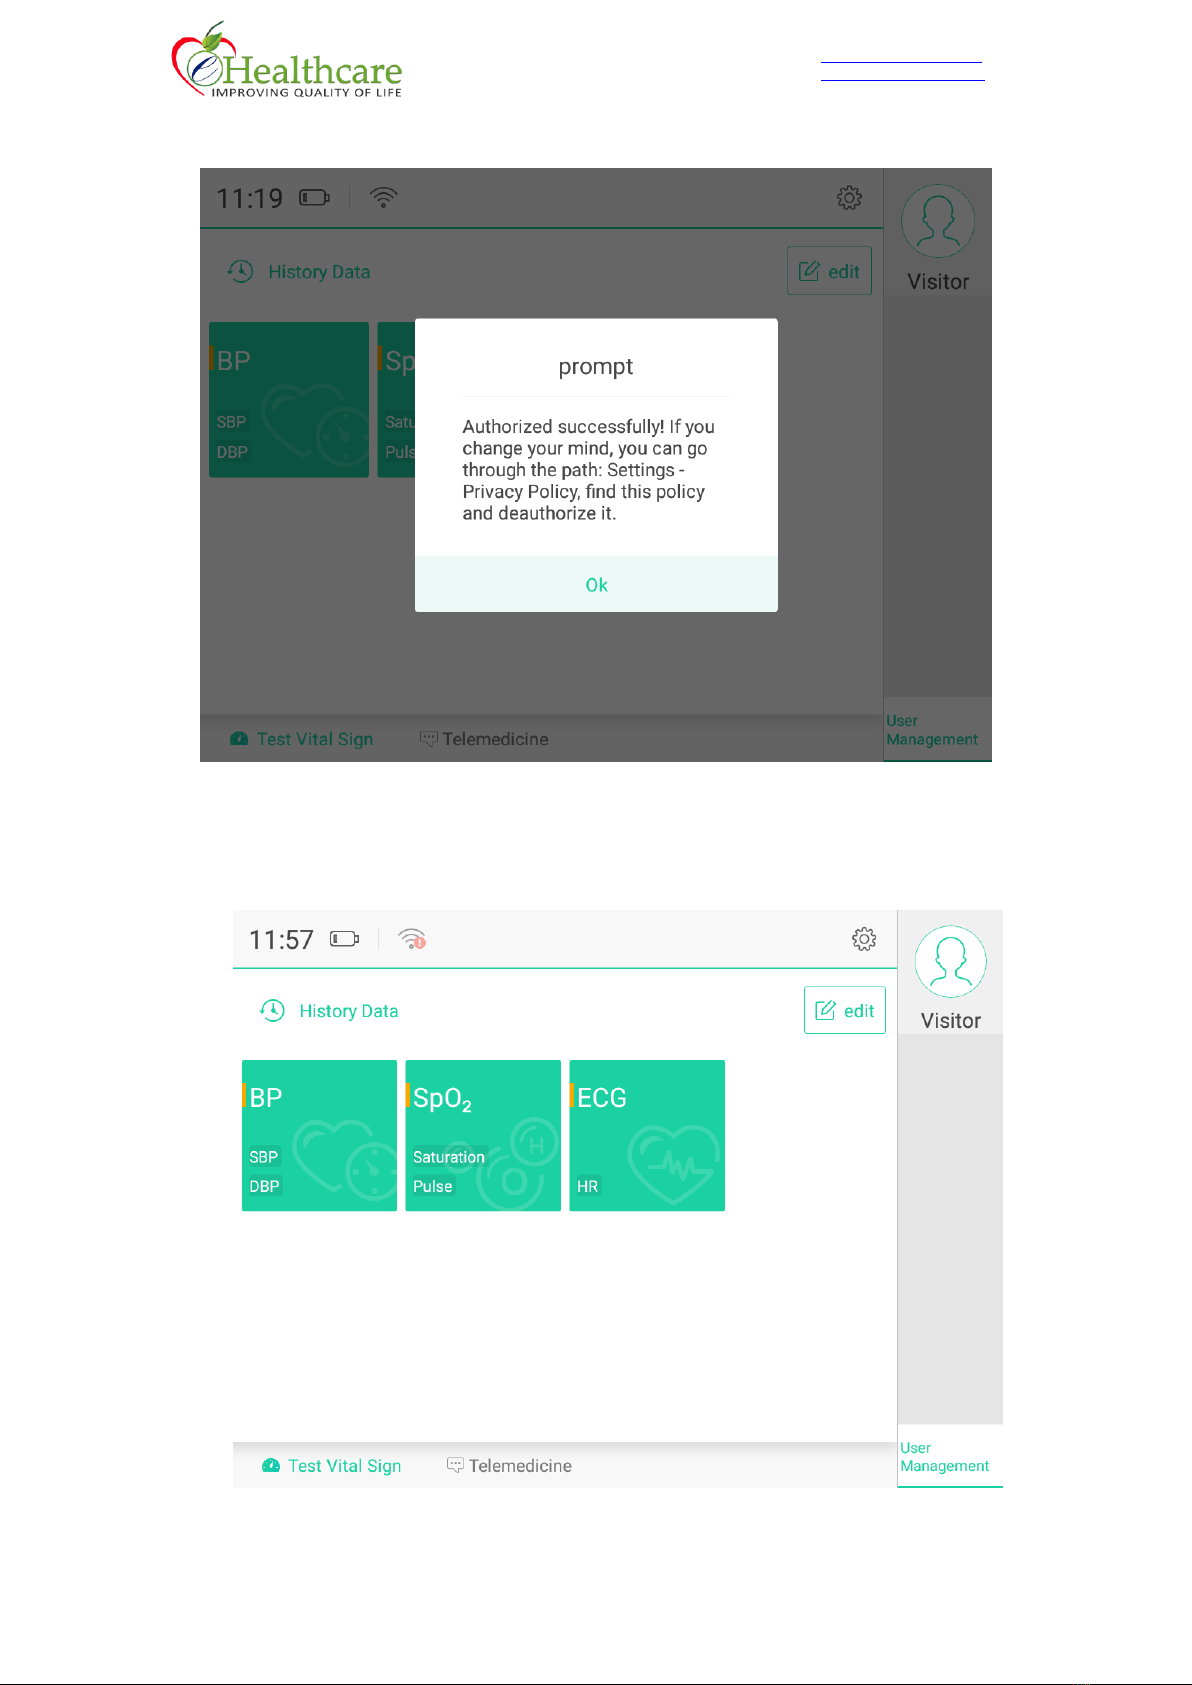
4) Now, we log in main interface. As the user account, we have three types.
A. Visitor
If you use Visitor to do the tests, the results will be not saved on Pad, you cannot find the
history data interface.
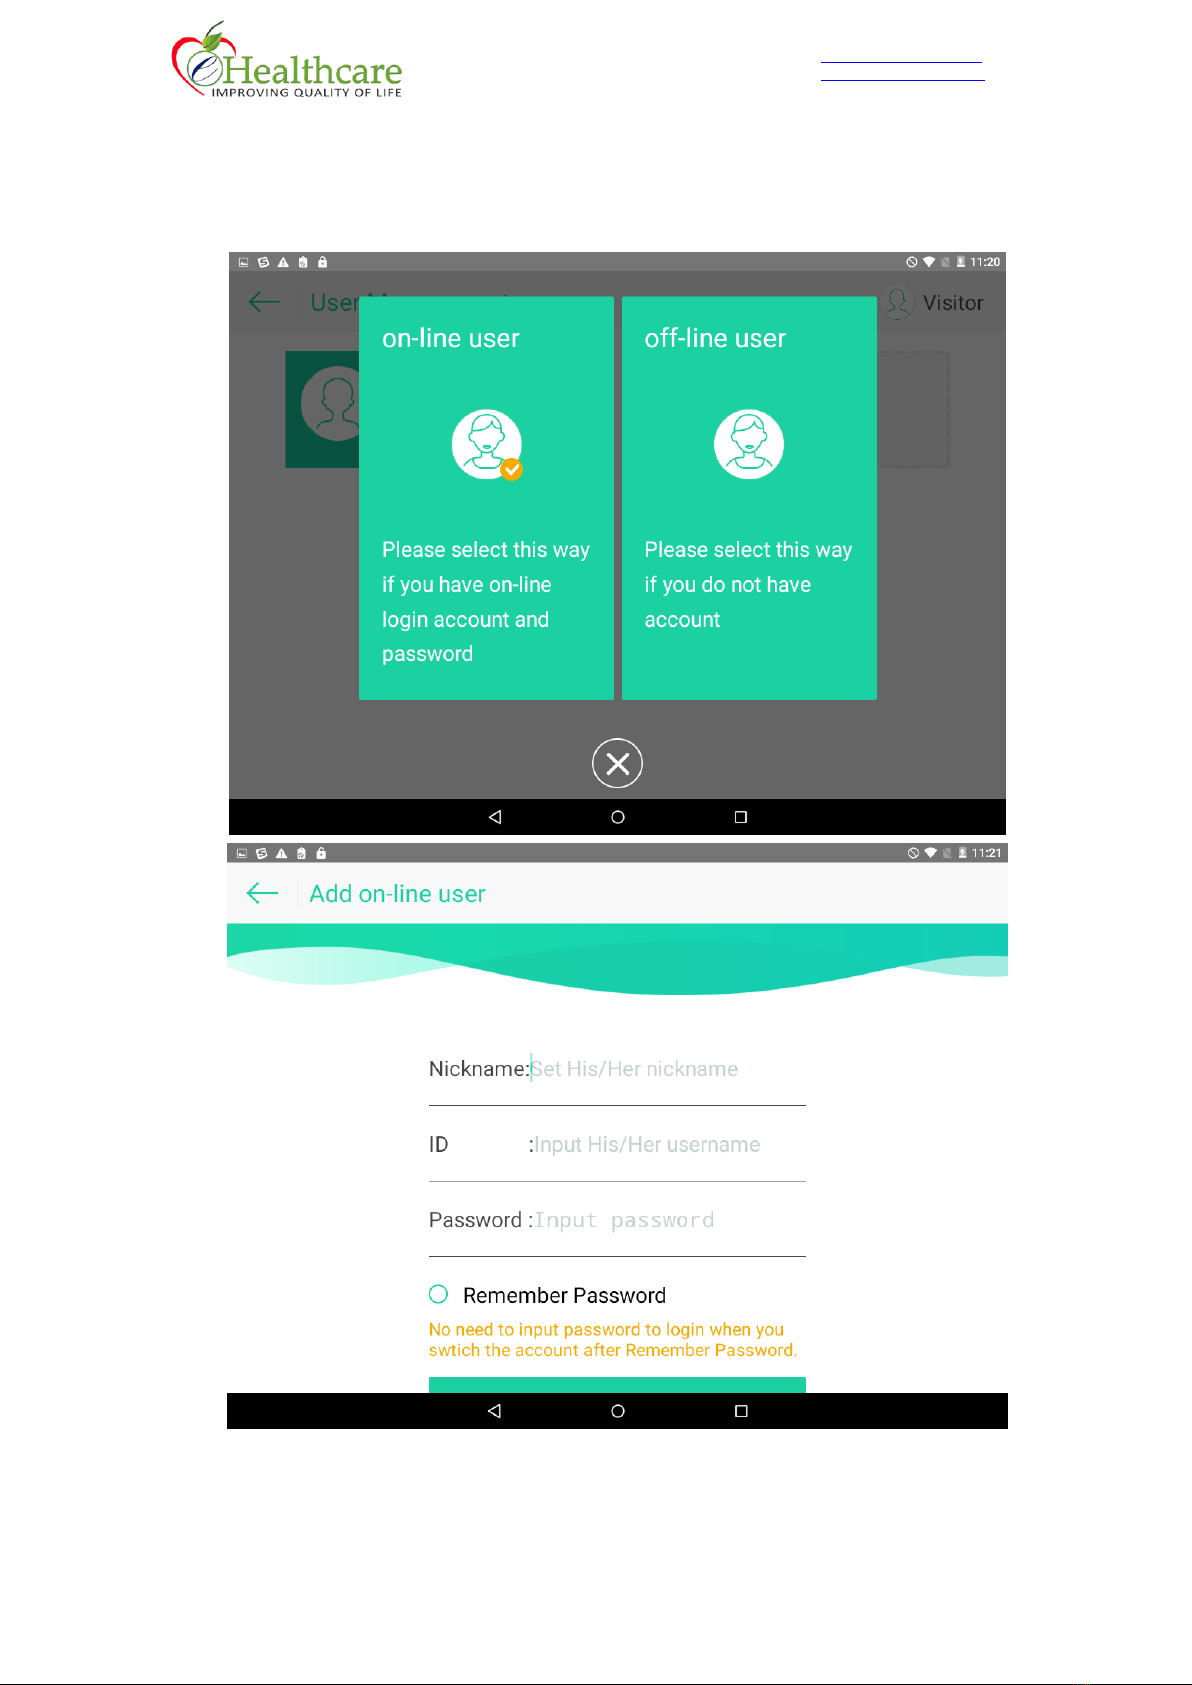
B. On-line User
For On-line user, Click “User Management” option and click “on-line user” to register the on-
line user. The accounts info should be supplied by your service team.

C. Off-line User
You can also register the off-line user, the test data can be saved on Pad but cannot be
uploaded to the back-end platform.
5) Click BP (Blood Pressure), SpO2 (Blood Oxygen), or ECG icon to start measurements.
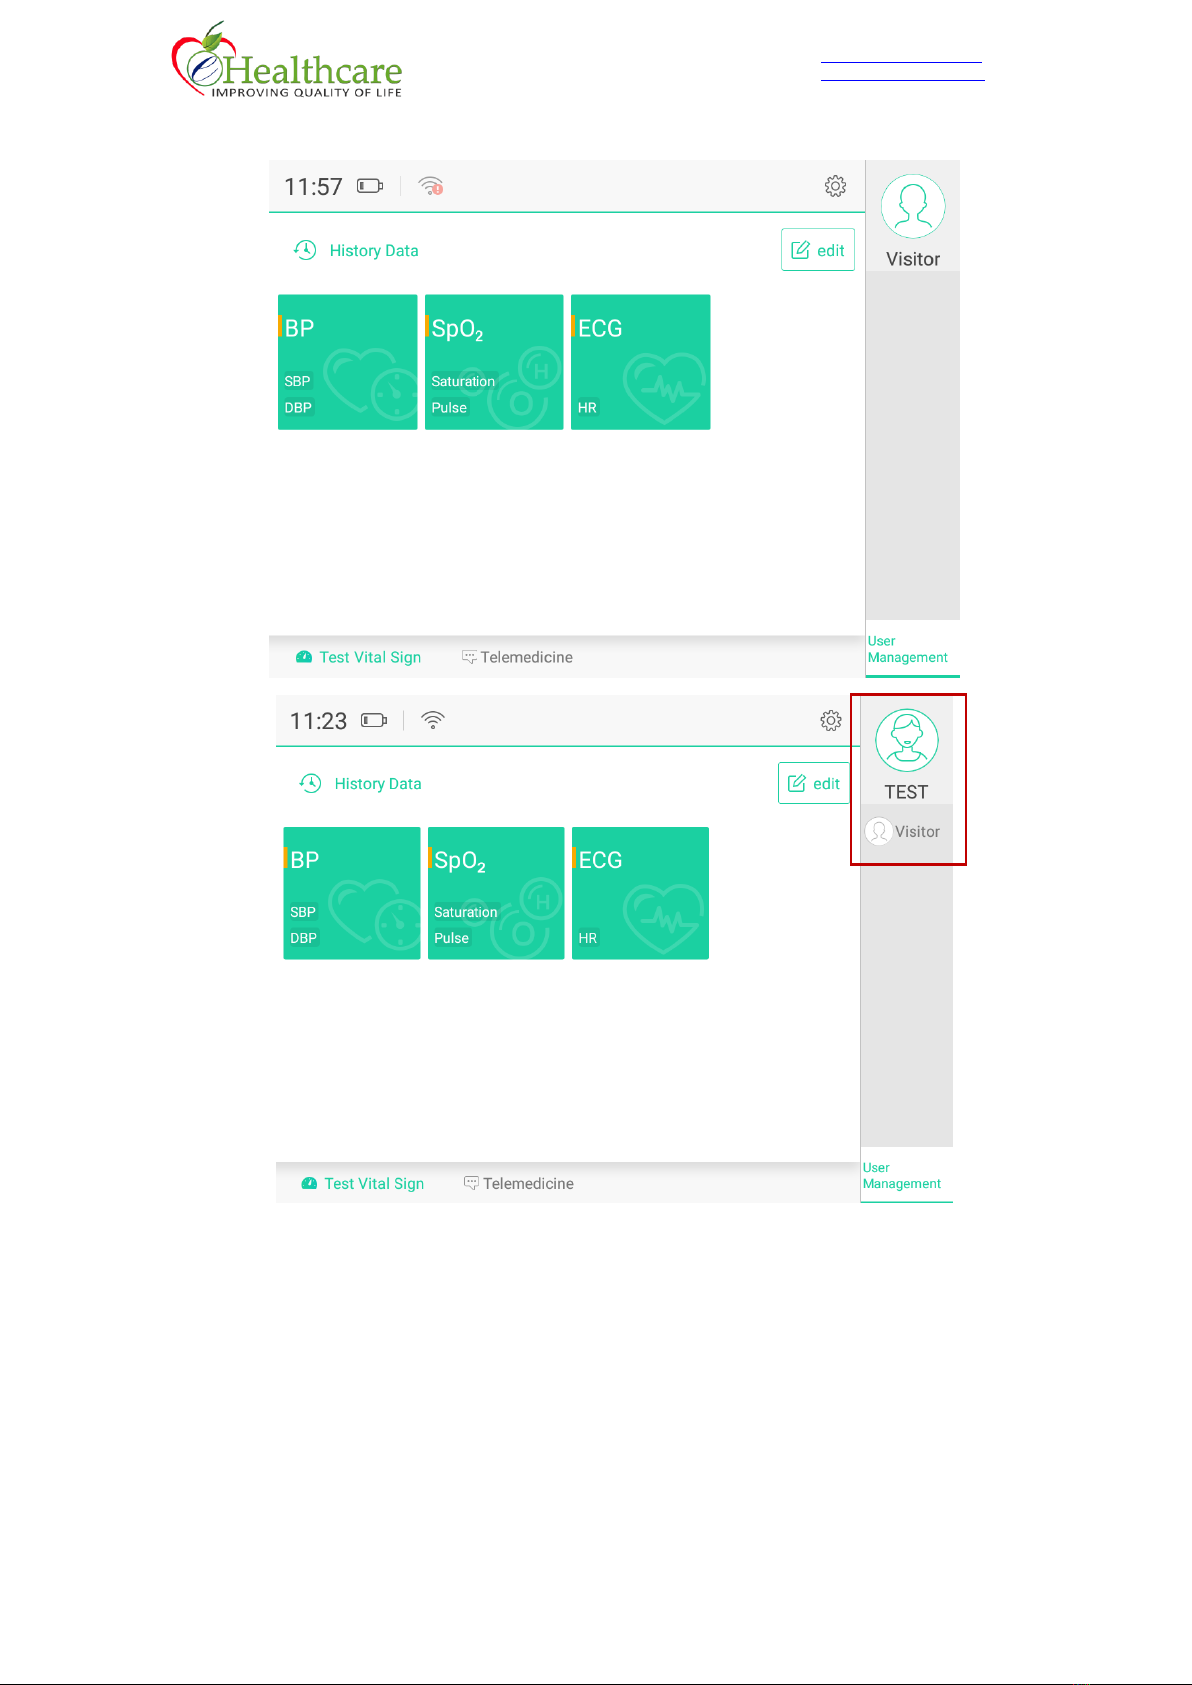
NOTE! You should select the correct account for testing!
2.4.1Blood Pressure Measurement
1) Click the blood pressure icon and enter instruction for measurement, please operate
according to instructions.

2) When you make the cuff ready, click “start” and the recorder will start to measure twice
automatically, you’re supposed to be calm and quiet when measuring. If you make fore to stop
in the process, there are no measurement results.
3) The measurement will complete automatically and display systolic pressure (SBP) and
diastolic pressure (DBP) on the result screen.

2.3.2 SPO2 Measurement
1) Click SPO2 icon and enter the instruction for measurement
2) When you make your finger clap ready, You’re supposed to be calm and quiet and you can
stop measurement in the process or wait for display result automatically in 30 seconds
without click “Start”. When measurement complete, you can see SPO2 and PR (Pulse Rate)
value on the screen.
Table of contents


