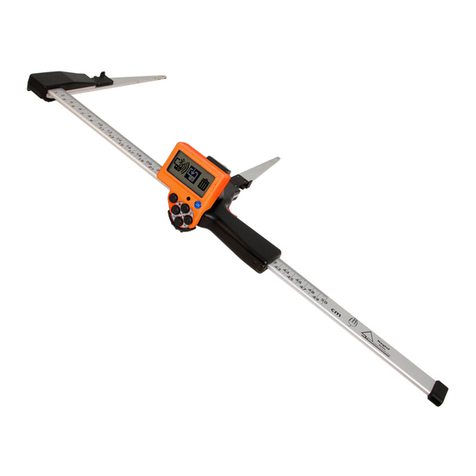
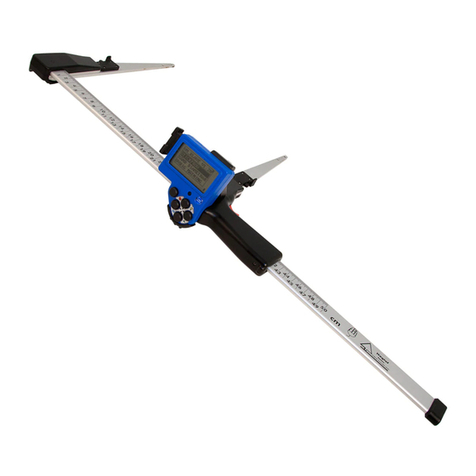
Haglof DP II User manual

© Haglöf Sweden AB 2013/Rev. 201503
DP II
User Manual
English

© Haglöf Sweden AB 2013/Rev. 201503
Haglöf Sweden®
Haglöf Sweden® AB is a family company with a long history of developing and manufacturing professional forest
measurement instrument solutions. Our genuine know-how in workshop production paired with high-tech electronic
and software development offer unique concepts and the markets’ most complete product range for professional forest
measurement work.
Haglöf Sweden product range includes increment borers, mechanical calipers, thread meters, height- and distance measu-
rers, solutions for positioning, computer calipers, software and complete system solutions.
e Digitech Professional and DP II are market leading computer calipers used for forest inventory, log scaling, harvester
calibration and more.Together with unique accessories, communication and compatibility with other instruments, the
DP forms a complete measuring system for efficient field operations with versatility and focus on user adaptation and
ruggedness.
Haglöf Sweden works for constant and continual improvement. Our goal is to make your measurement work more effi-
cient while producing more accurate results. Adaptability, compatibility and flexibility are some of the means to reach this
goal. A large software library with hundreds of software solutions enables completely new users a quick start. Communi-
cation with external instruments such as GPS devices and Vertex Lasers improves efficiency and reduces error sources.
Haglöf Sweden instruments are used in forestry, construction and planning, police and armed forces, agriculture, archaeo-
logy, geology, geography, fishery and wildlife research, utility industry and power line control and many more business and
research sectors. More than 200 companies around the world distribute Haglöf Sweden products and can offer quick and
professional service even in very remote locations. Check www.haglofsweden.com and contact us for more information!
Address: Klockargatan 8, SE-882 30 Långsele, Sweden.
Phone: +46 620 255 80. Fax: +46 620 205 81. www.haglofsweden.com

© Haglöf Sweden AB 2013/Rev. 201503 III
Contents
1 Overview 1
DP II . . . . . . . . . . . . . . . . . . . . . . . . . 2
DP II ComputerTerminal . . . . . . . . . . . . . . . . 3
SmartScale . . . . . . . . . . . . . . . . . . . . . . 4
2 System Description 5
DP II . . . . . . . . . . . . . . . . . . . . . . . . . 5
Computer Terminal . . . . . . . . . . . . . . . . . . 5
Computer Terminal without Serial Port . . . . . . . 5
Detachable Computer Terminal . . . . . . . . . . . 5
The Buttons on the Keyboard . . . . . . . . . . . . 6
3 Operating Procedure 7
How to Assemble the Computer Terminal . . . . . . . . 7
How to Disassemble the Computer Terminal . . . . . . . 7
Assembling the ComputerTerminal on the Wrist Holder. . 7
Removing the Computer Terminal from the Wrist Holder . 7
DP Radio Button . . . . . . . . . . . . . . . . . . . 8
Changing the Battery . . . . . . . . . . . . . . . 8
Synchronizing the DP Radio Enter Button . . . . . . 8
Turn o/on the DP Radio Function. . . . . . . . . . 8
Synchronization with the SmartScale . . . . . . . . . . 9
Display. . . . . . . . . . . . . . . . . . . . . . . . 9
Battery Indicator . . . . . . . . . . . . . . . . . 9
Charging the ComputerTerminal . . . . . . . . . . . . 9
How to Charge . . . . . . . . . . . . . . . . . . 9
PC Communication . . . . . . . . . . . . . . . . . 10
Connection to PC . . . . . . . . . . . . . . . . 10
BLUETOOTH® . . . . . . . . . . . . . . . . . . . . 10
Example: Send File to the Computer Terminal with Bluetooth® 11
Program . . . . . . . . . . . . . . . . . . . . . . 11
Older programs . . . . . . . . . . . . . . . . . 11
Updating programs . . . . . . . . . . . . . . . 11
Transfer programs to the DP II . . . . . . . . . . 11
Activate the program license . . . . . . . . . . . 11
Starting a new program . . . . . . . . . . . . . 12
Upgrading the BIOS . . . . . . . . . . . . . . . 12

iv | © Haglöf Sweden AB 2013/Rev. 201503
System menus . . . . . . . . . . . . . . . . . . . 12
Delete all . . . . . . . . . . . . . . . . . . . . 12
LICENSE . . . . . . . . . . . . . . . . . . . . 12
Delete program . . . . . . . . . . . . . . . . . 12
Files . . . . . . . . . . . . . . . . . . . . . . . . 12
File list . . . . . . . . . . . . . . . . . . . . . 13
OPEN FILE . . . . . . . . . . . . . . . . . . . 13
Send . . . . . . . . . . . . . . . . . . . . . . 13
INFO . . . . . . . . . . . . . . . . . . . . . . 13
KERMIT. . . . . . . . . . . . . . . . . . . . . 13
DELETE . . . . . . . . . . . . . . . . . . . . . 13
USB . . . . . . . . . . . . . . . . . . . . . . 13
Information. . . . . . . . . . . . . . . . . . . 13
Receive le . . . . . . . . . . . . . . . . . . . 13
FORMAT C:> . . . . . . . . . . . . . . . . . . 13
Settings . . . . . . . . . . . . . . . . . . . . . . 13
Serial port . . . . . . . . . . . . . . . . . . . . . 13
Bluetooth® . . . . . . . . . . . . . . . . . . . 13
Com cable . . . . . . . . . . . . . . . . . . . 13
Language. . . . . . . . . . . . . . . . . . . . 13
Contrast . . . . . . . . . . . . . . . . . . . . 13
CLOCK . . . . . . . . . . . . . . . . . . . . . 13
Calibrate . . . . . . . . . . . . . . . . . . . . 13
Test Menu . . . . . . . . . . . . . . . . . . . . . 14
Scale . . . . . . . . . . . . . . . . . . . . . . 14
Digitech Tape . . . . . . . . . . . . . . . . . . 14
DP DME . . . . . . . . . . . . . . . . . . . . 14
Long timer 600 . . . . . . . . . . . . . . . . . 14
No timer . . . . . . . . . . . . . . . . . . . . 14
Read Time . . . . . . . . . . . . . . . . . . . 14
AD-channels . . . . . . . . . . . . . . . . . . 14
Backlight . . . . . . . . . . . . . . . . . . . . 14
Charger info . . . . . . . . . . . . . . . . . . 14
Flashdisc c:> . . . . . . . . . . . . . . . . . . 14
Blue terminal . . . . . . . . . . . . . . . . . . 14
SmartScale . . . . . . . . . . . . . . . . . . . . . 14
Unique jaw design. . . . . . . . . . . . . . . . 14
Robust Design. . . . . . . . . . . . . . . . . . 14
Rechargeable Batteries - Environmental Concern . . 15
Charging the SmartScale . . . . . . . . . . . . . 15
Foldable Jaws . . . . . . . . . . . . . . . . . . 15
How to adjust jaws angle . . . . . . . . . . . . 15
Handle lock . . . . . . . . . . . . . . . . . . . 16
Adjusting the Handle . . . . . . . . . . . . . . 16
Calibration . . . . . . . . . . . . . . . . . . . 16
Angle Measuring . . . . . . . . . . . . . . . . . . 16
Calibrating the inclinometer . . . . . . . . . . . 17
Calibrate the zero angle (0) . . . . . . . . . . . . 17
Controlling the SmartScale. . . . . . . . . . . . . . 17
Maintenance . . . . . . . . . . . . . . . . . . . . 17
4 Accessories, some examples 18
Digitech® Tape . . . . . . . . . . . . . . . . . . . 18
Assembling the Digitech Tape. . . . . . . . . . . 18
Removing the DigitechTape . . . . . . . . . . . 18
DP232 . . . . . . . . . . . . . . . . . . . . . . . 18
DP Keyboard . . . . . . . . . . . . . . . . . . . . 18
DP DME . . . . . . . . . . . . . . . . . . . . . . 18
Accessories . . . . . . . . . . . . . . . . . . . 18
5 Technical Specication 19
Packet Contents. . . . . . . . . . . . . . . . . . . 20
6 Juridical information 22
Version: 1.2 User Manual
Revised: 2015-03-16 15:47 DP II
© Haglöf Sweden AB 2013/Rev. 201503< | 1
1 Overview
e DP II caliper incorporates the experience and knowledge gained from more than 70 years of developing and manu-
facturing professional field measurement instrument solutions for use in forests all over the world. Haglöf Sweden’s exten-
sive experience combined with innovation capacity and new ideas have resulted in this revolutionary computer caliper. e
DP II includes these unique features and more:
♦e lightest and most modern computer caliper on the market: approx. 890g or 35.6oz for 500mm/18”scale.
♦Built-in metal chassis in computer terminal for high stability
♦Patented foldable jaws with new design for easier use in confined spaces
♦Built-in rechargeable Li-ion batteries for environmental concern
♦SmartScale measuring system with wireless radio communication
♦Flexible use and optional placing of computer terminal
♦Built-in USB communication for quick and safe data transmission
♦Serial RS232 communication
♦Built-in Bluetooth®
♦Updated technology, secure data storage (SD card) and great memory capacity (>1GB)
♦Proven precise and energy conserving measuring system with SmartScale that can be used as a stand-alone instrument
♦Unique accessories such as digital external keyboard, digital measuring tape, distance measurer, green laser pointers etc
♦Extensive software library and adaptable and compatible software options for all types of work
♦Built-in clinometer and communication with Haglöf Sweden Vertex and Vertex Laser height measuring instruments
♦Low energy consumption with more than one week of work on a single charge
♦Backlit graphical black/white display with excellent visibility

1
2
3
6
7
3
5
4
User Manual Version: 1.2
DP II Revised: 2015-03-16 15:47
2| © Haglöf Sweden AB 2013/Rev. 201503
DP II
1. DP II SmartScale
2. DP II computer terminal
3. Quick release attachment for the computer terminal
4. Adjustment screws for the handle
5. Loudspeaker
6. USB interface and contact for battery charge
7. Enter button

6
7
5
4
3
1
2
Version: 1.2 User Manual
Revised: 2015-03-16 15:47 DP II
© Haglöf Sweden AB 2013/Rev.201503|
3
DP II Computer Terminal
1. LCD Display
2. IR receiver
3. Enter button
4. Arrow buttons (4ea)
5. Serial Port
6. Loudspeaker
7. USB interface and contact for battery charge

1
2
5
6
4
3
7
11
10
8
94
User Manual Version: 1.2
DP II Revised: 2015-03-16 15:47
4| © Haglöf Sweden AB 2013/Rev. 201503
SmartScale
1. Foldable jaws
2. Lock for the foldable jaws
3. Assembly point for quick release attachment for the
computer terminal
4. Enter button
5. LED Indicator
6. Scale
7. Movable handle
8. Handle lock
9. Contact position for battery charger
10. Quick release attachment for the computer terminal
11. Adjustments screws for the handle

Version: 1.2 User Manual
Revised: 2015-03-16 15:47 DP II
© Haglöf Sweden AB 2013/Rev. 201503 | 5
DP II
e DP II offers special features for flexible use and
versatile operation.e user can decide how to work with
the caliper based on the current work situation.e DP
II computer terminal is both a stand-alone device and can
be assembled and used with the moveable handle. In this
mode, the DP II will look like and work similar to a tradi-
tional computer caliper.
Computer Terminal
e DP II computer termi-
nal includes the necessary
interfaces such as high visibility display, five-button keypad,
USB port, serial port, loudspeaker, Bluetooth® and radio
communication. Data is stored in the
built-in industrial SD card with high
security and extra protected to sustain
cold, heat and hard impacts.
Computer Terminal excl. Serial Port
For operators that have no need for
special accessories or serial com-
munication, the DP II computer
terminal can be special ordered
excluding the serial port.e unit
weight and size will be less without
the serial port.
2 System Description
Detachable Computer Terminal
e DP II Computer Terminal can be detached from the
movable handle and the SmartScale.is is practical for
example when transferring data to your office PC.
When performing tree inventory in dense tree stands with
thick and low branches, it can be difficult to reach the mea-
suring point. e DP II Computer can be removed from
the SmartScale and jaws and placed inside your vest or
jacket pocket, worn on your wrist with the wrist holder ac-
cessory or placed at a distance from you.e DP II Smart-
Scale will in such cases look and work similar to a manual/
mechanical caliper with its low weight and simple opera-
tion, but carries all advantages expected from a computer
caliper. For the remote operation, the SmartScale has to be
factory ordered and equipped with a Radio Enter button.
e computer terminal communicates wirelessly with the
SmartScale measuring system at distances up to 10 meters.
e remote Radio Enter button replaces the mechanical
enter button on the movable handle.

3
2
1
2
User Manual Version: 1.2
DP II Revised: 2015-03-16 15:47
6| © Haglöf Sweden AB 2013/Rev. 201503
The Buttons on the Keyboard
When the DP II computer terminal is mounted on the
handle, many users prefer to work with the ”trigger-style”
Enter button(1) on the handle.
When the computer terminal is used as a stand-alone
computer, the onboard Enter button(2) on the terminal is
preferred. A remote Radio Enter button called DP Radio is
available as an accessory in cases where the caliper SmartS-
cale is used as a stand-alone unit. See below for more
details.
e arrow buttons (3) are used to navigate in the program
and to enter data. By pressing two buttons at the same
time, different functions can be activated, such as turn on
backlit display, shut off computer terminal and more.
No Icone Key/s Function
1 Left Step left
2 Right Step right
3 Up Step up
4 Down Step Down
5Up + left Power Off
6Up + right Back lit display
7Down + left Escape
8Down + right Vertex IR
Example Multi Function Button
Use Escape to step out of a menu or to interrupt an ongo-
ing Kermit communication. Press both buttons simultan-
eously according to the image.

4
2
5
image 2
image 3
3
1
2
image 1
Version: 1.2 User Manual
Revised: 2015-03-16 15:47 DP II
© Haglöf Sweden AB 2013/Rev. 201503 | 7
How to Assemble the Computer Terminal
1. Mount the support (2) by attaching the two guide pins
(3) in the outlets on the upper part of the movable
handle and firmly fastening the locking screw (1). Be
careful not to overtighten the screw.
2. Make sure that the clamp (4) on the handle is in raised
position, see image below.
3. Attach the computer terminal by engaging the support
(2) in the outlets (5) of the upper part of the terminal;
continue by lifting the support (2) with the terminal
and tilt the lower part to the movable handle. Lower
the computer terminal and lock it by folding the clamp
down (4).
3 Operating Procedure
How to Disassemble the Computer Terminal
1. Lift the clamp to the upright position.
2. Lift the computer terminal straight up and pull the
lower part of the terminal outward.
Assembling the Computer Terminal on the
Wrist Holder
e computer terminal can be used as a stand-alone hand-
held computer and attached onto the DP II Wrist holder
accessory and worn on your wrist.
1. Steer the guide pins in the metal holder into the out-
lets on the upper part of the computer terminal.
2. Stretch the metal holder open using the large tab on
the bottom of the holder and steer the lower guide pins
on the holder into the outlets on the terminal.
Removing the Computer Terminal from the
Wrist Holder
Stretch the metal holder open using the large tab on the
bottom of the holder and remove the guide pins from the
terminal.

User Manual Version: 1.2
DP II Revised: 2015-03-16 15:47
8| © Haglöf Sweden AB 2013/Rev. 201503
DP Radio Button
e DP Radio Enter button can
replace the mechanical enter
button on the caliper movable
handle. e radio button is used
when the DP terminal and
SmartScale are used stand-alone
e Radio Enter button is fac-
tory assembled on the DP II caliper.
Changing the Battery
e battery in the DP Radio button will last for approx-
imately one year depending on use.e DP Radio uses a
CR2032 3V battery.To change the battery, follow these
instructions.
1. Unscrew the screw (Torx T10) that attaches the DP
Radio button on the handle.
2. Remove the DP Radio button from the handle. Re-
move the battery lid by pulling it straight up. Remove
the battery.
3. Replace the old battery with a new battery. – inside, +
toward battery lid. Press the lid into position.
4. Attach the DP Radio on the handle with the screw.
Always dispose of old batteries in special battery containers
Synchronizing the DP Radio Enter Button
e DP Radio is synchronized with the computer terminal.
When assembling a new DP Radio Button, the synchroni-
zation needs to be made as follows:
1. Disassemble the DP Radio Button and battery accor-
ding to point 1 and 2 above.
2. Press 5-6 times on the DP Radio Button to drain it
completely.
3. Assemble the battery with – to the inside and + to the
battery lid.
4. Press the battery lid in place.
5. Start menu ”Radio” in the computer terminal. System
menu—Settings—Radio—SYNC.BUTTON”.
6. When the menu is running, press one (1) time on the
DP Radio Button and the message Press DPRadio
button is shown.
7. Repeat point 1-6 if the procedure failed.
8. Assemble the DP Radio Button on the handle with
the screw.
Turn o/on the DP Radio Function
e Radio function in the computer terminal can be turned
off when the DP Radio Button is not in use to save battery.
1. Select ”System menu—Settings—Radio—Enter
OFF” and press ENTER to turn off the function.
2. e Menu text will change to: ”System menu—Set-
tings—Radio—Enter ON”.

Version: 1.2 User Manual
Revised: 2015-03-16 15:47 DP II
© Haglöf Sweden AB 2013/Rev. 201503 |
9
Charging the Computer Terminal
e DP II SmartScale and the DP II terminal use re-
chargeable Li-ion batteries. Fully charged batteries last for
approximately one week depending on application used.
e batteries are charged with 5V through the USB con-
nections with the USB adapter and a mini USB cable that
can be connected to a PC, a USB car charger or an external
USB charger.
Normal charging time is 3-4 hours, depending on tempera-
ture and other factors.e computer terminal will charge
quicker if put in “USB mode”. In other cases the charging
time can exceed 4 hours. USB mode will (in normal cases)
automatically be activated, provided that your terminal
software allows it.
Note that the SmartScale needs to be charged as well; see
separate chapter on the SmartScale.
How to Charge
1. Place the USB cable (Mini-B) on the
DP II USB adapter.
2. Place the opposite
end (Type A) in a
USB connection in
your PC or in a USB
charger.
3. Connect the DP II
USB adapter with
the USB cable on the
computer terminal.
4. USB mode allows
for quicker charging process.
In normal cases the terminal
software will automatically go
to USB mode.e image shows
the display when the terminal is
in USB mode.
Synchronization with the SmartScale
e computer terminal needs to be synchronized with the
SmartScale measuring scale, to connect the radio units.
Functions for connection are available in the system menu.
Note that the synchronization is made on an open chan-
nel. Avoid having other Smart Scale units close by (<10m)
since this may interrupt the synchronization.
1. Reset the DP II by simultaneously pressing all five but-
tons.e DP II resets and restarts.
2. Set the SmartScale at 25 cm/10”.
3. Activate the menu Systemmenu — Settings — Radio
— Sync.Scale in the DP II computer terminal.
Display
e graphic black and white display uses 128x64 pixels. A
quick button function activates the backlit display, where
the light will be ON for approx. 30 seconds after a button
is pressed. Repeat the quick button press to turn off the
function.e caliper will consume more energy with the
backlit display function activated. At the right side in the
display there are symbols/icons that indicate the following
information:
Bluetooth communication on
Backlit display on
Tension on in the USB interface
Battery Indicator
Flashing = charging
Poor battery 3.00-3.30V
Normal battery 3.30-3.50V
Good battery 3.50-4.20V

User Manual Version: 1.2
DP II Revised: 2015-03-16 15:47
10 | © Haglöf Sweden AB 2013/Rev. 201503
PC Communication
Transfer your programs and data using your regular file ex-
plorer. No specific drivers or programs need to be installed.
e computer terminal charges the battery also when the
USB is connected to the PC.
Connection to PC
1. Place a USB cable
(Mini-B) to the DP II
USB adapter.
2. Place the opposite end
(Type A) in a USB
connection in the PC.
3. Connect the DP II
USB adapter with
the USB cable on the
terminal.
4. Go to USB mode in the terminal.
In normal cases, the software you
are using in the terminal will au-
tomatically go to this mode. e
image shows the terminal display in USB mode. You
can also choose to go to USB mode after a reset (reset
is made by pressing all five buttons on the terminal
at the same time) and use the arrow keys to go to the
USB menu and press Enter.
5. When your PC operating system
is connected, the USB icon in the
display will turn black. Your com-
puter terminal is now working as
a regular USB memory stick.
6. Your regular PC file explorer can now be used to copy,
move or delete files in the terminal.e data files are
usually located in the directory \\DATA, and programs
for the caliper in the directory \\PRG.
7. Finish the session by pressing Escape in the DP II
computer terminal.
8. Remove the USB adapter by releasing the stop and pull
the USB adapter backwards.
BLUETOOTH®
With Bluetooth technology you can work with wireless
communication to the Internet or to other electronic in-
struments with Bluetooth. Energy consumption is compa-
rably low. Bluetooth® is built-in the computer terminal for
communication to external devices such as GPS, scanners
and printers. e DP II terminal supports Master- and
Slave mode.
♦Master
Master mode is most common to use, and set under menu
SETTINGS/Com Port/Bluetooth. When in Master mode,
the computer terminal determines which external device to
communicate with.
♦Look for other devices
Before Bluetooth communication starts, the computer
terminal will look for nearby Bluetooth devices. Any found
devices are shown in a list, where the user selects which de-
vice to connect to. A code is usually stated that will be used
as a key for coming connections. For the code key to the
external device, please turn to the corresponding manual.
e code key is often 1234, which is also the key used by
the computer terminal when in Slave mode.
♦Pair (BONDING)
e computer terminal will use the last connected device
for coming connections. If using other device, delete the
last used device in the menu SETTINGS/Com Port/Blue-
tooth/Reset to initiate a new search. Note that the SET-
TINGS menu is usually reached in the application that is
running in the computer terminal.
♦PC
ere are many options for simple and inexpensive USB-
adapters with Bluetooth®, enabling Bluetooth connection
in your PC.e following examples show what a Bluetooth
communication can look like. Connect your USB Blue-
tooth adapter in your PC and install the drivers according
to instructions.

Version: 1.2 User Manual
Revised: 2015-03-16 15:47 DP II
© Haglöf Sweden AB 2013/Rev. 201503|
11
Example: Send File to the Computer Terminal with Blue-
tooth®
1. e computer terminal: Reset the terminal by pressing
all five (5) buttons simultaneously.
2. Select Bluetooth in the computer terminal as your
Com Port.
3. PC: Press to open the Bluetooth icon and check for
incoming ports. If there are no incoming ports, you will
have to set one up. Note the COM port number when
the port is set up.
4. PC: Start Hyperterminal in the PC. (Program/Acces-
sories/Communication/Hyperterminal)
5. PC: Select to use the Com port (see point 2).
6. Computer terminal: Select the FILE/Receive file
menu.e terminal starts to search for devices.
7. Computer terminal: Select your PC from the list and
state the code, for example 1234.
8. PC: Click on the Bluetooth note that appeared on your
PC screen and state code 1234.
9. PC: Select menu Transfer/Send file in Hyperterminal.
10. PC: Select file, for example Skalman6.DP2
11. PC: Select Protocol Kermit
12. PC: Select Send
e file is transferred to the caliper and the computer
terminal will automatically disconnect the Bluetooth con-
nection when ready.
Program
ere are numerous software options for many different
applications to the DP II. One or more programs can be
downloaded to your caliper. In most cases you will need a
valid software license.is license can be activated by the
user. All programs for the DP II should have file extension
”.DP2”
Older programs
Programs developed for/ modified for previous (Haglöf
Sweden®) caliper models are not suited for direct transfer
or compatible for the DP II. Please contact you distributor
for information on compatible programs for the DP II.
Updating programs
If you have a valid license to a DP II program, this license
is inherited by the next program when upgrading, and uses
the same product code. Delete older program versions after
a new version has been started to reuse licenses.
Transfer programs to the DP II
1. Reset the DP II by giving a short press on all five (5)
buttons on the terminal at the same time.e DP II
resets.
2. Put the USB cable
(Mini-B) in the DP II
USB adapter.
3. Put the other end
(Type A) in the PC
USB port.
4. Connect the DP II
USB adapter with the
USB cable on the computer terminal.
5. Go to USB mode by navigating
with the arrow keys to the USB
menu and press Enter.
6. When the PC operating system
is connected the USB icon in the display will turn
black.e computer terminal now works as a common
USB memory.
7. Start the PC file explorer and copy this or copy the
software options that are to be used in the DP II to file
”\PRG”.
8. Disconnect the PC by pressing Escape in the DP II.
9. Remove the USB adapter by releasing the stop and
pulling the USB adapter backwards.
10. Program files that have been copied to the DP II are
now available in the menu ”SELECT PROGRAM”.
In normal cases the program should be activated with a
license key before running it, see next page.
Activate program license
e license key can be obtained from your Haglöf Sweden
DP II distributor. If you do not have a license key, note the
DP II serial number (SerNo) and product code (PROD)
before contacting your distributor.
To activate the license, select menu ”SELECT PRO-
GRAM” and press ENTER. Use arrow button up- or
down to select the application and press ENTER.
Select menu ”Open file” followed by ”LICENSE”and press
ENTER.
State your code with the up- and down arrow buttons to
increase or decrease the value of digit above cursor. Use
the left- and right button to move cursor to next position.
Store the code with ENTER.
When upgrading a program with identical product code
you will not need to state the license key, provided that the
licensed program has not been deleted from the computer
terminal.

User Manual Version: 1.2
DP II Revised: 2015-03-16 15:47
12 | © Haglöf Sweden AB 2013/Rev. 201503
Start a new program
A new program is started by selecting the menu ”Reset”
(usually placed as a sub menu under “SETTINGS”). After
a reset, the DP II will display a list of downloaded pro-
grams. Select one of the alternatives and press ENTER.
Go to ”START” menu to start the program.
A program can also be started with a caliper reset (press all
five (5) buttons at the same time). Select menu ”SELECT
PROGRAM”.
e program that was last used will start in the start menu.
Upgrading the BIOS
BIOS is the program that handles all hardware in the
caliper.e BIOS needs to be upgraded on occasion as
follows:
1. Reset the DP II by giving a short press on all five (5)
buttons at the same time on the terminal.e DP II
resets.
2. Navigate to the ”USB” menu with right arrow button.
3. Press Enter.
4. Connect the USB adapter to the DP II and the USB
cable to the USB adapter and PC.
5. e PC operating system will initiate connection to the
DP II. e DP II now works as a USB memory stick
(MSD device)
6. Start the PC file explorer and copy the new Bios file
(ex.”DP2 V2.0.DPB”) to the root directory. In the
root directory you need to have the file ”BiosLoadV10.
DPL”.
7. Disconnect the PC with Escape in the DP II.
8. Remove the USB adapter by releasing the stop and
pulling the USB adapter backwards.
9. Reset the DP II with a short press on all five (5) but-
tons at the same time.e DP II restarts and updates
the Bios.
System menus
♦RESET
e operating system is started with a reset that can be
forced by pressing all five (5) buttons simultaneously.
Several functions in the operating system are reached from
below the system menu.
♦LANGUAGES
Several menus and commands in the system menu are
translated to different languages. Select the language menu
and set your preferred language with ENTER. Check the
time and date settings in the terminal settings.
♦START
Start the last used application and press ENTER to execute
the application. A license number should normally be stated
before starting to use an application. You can run an applica-
tion for five (5) days as trial before stating a license number.
is number can be purchased from your DP II distributor
and stated in the following menu, SELECT PROGRAM.
♦SELECT PROGRAM
Use the SELECT PROGRAM menu to select applica-
tion. Press arrow button up- or down to select, followed by
ENTER.To start the application, select START and press
ENTER. INFO contains information on licenses and date
for download of program.
Delete all
Use the ”Delete all”if you wish to delete all downloaded
applications. Individual applications can be deleted through
menu SELECT PROGRAM. Select which application to
delete.
LICENSE
A license key will be obtained from your Haglöf Sweden DP
II distributor. If you do not have a license key, note the serial
number SerNo and PROD before contacting your distribu-
tor.To activate the license, select menu SELECT PRO-
GRAM and press ENTER. Use the up- or down button to
select the application and press ENTER. Select LICENSE
and press ENTER. State your code with the up- or down
buttons to increase/decrease the value of cursor. Use the left-
and right button to move cursor to next position. Store the
code with ENTER.
Delete program
To delete a program in the computer terminal select menu
SELECT PROGRAM in the system menu and press EN-
TER. Use the up- or down button to select application and
press ENTER. Select DELETE and press ENTER.
Files
e operating system provides a menu where all files that
have been created and stored can be deleted or transferred to
PC or other external terminal. Files can contain data from
applications. Before deleting a file or formatting the flash
disc, make sure that no important data is left in the files.
Files can normally be deleted straight from an application
without the need to activate the system menu.
1. Reset the computer terminal by pressing all five (5)
buttons at the same time.
2. Press ENTER to go to the SYSTEM MENU.
3. Select the FILE menu.

Version: 1.2 User Manual
Revised: 2015-03-16 15:47 DP II
© Haglöf Sweden AB 2013/Rev. 201503|
13
File list
All saved files are listed (up to 200 ea). Individual files can
be selected and handled in the following menu system.
e selection ”Delete all” deletes all data files in the direc-
tory ”\DATA”.
OPEN FILE
e menu can be used in the application that is run to for
example open a file with data.
Send
Send a file with Bluetooth (Ftp/obex) to cell phone or
other device.e computer terminal has to be connected to
the receiving device, see the chapter on Bluetooth.
INFO
Information on selected files is shown, for example how
many bytes the file contains and when it was created.
KERMIT
e Kermit protocol can send the file with a cable (serial)
or with Bluetooth (Serial profile) to PC or other handheld.
DELETE
e file can be deleted.
USB
Activate the USB mode. In USB mode, the computer
terminal is ready to be connected to PC via USB cable and
to be handled as a USB memory stick. Files can be copied,
deleted, created etc. with the regular file explorer in the PC.
Quick battery charge of terminal is also activated in USB
mode.
Information
Information on the Flash disc, such as available space on
the internal flash disc is displayed.
Receive le
Use Kermit to send files from PC or other caliper to the
computer terminal.
FORMAT C:>
e flash disc can be zero set by formatting it. All stored
data and programs are deleted.
Settings
ere are different settings that need to be considered in
the system menu depending on software used in the DP II.
Serial port
Bluetooth®
e Bluetooth is a built-in wireless communication port.
Set as Master when the computer terminal is to initiate
communication and connection to external devices. Slave
mode is used when external devices need to connect to the
computer terminal. Use Reset to delete the information
on last used connection. Pair (bonding) is used to connect
devices to the DP II.
Com cable
Regular serial port where a straight modem cable is used.
Also setting for baud rate. (1200…115200kbs)
Language
Set system language.
Contrast
Set display contrast (0..63). Normal value is 32.
CLOCK
Set the built-in clock. If terminal has been without battery
power, the clock needs to be reset. Start with setting the
year with right- or left button and step one (1) step = year
at a time. Use up- or down to step with ten (10) years at a
time. Accept with ENTER. Continue with month, date,
hour, minutes and seconds in the same way.
Calibrate
Calibration of SmartScale, “Calibration” on page 16.

User Manual Version: 1.2
DP II Revised: 2015-03-16 15:47
14 | © Haglöf Sweden AB 2013/Rev. 201503
SmartScale
e SmartScale is the DP II measuring scale and jaws.e
Smart Scale contains the measuring system, a battery and
radio transmitter.e radio uses the ISM band on 2.4GHz.
e Smart Scale is synchronized with the computer ter-
minal and can after synchronization exclusively send data
to this specific terminal. If either of these units (the Smart
Scale or the computer terminal) are changed, a new syn-
chronization has to be performed, see chapter Computer
Terminal.e Smart Scale is available in the following
lengths: 500mm, 650mm, 800mm, 950mm, 1020mm, 18”,
24”, 36”, 40”
Unique jaw design
e DP II jaws are adjusted for smooth operation when
measuring timber in piles and when working in narrow
spaces.e firm jaw on the DP II Smart Scale has a special
design that allows it to slide in between and under logs
Robust Design
Exact measurements can be performed thanks to the extra
robust design and a strong, well balanced and light weight
aluminum chassis.
DP II SmartScale (excl. plastic details)
Test Menu
Most menus under TEST MENU are used for service and
error detection and not by DP II users.
Scale
Test for scale calibration and radio contact between the
SmartScale and the computer terminal.
Digitech Tape
Control and calibration of the Digitech® Tape accessory.
DP DME
Control and calibration of the DP DME accessory.
Long timer 600
Test of the internal timer, 600ms.
No timer
Test mode for built-in electronics.
Read Time
Display clock in the display.
AD-channels
Test mode for built-in electronics. First line in display
shows temperature of built-in battery when charging.
Battery temperature is constantly monitored and charging
will be interrupted if the temperature goes below 0°C/32F
or exceeds 45°C/113F. e second line shows the battery
tension (3.00-4.50V).
Backlight
Turn on/off of display backlight.
Charger info
Testmode for built-in electronics.
Flashdisc c:>
Shows information on what type of flashdisc is being used.
Blue terminal
Terminal mode directly to built-in Bluetooth.

Version: 1.2 User Manual
Revised: 2015-03-16 15:47 DP II
Rechargeable Batteries - Environmental Concern
Both the SmartScale measuring system and the computer
terminal in the DP II use rechargeable Li-ion batteries.
Fully charged, the batteries will last for approximately one
week depending on application used.e batteries are
charged through the USB ports with the USB adapter and
a mini USB cable that can be connected to a PC or to an
external USB charger.
Charging the SmartScale
Connect the DP II USB adapter with the mini USB cable
and USB charger, PC or USB car charger to the Smart-
Scale according to the image.e charging time is approxi-
mately 3 hours.
A LED indicator lights up when charging the Smart-
Scale. When the LED light blinks, it is time to charge the
battery.e indicator goes out when the battery is fully
charged.
e computer terminal will warn when measuring if the
DP II SmartScale has low battery capacity.
Foldable Jaws
e measuring scale has foldable jaws that can be locked in
position.To fold the jaw, push the lock up and fold accord-
ing to image below. Move the handle to the side as far as
possible. Both jaws are locked in position and to each other
along the scale.
How to adjust jaws angle
e Smart Scale angle of the jaws may need to be adjusted
after some time of use.e right and left jaw are adjusted
with a 2 mm Allen Key according to the image below.

User Manual Version: 1.2
DP II Revised: 2015-03-16 15:47
16 | © Haglöf Sweden AB 2013/Rev. 201503
Calibration
e SmartScale will normally not need calibration. Make
it a habit to check the displayed diameter to be identical to
the scale featured diameter measure (or calibration guide).
If there are divergences, (+-1mm) the SmartScale needs to
be calibrated.
Preferably use a calibration guide as described below:
Go to SETTINGS menu and then to CALIBRATION.
1. Place the movable jaw at 0 cm and press ENTER
2. Place the movable jaw at 500 mm (18 inches) and press
ENTER.e caliper is calibrated.
If the calibration failed, check the following:
Error code -1: Hardware error. Try recalibrating.
Error code -2: Not correctly calibrated. Recalibrate.
Error code -3: Measuring System disturbances. Try recali-
brating.
Error code -4: No radio contact. Try to redo the synchroniza-
tion between the SmartScale and the Computer Terminal
process.
Angle Measuring
e computer terminal contains an inclinometer that can
be used to measure angles and to calculate heights.e
Gator Eyes laser pointers accessories are recommended to
use as aim.e Gator Eyes are factory assembled on the
caliper jaws (specify on order!) and consist from two pow-
erful green laser pointers visible at long range and used to
measure diameters from a distance and/or as aiming guides
when measuring angles and heights. Remember that the
use of laser pointers can be restricted in your area! Always
treat and use laser pointers with care and consideration.
Always check local restrictions and guidelines before using
green laser. For information and instructions for the Gator
Eyes, see separate user guide and product sheets.
Handle lock
e movable handle on the scale can be locked if moved
toward the the fixed jaw. is is practical when carrying the
caliper in the handle and in other transport situations.To
unlock the handle, press the button-like part on one of the
jaws on the underside of the caliper, and at the same time
gently press the handle to the side. e locking function
(one or both locks) can be removed if preferred.
Adjusting the Handle
Use a 2mm Allen Key to adjust the handle.e handle has
built-in sliders to avoid too easy run.
Other manuals for DP II
1
Table of contents
Other Haglof Measuring Instrument manuals

Haglof
Haglof DME User manual

Haglof
Haglof Vertex 5 User manual

Haglof
Haglof Mantax Digitech II User manual

Haglof
Haglof Vertex Laser II VL402 User manual

Haglof
Haglof Digitech User manual

Haglof
Haglof Vertex Laser Geo User manual

Haglof
Haglof HCH User manual

Haglof
Haglof MD II User manual

Haglof
Haglof Vertex 5 User manual

Haglof
Haglof Postax User manual
Popular Measuring Instrument manuals by other brands

iCheckTPMS
iCheckTPMS IC005 instruction manual

Extech Instruments
Extech Instruments 407750 user guide

Thermo
Thermo Orion 620 quick start guide

Maico
Maico MedRx Otowave 102 operating manual

Bove Technology
Bove Technology B9 VW Installation & user guide

Keysight
Keysight 16801A Installation and quick start guide