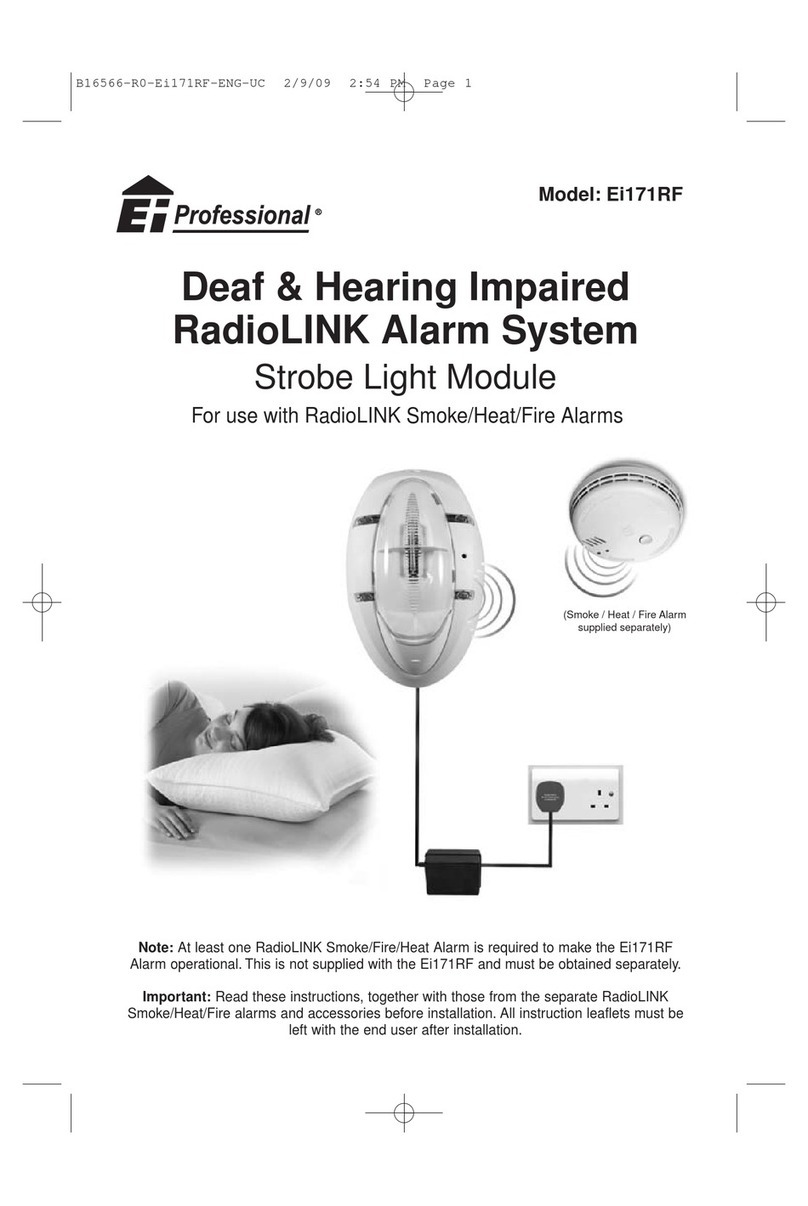
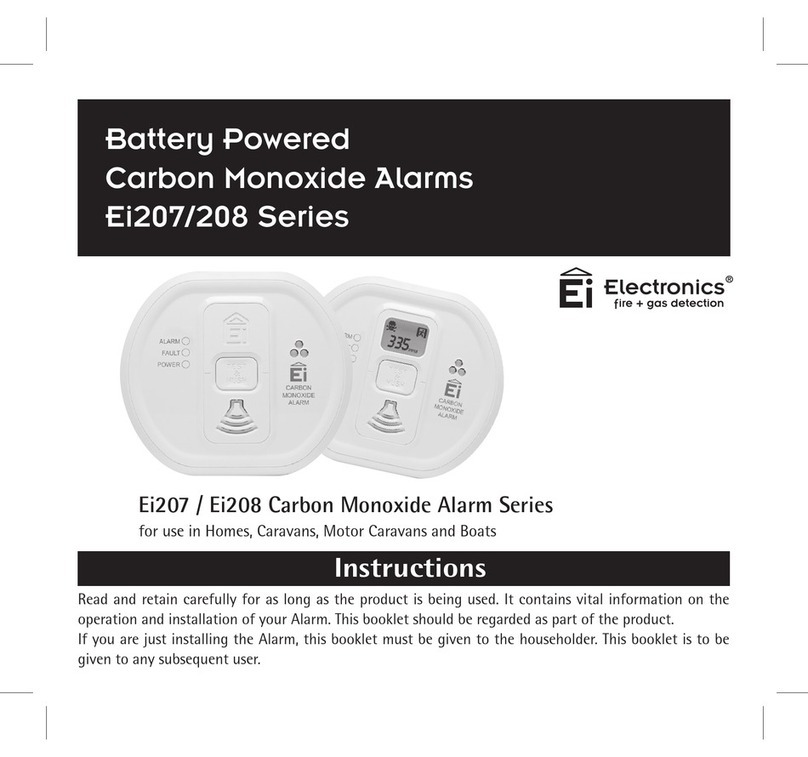
Ei Electronics Ei207 Series User manual

Instructions
Read and retain carefully for as long as the product is being used. It contains vital information on the
operation and installation of your Alarm. This booklet should be regarded as part of the product.
If you are just installing the Alarm, this booklet must be given to the householder. This booklet is to be
given to any subsequent user.
Ei207 / Ei208 Carbon Monoxide Alarm Series
for use in Homes, Caravans, Motor Caravans and Boats
Battery Powered
Carbon Monoxide Alarms
Ei207/208 Series


2
2. Location & Positioning
1. Read This First ....................................................................
2. Carbon Monoxide – The Silent Killer ..................................
3. Where to place CO Alarms .................................................
4. Installation ...........................................................................
5. Monitoring / Testing & Maintenance ....................................
6. What to do when the alarm sounds ....................................
7. How to Protect your Family .................................................
8. Technical Specification ..................................................
9. Getting the CO Alarm Serviced .....................................
10. Guarantees ....................................................................
11. Limitations of CO Alarms ...............................................
12. Troubleshooting .............................................................
13. Display & Indicator Summary ........................................
14. Contact Us .....................................................................
4
5
10
16
18
23
24
26
27
27
28
30
32
35
Table of Contents page

3
Model
Ei207
Ei207 Series with Replaceable Batteries (2 x AAA)
Model Chart
Ei207D
No
No
RF
Capability
No
No
RF Module
Supplied
No
Yes
LCD
Display
Model
Ei208W
Ei208WRF
Yes
Yes
RF
Capability
No
Yes
RF Module
Supplied
No
Ei208
No No No
No
Ei208DW
Ei208DWRF
Yes
Yes No
Yes
Yes
Yes
LCD
Display
Ei208 Series with built-in Long Life Battery
The models listed below are designed for domestic premises, caravans,
motor caravans & boats in accordance with EN 50291-1:2010 & EN 50291-2:2010

1. Read This First
Congratulations on becoming the owner of an Ei Carbon Monoxide Alarm. This
will help protect you and your household from the dangerous effects of Carbon
Monoxide- the silent killer.
7KH&DUERQ0RQR[LGH $ODUP&2$ODUP LVSRZHUHGXS E\FDUHIXOO\URWDWLQJ LW
onto the mounting plate which activates the on/off switch. The indicator lights
ZLOO LPPHGLDWHO\ IODVK LQ VHTXHQFH WR VKRZ WKH\ DUH ZRUNLQJ )RU WKH 'LVSOD\
PRGHOVWKH/&'VFUHHQZLOOEULHIO\GLVSOD\DOOLFRQV7KHQZDLWVHFRQGVDIWHU
connecting the power before button testing.
7KH 3RZHU OLJKW LV QRW LOOXPLQDWHG GXULQJ VWDQGE\ 7KLV OLJKW ZLOO IODVK JUHHQ
when the test button is pressed to indicate that power is present and Alarm is
functioning.
,QVWDOO D &2 $ODUP LQ HYHU\ URRP WKDW FRQWDLQV D IXHO EXUQLQJ DSSOLDQFH
particularly rooms where people spend a lot of time e.g. bedrooms, kitchens and
sitting rooms.
,QURRPVZLWKDQDSSOLDQFHLQVWDOOSUHIHUDEO\RQWKHFHLOLQJPPIURPZDOOV
and between 1m to 3m horizontally from appliance. In rooms remote from the
appliance install at ‘head height’, where the light indicators can be seen.
7HVWWKH$ODUPZHHNO\E\SUHVVLQJDQGKROGLQJWKHWHVWEXWWRQIRUDIHZVHFRQGV
5HSODFH$ODUPZKHQWKH³5(3/$&(81,7%<´GDWHKDVEHHQUHDFKHG&KHFN
the label on the side of the Alarm.
'RQRWILW$ODUPXQWLODOOEXLOGLQJZRUNLVFRPSOHWHGWRDYRLGFRQWDPLQDWLRQ
4

2. Carbon Monoxide – The Silent Killer
2.1 What is Carbon Monoxide ?
Many people are killed each year, and many more suffer ill health from Carbon
0RQR[LGH&2SRLVRQLQJ&2LV DQ LQYLVLEOH RGRXUOHVV WDVWHOHVVDQGH[WUHPHO\
toxic gas. It is produced by appliances and vehicles burning fuels, such as coal, oil,
natural/bottled gas, paraffin, wood, petrol, diesel, charcoal etc. CO is absorbed by
red blood cells in the lungs in preference to oxygen - this results in rapid damage
to the heart and brain from oxygen starvation.
High levels of CO in a house can be caused by:
,QFRUUHFWO\RUSRRUO\LQVWDOOHGIXHOEXUQLQJDSSOLDQFHV
%ORFNHGRUFUDFNHGFKLPQH\VIOXHV
%ORFNHGYHQWVRUGUDXJKWSURRILQJZKLFKPDNHVDUHDVZLWKIXHOEXUQLQJ
appliances or fireplaces airtight.
(QJLQHVRIFDUVODZQPRZHUVHWFOHIWUXQQLQJLQFRQILQHGVSDFHV
3RUWDEOHSDUDIILQRUJDVKHDWHUVLQEDGO\YHQWLODWHGURRPV
2.2 What happens when your CO Alarm detects Carbon Monoxide ?
When the Alarm detects potentially dangerous levels of CO, it flashes the red alarm
OLJKWLPPHGLDWHO\DQGWKHQVRXQGVDORXGDODUPLIWKH&2SHUVLVWV7DEOH%%
below shows how the CO Alarm reacts to different levels of CO gas and exposure
time. At higher levels of CO the Alarm turns on sooner. The rate of flashing of the
red light indicates the level of CO. If your CO Alarm sounds follow the instructions
in section 6. NEVER IGNORE THE ALARM !
5

2.3 Symptoms of Carbon Monoxide Poisoning
Table A
35 The maximum allowable concentration for continuous exposure in any
8 hour period according to OSHA *.
150 Slight headache after 1.5 hours.
200 Slight headache, fatigue, dizziness, nausea after 2-3 hours.
400 Frontal headaches within 1-2 hours, life threatening after 3 hours, also maximum
SDUWVSHUPLOOLRQLQIOXHJDVRQDQDLUIUHHEDVLVDFFRUGLQJWR86(QYLURQPHQWDO
Protection Agency.
800 Dizziness, nausea and convulsions within 45 minutes. Unconsciousness within
2 hours. Death within 2-3 hours.
1,600 Headache, dizziness and nausea within 20 minutes. Death within 1 hour.
3,200 Headache, dizziness and nausea within 5-10 minutes. Death within 25-30 minutes.
6,400 Headache, dizziness and nausea within 1-2 minutes. Death within 10-15 minutes.
12,800 Death within 1-3 minutes.
ppm
Concentration
of CO in Air Inhalation Time (approx) and Symptoms Developed
ppm = parts per million
*OSHA Occupational Safety & Health Association
6

2.4 Pre-Alarm
When the Alarm detects over 43 ppm CO the red light flashes in accordance with
7DEOH% % 7KLVKHOSVORFDWH &2 OHDNVDVWKH &2 $ODUPJLYHV DQ LQGLFDWLRQ
straight away.
:LWKRXW WKLV IHDWXUH WKH &2 OHYHO ZRXOG QHHG WR EH DW SSP &2 IRU W\SLFDOO\
PLQXWHV IRU DQ DODUP VRXQG WR EH JLYHQ 1RWH WKH 3UH$ODUP VLJQDO PD\ EH
triggered by CO coming for example, from cooking with gas, from car engines or
from nearby barbecues. This is usually not a concern, unless the pre-alarm signal
persists until the Alarm sounds and the CO source is unknown.
The display models will display CO concentrations greater than 10ppm in
DFFRUGDQFHZLWK7DEOH%%
NOTE: The CO Alarm may sound if cigarette smoke is blown into it, or aerosols
are released nearby.
2.5 CO Alarm Memory
The CO Alarm memory is an important feature of the CO Alarm where even if the
house is unoccupied during an alarm condition it warns the homeowner that the CO
Alarm has previously detected CO gas and been in alarm. The memory feature has
two operation modes:
- memory indication for 24 hour period after alarm.
- memory recall on demand
24 hour memory indicators: After alarm, the RED light will flash at different rates
HYHU\PLQXWHDSSUR[GHSHQGLQJRQWKHOHYHORI&2GHWHFWHGVHH7DEOH&
Memory recall on demand: To review the memory status after initial 24 hours,
press and hold the test button, the red led will flash in accordance to Table C.
Display models will show the peak level of CO measured.
7

8
Red Light Display Icon Sounder
(before horn sounds)(Pre Alarm) (Alarm)
Display Icon
(after horn sounds)
CO Gas Level
0 < ppm < 10 ppm
* unless it has alarmed previously (see CO Alarm Memory below)
ppm values shown in table are for example purposes only
Off* Blank Blank Off
10 < ppm < 30 ppm
Off* Off
Off
Off*
PPM level
PPM level (flash)
on - 4 seconds,
off - 12 seconds
PPM level (flash)
on - 4 seconds,
off - 12 seconds
PPM level
on within 60-90 mins
(typ 72 mins)
on within 10-40 mins
(typ 18 mins)
2 flashes
every 2 secs
on within 2 mins
(typ 40 secs)
4 flashes
every 2 secs
1 flash
every 2 secs
30 < ppm < 43 ppm
43 < ppm < 80 ppm
80 < ppm < 150 ppm
> 150 ppm
Table B-1: CO Alarm Response - (version 1)
* There are two variations of the LCD display as outlined in the tables below

150
150
100
100
060
060
Red Light Display Icon Sounder
(before horn sounds)(Pre Alarm) (Alarm)
Display Icon
(after horn sounds)
CO Gas Level
0 < ppm < 10 ppm
* unless it has alarmed previously (see CO Alarm Memory below)
ppm values shown in table are for example purposes only
Off* Blank Blank Off
10 < ppm < 30 ppm
Off* Off
Off
Off*
PPM level
PPM level (flash)
on - 4 seconds,
off - 12 seconds
PPM level (flash)
on - 4 seconds,
off - 12 seconds
PPM level
on within 60-90 mins
(typ 72 mins)
on within 10-40 mins
(typ 18 mins)
2 flashes
every 2 secs
on within 2 mins
(typ 40 secs)
4 flashes
every 2 secs
1 flash
every 2 secs
30 < ppm < 43 ppm
43 < ppm < 80 ppm
80 < ppm < 150 ppm
> 150 ppm
9
Table B-2: CO Alarm Response - (version 2)

Reset Memory: Hold down the test button until the red light stops and the green
light starts flashing. Cover the horn with a cloth to muffle the alarm during this time.
Please note that the memory will also be reset when the CO Alarm is switched off.
3. Where to place CO Alarms
3.1 Ideally a Carbon Monoxide Alarm should be installed in:
- Every room containing a fuel burning appliance, and
- Remote rooms where occupants spend a considerable amount of time
- Every bedroom
However if the number of Carbon Monoxide Alarms to be fitted is limited, the
IROORZLQJSRLQWVVKRXOGEHFRQVLGHUHGZKHQGHFLGLQJZKHUHEHVWWRILWWKHDODUPV
- If there is an appliance in a room where people sleep, place a CO Alarm in
this room
- Locate a CO Alarm in a room containing a flueless or open-flued appliance, and
/RFDWHDQ$ODUPLQDURRPZKHUHWKHRFFXSDQWVVSHQGPRVWRIWKHLUWLPHHJ
VLWWLQJURRP
Table C: CO Alarm Memory Indicators
CO Gas Level
ppm > 43 ppm
2 flashes every minute (approx)
ppm > 80 ppm
4 flashes every minute (approx)
ppm > 150 ppm
8 flashes every minute (approx)
Red Light Response
24 Hours On Demand (Button Press)
2 flashes
4 flashes
8 flashes
10

- In a bedsit, the CO Alarm should be placed as far away from the cooking
appliance as possible, but near to where the person sleeps
- If the appliance is in a room not normally used, such as a boiler room, the CO Alarm
should be placed just outside the room so that the Alarm will be heard more easily.
3.2 Unsuitable Locations
Do not place the CO Alarm in any of the following areas.
,QWKHLPPHGLDWHYLFLQLW\RIDFRRNLQJDSSOLDQFHNHHSLWDWOHDVWPHWUH
KRUL]RQWDOO\IURPLW
2XWVLGHWKHEXLOGLQJ
,QDQHQFORVHGVSDFHHJLQRUEHORZDFXSERDUG
,QDGDPSRUKXPLGDUHD
'LUHFWO\DERYHDVLQNRUFRRNHU
1H[WWRDGRRUZLQGRZDLUYHQWRUDQ\ZKHUHWKDWLWZRXOGEHDIIHFWHGE\
draughts.
1H[WWRDQH[WUDFWRUIDQ
2YHUKHDWVRXUFHVVXFKDVUDGLDWRUVRUKRWDLUYHQWV
:KHUHLWZRXOGEHREVWUXFWHGHJE\FXUWDLQVRUIXUQLWXUH
,QDQDUHDZKHUHWKHWHPSHUDWXUHFRXOGGURSEHORZ&RUULVHDERYH&
:KHUHGLUWRUGXVWFRXOGEORFNWKHVHQVRU
:KHUHLWFRXOGEHHDVLO\NQRFNHGRUGDPDJHGRUZKHUHLWFRXOGEHDFFLGHQWDOO\
turned off or removed.
11

,QDEDWKURRPRURWKHUDUHDVZKHUHWKH&2$ODUPPD\EHH[SRVHGWR
ZDWHUVSODVKHVGULSSLQJRUFRQGHQVDWLRQHJDERYHDQHOHFWULFNHWWOH
1HDUSDLQWWKLQQHUVVROYHQWIXPHVRUDLUIUHVKHQHUV
3.3 If locating the CO Alarm in a room with a fuel burning appliance
(see figure 1)
,ILWLVPRXQWHGRQDZDOOLWVKRXOGEHORFDWHGDWDKHLJKWJUHDWHUWKDQWKHKHLJKWRI
any door or window but still be at least 150mm from the ceiling.
,ILWLVPRXQWHGRQWKHFHLOLQJLWVKRXOGEHDWOHDVWPPIURPDQ\ZDOORUOLJKW
fitting.
7KH&2$ODUPVKRXOGEHDKRUL]RQWDOGLVWDQFHRIEHWZHHQPDQGPIURPWKH
potential CO source.
,IWKHUHLVDSDUWLWLRQLQWKHURRPWKH&2$ODUPVKRXOGEHORFDWHGRQWKHVDPHVLGH
of the partition as the potential source.
,QURRPVZLWKVORSHGFHLOLQJVWKH&2$ODUPVKRXOGEHORFDWHGDWWKHKLJKVLGHRI
WKHURRPVHHILJXUH
3.4 If locating the CO Alarm in a bedroom or in rooms remote from a fuel
burning appliance (see figure 3)
0RXQWWKH&2$ODUPUHODWLYHO\FORVHWRWKHEUHDWKLQJ]RQHRIWKHRFFXSDQWV
Whatever position is chosen make sure it is possible to view the three light
indicators, when in the vicinity of the Alarm.
WARNING: Do not use the CO Alarm on an intermittent basis, or as a portable
detector for the leakage of combustion products from fuel burning appliances or
chimneys.
12

300mm
150mm
1 to 3 m
1 to 3 m
DEAD AIR
DON'T LOCATE
HERE
CO Alarm
Figure 1
Location in room with a fuel burning appliance
13

3a. Additional information on where to place CO Alarms in recreational vehicless
Caravans and boats
Caravans and boats may have additional risks of carbon monoxide ingress through
air vents due to the nearby presence of other vehicles, engines, generators or
barbecues, however this does not change the basic guidance on location of the
Alarm. Caravans and boats should be fitted with an Alarm in the same room as
DQ\FRPEXVWLRQDSSOLDQFHVORFDWHGLQDFFRUGDQFHZLWKVHFWLRQOIWKHFDUDYDQ
CO Alarm
about
1 to 2m
Figure 3
Location in bedrooms & other rooms
remote from the appliance
LHDWEUHDWKLQJOHYHO
300mm
CO Alarm
Figure 2
Location in rooms with sloped ceilings,
the CO alarm should be located at the
high side of the room
14

or boat has a single living space which incorporates the sleeping accommodation,
it can be considered to be equivalent to a bedsit, and a single Alarm is sufficient.
However, any sleeping accommodation which is in a separate room from the
FRPEXVWLRQDSSOLDQFHVVKRXOGDOVRFRQWDLQDQ$ODUPORFDWHGLQDFFRUGDQFHZLWK
3.4.
Choosing locations in caravans and boats
It is not always possible to find an optimum location for an Alarm, for example,
a small caravan or boat may not have suitable vertical surfaces available.
1HYHUWKHOHVVZKHQILWWLQJDQDSSDUDWXVLQVXFKVLWXDWLRQVWKHWZRPRVWLPSRUWDQW
considerations when selecting an appropriate location are:
QRWPRXQWLQJWKHDSSDUDWXVGLUHFWO\DERYHDVRXUFHRIKHDWRUVWHDPDQG
PRXQWLQJ WKHDSSDUDWXVDWDGLVWDQFHRIPPIURPWKHQHDUHVWHGJHRIWKH
potential source.
Interfering Substances
- The apparatus should not be exposed to excessive amounts of fumes from petrol,
diesel, solvents, greases, alcohols and organic cleaning fluids.
- The apparatus may respond to brief exhaust gas emissions e.g. during initial
start-up of an appliance or engine.
- Hydrogen acts as an interferent and may give rise to alarms. Hydrogen can arise
from some battery charging activities and also the curing of concrete under
certain circumstances.
Testing with CO
It is recommended that at least once per year that the apparatus is tested with
Carbon Monoxide, particularly in recreational vehicles.
15

4. Installation
Warning: The Installation of this CO Alarm should not be used as a subsitute
for proper installation, use and maintenance of fuel buring appliances including
appropriate ventilation and exhaust systems.
4.1 Installation Procedure
1. Select a location complying with the advice in ‘Where
to place CO Alarms’ section.
2. Remove the mounting plate from the packaging/
Alarm.
3. Place the mounting plate on the ceiling/wall exactly
where you want to mount the Alarm. With a pencil, mark
the location of the two screw holes.
4. Taking care to avoid any electrical wiring in the ceiling,
drill holes using a 5.0mm drill bit through the centre of
the marked locations. Push the plastic screw anchors
provided into the drilled holes. Screw the mounting plate
to the ceiling/wall. If wall mounting the CO Alarm, the
panel pin may be used as an alternative to the screws,
provided it is suitable for the mounting surface.
5. Alternatively, if desired, the CO Alarm will also free
stand on a flat surface with the mounting plate attached.
,IXVLQJWKH5DGLR/,1.LQWHUFRQQHFWLRQHQVXUHWKH5)PRGXOHLVILWWHGFRUUHFWO\
LQWRWKH EDVHRI WKH $ODUP )RU IXUWKHU DGYLFH RQWKH 5DGLR/,1. LQVWDOODWLRQ VHH
ERRNOHW³RadioLINK Module for Battery Powered Carbon Monoxide Alarms´
wall panel pin
mounting pad
Figure 4
Alternative Mounting pin
16

7. Carefully line up the Alarm on the base, gently
SUHVV KRPH WZLVW RQ ± VHH ILJXUH 7KLV
FRQQHFWVWKHEDWWHULHV 7KHUHGDPEHU JUHHQ
lights will immediately flash in sequence to show
they are working. In addition, the icons on the LCD
display on the Display models will briefly light up.
3UHVV WKH 7HVW EXWWRQ DIWHU VHFRQGV WR
HQVXUHWKDWWKH$ODUPZRUNVVHHILJXUH
9. The Power light is not illuminated during
standby. This light will flash green when the test
button is pressed to indicate that power is present
and Alarm is functioning.
10. Install all the other Alarms similarly.
4.2 How to Tamperproof the Alarm
7KH$ODUPFDQEHPDGHUHVLVWDQWWRXQDXWKRULVHGUHPRYDO%UHDNRIIWKHVPDOOSLOODU
on the base as shown in figure 6a. To remove the Alarm from the ceiling it is now
QHFHVVDU\WRXVH D VPDOOVFUHZGULYHUVHH ILJXUH EWRUHOHDVH WKHFDWFKSXVK
CARBON
MONOXIDE
ALARM
ALARM
FAULT
POWER
Red
Light
Amber
Light
Green
Light
Test
Button
Figure 5
Figure 6a Figure 6b Figure 7
17

FDWFKWRZDUGVWKHFHLOLQJDQGWKHQWZLVWRIIWKH$ODUP If necessary it is possible
WR IXUWKHU VHFXUH RU WDPSHUSURRI WKH $ODUP E\ XVLQJ D 1R RU 1R WR PP
GLDPHWHUQRWVXSSOLHGVHOIWDSSLQJVFUHZWRPPORQJWRILUPO\ORFNWKH$ODUP
DQGLWVPRXQWLQJSODWHWRJHWKHUVHHILJXUH.
5. Monitoring, Testing & Maintenance
Monitoring
The CO Alarm self checks vital functions to ensure that it is operating correctly.
1. Low battery fault – the battery voltage is measured and compared against a
low voltage threshold.
2. Sensor Fault – the sensor is checked for electrical continuity and open circuit.
(QGRI/LIHIDXOW(2/±7KH$ODUPLVSURJUDPPHGWRFKHFNZKHQWKHXVHIXO
life of the Alarm has been exceeded.
000
Standby No visual or audible indication if unit is OK
Status Result
Unit OK ( Button Test) Off Off On On
Low Battery Off 1 Flash 1 Beep See NoteOff
Sensor Fault Off 2 Flashes 2 Beeps Replace AlarmOff
Table D: Monitoring & Testing Summary
Red LED
(Alarm) (Fault) (Power)
Amber LED Green LED
Sounder LCD Display
(version 2)
LCD Display
(version 1)
Action
End of Life (EOL) Off 3 Flashes 3 Beeps Replace AlarmOff
Note*- For Ei208 models replace the Alarm - For Ei207 models (see low battery instructions)
18

Low Battery:
When the battery is starting to be depleted the CO Alarm will beep and the Amber
LED will flash every minute.
The low battery beeps can be supressed for 24 hours by pressing the button.
,W LV UHFRPPHQGHG WKDW WKLV LV GRQH XQWLO HLWKHU UHSODFHPHQW EDWWHULHV RU D
UHSODFHPHQW&2$ODUPLVDYDLODEOHVRDVWRPDLQWDLQSURWHFWLRQDJDLQVW&2OHDNV
,I LW LV D &2 $ODUP ZLWK D EXLOW LQ EDWWHU\ LH IURP WKH (L VHULHV UHSODFH WKH
entire CO Alarm.
Battery Replacement (For Ei207 Models Only):
Check the ‘Replace by’ label on the side wall -
if it has been exceeded replace the entire CO
Alarm. If the Replace by’ label on the side wall
has not been exceeded, remove the Alarm from
WKHPRXQWLQJSODWHUHPRYHWKHEDWWHU\FRYHUVHH
ILJXUH DQG UHSODFH WKH EDWWHULHV 8VH RQO\ WKH
following Alkaline AAA size batteries: Duracell,
Panasonic, or Energizer.
Insert the new batteries with the orientation shown
on the base. Replace the battery cover and
UHSODFHWKH$ODUPEDFNRQLWVPRXQWLQJSODWHWKLV
DFWLRQ DXWRPDWLFDOO\ VZLWFKHV RQ WKH EDWWHULHV
%XWWRQWHVWWKH$ODUPDIWHUVHFRQGVWRFKHFN
the batteries are installed correctly and that they
are not depleted.
19
Figure 8
Other manuals for Ei207 Series
1
This manual suits for next models
8
Table of contents
Other Ei Electronics Security System manuals
Ei Electronics
Ei Electronics Ei 405 User manual

Ei Electronics
Ei Electronics Ei156TL User manual

Ei Electronics
Ei Electronics RadioLINK Ei168RC User manual

Ei Electronics
Ei Electronics RadioLINK Ei200MRF User manual
Ei Electronics
Ei Electronics MCP401RC User manual
Ei Electronics
Ei Electronics Ei Ei168RC User manual
Ei Electronics
Ei Electronics Ei154TL User manual

Ei Electronics
Ei Electronics RadioLINK Ei171RF User manual

Ei Electronics
Ei Electronics Ei208DWRF User manual

Ei Electronics
Ei Electronics Ei600 Series User manual