eInfochips iMX8XML User manual

ML Demos User Manual
iMX8XML Reference Design
Version
Status
Date
0.2
Draft
14-Oct-2019
Confidentiality Notice
Copyright (c) 2019 eInfochips. - All rights reserved
This document is authored by eInfochips and is eInfochips intellectual property, including the copyrights in all
countries in the world. This document is provided under a license to use only with all other rights, including ownership
rights, being retained by eInfochips. This file may not be distributed, copied, or reproduced in any manner, electronic
or otherwise, without the express written consent of eInfochips

Contents
Document Details ..........................................................................................................................................4
Document History..............................................................................................................................4
Definition, Acronyms and Abbreviations...........................................................................................4
References .........................................................................................................................................4
Introduction ...................................................................................................................................................5
Purpose of the document ..................................................................................................................5
About the System ..............................................................................................................................5
Pre-requisite ......................................................................................................................................5
ML Demos Background..................................................................................................................................7
Copy Demos to SD Card.....................................................................................................................7
Run Setup.........................................................................................................................................11
Running ML Demos......................................................................................................................................12
1. Crowd Counting Demo.....................................................................................................................12
2. Object Detection Demo ...................................................................................................................16
3. Face Recognition Demo ...................................................................................................................21
4. Speech Recognition Demo...............................................................................................................28
5. Basler Camera Demo .......................................................................................................................39
6. Face Recognition using Tensorflow Lite demo ................................................................................42
7. Object Recognition using Arm NN Demo ........................................................................................45
Troubleshooting...........................................................................................................................................51
HDMI................................................................................................................................................51
Camera.............................................................................................................................................51
ML Demos references..................................................................................................................................53
Figures
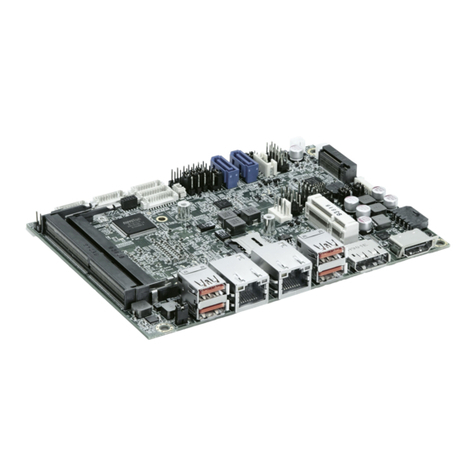
Figure 1: iMX8XML RD..............................................................................................................................5
Figure 2: Hardware Setup..........................................................................................................................6
Figure 3: SD card partitions overview after flashing firmware .............................................................8
Figure 4: Create New EXT4 partition.......................................................................................................9
Figure 5: SD card partition after creating new one..............................................................................10
Figure 6: Run Crowd Count Demo.........................................................................................................12
Figure 7: Crowd Count Pre-Captured Mode.........................................................................................15
Figure 8: Crowd Count Live Mode..........................................................................................................15

Figure 9: Run Object Detection Demo...................................................................................................17
Figure 10: Setup for object detection.....................................................................................................19
Figure 11: Sample Input Image for Object Detection..........................................................................20
Figure 12: Sample Object detection output ..........................................................................................20
Figure 13: Face Recognition Demo Testing.........................................................................................22
Figure 14: Face Recognition Output......................................................................................................25
Figure 15: Run Speech Recognition Demo..........................................................................................28
Figure 16: Basler Camera logs...............................................................................................................39
Figure 17: Basler Pylon Viewer App......................................................................................................40
Figure 18: Pylon Viewer App display issue...........................................................................................41
Figure 19: Tensorflow based Face Recognition demo run screen ...................................................42
Figure 20: Tensorflow based Face Recognition demo output screen..............................................43
Figure 21: Arm NN Object Recognition run screen.............................................................................45
Figure 22: Arm NN Object Recognition output screen........................................................................47
Figure 23: Arm NN Object Recognition using MIPI camera run screen...........................................48
Figure 24: Arm NN Object Recognition using MIPI camera output screen .....................................50
Figure 25: No HDMI Connected Error ...................................................................................................51
Figure 26: No Camera connected error.................................................................................................52
Tables
Table 1: Documents History......................................................................................................................4
Table 2: Definition, Acronyms and Abbreviations..................................................................................4
Table 3: References...................................................................................................................................4

DOCUMENT DETAILS
Document History
Version
Author
Reviewer
Approver
Name
Date
(DD-MM-
YYYY)
Name
Date
(DD-MM-
YYYY)
Name
Date
(DD-MM-
YYYY)
0.1
Anil Patel
19-Apr-2019
Prajose
John
19-Apr-
2019
Bhavin
Patel
19-Apr-
2019
0.2
Anil Patel
15-Oct-2019
Prajose
John
15-Oct-
2019
Bhavin
Patel
15-Oct-
2019
Version
Description Of Changes
0.1
initial draft
0.2
Added EIQ support and demos
Table 1: Documents History
Definition, Acronyms and Abbreviations
Definition/Acronym/Abbreviation
Description
cd
Change directory
scp
Secure copy over the network
dfl
Default
Wi-Fi
Wireless fidelity
LTE
Long-Term Evolution
ML
Machine Learning
SVM
Support Vector Machine
CNN
Convolutional Neural Network
tf
Tensorflow
Table 2: Definition, Acronyms and Abbreviations
References
No.
Document
Version
Remarks
1
Refer the User guide V2.2
2.2
Prod Release.
Table 3: References

Introduction
Purpose of the document
•Purpose of this document is to use / understand / demonstrate Machine Learning
Demos to run on iMX8ML_RD AIML firmware.
About the System
•This system contains iMX8X reference design with multiple interfaces. This is used
for Machine learning experience.
Figure 1: iMX8XML RD
Pre-requisite
•x86 host system having Linux Ubuntu 16.04 LTS installed
•Basic understanding of Linux commands
•Flash the AIML firmware image to SD Card with all required python packages
(Refer User Guide)
•Webcam or Mezzanine D3 Camera
•USB HUB / mouse / Keyboard
•HDMI Display with HDMI connector
•Ethernet or WiFi with Internet Connectivity (for Audio google API Demo Only)
•Open board's terminal- console (minicom) on x86 Host PC (Refer User Guide)

Figure 2: Hardware Setup

ML DEMOS BACKGROUND
To demonstrate board’s capabilities for Machine Learning demos, we implemented few Audio and
video related ML demos. These demos mainly depend on OpenCV, Tensorflow, Caffe, ARM NN
and some python packages. All video ML demos required video source (webcam or D3
Mezzanine based OV5640 camera) to capture live stream and perform some action on it.
Moreover, Audio demos capture audio from DMIC or any other USB mic and perform speech
recognition on it.
All Demos are located on home folder of board under “ARROW_DEMOS” name.
Copy Demos to SD Card
(If we have constraint of size of board and want to copy demos to USB or another partition then only
follow this steps otherwise no need to do these steps.)
Our original firmware image took around 7GB space inside SD card. We can use rest of the
space of sdcard as storage device for ML demos. For that, we need to create FAT or EXT4
partition. We recommended ext4 partition as it is default Linux file system. To do so follow below
procedure.
•Flash SD card with required AIML firmware release. (Firmware release version must be
BETA release 0.3 or above). (Refer User Guide for this.)
•In Linux HOST OS, open “disk” utility and see sdcard partitions in it. You can see image
like below.

Figure 3: SD card partitions overview after flashing firmware
•As shown in above figure, in SD card partitions, we can see unused partition (10 GB) at
last. We can utilized it.
•Now Click on “+” sign to create new partition.
•Please select file system ext4 and name it as shown below.

Figure 4: Create New EXT4 partition
•It will take few times and create partition and we can able to mount that partition. (See
beow Figure for reference.)

Figure 5: SD card partition after creating new one
•Copy ARROW DEMOS on this partition. If you are unable to do that then kindly unmount
and mount again.
•After successful copy, boot our AIML board with this sdcard.
•After boot up we can see Demos at below location:
# ls -la /run/media/mmcblk1p3/ARROW_DEMOS/
total 40
drwxrwxrwx 7 1000 tracing 4096 Apr 9 14:22 .
drwx------ 5 1000 tracing 4096 Apr 9 14:22 ..
drwxrwxrwx 4 1000 tracing 4096 Apr 1 13:07 ai-crowd_count
drwxrwxrwx 6 1000 tracing 4096 Apr 9 14:40 face_recognition
drwxrwxrwx 4 1000 tracing 4096 Apr 9 12:24 real-time-object-detection
-rwxrwxrwx 1 1000 tracing 9322 Apr 9 14:18 run_ml_demos.sh
drwxrwxrwx 2 1000 tracing 4096 Apr 12 11:12 speech_recognition_tensorflow

Run Setup
All required Python packages for ML demos are already installed in AIML firmware image. Our
demos run using Python3 so we have added package for Python3 and not for python. We have
also provide support for Python and Python3 PIP Package. Through which we can add or remove
any python package and remove dependencies for rebuilding firmware image each times.
To install any python3 or python package use command:
<pip3 or pip> install <PACKAGE NAME OR PACKAGE WHEEL NAME>
To remove any python3 or python package use command:
<pip3 or pip> uninstall <PACKAGE NAME>
Some python packages, i.e. tensorflow has no standard python wheel package for ARM
AARCH64 platform so we need to cross compile from source and need to create one (wheel
package) for board. We already did that and provide wheel packages at home folder to setup
python module on our board. For that user need to run setup_ml_demo.sh script using below
commands:
# sh ~/setup_ml_demo.sh
This script takes approximately 15-20 minutes and will install all required python3 packages for
ML demos so it has to be run once before running all the ML demos. We already provide
required wheel package at home folder so this script do not required any internet connectivity for
installing packages. However, apart from script if you want to install any package as describe
above then you required clientless (No firewall) internet connectivity.
ML Demos not comes with default firmware images. This is because we do not want to increase
size of original firmware image as it take much times to flash SD card. In addition, by separate
release of ML demos we can remove dependencies of firmware image release. This lead us to
improve our demos without affecting firmware packages if we don’t have any dependencies of
software or packages.

RUNNING ML DEMOS
To run ML Demos we have created run_ml_demo.sh shell script. This script ask for user
preferences like demo type, camera types, camera node entry, desired MIC etc and based on
that run ML demos.
In this section, we discuss how to run each demo. Details description of Demo is in next section.
1. Crowd Counting Demo
This is a demo application using Python, QT, and Tensorflow to be run on embedded
devices for Crowd counting. In this demo, we count the heads/persons in the crowd.
Therefore, it is useful in human flow monitoring or traffic control.
This demo run on either pre-captured Image mode or in Live Camera mode. In pre-captured
image mode, we took few sample images and find head counts in those images. In live
camera mode we capture live frame through webcam or D3 mezzanine camera and try to
find head count from it. User can select any mode by clicking on GUI.
Pre-requisite:
•Webcam or D3 Mezzanine camera
•USB mouse
•HDMI Display having minimum 1080p resolution
Steps to run Demo:
Figure 6: Run Crowd Count Demo

Run /run/media/mmcblk1p3/ARROW_DEMOS/run_ml_demos.sh script and select
option 1.
See below full log to run demo, where user input is in BOLD RED fonts.
# sh /run/media/mmcblk1p3/ARROW_DEMOS/run_ml_demos.sh
######## Welcome to ML Demos [AI Corowd Count/Object detection/Face
Recognition/Speech Recognition/Arm NN] ##########
Prerequisite: Have you run <setup_ml_demo.sh>?
Press: (y/n)
n
****** Script Started *******
Setup is already completed. No need to do anything. Exiting...
Choose the option from following
Press 1: AI Crowd Count
Press 2: Object Detection
Press 3: Face Recognition
.
.
Select: (1/2/3/4/5)
1
Welcome to AI Crowd Counting
This is a demo application using Python, QT, Tensorflow to be run on embedded devices for
Crowd counting
You can choose Option for Live Mode (Camera)/Pre-captured Image Mode By clicking on
GUI
Please choose type of camera used in demo
Press 1: For USB Web Cam
Press 2: For D3 Mazzanine Camera
2

D3 Mazzanine Camera is used for demo
[ 130.962684] random: crng init done
[ 130.966100] random: 7 urandom warning(s) missed due to ratelimiting
ImportError: No module named 'numpy.core._multiarray_umath'
ImportError: No module named 'numpy.core._multiarray_umath'
NN> using tensorflow version: 1.3999999999999999
NN> using CPU-only (NO CUDA) with tensorflow
##### LOADING TENSORFLOW GRAPH
##### 160x120 used for live mode as these typically are close
##### 640x480 used for pre-captured large images of crowd as these are far
TF> using 640x480 resolution
If you run demo using USB webcam then last entry would be like:
Please choose type of camera used in demo
Press 1: For USB Web Cam
Press 2: For D3 Mazzanine Camera
1
USB Web Camera is used for demo
Enter Camera device node entry e.g. /dev/video4
/dev/video7
Here “/dev/video7” is webcam camera node by which we capture frame. User can check
his/her node entry by plugging/unplugging webcam and see which /dev/ node entry is
removed/showed.
By default demo run in pre-capture mode, and see output of headcount with inference time
and date. Inference time is time taken to process one frame and finding headcount from it.
Inference time is in Milli Seconds (ms). In pre-capture mode, Inference time is around 5000
to 6000 ms (5 to 6 sec) while in live mode, inference time is 450 to 550 ms. That’s because
we use smaller input image in live mode.
As shown in below image, on right side we show “Density Maps” for left side input image.

Figure 7: Crowd Count Pre-Captured Mode
Figure 8: Crowd Count Live Mode

2. Object Detection Demo
In this Demo, we detect few objects like aeroplane, bicycle, bus, car, cat, cow, dog, horse,
motorbike, person, sheep, train (objects necessary for self-driving cars.)
Here we have two version of Object detection. Both demo use same caffe based object
detection model so accuracy remain same for both the demos. The only difference is in video
output.
In Fast Object detection, we have smooth video. Here we create two python process. In one
python process, we sample one frame at a time and done object detection on that frame.
Another python process will use this object detection credentials and apply it on the entire
frame it read from Camera. Thus, Camera output is smooth but object detection take 2 to 3
secs to give actual real-time output.
In Slow Object detection, we have single python process, which read camera frame first and
do object detection on it. Therefore, here we do object detection on each frame and video
output is choppy. However, here we got real-time object detection output. No delay. Due to
that, this demo is perfect to identify board’s capabilities.
Pre-requisite:
•Webcam or D3 Mezzanine camera
•USB mouse
•HDMI Display having minimum 1080p resolution
•Objects which we want to detect
•Object Images and another PC or laptop (in case of no real objects)
Steps to run Demo:
Run /run/media/mmcblk1p3/ARROW_DEMOS/run_ml_demos.sh script and select
option 2.

Figure 9: Run Object Detection Demo
See below full log to run demo, where user input is in BOLD RED fonts.
# sh /run/media/mmcblk1p3/ARROW_DEMOS/run_ml_demos.sh
######## Welcome to ML Demos [AI Corowd Count/Object detection/Face
Recognition/Speech Recognition/Arm NN] #########
#
Prerequisite: Have you run <setup_ml_demo.sh>?
Press: (y/n)
y
Choose the option from following
Press 1: AI Crowd Count
Press 2: Object Detection
Press 3: Face Recognition
.
.
Select: (1/2/3/4/5)

2
Welcome to object Detection
This model detect aeroplane, bicycle, bus, car, cat, cow, dog, horse, motorbike, person,
sheep, train (objects necess
ary for self-driving)
Please choose type of camera used in demo
Press 1: For USB Web Cam
Press 2: For D3 Mazzanine Camera
1
USB Web Camera is used for demo
Enter Camera device node entry e.g. /dev/video4
/dev/video7
Which Object detection Demo you want to run:
Press 1: For Fast Object Detection. Here Video Output is smooth.
Because we randomly sample only few frames from camera and applied same object
detections on the rest of frames.
Press 2: For Slow Object detection. Here we applied object detections on each camera
frame and display output.
So video output is very choppy. But get real-time detection here.
Please Select: (1/2)
2
Slow Object Detection demo
Loading model...
Starting video stream...
(python3:3911): GStreamer-CRITICAL **: gst_element_get_state: assertion
'GST_IS_ELEMENT (element)' failed

Using Wayland-EGL
Using the 'xdg-shell-v6' shell integration
Total Elapsed time: 15.52
Approx. FPS: 0.90
Exiting Demo...
Now in this demo, we need to provide object in front of camera to detect it. Person is the best
real-time object for detection. Most of the object is easily available outside environment.
However, to test model we don’t need actual object. We can simply provide good image of
object instead of real object to verify our model. Input image must be provided with correct
angle and exposure of light to detect objects. For that put input image inside PC or Laptop
and set camera in front of it. For reference, we have attached below figure of setup. Also
provided sample input image and its outputs.
Figure 10: Setup for object detection

Figure 11: Sample Input Image for Object Detection
Figure 12: Sample Object detection output
As shown in above figure, in output image, dog is not detected, as it is not in good angle and
exposure. Due to that model detect that with very low percentage and we ignore that due to
low confidence. Also model confused train image with train and bus. If we retrain our model
to train more images like that then we may get better performance.
Table of contents
Other eInfochips Single Board Computer manuals
