EINHELL GE-HC 18 Li T User manual

GE-HC 18 Li T (I)
GE-LC 18 Li T
Art.-Nr.: 3410789 I.-Nr.: 21022
Art.-Nr.: 3410875 I.-Nr.: 21022
7
EN Operating instructions
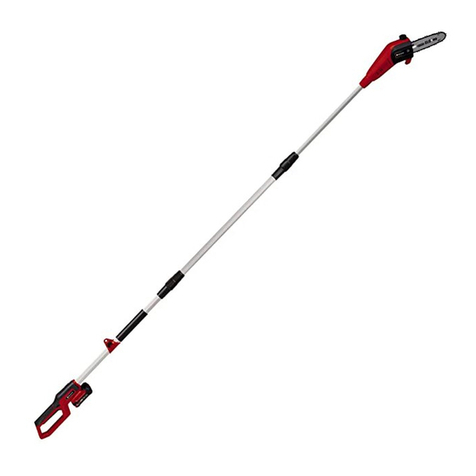
Cordless Telescopic Pole Chain
Saw
FR Mode d’emploi
Scie à chaîne à perche télesco-
pique sans fil
SP Manual de instrucciones
Motosierra inalámbrica de altura
Anl_GE_HC_18_Li_T_Part1_USA_SPK7.indb 1Anl_GE_HC_18_Li_T_Part1_USA_SPK7.indb 1 23.11.2022 14:22:3423.11.2022 14:22:34

- 2 -
1
2
14
12
8
3
6
18
2
15
10
7
3
1
16
13
11
9
6
5
4
2
17
53 18 5 6
Anl_GE_HC_18_Li_T_Part1_USA_SPK7.indb 2Anl_GE_HC_18_Li_T_Part1_USA_SPK7.indb 2 23.11.2022 14:22:3523.11.2022 14:22:35

- 3 -
4
6 7
8 9
27
16
7
19
16
15
28 15
27
5
21 22
23
20
Anl_GE_HC_18_Li_T_Part1_USA_SPK7.indb 3Anl_GE_HC_18_Li_T_Part1_USA_SPK7.indb 3 23.11.2022 14:22:3623.11.2022 14:22:36

- 4 -
11
12 13
14
8
15
31 8
22
30
7
10
29
0.08"/plg (2 mm)
Anl_GE_HC_18_Li_T_Part1_USA_SPK7.indb 4Anl_GE_HC_18_Li_T_Part1_USA_SPK7.indb 4 23.11.2022 14:22:4123.11.2022 14:22:41

- 5 -
16 17
18 19
20 21
13
26
24
25
9 10 11 12
1
26
Anl_GE_HC_18_Li_T_Part1_USA_SPK7.indb 5Anl_GE_HC_18_Li_T_Part1_USA_SPK7.indb 5 23.11.2022 14:22:4423.11.2022 14:22:44

- 6 -
23
24
26 27
32
2.
1.
22
26
90°
25
34
33
Anl_GE_HC_18_Li_T_Part1_USA_SPK7.indb 6Anl_GE_HC_18_Li_T_Part1_USA_SPK7.indb 6 23.11.2022 14:22:5023.11.2022 14:22:50

- 7 -
28
vu
L
33 ft (10m)
29 1
6 7 8 9 10 11
2 3 4 5
Anl_GE_HC_18_Li_T_Part1_USA_SPK7.indb 7Anl_GE_HC_18_Li_T_Part1_USA_SPK7.indb 7 23.11.2022 14:22:5323.11.2022 14:22:53

EN
- 8 -
DANGER!
When using the equipment, a number of safety
precautions must be observed to avoid injuries
and damage. Please read the complete operating
instructions and safety information with due care.
Keep these operating instructions in a safe place
so that the information is available at all times. If
you give the equipment to any other person, hand
over these operating instructions and the safety
information as well. We cannot accept any liability
for damage or accidents which arise due to
failure to follow these instructions and the safety
information.
1. Safety information
Read All Instructions
WARNING: When using electric gardening
appliances, basic safety precautions should
always be followed to reduce the risk of fire,
electric shock, and personal injury, including the
following:
FOR ALL APPLIANCES
• Avoid dangerous environments - do not use
appliances in damp or wet locations.
• Don’t use in rain.
• Keep children away - all people and pets
should be kept at a distance from the work
area.
• Dress properly - do not wear loose clothing or
jewelry. They can be caught in moving parts.
Wear protective clothing; use of work gloves,
long pants, a long sleeved shirt and safety
footwear is recommended when working
outdoors.Wear protective hair covering to
contain long hair.
• Use safety glasses - always use face or dust
mask if the area in which you are working is
dusty.The purpose of the safety rules is to
attract your attention to possible dangers.
The safety symbols and the explanations
with them, require your careful attention and
understanding.The safety warnings do not
by themselves eliminate any danger. The
instruction or warnings they give are not
substitutes for proper accident prevention
measures.
• Use right appliance - do not use appliance for
any job except that for which it is intended.
• Do not force appliance - it will do the job
better and with less likelihood of a risk of
injury at the rate for which it was designed.
• Do not overreach - keep proper footing and
balance at all times.
• Stay alert. Use common sense. Do not
operate appliance when you are tired or
under the influence of drugs, alcohol or
medication.
• When not in use, appliances should be stored
indoors in dry places out of reach of children.
• Maintain appliance with care. Follow
instructions for lubricating and changing
accessories. Keep handles dry, clean, and
free from oil and grease.
• Check damaged parts. Before using the
appliance, make sure the safety guards are
intact. Never use a tool without its safety
guard. Check the alignment of the moving
parts, the binding of the moving parts.
• Check for broken or defective parts that
can affect the safe operation of your tool. A
guard or other part that is damaged should
be properly repaired or replaced by an
authorized service centre unless indicated
elsewhere in this manual.
• Recharge only with the charger specified by
the manufacturer. A charger that is suitable
for one type of battery pack may create a risk
of fire when used with another battery pack.
• Use appliances only with specifically
designated battery packs. Use of any other
battery packs may create a risk of injury and
fire.
• When battery pack is not in use, keep it away
from other metal objects, like paper clips,
coins, keys, nails, screws or other small metal
objects, that can make a connection from
one terminal to another. Shorting the battery
terminals together may cause burns or a fire.
• Under abusive conditions, liquid may be
ejected from the battery; avoid contact. If
contact accidentally occurs, flush with water.
If liquid contacts eyes, additionally seek
medical help. Liquid ejected from the battery
may cause irritation or burns. (This advice is
considered correct for conventional NiMh,
NiCd, lead acid and Lithium-ion cell types. If
this advice is incorrect for a cell design that
differs from these, then the correct advice
may be substituted.)
• Do not use a battery pack or appliance that is
damaged or modified. Damaged or modified
batteries may exhibit unpredictable behavior
resulting in fire, explosion or risk of injury.
• Do not expose a battery pack or appliance
to fire or excessive temperature. Exposure to
fire or temperature above 266°F (130°C) may
Anl_GE_HC_18_Li_T_Part1_USA_SPK7.indb 8Anl_GE_HC_18_Li_T_Part1_USA_SPK7.indb 8 23.11.2022 14:22:5323.11.2022 14:22:53

EN
- 9 -
cause explosion.
• Follow all charging instructions and do
not charge the battery pack or appliance
outside of the temperature range specified
in the instructions. Charging improperly or at
temperatures outside of the specified range
may damage the battery and increase the risk
of fire.
• Have servicing performed by a qualified
repair person using only identical
replacement parts.This will ensure that the
safety of the product is maintained.
• Do not modify or attempt to repair the
appliance or the battery pack (as applicable)
except as indicated in the instructions for use
and care.
1.) FOR ALL BATTERY-OPERATED
APPLIANCES:
• Do not charge appliance in rain, or in wet
locations.
• Do not use battery-operated appliances in
the rain. Always remove or disconnect battery
pack before adjusting, cleaning, servicing or
transporting the garden appliances.
2.) FOR ALL BATTERY-OPERATED
PRODUCTS EMPLOYING A DETACHABLE
OR SEPARABLE
BATTERY:
• Use only the following type and size battery:
18V 1.5Ah PXC Lithium-ion battery
18V 2.0Ah PXC Lithium-ion battery
18V 2.5Ah PXC Lithium-ion battery
18V 3.0Ah PXC Lithium-ion battery
18V 4.0Ah PXC Lithium-ion battery
18V 3.0Ah PXC Plus Lithium-ion battery
18V 4.0Ah PXC Plus Lithium-ion battery
18V 5.2Ah PXC Plus Lithium-ion battery
18V 4.0Ah/6.0Ah PXC Plus Lithium-ion
battery
18V 5.0Ah/8.0Ah PXC Plus Lithium-ion
battery
• Do not dispose of the battery in a fire.The
cell may explode. Check with local codes for
possible special disposal instructions.
• Do not open or mutilate the battery. Released
electrolyte is corrosive and may cause
damage to the eyes or skin. It may be toxic if
swallowed.
• Exercise care in handling the battery in order
not to short it with conducting materials such
as rings, bracelets, and keys. The battery or
conductor may overheat and cause burns.
3.) AVOID UNINTENTIONAL STARTING – DO
NOT INSERT BATTERY WHILE YOUR
FINGER IS ON THE SWITCH. BE SURE
SWITCH IS OFF WHEN INSERTING THE
BATTERY.
GENERAL SAFETY WARNINGS FOR THE
BATTERY PACK
• Dispose of used battery promptly and
properly. When disposing of secondary cells
or batteries, keep cells or batteries of different
electrochemical systems separate from each
other.
• Keep battery out of reach of children and in
original package until ready to use.
• Never put batteries in one’s mouth. If
swallowed, contact local poison control
centre immediately.
• CAUTION – The battery used in this device
may present a risk of fire or chemical burn
if mishandled. Replace battery with Einhell/
lawn master brand only. Use of another
battery may present a risk of fire or explosion.
• WARNING: Do not use a visibly damaged
battery pack or appliance.
• WARNING: Do not modify or attempt to repair
the appliance or the battery pack.
• BATTERIES MUST BE RECYCLED.
• Do not short-circuit a cell or battery. Do not
store cells or batteries haphazardly in a box
or drawer where they may short-circuit each
other or be short-circuited by conductive
materials.
• Do not subject cells or batteries to
mechanical shocks.
• Keep cells and batteries clean and dry.Wipe
the cell or battery terminals with a clean dry
cloth if they become dirty.
• Do not maintain secondary cells and batteries
on charge when not in use.
• Retain the original cell and battery. Do not
use any charger other than that specifically
provided for use with the equipment.
Secondary cells and batteries need to be
charged before use. Always use the correct
charger and refer to the manufacturer’s
instructions or equipment manual for proper
charging instructions.
• When possible, remove the battery from the
equipment when not in use.
• Prevent unintentional starting. Ensure the
switch is in the off-position before connecting
to the battery pack, picking up or carrying the
appliance. Carrying the appliance with your
finger on the switch or energizing appliances
Anl_GE_HC_18_Li_T_Part1_USA_SPK7.indb 9Anl_GE_HC_18_Li_T_Part1_USA_SPK7.indb 9 23.11.2022 14:22:5323.11.2022 14:22:53

EN
- 10 -
that have the switch on invites accidents.
• Disconnect the battery pack from the
appliance before making any adjustments,
changing accessories, or storing appliance.
Such preventive safety measures reduce the
risk of starting the appliance accidentally.
• Under abusive conditions, liquid may be
ejected from the battery; avoid contact. If
contact accidentally occurs, flush with water.
If liquid contacts eyes, additionally seek
medical help. Liquid ejected from the battery
may cause irritation or burns.
• Have servicing performed by a qualified
repair person using only identical
replacement parts.This will ensure that the
safety of the product is maintained.
• Protect your rechargeable battery against
moisture, rain and high humidity. Moisture,
rain and high humidity can cause dangerous
cell damage. Never charge or work with
batteries which have been exposed to
moisture, rain or high humidity – replace them
immediately.
• If your equipment is fitted with a detachable
battery, remove the battery for safety reasons
after you have finished your work.
IMPORTANT SAFETY INSTRUCTIONS FOR
CHARGER
WARNING: This product may contain lead,
phthalate or other chemicals known to the State
of California to cause cancer, birth defects and
other reproductive harm. Please wash your hands
after use.
Protection from environmental influences
1. Wear suitable work clothes.Wear safety
goggles.
2. Protect your cordless tool and the battery
charger from moisture and rain. Moisture
and rain can cause dangerous cell damage.
3. Do not use the cordless tool or the battery
charger near vapors and inflammable liquids.
4. Use the battery charger and cordless tools
only in dry conditions and an ambient
temperature of 10-40°C.
5. Do not keep the battery charger in places
where the temperature is liable to reach over
40°C. In particular, do not leave the battery
charger in a car that is parked in the sunshine.
6. Protect batteries from overheating.
Overloads, over-charging and exposure to
direct sunlight will result in overheating and
cell damage. Never charge or work with
batteries which have been overheated –
replace them immediately if possible.
7. Storage of batteries, battery chargers
and cordless tools. Store the charger and
your cordless tool only in dry places with an
ambient temperature of 10-40°C. Store your
lithium-ion battery pack in a cool, dry place at
a temperature of 10-20°C. Protect them from
humidity and direct sunlight. Only place fully
charged batteries in storage (charged at least
40%).
8. Prevent the lithium-ion battery pack from
freezing. Battery packs which were stored
below 0°C for more than 60 minutes must be
disposed of.
9. When handling batteries beware of
electrostatic charge: Electrostatic discharges
cause damage of the electronic protection
system and the battery cells. Avoid
electrostatic charging and never touch the
battery poles.
Chain saw safety warnings
1) Keep all parts of the body away from the saw
chain. Do not remove cut material or hold
material to be cut when saw chain is moving.
Make sure the switch is offwhen clearing
jammed material. Saw chain continues to
move after the switch is turned off. A moment
of inattention while operating the pole chain
saw may result in serious personal injury.
2) Carry the pole chain saw by the handle with
the saw chain stopped.When transporting
or storing the pole chain saw, always fit the
saw chain guard. Proper handling of the pole
chain saw will reduce possible personal injury
from the saw chain.
3) Hold the pole chain saw by insulated gripping
surfaces only, because the saw chain may
contact hidden wiring. A saw chain contacting
a ″live″wire may make exposed metal parts
of the pole chain saw ″live″and could give
the operator an electric shock.
4) Do not use the pole chain saw in bad weather
conditions, especially when there is a risk
of lightning.This decreases the risk of being
struck by lightning.
5) To reduce the risk of electrocution, never use
near any electrical power lines. Contact with
or use near power lines may cause serious
injury or electric shock resulting in death.
6) Always use two hands when operating the
pole chain saw. Hold the pole chain saw with
both hands to avoid loss of control.
7) Always use head protection when operating
the pole chain saw overhead. Falling debris
Anl_GE_HC_18_Li_T_Part1_USA_SPK7.indb 10Anl_GE_HC_18_Li_T_Part1_USA_SPK7.indb 10 23.11.2022 14:22:5323.11.2022 14:22:53
EN
- 11 -
can result in serious personal injury.
This equipment is not intended to be used
by persons (including children) with reduced
physical, sensory or mental capacities or those
with a lack of experience and/or knowledge
unless they are supervised by a person who is
responsible for their safety or they have received
instructions from such a person in how to use
the equipment safely. Children must always be
supervised in order to ensure that they do not
play with the equipment.
SAVE THESE INSTRUCTIONS
Explanation of the symbols on the equipment
(Fig. 29):
1. Warning!
2. Wear safety goggles, a face guard and ear
protection.
3. Protect the equipment from rain and humidity.
4. Maximum cutting length of the pole chain
saw.
5. Electric shock can cause fatal injury. Keep a
distance of at least 33 ft. (10 m) from power
lines.
6. Read the directions for use before operating
the equipment.
7. Wear sturdy, non-slip footwear.
8. Watch out for falling parts.
9. Keep your distance.
10. Direction of the chain movement and teeth of
the pole chain saw.
11. Wear safety gloves.
2. Layout and items supplied
2.1 Layout
1. Grip
2. On/Offswitch
3. Safety lock-off
4. Safety lock-offfor the handle angle adjuster
5. Assembly nut
6. Tube
7. Shoulder strap with safety release
8. Additional handle
9. Telescopic tube 1 lock nut
10. Telescopic tube 1
11. Telescopic tube 2 lock nut
12. Telescopic tube 2 with motor housing
13. Safety lock-offfor the motor housing angle
adjuster
14. Chain saw attachment
15. Chain saw bar
16. Saw chain
17. Chain saw guard
18. Handle housing
19. Carabiner
20. Strap attachment with metal loops
21. Hex. screw
22. Lock
23. Handle locking latch
24. Safety lock-off
25. Motor housing
26. Lock button
27. Chain tension lock knob
28. Sprocket wheel
29. Chain tensioning wheel
30. Oil tank
31. Oil tank cap
32. Pushlock button
33. Battery capacity indicator
34. Battery capacity indicator button
2.2 Items supplied
Please check that the article is complete as
specified in the scope of delivery. If parts are
missing, please contact our service center or the
store where you made your purchase at the latest
within 5 work days after purchasing the article and
upon presentation of a valid bill of purchase.
• Open the packaging and take out the
equipment with care.
• Remove the packaging material and any
packaging and/or transportation braces (if
present).
• Check to see if all the items are supplied.
• Inspect the equipment and accessories for
transport damage.
• If possible, keep the packaging until the end
of the guarantee period.
Danger!
The equipment and packaging material are
not toys. Do not let children play with plastic
bags, plastic sheets and small parts. There is
a risk of choking and suffocating!
• Complete handle
• Complete tube with motor unit
• Shoulder strap with safety release
• Chain saw attachment
• Bar
• Saw chain
• Chain saw guard
• Original operating instruction with safety
information
Anl_GE_HC_18_Li_T_Part1_USA_SPK7.indb 11Anl_GE_HC_18_Li_T_Part1_USA_SPK7.indb 11 23.11.2022 14:22:5323.11.2022 14:22:53
EN
- 12 -
Separately available accessories
18V 1.5Ah PXC Lithium-Ion battery
18V 2.0Ah PXC Lithium-Ion battery
18V 2.5Ah PXC Lithium-Ion battery
18V 3.0Ah PXC Lithium-Ion battery
18V 4.0Ah PXC Lithium-Ion battery
18V 3.0Ah PXC Plus Lithium-Ion battery
18V 4.0Ah PXC Plus Lithium-Ion battery
18V 5.2Ah PXC Plus Lithium-Ion battery
18V 4.0Ah/6.0Ah PXC Plus Lithium-Ion battery
18V 5.0Ah/8.0Ah PXC Plus Lithium-Ion battery
18V PXC Dual Port Fast Charger
18V PXC Fast Charger
Contact your local retailer for more specific
models of batteries and charger available in your
area.You can also explore battery + charger
options at Einhell.com.
3. Intended use
Pole chain saw with telescopic handle
The chain saw attachment is allowed to be used
only on the supplied motor head.
The chain saw with telescopic handle is designed
for lopping offtree branches. It is not suitable for
extensive sawing work, felling trees or sawing any
materials other than wood.
The equipment is allowed to be used only for its
prescribed purpose. Any other use is deemed to
be a case of misuse.The user/operator and not
the manufacturer will be liable for any damage or
injuries of any kind resulting from such misuse.
Please note that our equipment has not been
designed for use in commercial, trade or
industrial applications. Our warranty will be voided
if the equipment is used in commercial, trade or
industrial businesses or for equivalent purposes.
4. Technical data
Motor power supply: ............................ 18V
Bar chain length:.................................. 8" (20 cm)
Chain pitch:...................... 3/8" (9.5 mm), 33 teeth
Chain thickness: .........................0.050" (1.3 mm)
Saw chain: ...............................Oregon 91P033X
Bar: .................................. Oregon 080NDEA041
Cutting speed
at rated RPM:.................. 12.34 ft./sec. (3.76 m/s)
Telescopic shaft: .... 6 ft. to 9 ft. (1.83 m to 2.77 m)
Oil tank capacity:...................... 125 ml (4.23 floz)
Adjustable
head angles: ...........-60°,-40°,-20°,0°,20°,40°,60°
Adjustable handle angles:........... -40°,-20°,0°,20°
Weight (Tool only): ...........................8.8 lbs (4 kg)
Reduce noise generation and vibration to a
minimum!
• Use only equipment that is in perfect
condition.
• Maintain and clean the equipment regularly.
• Adapt your way of working to the equipment.
• Do not overload the equipment.
• Have the equipment checked if necessary.
• Switch off the equipment when not in use.
• Wear gloves.
5. Before starting the equipment
Caution! Install the battery only after you have
completely assembled the device and made all
settings. Always wear protective gloves when
working on the equipment to protect yourself
against injury. Carefully unpack all parts and
check that they are complete (Fig. 1).
5.1 General information on assembly
a) Fig. 2-3: Push the tube (6) onto the handle
housing (18) as far as the mark and screw it
tight with the assembly nut (5).
b) Fig. 4: Hook the carabiner (19) of the shoulder
strap (7) into the strap attachment (20).
c) Fig. 5: The additional handle (8) consists of
the hex. screw (21) and lock (22). It is fitted
to the handle locking latch (23) as illustrated.
Push the hex. screw (21) into the additional
handle and screw it tight to the lock (22).
Anl_GE_HC_18_Li_T_Part1_USA_SPK7.indb 12Anl_GE_HC_18_Li_T_Part1_USA_SPK7.indb 12 23.11.2022 14:22:5323.11.2022 14:22:53
EN
- 13 -
5.2 Fitting the chain saw attachment (for use
as a pole chain saw)
5.2.a Assembly of the bar and the saw chain
• Undo the chain tension lock knob (27) of the
chain wheel cover (Fig. 6).
• Take off the chain wheel cover.
• Lay the chain as shown in the groove which
runs around the chain saw bar (Fig. 7).
• Insert the bar and chain as shown in the
mounting of the chain saw (Fig. 8). At the
same time guide the chain around the
sprocket wheel (Fig. 8/ Item 28).
• Attach the chain wheel cover and fasten it
hand-tight with the chain tension lock knob
(Fig. 9/Item 27).
Do not fully tighten the chain tension lock knob
until after you have adjusted the chain tension
(see section 5.2.b.).
5.2.b Tensioning the saw chain
Caution! Always remove the battery from the
device before inspection and adjustment. Always
wear protective gloves when working on the chain
saw to protect yourself against injury.
• Undo the chain tension lock knob (27) of the
chain wheel cover a few turns (Fig. 6).
• Adjust the chain tension with the chain
tensioning wheel (Fig. 10/Item 29). Turning
the wheel clockwise increases the chain
tension, turning it counter-clockwise
decreases the chain tension.The saw chain
is correctly tensioned if it can be lifted approx.
0.08" (2 mm) in the middle of the bar (Fig. 11).
• Tighten the chain tension lock knob (27) of
the chain wheel cover (Fig. 9).
Important! All the chain links must lie properly in
the guide groove of the bar.
Notes on tensioning the chain:
The chain must be properly tensioned to ensure
safe operation.When the saw chain can be raised
by around 0.08" (2 mm) in the middle of the bar,
you know that the chain tension is ideal. During
cutting, the temperature of the chain rises and
its length changes. It is important therefore to
check the chain tension at least every 10 minutes
and to adjust it again as required.This applies
in particular to new saw chains. When you have
finished working, slacken the chain again as it
will shorten when it cools down.This will help to
prevent damage to the chain.
5.2.c Saw chain lubrication
Caution! Always remove the battery from the
device before inspection and adjustment. Always
wear protective gloves when working on the chain
saw to protect yourself against injury.
Important! Never operate the chain if it is not
lubricated with saw chain oil. Use of the chain saw
without saw chain oil or if the oil level is below the
viewing window will result in damage to the chain
saw!
Important! Be aware of the temperature
conditions:
Different lubricants with completely different
viscosities are required at different ambient
temperatures. At lower temperatures you will need
low viscosity oils in order to achieve a sufficient
lubricating film. However, if the same low viscosity
oil is used during the summer it will become even
thinner due to the ambient temperatures alone,
and as a result the lubricating film could break
down, causing the chain to overheat and become
damaged. In addition, the chain oil would burn
and produce unnecessary pollutants.
Filling the oil tank (Fig. 12):
• Place the chain saw on a flat surface.
• Clean the area around the oil tank cap (Fig.
12/Item 31) and then open the oil tank cap.
• Fill the oil tank (Fig. 12/Item 30) with saw
chain oil. In the process, make sure that no
dirt enters the tank, as this could cause the oil
nozzle to become blocked.
• Close the oil tank cap (Fig. 12/Item 31).
After the chain saw attachment has been fitted
and when the equipment is not being used, slip
the chain saw guard (Fig. 1/Item 17) over the
mounted bar with saw chain in order to prevent
injuries.
5.3 Adjusting the additional handle (Fig. 13-
14)
a) Setting the tilt of the additional handle
Open the lock (22). Set the desired tilt of the
additional handle (8). Close the lock.
b) Shifting the additional handle
Open the lock and slide the additional handle (8)
into the required position. Close the lock.
5.4 Using the shoulder strap
Warning! Always use the shoulder strap when
working with the equipment. Switch offthe
Anl_GE_HC_18_Li_T_Part1_USA_SPK7.indb 13Anl_GE_HC_18_Li_T_Part1_USA_SPK7.indb 13 23.11.2022 14:22:5423.11.2022 14:22:54

EN
- 14 -
equipment before you take offthe shoulder strap
(Otherwise there is a risk of injury).
1. Hook the carabiner (Fig. 4/Item 19) into the
strap attachment (20).
2. Slip the shoulder strap (Fig. 15/Item 7) over
your shoulder.
3. Adjust the length of the shoulder strap so that
the strap attachment is at waist level (Fig. 15).
4. The shoulder strap is equipped with a buckle.
Press the locking tabs together (Fig. 16) if you
need to put down the equipment quickly.
5. To change the strap position on the
equipment, press together the two metal
loops on the strap attachment (Fig. 4/Item 20)
and adjust the strap attachment on the tube.
5.5. Adjusting the angle of the handle (Fig.
17)
Press the two safety lock-offs (24) and adjust the
angle of the handle (1) to any of 4 latching posi-
tions.
5.6. Adjusting the angle of the motor housing
(Fig. 18)
Press the two safety lock-offs (13) and adjust the
angle of the motor housing (25) to any of the 7
latching positions.
5.7 Adjusting the telescopic tube (Fig. 19)
1. Undo the telescopic tube lock nuts (9 + 11) by
turning them counterclockwise.
2. Pull out the telescopic tubes (10 + 12) to suit
the required working height.
3. Secure the telescopic tube lock nuts (9 + 11)
by turning them clockwise.
5.8 Fitting the chain saw attachment to the
motor head (Fig. 20 – 21)
The chain saw guard must be slipped over the
mounted bar with saw chain in order to prevent
injuries.
1. Position the chain saw attachment and the
motor head such that the arrows on both
parts coincide.
2. Press the chain saw attachment against the
motor head.This will cause the lock button
(26) to be pushed to the right.Turn the chain
saw attachment clockwise.The chain saw
attachment will lock onto the motor head and
is then secured in place.This will cause the
lock button (26) to be pushed to the left.
5.9 Pivoting the chain saw attachment 90° on
the motor head (Fig. 22)
The chain saw guard must be slipped over the
mounted bar with saw chain in order to prevent
injuries.
1. Pull the lock button (26) to the right.
2. Turn the chain saw attachment 90°
counterclockwise.The chain saw attachment
will lock onto the motor head and is then
secured in place.
5.10 Removing the chain saw attachment
from the motor head (Fig. 20 – 21)
The chain saw guard must be slipped over the
mounted bar with saw chain in order to prevent
injuries.
1. Pull the lock button (26) to the right.
2. Turn the chain saw attachment to the point
where the arrows on the motor head and
chain saw attachment coincide, allowing the
attachment to be removed.
5.11 Fitting the battery (Fig. 23 – 24)
Press the side pushlock button (32) of the battery
pack as shown in Fig. 23 and push the battery
pack into the mount provided.When the battery
pack is positioned as in Fig. 24, make sure that
the pushlock button latches in place! To remove
the battery pack, proceed in reverse order.
6. Operation
Please note that the statutory regulations
governing noise abatement may differ from one
location to another.
Caution! Always use the shoulder strap when
working with the equipment. Always switch offthe
equipment before you take offthe shoulder strap.
(Otherwise there is a risk of injury.)
Put on the shoulder strap as described above, fit
the required attachment and adjust the equipment
to suit your needs.
Switching on/off
Switching on
• Hold the equipment by the handles with both
hands (thumbs under the additional handle).
• Slide the safety lock-off (Fig. 3/Item 3) to the
front and hold.
• Switch on the equipment with the On/Off
switch (Fig. 3/Item 2).You can then release
Anl_GE_HC_18_Li_T_Part1_USA_SPK7.indb 14Anl_GE_HC_18_Li_T_Part1_USA_SPK7.indb 14 23.11.2022 14:22:5423.11.2022 14:22:54

EN
- 15 -
the safety lock-off.
Switching off
Release the On/Offswitch (Fig. 3/Item 2).
6.1 Charging the Lithium-Ion battery (not
included)
The corresponding instructions can be found
in the original operating instructions for your
charger.
6.2 Battery capacity indicator (Fig. 25 / item
33)
Press the battery capacity indicator switch (34).
The battery capacity indicator (33) shows the
charge status of the battery using 3 LEDs.
All 3 LEDs lit:
The battery is fully charged.
2 or 1 LED(s) lit:
The battery has an adequate remaining charge.
1 LED flashing:
The battery is empty, recharge the battery.
All LEDs flashing:
The temperature of the battery is too low. Remove
the battery from the device and leave it at room
temperature for a day. If the error occurs again,
this means that the battery has been completely
depth-discharged and is defective. Remove the
battery from the device. Never use or charge a
defective battery.
7. Working with the chain saw
attachment
Preparations
To ensure that you can work safely, check the
following points before every use and in the event
of any damage:
Condition of the chain saw
Inspect the chain saw before the start of work for
damage to the housing, the saw chain and the
bar. Never use a chain saw which is obviously
damaged.
Oil tank
Level of oil in the oil tank: Both before and
during your work make sure that there is always
sufficient oil in the system.To avoid damaging
the chain saw, never run the saw if there is no oil
in the system or if the oil drops below the "min"
mark. On average, a single filling will last around
20 minutes depending on the number of pauses
in cutting and the loads involved.
Saw chain
Tension of the chain, condition of the cutting
elements: The sharper the chain, the easier and
more controllable it is to operate the chain saw.
The same also applies to the chain tension. For
greater safety you must check the chain tension
before your work and at least every 10 minutes
during your work. New chains in particular tend to
expand more.
Safety clothing
Always wear appropriate tight-fitting safety
clothing such as special trousers which protect
against cuts, protective gloves and safety shoes.
Hearing protection and protective goggles
Wear a protective helmet with integral face and
hearing protection.This will offer protection
against falling branches and recoiling branches.
Work safety
• To ensure that you can work in safety you
must use the equipment at a working angle of
max. 60°.
• Never stand under the branch you want to
saw.
• Use special caution when working with
branches under tension and splintering wood.
• Possible risk of injury caused by falling
branches and catapulting pieces of wood.
• When the equipment is in operation, keep
other persons and animals away from the
danger zone.
• The equipment is not protected from electric
shock through contact with high-voltage
cables. Keep a minimum distance of 33 ft. (10
m) from live cables. Electric shock can cause
fatal injury.
• When working on slopes always stand to the
upper or left or right side of the branch you
want to cut.
• Hold the equipment as close as possible to
your body. This will help you to keep your
balance.
Cutting techniques
• When removing branches, hold the
equipment at an angle of max. 60° to the
horizontal to avoid being hit by a falling
Anl_GE_HC_18_Li_T_Part1_USA_SPK7.indb 15Anl_GE_HC_18_Li_T_Part1_USA_SPK7.indb 15 23.11.2022 14:22:5423.11.2022 14:22:54

EN
- 16 -
branch (Fig. 28).
• Start with the bottom branches on the tree.
This will make it easier for the cut branches to
drop.
• After completing a cut, the weight of the saw
will abruptly increase for the operator as the
saw is no longer supported by the branch.
This can result in you losing control over the
saw.
• Remove the saw from the cut only with the
saw chain still running.This will prevent the
saw from getting jammed.
• Never cut with the tip of the saw.
• Never cut into the bulging branch collar. This
will prevent the tree from healing.
Sawing offsmaller branches (Fig. 26):
Place the contact surface of the saw onto the
branch.This will prevent the saw from making
jerky movements when you begin a cut. Exerting
slight pressure, guide the saw from the top to the
bottom through the branch.
Sawing offlarge and long branches (Fig. 27):
Carry out a relief cut when working on large
branches.
Start by sawing through 1/3 of the branch
diameter from the top to the bottom with the top
side of the bar (Fig. 27/Point 1).Then saw towards
the first cut from the top to the bottom with the
bottom side of the bar (Fig. 27/Point 2).
Saw offlong branches in several steps to keep
control over the impact location.
Kickback
The term "kickback" describes what happens
when the running chain saw suddenly kicks
upward and backward. Usually this is caused
by contact between the tip of the bar and the
workpiece or by the saw chain becoming trapped.
In the event of kickback, large forces occur
suddenly and violently. As a result, the chain saw
usually reacts uncontrollably. This can often result
in very serious injuries to the worker or persons in
the vicinity.The risk of kickback is at its greatest
when the saw is positioned for a cut in the region
of the tip of the bar, as the leverage effect is
greatest there. It is therefore safest to position the
saw as flat as possible.
Danger!
• Make sure that the chain tension is always
correctly adjusted.
• Only use a chain saw if it is in perfect working
order.
• Only work with a saw chain that has been
properly sharpened in accordance with the
instructions.
• Never cut with the upper edge or the tip of the
bar.
• Always hold the chainsaw firmly with both
hands.
Cutting wood which is under tension
Special care is required when cutting wood which
is under tension. Cutting wood which is under
tension can release the tension, causing the
wood to react out of control. In the worst case this
can result in severe and even fatal injuries.This
type of work must be performed only by specially
trained persons.
8. Cleaning and maintenance
HAZARD!
Always take the battery out of the equipment
before starting any cleaning work.
8.1 Cleaning
• Regularly clean the tensioning mechanism
by blowing it out with compressed air or
cleaning it with a brush. Do not use any tools
for cleaning.
• Keep the handles free of oil so that you can
maintain a firm grip.
• If you are not going to use the chain saw for
an extended period of time, remove the chain
oil from the oil tank. Briefly immerse the saw
chain and the bar into an oil bath and then
wrap them in oil paper.
• Never immerse the equipment in water or
other liquids in order to clean it.
• Use a brush to remove deposits from the
safety guards.
• Keep all safety devices, air vents and the
motor housing free of dirt and dust as far as
possible.Wipe the equipment with a clean
cloth or blow it down with compressed air at
low pressure.
• We recommend cleaning the equipment
immediately each time after use.
• Clean the equipment regularly with a damp
cloth and some soft soap. Do not use
cleaning agents or solvents; these may
be aggressive to the plastic parts in the
equipment. Ensure that no water can get into
the interior of the equipment.The ingress of
water into an electric power tool increases the
Anl_GE_HC_18_Li_T_Part1_USA_SPK7.indb 16Anl_GE_HC_18_Li_T_Part1_USA_SPK7.indb 16 23.11.2022 14:22:5423.11.2022 14:22:54

EN
- 17 -
risk of an electric shock.
8.2 Maintenance
8.2.1 Chain saw attachment
Replacing the chain and bar
The chain saw bar needs to be replaced if the
guide groove of the bar is worn. Proceed as
described in the section “Assembly of the bar and
the saw chain”.
Checking the automatic chain lubrication
You should check the operation of the automatic
chain lubrication system on a regular basis
in order to guard against overheating and the
damage this can cause to the bar and the saw
chain. Point the tip of the bar at a smooth surface
(a board or a cut tree face) and allow the chain
saw to run. If you see a growing oil stain on the
smooth surface, the automatic chain lubrication
system is working properly. If no clear oil trace is
evident then please refer to the corresponding
instructions in “Troubleshooting”. If the information
contained there still fails to remedy the situation,
please contact a service center or another
similarly qualified workshop.
Important! Do not actually touch the surface with
the tip of the bar when performing this test. Keep
a safe distance of approx. 7.9" (20 cm).
Sharpening the saw chain
Working effectively with the chain saw is only
possible if the saw chain is in good condition and
sharp.This also reduces the risk of kickback.The
chain can be re-sharpened by any dealer. Do not
attempt to sharpen the chain yourself unless you
have the necessary special tools and experience.
9. Disposal and recycling
The equipment is supplied in packaging to
prevent it from being damaged in transit.The
raw materials in this packaging can be reused or
recycled.The equipment and its accessories are
made of various types of material, such as metal
and plastic. Never place defective equipment in
your household refuse.The equipment should
be taken to a suitable collection center for proper
disposal. If you do not know the whereabouts of
such a collection point, you should ask in your
local council offices.
10. Storage
Store the equipment and its accessories out
of children‘s reach in a dark and dry place at
above freezing temperature.The ideal storage
temperature is between 41°F and 86°F
(5°C and 30°C). Keep the electric tool in its
original packaging.
The reprinting or reproduction by any other
means, in whole or in part, of documentation
and papers accompanying the products is
strictly subject to the express consent of Einhell
Germany AG.
Subject to technical changes.
Anl_GE_HC_18_Li_T_Part1_USA_SPK7.indb 17Anl_GE_HC_18_Li_T_Part1_USA_SPK7.indb 17 23.11.2022 14:22:5423.11.2022 14:22:54

EN
- 18 -
11. Troubleshooting guide
Danger!
Before troubleshooting, switch offthe equipment and remove the battery.
The table below contains a list of problem symptoms and explains what you can do to remedy the
problem if your equipment fails to work properly. If the problem still persists after working through the list,
please contact your nearest service center.
Problem Possible cause Solution
The equipment
does not work.
- Battery charge is low.
- Battery is not correctly inserted.
- Charge battery.
- Remove battery and insert again.
Equipment operates
intermittently.
- Loose connection (external).
- Loose connection (internal).
- ON/OFF switch defective.
- Consult a service center.
Saw chain is dry. - No oil in the tank.
- Vent in the oil tank cap is blocked.
- Oil outlet is blocked.
- Top up with oil.
- Clean the oil tank cap.
- Clear the oil outlet.
Chain/guide bar
is hot.
- No oil in the tank.
- Vent in the oil tank cap is blocked.
- Oil outlet is blocked.
- Chain is blunt.
- Chain is overtensioned.
- Top up with oil.
- Clean the oil tank cap.
- Clear the oil outlet.
- Re-sharpen or replace the chain.
- Check the chain tension.
Chain saw judders,
vibrates or does not
saw properly.
- Chain is undertensioned.
- Chain is blunt.
- Chain is worn.
- Saw teeth point in the wrong
direction.
- Adjust the chain tension.
- Re-sharpen or replace the chain.
- Replace the chain.
- Refit the chain with the teeth facing
in the correct direction.
If the equipment will not work in spite of the troubleshooting measures and the voltage supply being OK,
please contact a service center.
Anl_GE_HC_18_Li_T_Part1_USA_SPK7.indb 18Anl_GE_HC_18_Li_T_Part1_USA_SPK7.indb 18 23.11.2022 14:22:5423.11.2022 14:22:54

FR
- 19 -
Danger !
Certaines mesures de sécurité doivent être res-
pectées pendant l’utilisation des appareils pour
empêcher les blessures et les dommages. Par
conséquent, lisez attentivement le présent mode
d’emploi / les consignes de sécurité. Conser-
vez-les bien pour avoir les informations toujours
à la portée de la main. Si vous devez passer
l’appareil à d’autres personnes, veuillez leur
remettre également le présent mode d’emploi /
les consignes de sécurité. Nous ne sommes pas
tenus des accidents ou dommages survenus à
cause de non-respect du présent mode d’emploi
et des consignes de sécurité.
1. Consignes de sécurité
Lisez toutes les instructions
AVERTISSEMENT : Pendant l’utilisation des
appareils électriques de jardinage, respectez
toujours les mesures de sécurité pour réduire le
risque d’incendie, de choc électrique et de bles-
sures, y compris ce qui suit :
POUR TOUS LES APPAREILS
• Évitez les environnements dangereux – n’uti-
lisez pas les appareils dans des endroits
humides ou mouillés.
• Ne les utilisez pas sous la pluie.
• Éloignez les enfants, toutes les personnes et
les animaux doivent être tenus à distance de
la zone de travail.
• Habillez-vous correctement – ne portez
pas de vêtements lâches ou des bijoux. Ils
peuvent être happés par les pièces mo-
biles. Pour les travaux à l’extérieur, il est
recommandé de porter des vêtements de
protection, d’utiliser des gants de travail, de
porter des pantalons longs, une chemise à
manches longues et des chaussures de sé-
curité. Portez un couvre-chef pour recouvrir
des cheveux longs.
• Utilisez des lunettes de sécurité – utilisez
toujours un masque facial ou anti-poussière si
l’endroit où vous travaillez est poussiéreux. Le
but des règles de sécurité consiste à attirer
votre attention sur les dangers potentiels. Les
symboles de sécurité et leurs explications
exigent votre attention et votre compréhen-
sion. Les avertissements de sécurité ne
suppriment pas le risque à eux seuls. Les
instructions ou avertissements qu’ils donnent
ne remplacent pas les mesures adéquates de
prévention d’accidents.
• Utilisez l’appareil approprié – n’utilisez pas
l’appareil dans un autre but que celui pour
lequel il a été conçu.
• Ne forcez pas l’appareil – il fonctionnera
mieux et avec une moindre probabilité d’un
risque ou d’une blessure à la vitesse pour
laquelle il a été conçu.
• Ne vous penchez pas trop – gardez une
bonne position et l’équilibre à tout instant.
• Restez vigilant. Utilisez du bon sens. N’utili-
sez pas l’appareil si vous êtes fatigué ou si
vous vous trouvez sous l’emprise de drogues,
d’alcool ou de médicaments.
• Si vous n’utilisez pas l’appareil, rangez-le
dans un local sec inaccessible aux enfants.
• Entretenez l’appareil avec soin. Suivez les
instructions de lubrification et de remplace-
ment des accessoires. Gardez les poignées
sèches, propres et exemptes d’huile et de
graisse.
• Vérifiez les pièces endommagées. Avant
d’utiliser l’appareil, assurez-vous que les
dispositifs de sécurité sont intacts. N’utilisez
jamais un outil sans son dispositif de sécurité.
Vérifiez l’alignement de pièces mobiles, le
coincement de pièces mobiles.
• Examinez les pièces cassées ou défec-
tueuses qui peuvent affecter le fonctionne-
ment en toute sécurité de votre outil. Une pro-
tection ou une autre pièce endommagée doit
être correctement réparée ou remplacée par
un centre de service autorisé, sauf indication
contraire dans le présent mode d’emploi.
• Rechargez uniquement avec un chargeur
spécifié par le fabricant. Un chargeur qui
convient pour un type de batterie peut créer
un risque d’incendie s’il est utilisé avec un
autre bloc de batterie.
• Utilisez les appareils uniquement avec des
batteries spécifiquement désignées. L’utilisa-
tion de tout autre batterie peut créer un risque
de blessure et d’incendie.
• Lorsque la batterie n’est pas utilisée, conser-
vez-la à l’écart d’autres objets métalliques,
comme les trombones, les pièces de mon-
naie, les clés, les clous, les vis ou autres
petits objets métalliques qui pourraient créer
une connexion entre les bornes. La mise en
court-circuit des bornes de batteries peut
causer des brûlures ou un incendie.
• Dans des conditions abusives, un liquide peut
sortir de la batterie, évitez le contact. En cas
de contact accidentel, rincez avec de l’eau.
En cas de contact du liquide avec les yeux,
Anl_GE_HC_18_Li_T_Part1_USA_SPK7.indb 19Anl_GE_HC_18_Li_T_Part1_USA_SPK7.indb 19 23.11.2022 14:22:5423.11.2022 14:22:54

FR
- 20 -
consultez un médecin. Le liquide sorti de la
batterie peut causer des irritations ou des
brûlures. (Ce conseil est considéré comme
juste pour les types de piles conventionnels
de NiMh, NiCd, plomb-acide et Lithium-ion. Si
ce conseil est inapproprié pour une onception
de cellule différentes de celle-ci, le conseil
judicieux peut être appliqué.
• N’utilisez pas une batterie ou un appareil
endommagés ou modifiés. Les batteries
endommagées ou modifiées peuvent agir
de manière imprévisible et donner lieu à un
incendie, une explosion ou un risque de bles-
sure.
• N’exposez pas les batteries ou l’appareil
au feu ou à des températures excessives.
L’exposition au feu ou à une température
supérieure à 130 °C (266 °F) peut provoquer
une explosion.
• Suivre toutes les instructions de charge et ne
pas charger la batterie ou l’appareil en dehors
de la gamme de température spécifiée dans
les instructions. Un mauvais chargement ou
un chargement à des températures en dehors
de la gamme spécifiée peut endommager la
batterie et augmenter les risques d’incendie.
• Confiez le service à un réparateur qualifié qui
utilise uniquement les pièces de rechange
identiques. Cela permettra de maintenir la
sécurité du produit.
• Ne modifiez pas est n’essayez pas de réparer
l’appareil ou la batterie (si applicable), sauf
exception indiquée dans les instructions d’uti-
lisation et d’entretien.
1.) POUR TOUS LES APPAREILS SANS FIL
• Ne chargez pas l’appareil sous la pluie ou
dans des locaux humides.
• N’utilisez pas les appareils à batterie sous la
pluie. Retirez toujours la batterie avant l’ajus-
tement, le nettoyage, le service ou le trans-
port l’appareil de jardin.
2.) POUR TOUS LES PRODUITS SANS FIL
AVEC UNE BATTERIE AMOVIBLE OU SÉ-
PARABLE :
• Utilisez uniquement la batterie de type et de
taille suivants :
18V 1,5Ah PXC batterie Li-ion
18V 2,0Ah PXC batterie Li-ion
18V 2,5Ah PXC batterie Li-ion
18V 3,0Ah PXC batterie Li-ion
18V 4,0Ah PXC batterie Li-ion
18V 3,0Ah PXC Plus batterie Li-ion
18V 4,0Ah PXC Plus batterie Li-ion
18V 5,2Ah PXC Plus batterie Li-ion
18V 4,0Ah/6,0Ah PXC Plus batterie Li-ion
18V 5,0Ah/8,0Ah PXC Plus batterie Li-ion
• Ne jetez pas la batterie dans le feu. La cel-
lule peut exploser. Consultez les règlements
locaux pour connaître les instructions d’élimi-
nation spécifiques possibles.
• N’ouvrez ni n’abîmez la batterie. L’électrolyte
libéré est corrosif et peut être dangereux pour
les yeux ou la peau. Il peut être toxique s’il est
avalé.
• Manipulez la batterie avec précaution afin de
ne pas la court-circuiter avec des matériaux
conducteurs, tels que les bagues, les brace-
lets et les clés. La batterie ou le conducteur
peuvent surchauffer et causer des brûlures.
3.) ÉVITEZ UN DÉMARRAGE INTEMPESTIF
– N’INSÉREZ PAS LA BATTERIE ALORS
QUE VOTRE DOIGT EST SUR L’INTER-
RUPTEUR. ASSUREZ-VOUS QUE L’INTER-
RUPTEUR EST SUR L’ARRÊT EN INSÉ-
RANT LA BATTERIE.
AVERTISSEMENTS DE SÉCURITÉ GÉNÉ-
RAUX POUR LA BATTERIE
• Éliminez la batterie usée vite et promptement.
Lors de l’élimination des piles secondaires ou
des batteries, gardez les piles ou les batteries
de différents systèmes électrochimiques sé-
parément les unes des autres.
• Gardez la batterie hors de portée des enfants
dans l’emballage d’origine jusqu’à son utilisa-
tion.
• Ne mettez jamais les batteries dans la
bouche. Si elles sont avalées, contactez im-
médiatement le centre antipoison local.
• PRUDENCE – La batterie utilisée dans cet
appareil peut présenter un risque d’incendie
ou de brûlure chimique en cas de mauvaise
manipulation. Remplacez uniquement la
batterie de marque principale Einhell / gazon.
L’utilisation d’une autre batterie peut présen-
ter un risque d’incendie ou d’explosion.
• AVERTISSEMENT : N’utilisez pas une batte-
rie ou un appareil visiblement endommagé.
• AVERTISSEMENT : Ne modifiez ni n’essayez
de réparer l’appareil ou la batterie.
• LES BATTERIES DOIVENT ÊTRE RECY-
CLÉES.
• Ne court-circuitez une cellule ou une batterie.
Ne conservez pas les piles ou les batteries
au hasard dans une boîte ou un tiroir ou elles
peuvent court-circuiter entre elles ou être
court-circuitées par les matériaux conduc-
Anl_GE_HC_18_Li_T_Part1_USA_SPK7.indb 20Anl_GE_HC_18_Li_T_Part1_USA_SPK7.indb 20 23.11.2022 14:22:5423.11.2022 14:22:54
Other manuals for GE-HC 18 Li T
3
This manual suits for next models
3
Table of contents
Languages:
Other EINHELL Pole Saw manuals

EINHELL
EINHELL GC-LC 18 Li T User manual

EINHELL
EINHELL GE-LM 36/4in1 Li-Solo User manual

EINHELL
EINHELL BG-CB 2041 T User manual

EINHELL
EINHELL GC-LC 1815 T User manual

EINHELL
EINHELL GE-GS 18/150 Li-Solo User manual

EINHELL
EINHELL 45.016.53 User manual

EINHELL
EINHELL BG-EC 620 T User manual

EINHELL
EINHELL GC-LC 18/20 Li T User manual

EINHELL
EINHELL 34.082.20 User manual

EINHELL
EINHELL BG-PC 2625 T User manual