manuals.online logo
Brands
  1. Home
  2. •
  3. Brands
  4. •
  5. Eizo
  6. •
  7. Monitor
  8. •
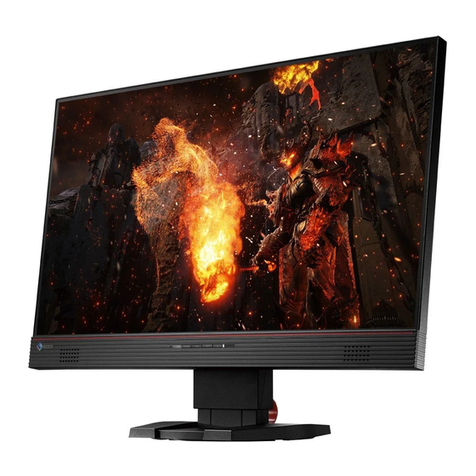
  9. Eizo foris FS2735 User manual

Eizo foris FS2735 User manual

- 1 - - 2 -
- 3 - - 4 -
Color LCD Monitor
LCD-Farbmonitor
Moniteur couleur LCD
Цветной ЖКД-монитор
Setup Guide
Important Please read PRECAUTIONS, this Setup Guide and the User’s Manual stored on the CD-ROM carefully to
familiarize yourself with safe and effective usage. Please retain this guide for future reference.
• For details such as screen adjustments or settings, see the User’s Manual on the EIZO LCD Utility Disk (CD-ROM).
Installationsanleitung
Wichtig Lesen Sie die VORSICHTSMASSNAHMEN, diese Installationsanleitung und das Benutzerhandbuch (auf
der CD-ROM) aufmerksam durch, um sich mit der sicheren und efzienten Bedienung vertraut zu machen.
Bewahren Sie diese Anleitung zum späteren Nachschlagen auf.
• Informationen zu den Einstellungen des Bildschirms nden Sie im Benutzerhandbuch auf der EIZO LCD Utility
Disk (CD-ROM).
Guide d’installation
Important Veuillez lire attentivement les PRECAUTIONS, ce Guide d’installation ainsi que le Manuel d’utilisation inclus
sur le CD-ROM, an de vous familiariser avec ce produit et de l’utiliser efcacement et en toute sécurité.
Veuillez conserver ce guide pour référence ultérieure.
• Pour plus de détails concernant les réglages de l’écran, reportez-vous au manuel d’utilisation inclus dans le disque
utilitaire « EIZO LCD Utility Disk » (CD-ROM).
Руководство по установке
Важно! Внимательно прочитайте МЕРЫ ПРЕДОСТОРОЖНОСТИ, настоящее Руководство по установке и
Руководство пользователя на компакт-диске и ознакомьтесь с правилами безопасной и эффективной
эксплуатации.
• Подробная информация по регулировке изображения или параметрам содержится в Руководстве
пользователя на диске EIZO LCD Utility Disk (CD-ROM).
Copyright© 2015 EIZO Corporation All rights reserved.
1st Edition-November, 2015 Printed in Japan.
00N0L945A1
(U.M-SUGFS2735-4)
Package Contents / Verpackungsinhalt /
Contenu de l’emballage / Содержимое упаковки
2Connections / Anschließen /
Branchements / Соединения
1 2
*1 Commercially available product
*1 Im Handel erhältliches Produkt
*1 Produit disponible dans le commerce
*1 Стандартное изделие
*2 When removing the DisplayPort cable, ensure that the
connector is unlocked, then remove the cable while
pressing the triangle mark (▲) on the plug.
*2 Wenn Sie das DisplayPort-Kabel abziehen, stellen Sie
sicher, dass die Anschlussbuchse entriegelt ist, Drücken
Sie dann auf das Dreieck (▲) auf dem Stecker und ziehen
Sie gleichzeitig das Kabel ab.
*2
Lorsque vous retirez le câble DisplayPort, assurez-vous que le
connecteur est déverrouillé, puis retirez le câble tout en appuyant
sur le repère en forme de triangle (▲) situé sur la che
*2 Перед отсоединением кабеля DisplayPort обязательно
откройте защелку. Затем прижмите значок треугольника
(▲) на разъеме кабеля и вытяните кабель.
1Stand Assembly / Standfuß montieren /
Montage sur pied / Стойка в сборе
12 3
Power cord
Netzkabel
Cordon d’alimentation
Шнур питания
DVI DVIDVI USB AUDIO
OUTPUT
Display
Port
HDMI
Fit the stand base (four holes) into the
stand brace (four tabs).
Stecken Sie den Standfuß (vier Löcher)
in den Monitorständer (vier Laschen).
Fixez la base du pied (quatre orifices) dans
le support du pied (quatre languettes).
Присоедините основание стойки
(с четырьмя отверстиями) к
фиксатору стойки с четырьмя
выступами).
Click!
Klick!
Un clic doit retentir
!
Защелкните!
3Screen Display / Bildschirmanzeige /
Afchage à l’écran / Отображение экрана
123
4
Angle and Height Adjustment / Neigungs- und Höhenverstellung /
Réglage de l’angle et de la hauteur / Регулировка высоты и угла наклона
Recommended Resolution
Empfohlene Auösun
Résolution conseillée
Рекомендуемое разреше-ние
2560×1440
: On
: Ein
: marche
: Вкл
: Off, ❙: On (Factory Preset: On)
: Aus, ❙: Ein (Werkseinstellung: Ein)
:
arrêt,
❙
: marche (Réglage de fabrication : marche)
:
Откл., ❙: Вкл (Заводская настройка: Вкл)
When using the monitor screen in portrait mode
Pull the screen up to the highest position, tilt it upward, and then
rotate it 90 degrees counterclockwise or clockwise to provide a
portrait view.
Bei Verwendung des Monitorbildschirms im Hochformat
Ziehen Sie den Bildschirm nach oben in die höchste Position, kippen
Sie ihn nach oben, und drehen Sie ihn dann um 90 Grad gegen den
Uhrzeigersinn oder im Uhrzeigersinn, um das Hochformat einzustellen.
Lors de l’utilisation de l’écran du moniteur en mode portrait
Remontez l’écran jusqu’à sa position la plus élevée, inclinez-le vers le haut, puis
faites-le tourner de 90 degrés dans le sens contraire des aiguilles d’une montre
ou dans le sens des aiguilles d’une montre, pour le placer en orientation portrait.
Просмотр изображения на экране монитора в книжной ориентации
Чтобы просматривать изображение в книжной ориентации, поднимите экран
монитора вверх до конца, отклоните его верхнюю часть назад, а затем
поверните экран на 90 градусов против часовой стрелки или по часовой стрелке.
Note • You need a graphics board that supports portrait
mode and you need to congure it to function.
For details, refer to the manual of the graphics
board.
Hinweis
•
Sie benötigen eine Grakkarte, die dasHochformat
unterstützt, und müssen die Grakkarte für die
Funktion kongurierenNähere Informationen
nden Sie im Handbuchzur Grakkarte
Remarque
•
Vous avez besoin d'une carte vidéo prenant en
charge le mode portrait, et vous devez la congurer
pour qu'elle fonctionne correctement.Pour plus de
détails, reportez-vous au manuel de la carte vidéo.
Примечание
•
Графический адаптер должен обеспечивать режим
книжной ориентации изображения. Для использования
этой функции графический адаптер нужно
соответствующим образом настроить. Подробные
сведения см. в руководстве к графическому адаптеру.
145 mm (Tilt: 35°)
155 mm (Tilt: 0°)
145 mm (Kippen: 35°)
155 mm (Kippen: 0°)
145 mm (Inclinaison : 35°)
155 mm (Inclinaison : 0°)
145 мм (наклон: 35°)
155 мм (наклон: 0°)
Tilt / Kippen / Inclinaison / Наклон
The monitor stand pivots and tilts upward.
When tilting the monitor screen upward, put your hand on the bottom of the
monitor and pull it up a little harder.
Der Standfuß des Monitors ist drehbar und lässt sich nach oben kippen.
Wenn Sie den Monitorbildschirm nach oben kippen, legen Sie die Hand an die
Unterkante des Monitors und ziehen sie etwas fester nach oben.
Le pied du moniteur pivote et s’incline vers le haut.
Lorsque vous inclinez l’écran du moniteur vers le haut, placez vos mains sur le
bas du moniteur, et poussez-le un peu plus fortement vers le haut.
Стойка монитора позволяет поворачивать экран и отклонять его верхнюю часть назад.
Чтобы отклонить назад верхнюю часть экрана монитора, возьмитесь за монитор снизу
и потяните его вверх с небольшим усилием.
Height adjustment / Höhenjustierung /
Réglage de la hauteur / Регулировка высоты
• Stepless height adjustment
•
If it is difcult to move the monitor, put your both hands on the top of the monitor
and push it down.
• You may need to move the monitor up and down forcefully because the
moving unit is initially set tightly.
• Stufenlose Höhenjustierung
•
Wenn der Monitor sich nur schwer bewegen lässt, legen Sie beide Hände auf die
Oberkante des Monitors und drücken ihn herunter.
• Sie müssen den Monitor eventuell kräftig nach oben und unten bewegen, da
das bewegliche Element anfänglich schwergängig eingestellt ist.
• Réglage de la hauteur sans paliers
•
S’il est difcile de déplacer le moniteu, placez vos deux mains en haut du moniteur
et poussez-le vers le bas.
• Il est possible que vous deviez déplacer le moniteur vers le haut et le bas avec
fermeté, car le module de déplacement est serré par défaut.
• Плавная регулировка высоты
•
Если экран монитора перемещается с трудом, нажмите на него сверху двумя
руками и сдвиньте вниз.
•
Для перемещения экрана монитора вверх и вниз может потребоваться применение
силы, так как при изготовлении подвижная часть была плотно установлена.
: On
: Ein
: marche
: Вкл
• Monitor
• Monitor
• Moniteur
• Монитор
• Stand base
• Standfuß
• Base du pied
• Основание стойки
• PP200
(DisplayPort - DisplayPort)
digital signal cable
• PP200
(DisplayPort - DisplayPort)
digitales Signalkabel
•
PP200
(DisplayPort - DisplayPort)
câble de signal numérique
•
PP200
(DisplayPort - DisplayPort)
цифровой сигнальный
кабель
• UU200SS (USB 3.0) EIZO USB cable
• EIZO USB-Kabel UU200SS (USB 3.0)
• Câble USB EIZO UU200SS (USB 3.0)
• USB-кабель EIZO UU200SS (USB 3.0)
•
The EIZO LCD Utility Disk
contains:
-User's Manual
-
Color adjustment software "G-
Ignit
ion"
•
Die EIZO LCD Utility Disk enthält:
-Benutzerhandbuch
-
Farbeinstellungs-Software „G-Ignition“
•
Le disque utilitaire « EIZO LCD Utility Disk » contient :
-Manuel d’utilisation
-
Logiciel de réglage de couleur « G-Ignition »
•
Содержание диска EIZO LCD Utility Disk:
-Руководство пользователя
-Программное обеспечение для регулировки цвета
«G-Ignition»
• Cable holder
• Kabelabdeckung
• Enveloppe de câbles
• Держатель кабеля
• Power cord
• Netzkabel
• Cordon d’alimentation
• Шнур питания
• PRECAUTIONS, Setup Guide
• VORSICHTSMASSNAHMEN, Installationsanleitung
• PRECAUTIONS, Guide d’installation
• МЕРЫ ПРЕДОСТОРОЖНОСТИ, Руководство по
установке
• VESA mounting screws
• VESA-Befestigungsschrauben
• Vis de montage VESA
• Крепежные винты
стандарта VESA
HH200HS
(optional)
(optional)
(en option)
(не входит в
комплект)
DD200DL
(optional)
(optional)
(en option)
(не входит
в комплект)
PP200*2
(DVI connection)
For audio output
via the monitor
(DVI-Verbindung)
Zur Audioausgabe
über den Monitor
(Connexion DVI)
Pour la sortie audio
via le moniteur
(Разъем DVI)
Для вывода
аудиосигналов
через монитор
For the USB
hub function /
G-Ignition
Für die USB-
Hub-Funktion /
G-Ignition
Pour la fonction
de concentrateur
USB / G-Ignition
Для использования
функции USB-
концентратора /
программного
обеспечения
«G-Ignition»
DVI-HDMI
converter cable*1
DVI-HDMI-
Konvertierungskabel
*1
Câble de conversion
DVI-HDMI
*1
Кабель-переходник
DVI-HDMI
*1
UU200SS
(USB 3.0)
Stereo mini jack
cable*1
Stereo-Mini-Jack-
Kabel*1
Câble mini-jack
stéréo*1
Стереокабель с
мини-разъемом*1
- 7 - - 8 -
- 5 - - 6 -
Hinweise zur Auswahl des richtigen Schwenkarms für Ihren Monitor
Dieser Monitor ist für Bildschirmarbeitsplätze vorgesehen. Wenn nicht der zum Standardzubehör gehörigeSchwenkarm verwendet wird, muss statt des-
sen ein geeigneter anderer Schwenkarm installiert werden. Bei derAuswahl des Schwenkarms sind die nachstehenden Hinweise zu berücksichtigen:
Der Standfuß muß den nachfolgenden Anforderungen entsprechen:
a) Der Standfuß muß eine ausreichende mechanische Stabilität zur Aufnahme des Gewichtes vom Bildschirmgerät und des spezizierten Zubehörs
besitzen. Das Gewicht des Bildschirmgerätes und des Zubehörs sind in der zugehörenden Bedienungsanleitung angegeben.
b) Die Befestigung des Standfusses muß derart erfolgen, daß die oberste Zeile der Bildschirmanzeige nicht höher als die Augenhöhe eines Benut-
zers in sitzender Position ist.
c) Im Fall eines stehenden Benutzers muß die Befestigung des Bildschirmgerätes derart erfolgen, daß die Höhe der Bildschirmmitte über dem
Boden zwischen 135 – 150 cm beträgt.
d) Der Standfuß muß die Möglichkeit zur Neigung des Bildschirmgerätes besitzen (max. vorwärts: 5°, min. nach hinten ≥ 5°).
e) Der Standfuß muß die Möglichkeit zur Drehung des Bildschirmgerätes besitzen (max. ±180°). Der maximale Kraftaufwand dafür muß weniger
als 100 N betragen.
f) Der Standfuß muß in der Stellung verharren, in die er manuell bewegt wurde.
g) Der Glanzgrad des Standfusses muß weniger als 20 Glanzeinheiten betragen (seidenmatt).
h) Der Standfuß mit Bildschirmgerät muß bei einer Neigung von bis zu 10° aus der normalen aufrechten Position kippsicher sein.
Hinweis zur Ergonomie :
Dieser Monitor erfüllt die Anforderungen an die Ergonomie nach EK1-ITB2000 mit dem Videosignal, 2560 × 1440, Digital Eingang und mindestens 60,0
Hz Bildwiederholfrequenz, non interlaced. Weiterhin wird aus ergonomischen Gründen empfohlen, die Grundfarbe Blau nicht auf dunklem Untergrund
zu verwenden (schlechte Erkennbarkeit, Augenbelastung bei zu geringem Zeichenkontrast.)
Übermäßiger Schalldruck von Ohrhörern bzw. Kopfhörern kann einen Hörverlust bewirken.
Eine Einstellung des Equalizers auf Maximalwerte erhöht die Ausgangsspannung am Ohrhörer- bzw.
Kopfhörerausgang und damit auch den Schalldruckpegel.
„Maschinenlärminformations-Verordnung 3. GPSGV:
Der höchste Schalldruckpegel beträgt 70 dB(A) oder weniger gemäss EN ISO 7779“
[Begrenzung des maximalen Schalldruckpegels am Ohr]
Bildschirmgeräte: Größte Ausgangsspannung 150 mV
5Attaching Cable Holder / Anbringen der Kabelabdeckung /
Fixation de l’enveloppe de câbles / Присоединение держателя кабеля
123
6Language / Sprache / Langue / Язык
7Connecting Monitor with G-Ignition Mobile /
Verbinden des Monitors mit G-Ignition Mobile /
Connexion du moniteur à G-Ignition Mobile /
Использование монитора с программным обеспечением G-Ignition Mobile
“G-Ignition Mobile” allows you to use your smartphone as a substitute for a remote control to operate the monitor. For details on
G-Ignition Mobile, such as its operating conditions, refer to the User’s Manual contained on the EIZO LCD Utility disk
(CD-ROM). To use G-Ignition Mobile, connect the monitor to your smartphone (Android or iOS) via Bluetooth.
Mit „G-Ignition Mobile“ können Sie statt einer Fernbedienung Ihr Smartphone verwenden, um den Monitor zu bedienen. Nähere Informationen zu
G-Ignition Mobile, wie etwa die Betriebsbedingungen, nden Sie im Benutzerhandbuch, das auf derEIZO LCD Utility Disk (CD-ROM) enthalten
ist. Um G-Ignition Mobile verwenden zu können, verbinden Sie den Monitor über Bluetooth mit Ihrem Smartphone (Android oder iOS).
« G-Ignition Mobile » vous permet d’utiliser votre smartphone comme télécommande, an de faire fonctionner le moniteu. Pour
plus de détails sur G-Ignition Mobile, tels que ses conditions de fonctionnement, reportez-vous au manuel d’utilisation inclus
dans le disque utilitaire « EIZO LCD Utility Disk » (CD-ROM). Pour utiliser G-Ignition Mobile, connectez le moniteur à votre
smartphone (Android ou iOS) via Bluetooth.
Программное обеспечение «G-Ignition Mobile» дает возможность использовать смартфон в качестве пульта дистанционного
управления монитором. Подробные сведения о программном обеспечении G-Ignition Mobile, например, о требованиях к
условиям работы, см. в Руководстве пользователя на компакт-диске EIZO LCD Utility Disk. Чтобы использовать программное
обеспечение G-Ignition Mobile, подключите монитор к смартфону (на базе ОС Android или iOS) через Bluetooth.
1
2
Displaying the operation guide
Anzeigen der Bedienerführung
Affichage du guide de fonctionnement
Отображение руководства по эксплуатации
Displaying the Languages menu
Anzeigen des Sprachenmenüs
Affichage du menu Langues
Отображение меню Languages
Displaying the Bluetooth Settings Menu / Anzeigen des Bluetooth-Einstellungsmenü /
Afchage du menu réglage Bluetooth / Отображение меню Bluetooth Settings
Displaying the operation guide
Anzeigen der Bedienerführung
Affichage du guide de fonctionnement
Отображение руководства по эксплуатации
Displaying the Bluetooth Settings menu
Anzeigen des Bluetooth-Einstellungsmenü
Affichage du menu réglage Bluetooth
Отображение меню Bluetooth Settings
Connecting (pairing) the Monitor to Smartphone / Verbinden bzw. Koppeln des Monitors mit dem Smartphone /
Connexion (couplage) du moniteur au smartphone / Подключение (связывание) монитора со смартфоном
Using the control button, operate the menu. Follow the steps below to pair the monitor with your smartphone.
Bedienen Sie das Menü mit der Steuertaste. Befolgen Sie die unten gezeigten Schritte, um den Monitor mit Ihrem Smartphone zu koppeln.
À l’aide de la touche de commande, utilisez le menu. Suivez les étapes ci-dessous pour coupler le moniteur avec votre smartphone.
Выберите нужный пункт меню с помощью кнопки управления. Свяжите монитор со смартфоном, выполнив описанные ниже действия.
Select the language.
Wählen Sie die Sprache aus.
Sélectionnez la langue.
Выберите язык.
Select "On".
Wählen Sie „Ein“.
Sélectionnez « Marche ».
Выберите «Вкл».
●If no images are displayed
If a problem still remains after applying the suggested remedies, contact your local EIZO representative.
Problem Possible cause and remedies
No images are
displayed
Power indicator does not light
up.
• Check whether the power cord is correctly connected.
• Turn the main power switch on.
• Turn off the main power, and then turn it on again a few minutes later.
• Press .
Power indicator lights up white. • Increase “Brightness”, “Contrast”, or “Gain” in the Setting menu.
Power indicator lights up
orange.
• Check whether the signal cable is connected properly.
• Check whether the external device is turned on.
• Operate the mouse or keyboard.
• Switch the input signals by pressing the input signal selector.
A message is
displayed
Example: • This message appears when the signal is not input correctly even when the
monitor functions correctly.
• Check whether the PC is congured to meet the resolution and vertical scan
frequency requirements of the monitor (see "3-1 Compatible Resolutions/
Formats").
• Reboot the PC.
• Select an appropriate setting using the graphics board’s utility or other functions.
For details, refer to the manual of the graphics board.
●Wenn kein Bild angezeigt wird
Wenn ein Problem auch nach Ergreifen der empfohlenen Abhilfemaßnahmen weiter besteht, wenden Sie sich an Ihren EIZO-Vertreter vor Ort.
Problem Mögliche Ursache und Abhilfemaßnahmen
Es wird kein Bild
angezeigt
Die Netzkontroll-LED leuchtet
nicht.
• Überprüfen Sie, ob das Netzkabel richtig angeschlossen ist.
• Schalten Sie den Hauptnetz-Schalter ein.
• Schalten Sie den Hauptnetz-Schalter aus und nach einigen Minuten wieder ein.
• Drücken Sie .
Die Netzkontroll-LED leuchtet weiß.
• Erhöhen Sie „Helligkeit“, „Kontrast“ oder „Gain-Einstellung“ im Einstellungsmenü.
Die Netzkontroll-LED leuchtet
orangefarben.
• Überprüfen Sie, ob das Signalkabel ordnungsgemäß angeschlossen ist.
• Überprüfen Sie, ob das externe Gerät eingeschaltet ist.
• Bedienen Sie die Maus oder die Tastatur.
• Wechseln Sie die Eingangssignale durch Drücken der Eingangssignal-Wähltaste.
Eine Meldung wird
angezeigt
Beispiel: • Diese Meldung wird angezeigt, wenn das Signal nicht eingespeist wird, auch wenn
der Monitor ordnungsgemäß funktioniert.
• Überprüfen Sie, ob der PC so konguriert ist, dass er dieAnforderungen des
Monitors hinsichtlich Auösung und vertikalerAbtastfrequenz erfüllt (siehe „3-1
Kompatible Auösungen/Formate“).
• Starten Sie den PC neu.
•
Wählen Sie mithilfe des Dienstprogramms der Grakkarte oder andererFunktionen eine
geeignete Einstellung aus. Nähere Informationen nden Sie imHandbuch zur Grakkarte.
●Si aucune image ne s’afch
Si un problème persiste après avoir mis en œuvre les solutions suggérées, prenez contact avec votre représentant EIZO local.
Problème Cause possible et solutions
Aucune image ne
s'afch
Le témoin de fonctionnement
ne s'allume pas.
• Vériez si le cordon d’alimentation est correctement branché
• Activez le commutateur d’alimentation principal.
• Coupez l’alimentation, puis activez-la quelques minutes après.
• Appuyez sur .
Le témoin de fonctionnement
s’allume en blanc.
•
Augmentez la « Luminosité », le « Contraste » ou le « Gain » dans le menu réglage.
Le témoin de fonctionnement
s’allume en orange.
• Vériez si le câble de signal est correctement branché.
• Vériez si le dispositif externe est sous tension.
• Utilisez la souris ou le clavier.
• Commutez les signaux d’entrée en appuyant sur le sélecteur de signal d’entrée.
Un message
s'afch
Exemple : • Ce message apparaît lorsque le signal n’entre pas correctement, même lorsque le
moniteur fonctionne correctement.
•
Vériez si la conguration du PC respecte les exigences de résolution et dfréquence
de balayage vertical du moniteur (voir « 3-1 Résolutions compatibles/Formats »).
• Redémarrez le PC.
•
Sélectionnez un réglage approprié en utilisant l’utilitaire de la carte vidéo ou d’autres
fonctions. Pour plus de détails, reportez-vous au manuel de la carte vidéo.
●Если изображения не воспроизводятся
Если не удается устранить неисправность с помощью рекомендуемых действий, обратитесь к местному
представителю компании EIZO.
Неисправность Причина и действия по устранению
Изображения не
воспроизводятся
Индикатор питания не
светится.
• Check whether the power cord is correctly connected.
• Turn the main power switch on.
• Turn off the main power, and then turn it on again a few minutes later.
• Press .
Индикатор питания светится
белым светом.
• Увеличьте значения параметров «Brightness», «Contrast» или «Gain» в меню
настроек.
Индикатор питания светится
оранжевым светом.
• Проверьте, правильно ли подключен сигнальный кабель.
• Проверьте, включено ли внешнее устройство.
• Пошевелите мышь или нажмите любую клавишу на клавиатуре.
• Переключите входной сигнал с помощью переключателя входных сигналов.
На экране
отображается
сообщение
Пример: • Это сообщение появляется в случаях, когда входной сигнал поступает с
ошибками. Оно не свидетельствует о неисправности монитора.
• Проверьте соответствие настроек компьютера требованиям монитора
к разрешению и частоте вертикальной развертки (см. пункт 3-1
«Поддерживаемые разрешения и форматы»).
• Перезагрузите компьютер.
• Выберите нужный параметр, используя утилиту графического адаптера или
другие функции. Подробные сведения см. в руководстве к графическому
адаптеру.
Input signal selector
Eingangssignal-Wähltaste
Sélecteur de signal d'entrée
Переключатель входного сигнала
Press one of them.
Drücken Sie eine der Tasten.
Appuyez sur l'un d'eux.
Нажмите одну из кнопок.
Back of monitor
Rückseite des Monitors
Arrière du moniteur
Задняя сторона монитора
Front of monitor
Vorderseite des Monitors
Avant du moniteur
Передняя сторона монитора
Press the control button.
Drücken Sie die Steuertaste.
Appuyez sur la touche de commande.
Нажмите кнопку управления.
Operation guide
Bedienerführung
Guide de fonctionne-ment
Руководство по экс-плуатации
Color mode selector
Farbmodus-Wähltaste
Sélecteur du mode couleur
Переключатель цветового режима
Control button
Steuertaste
Touche de commande
Кнопка управления

Other manuals for foris FS2735

1

Other Eizo Monitor manuals

Eizo ColorEdge CS2400R User manual

Eizo

Eizo ColorEdge CS2400R User manual

Eizo FLEXSCAN T1751 - User manual

Eizo

Eizo FLEXSCAN T1751 - User manual

Eizo DuraVision FDS1904 User manual

Eizo

Eizo DuraVision FDS1904 User manual

Eizo EIZO FlexScan P1700 User manual

Eizo

Eizo EIZO FlexScan P1700 User manual

Eizo FLEXSCAN S2433W User manual

Eizo

Eizo FLEXSCAN S2433W User manual

Eizo FP-301 User manual

Eizo

Eizo FP-301 User manual

Eizo FlexScan S1501 User guide

Eizo

Eizo FlexScan S1501 User guide

Eizo L985 EX User manual

Eizo

Eizo L985 EX User manual

Eizo DuraVision FDF2304W-IP User manual

Eizo

Eizo DuraVision FDF2304W-IP User manual

Eizo RadiForce RX320 User manual

Eizo

Eizo RadiForce RX320 User manual

Eizo FlexScan T1501 User manual

Eizo

Eizo FlexScan T1501 User manual

Eizo ColorEdge CS2400R User manual

Eizo

Eizo ColorEdge CS2400R User manual

Eizo DuraVision FDU2101 User manual

Eizo

Eizo DuraVision FDU2101 User manual

Eizo DuraVision FDF2304W-IP User guide

Eizo

Eizo DuraVision FDF2304W-IP User guide

Eizo FlexScan T761 User manual

Eizo

Eizo FlexScan T761 User manual

Eizo FLEXSCAN F520 - User manual

Eizo

Eizo FLEXSCAN F520 - User manual

Eizo DuraVision FDS1921T-GY User manual

Eizo

Eizo DuraVision FDS1921T-GY User manual

Eizo Raptor SQ2801 User manual

Eizo

Eizo Raptor SQ2801 User manual

Eizo FlexScan S2000 User manual

Eizo

Eizo FlexScan S2000 User manual

Eizo FLEXSCAN F520 - User manual

Eizo

Eizo FLEXSCAN F520 - User manual

Eizo ColorEdge CG220 User manual

Eizo

Eizo ColorEdge CG220 User manual

Eizo CuratOR EX2721 User manual

Eizo

Eizo CuratOR EX2721 User manual

Eizo FLEXSCAN T2351W User manual

Eizo

Eizo FLEXSCAN T2351W User manual

Eizo FORIS FS2331 User manual

Eizo

Eizo FORIS FS2331 User manual

Popular Monitor manuals by other brands

Epson CD5220 user manual

Epson

Epson CD5220 user manual

MicroNet mn100 user manual

MicroNet

MicroNet mn100 user manual

Runco CrystalSeries XP-OPAL6 DHD specification

Runco

Runco CrystalSeries XP-OPAL6 DHD specification

Barco MDRC-2122 WP user guide

Barco

Barco MDRC-2122 WP user guide

decrane aerospace TSC-9104-101-X Installation and operation manual

decrane aerospace

decrane aerospace TSC-9104-101-X Installation and operation manual

LG D2341P owner's manual

LG

LG D2341P owner's manual

LG Flatron N1642W Brochure & specs

LG

LG Flatron N1642W Brochure & specs

Philips 50PP920299 Directions for use

Philips

Philips 50PP920299 Directions for use

Samsung 203B - SyncMaster - 20" LCD Monitor Service manual

Samsung

Samsung 203B - SyncMaster - 20" LCD Monitor Service manual

Lenovo L2362p Wide manual

Lenovo

Lenovo L2362p Wide manual

BenQ FP51G user manual

BenQ

BenQ FP51G user manual

Lenovo L27m-28 user guide

Lenovo

Lenovo L27m-28 user guide

Fopo S12 user guide

Fopo

Fopo S12 user guide

BenQ XL2410T user manual

BenQ

BenQ XL2410T user manual

AOC E2357FH Service manual

AOC

AOC E2357FH Service manual

Planar IX2851 user guide

Planar

Planar IX2851 user guide

JVC VM-4200 instructions

JVC

JVC VM-4200 instructions

BGH BP4201S Service manual

BGH

BGH BP4201S Service manual

manuals.online logo
manuals.online logoBrands
  • About & Mission
  • Contact us
  • Privacy Policy
  • Terms and Conditions

Copyright 2025 Manuals.Online. All Rights Reserved.