eKey Uno User manual

Quick Start Guide
Operating the ekey uno
rechargeable ngerprint
scanner, wireless

• ekey uno
• Rechargeable battery
• Torx screwdriver
• Charger
• Bottom cap
• Safety screw
• Screws for attaching the ekey uno to the mounting plate
• Anchors and screws for attaching the mounting plate
to the wall
Battery-operated variant
Observe the enclosed Safety Information.
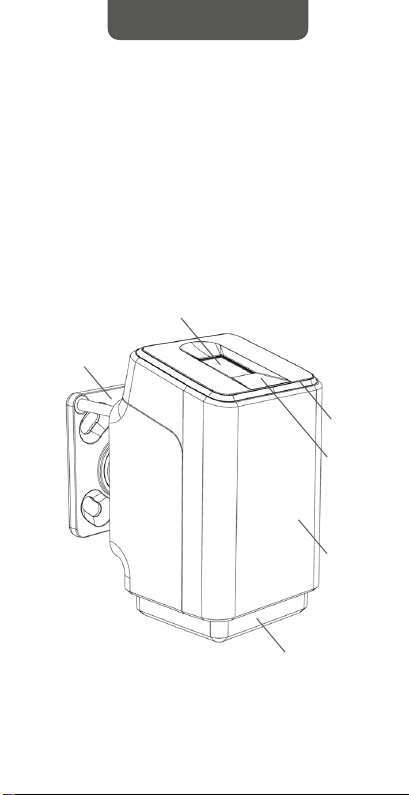
Scope of delivery
Mounting plate
Sensor
Light ring
Activation
sensor
Cover
Rechargeable
battery
Battery-operated variant
3
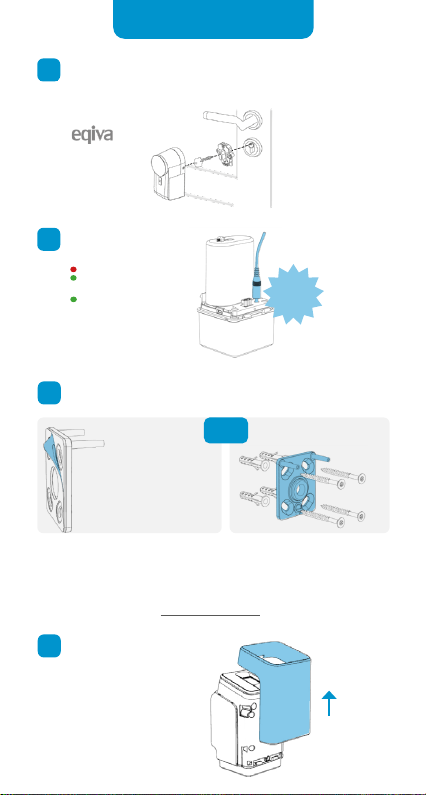
Attach the mounting plate (mount the ekey uno in the direct
vicinity of your door lock – height 110 cm)
2
Charge the battery
Battery is charging
Battery fully charged
4
Remove the cover
*NOTICE: Remove the entire base foil.Thoroughly clean the surface where the device
is to be mounted. Adhere the mounting plate only to a smooth, dry surface at room
temperature. Apply a large amount of pressure to the surface to adhere the
mounting plate. The bond only reaches maximum adhesive strength after 3 days.
Only then can the mounting plate be fully loaded.
For further information, visit: www.ekey-uno.net/faq.
1
Activate the eqiva BLUETOOTH® Smart Lock
Follow the instructions in the operating instructions for the
eqiva BLUETOOTH® Smart Lock
Glue variant*
CLICK
An adhesive foil is already
attached to the mounting
plate. Remove the base foil
and adhere the mounting
plate.
OR
Screw variant
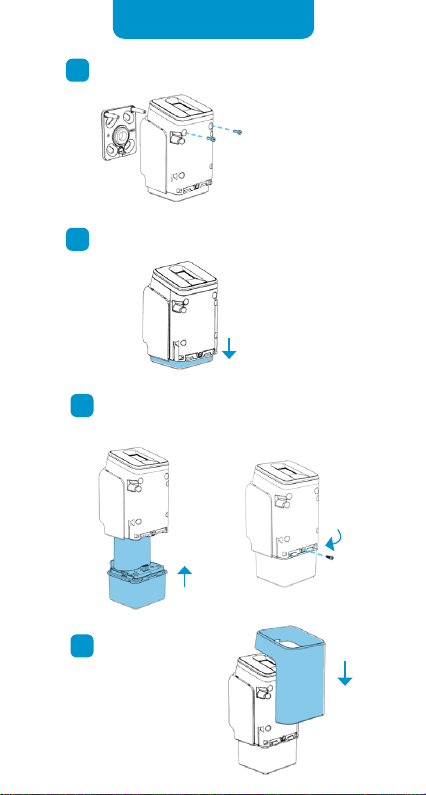
7
Insert the rechargeable battery and
close clamp
Optional: Attach the safety screw
Battery-operated variant
Battery-operated variant
8
Replace the cover
5
Screw the ekey uno in place
6
Remove the bottom cap
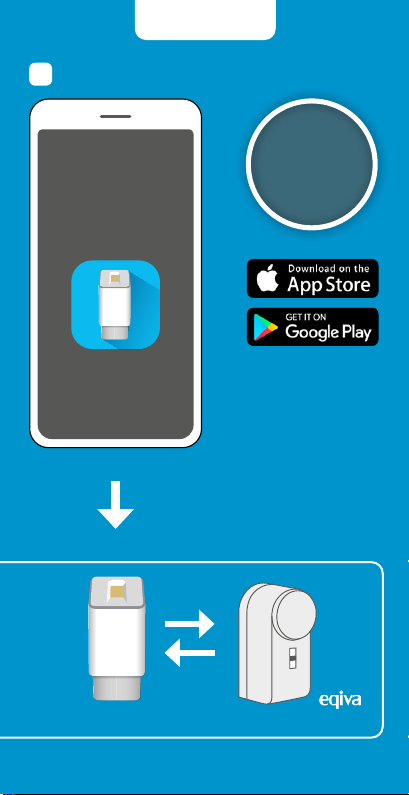
ekey uno
ekey uno app
FREE
DOWNLOAD
Apple and the Apple logo
are trademarks of Apple Inc.,
registered in the U.S. and
other countries.
App Store is a service mark
of Apple Inc. Android, Google
Play, and the Google Play logo
are trademarks of Google Inc.
9
Download the app
ekey uno app
GET CONNECTED!
www.ekey-uno.net
BLUETOOTH® Smart Lock

Quick Start Guide
ID 329/697/0/633: Version 1,
2019-05-13
Copyright © 2019 ekey biometric systems GmbH.
All content, artwork, and any ideas contained in this Quick Start Guide are
subject to applicable copyright laws. Any transmission, relinquishment, or
transfer of this content or parts thereof to any third party requires the prior
written consent of ekey biometric systems GmbH. Translation of the original
Quick Start Guide.
www.ekey-uno.net | This document is not subject to updating. We reserve the right to make technical modications and change the product‘s appearance; any liability for errors and misprints is excluded.
Critical battery level Access denied due to
time slot
More information is
available in the FAQ area
of the ekey uno app
www.ekey-uno.net
Operating the ekey uno
Close
Open
Place nger
on sensor.
No connection to eqiva
BLUETOOTH® Smart Lock
Connect ekey uno with
mobile device
Battery-operated variant
Place nger on sensor, wait
until LEDs ash blue. Place
nger on sensor again
while LEDs are ashing.
Place nger on sensor until
top right segment ashes.
Activation
sensor

Quick Start Guide
Operating the ekey uno
ngerprint scanner, wireless
• ekey uno
• Torx screwdriver
• Charger
• Bottom cap
• Safety screw
• Screws for attaching the ekey uno to the mounting plate
• Anchors and screws for attaching the mounting plate
to the wall
Mains-powered variant
Bottom cap
Scope of delivery
Observe the enclosed Safety Information.
Sensor
Light ring
Activation
sensor
Cover
Mounting plate
Mains-powered variant
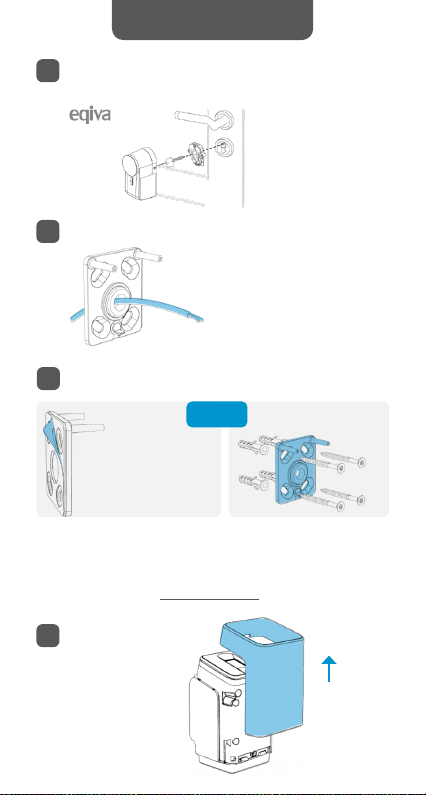
4
Remove the cover
1
Activate the eqiva BLUETOOTH® Smart Lock
Follow the instructions in the operating instructions for the
eqiva BLUETOOTH® Smart Lock
2
Cable through mounting plate
3
Attach the mounting plate (mount the ekey uno in the direct
vicinity of your door lock – height 110 cm)
*NOTICE: Remove the entire base foil.Thoroughly clean the surface where the device
is to be mounted. Adhere the mounting plate only to a smooth, dry surface at room
temperature. Apply a large amount of pressure to the surface to adhere the
mounting plate. The bond only reaches maximum adhesive strength after 3 days.
Only then can the mounting plate be fully loaded.
For further information, visit: www.ekey-uno.net/faq.
Glue variant*
An adhesive foil is already
attached to the mounting
plate. Remove the base foil
and adhere the mounting
plate.
OR
Screw variant
Mains-powered variant
Mains-powered variant
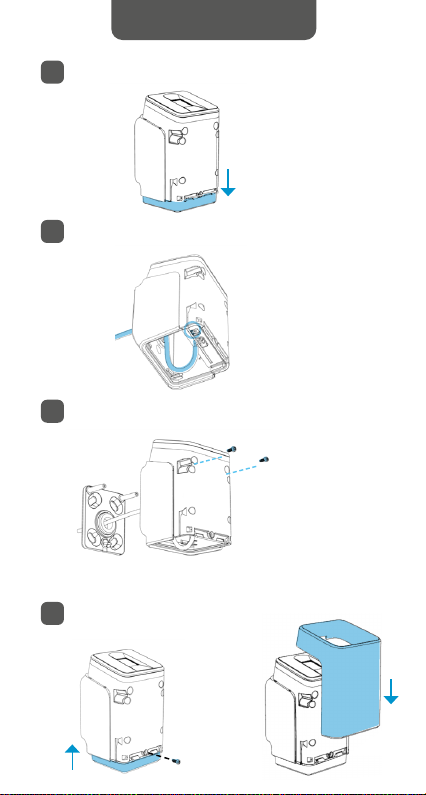
6
Thread cable through and connect
5
Remove the bottom cap
7
Screw the ekey uno in place
8
Replace bottom cap and cover
Optional: Attach the safety screw
Other manuals for Uno
2
Table of contents
Other eKey Scanner manuals


