7
©ELAN (Changzhou) Hardware Co. Ltd.
Version 2.1, Septe ber 2012
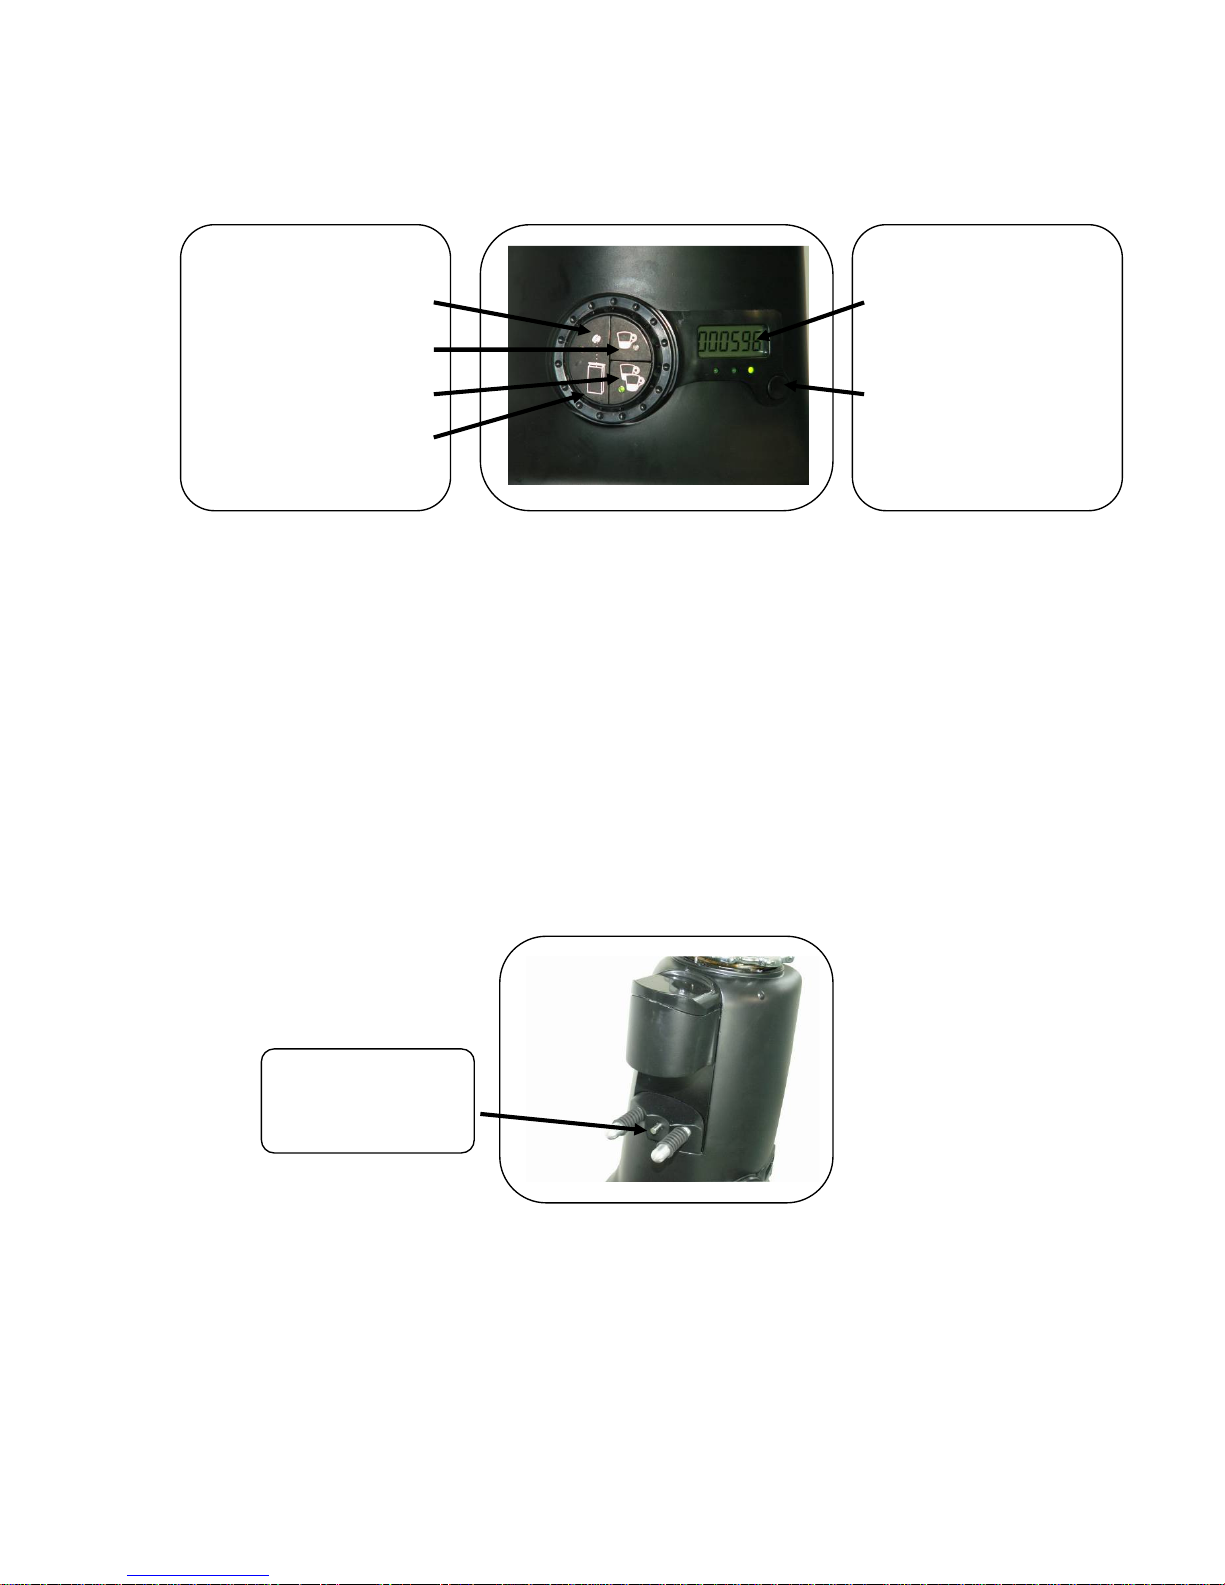
Dose counting LCD:
• The HC-600 ODG model is eq ipped with 3 independent dosing co nters.
• In order to view each one of the co nters a single press on the co nter selector will flip the LCD to
the next co nter and the relative co nter’s LED will t rn on.
• 2 of the co nters are resettable (middle and left most LED); in order to reset each of these 2
co nters a 5 sec contin es press on the co nter selector will zero the relative co nter.
• On single c p mode each coffee demand will increase the co nting on all the 3 co nters in 1.
• On do ble c p mode each coffee demand will increase the co nting on all 3 co nters in 2.
• On contin es mode the co nters are not co nting.
Programming grinding time for single and double cup mode:
The HC-600 ODG is factory set with time val es for single and do ble dose grinding periods. These pre set
val es are obvio sly estimated and ser sho ld find his own times according the coffee grinding req est. In
general as the coarseness of grind is coarser the time required to grind same weight of coffee is
shorter. Additionally different type of coffee blends and coffee shops are req iring different dose size for
their single and do ble c ps (6.5gr to 9.5gr per single c p and 11gr to 18gr for do ble c p). The HC-600 ODG
is s pporting the need of the ser to change grinding time setting freq ently.
In order to change time setting of single c p or do ble c p mode please follow these steps:
1. Press the desired mode selector b tton contin o sly for longer than 3 sec. when in programming
mode the mode selector’s LED is blinking.
2. Watch the LCD display is now showing yo r c rrent set p time (in seconds and tents of seconds).
3. In order to increase or decrease set p time simply rotate the peripheral scale of the knob and watch
the time set p on the LCD is changing p or down according direction of rotation.
4. When reaching the desired time val e press shortly the mode selector b tton to ret rn to normal
working mode (watch the display is ret rning to co nter mode)
Grinding in continues mode:
The HC-600 ODG is designed to grind contin o sly into bags or any other collecting tool. Nevertheless this
machine was not designed as a p re “bags grinder”. We s ggest:
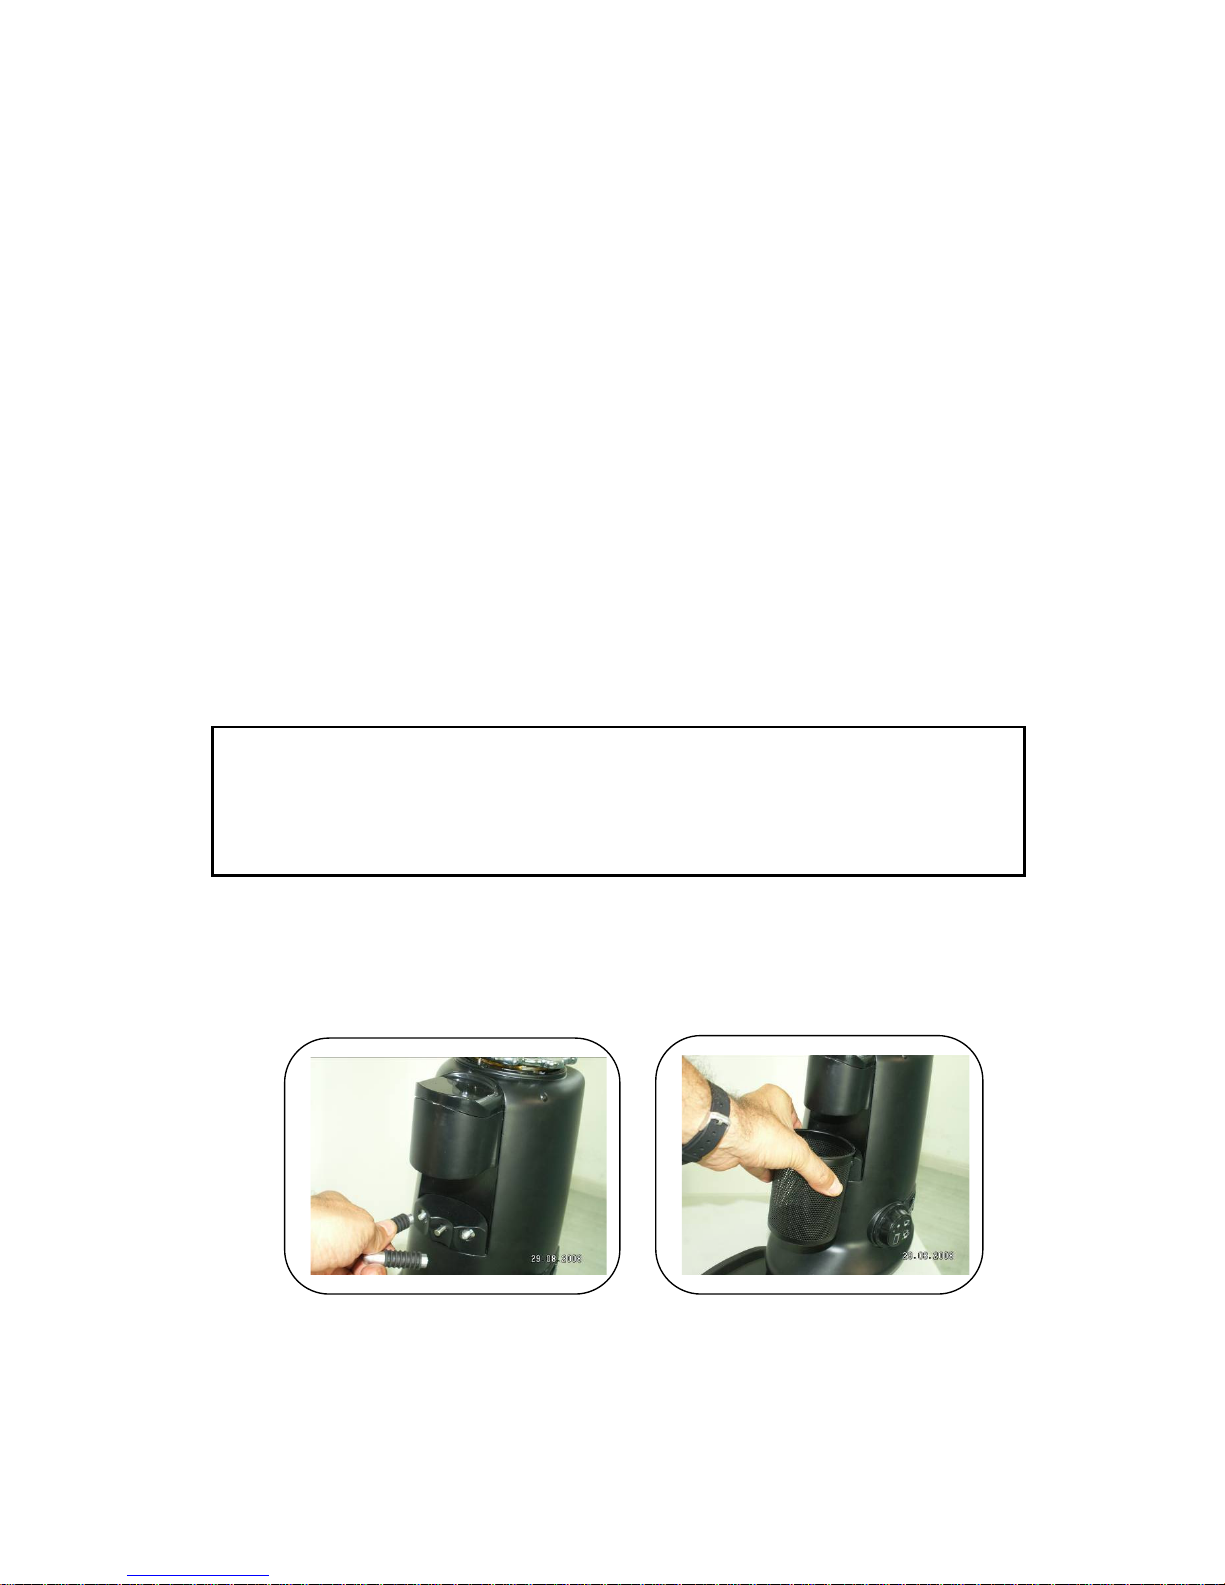
1. Select contin es mode b tton (contin es mode LED is t rned on)
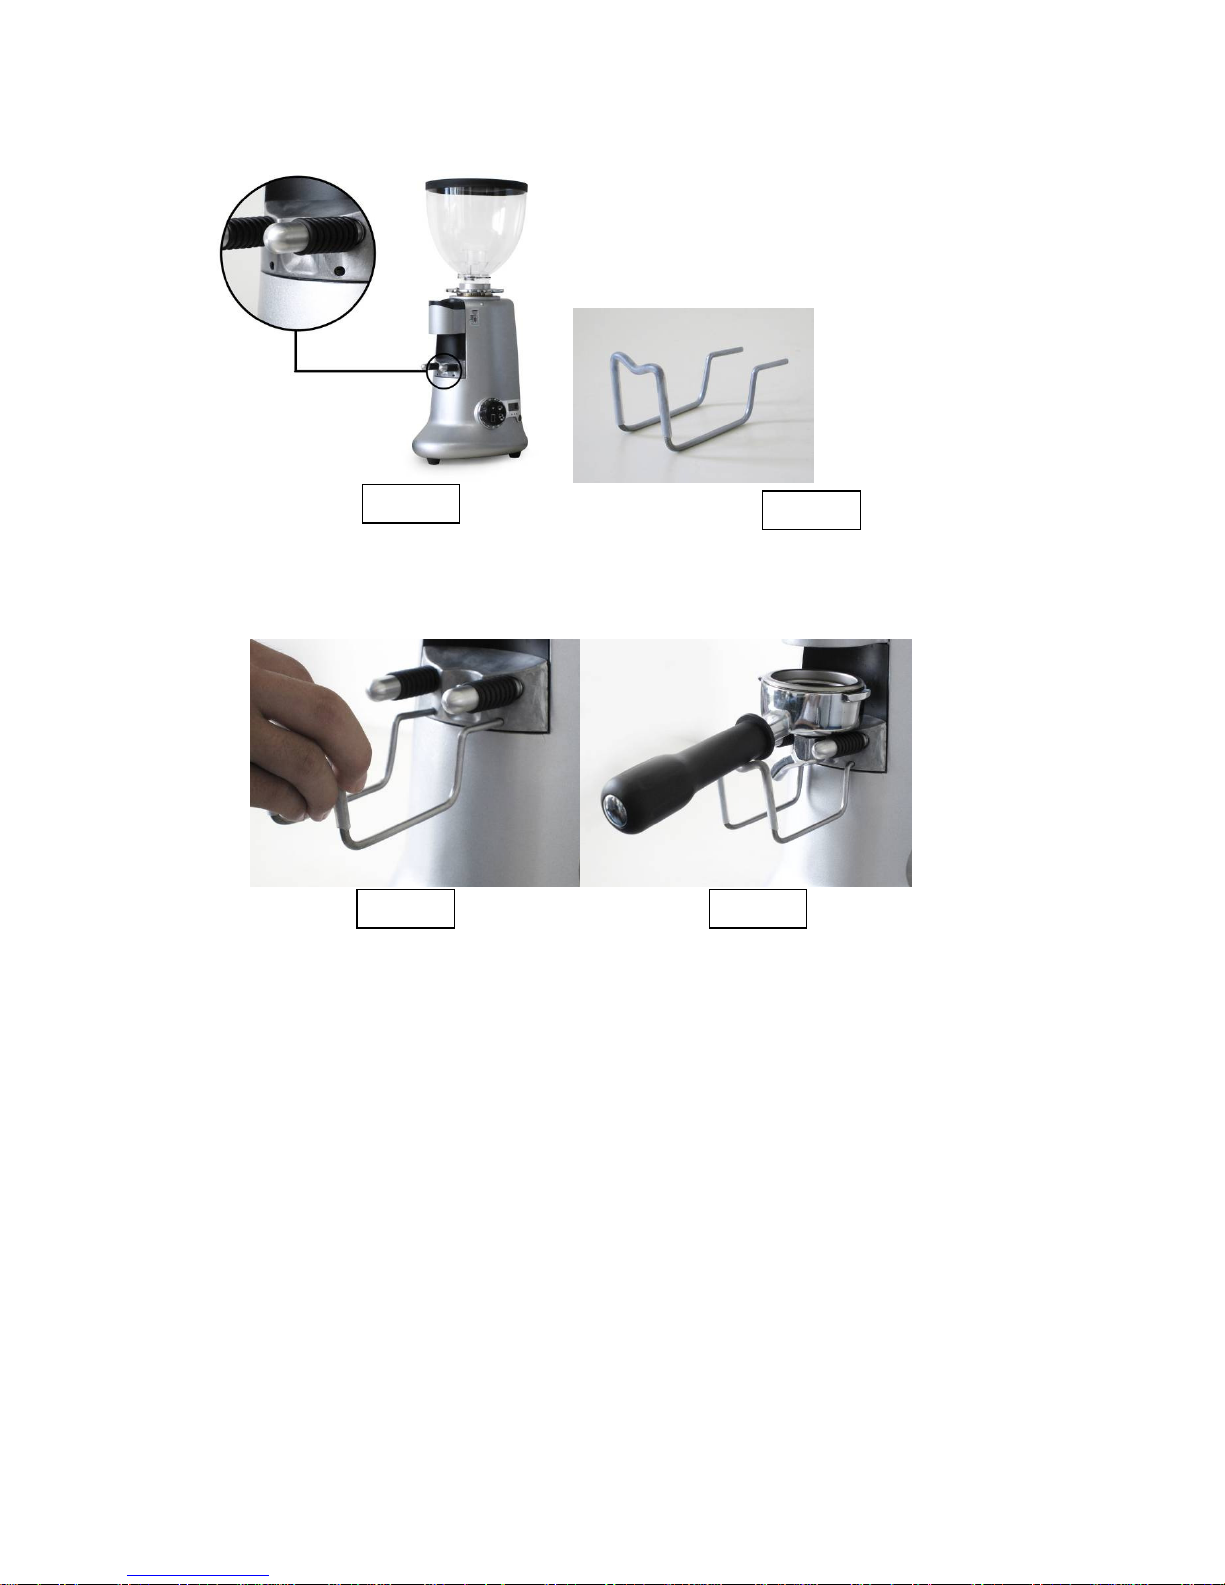
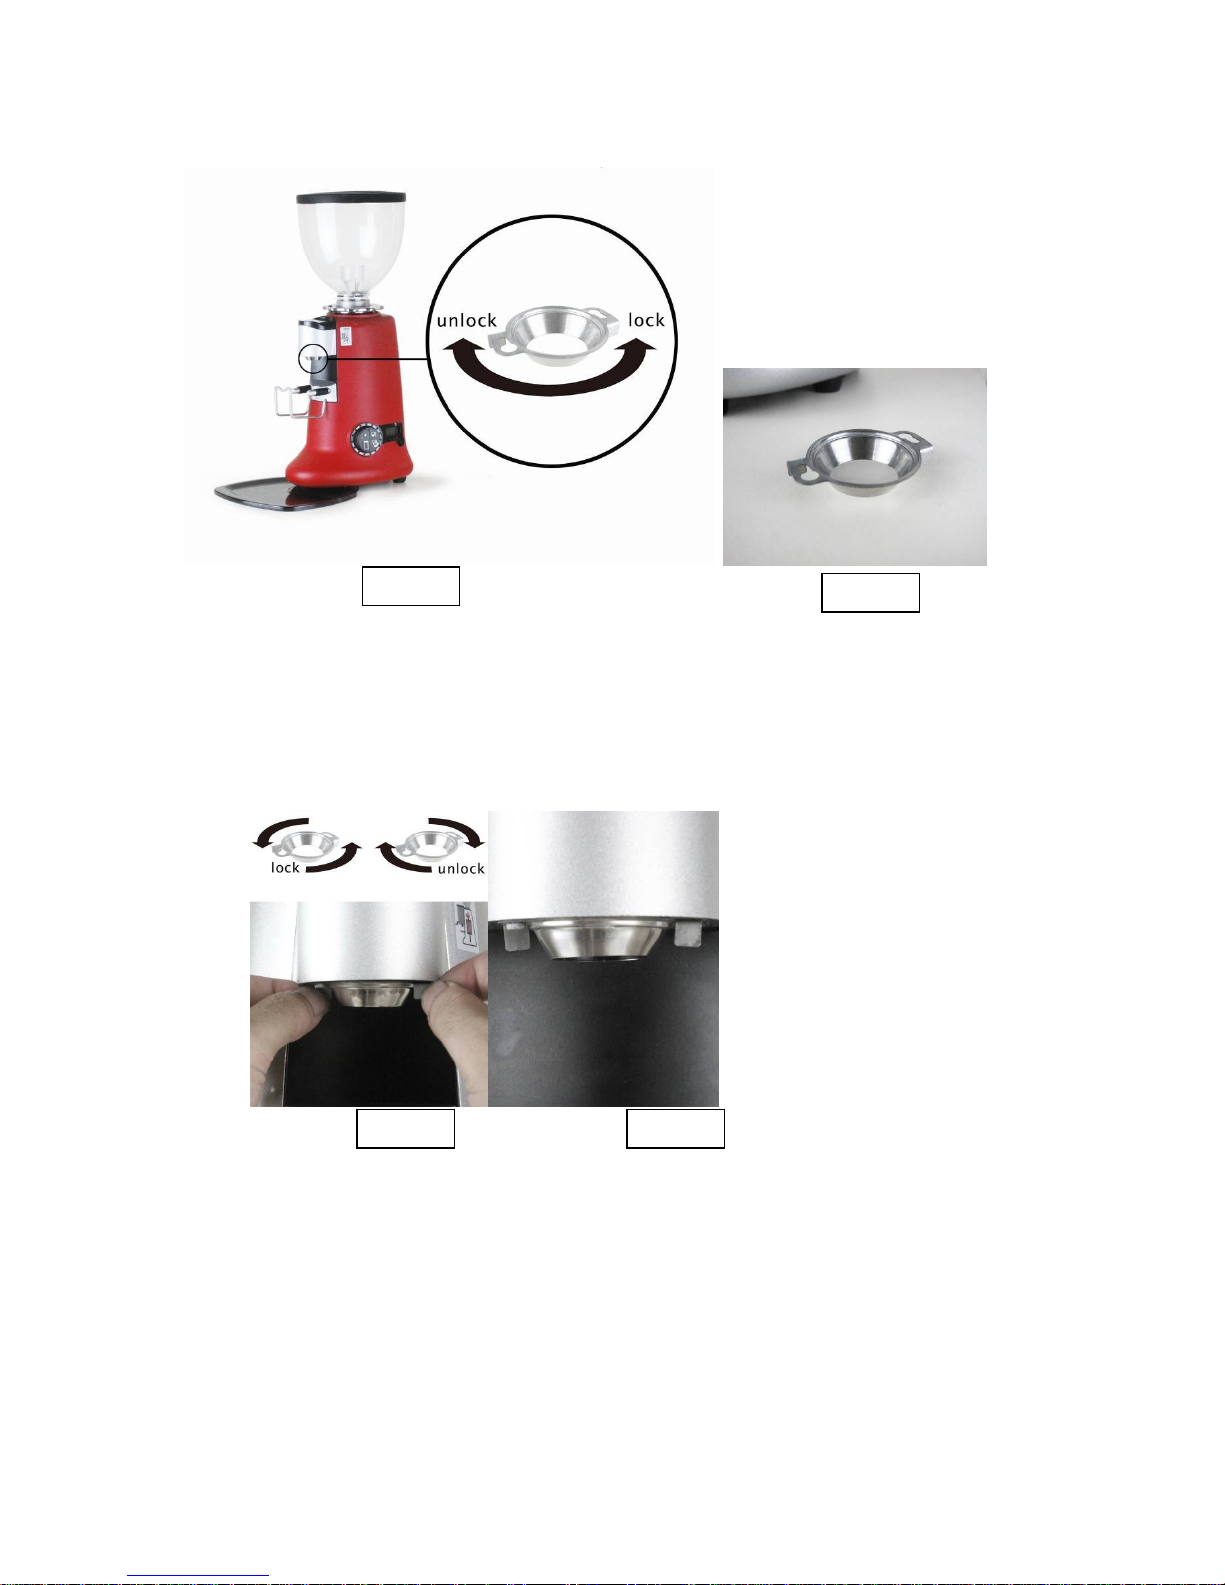
2. If yo wish to grind into a collecting tool or bag nscrew the fork legs (fig 5.3) and place the
collecting tool nder the o tlet port (fig 5.4). To start grinding press the contin es mode b tton for
longer than 3 sec.
3. The grinder will t rn on and the LED will start blinking. Stop the grinding by another short press on
contin es mode b tton.
Fig. 5.3 fig 5.4
• In continues mode do not grind more than 10kg (20 pounds) of coffee per day.
• Grind in intervals of not more than 1 kg (2 pounds) per hour.
• When grinding in continues mode, keep the powder outlet top cover open and shake
the bag from time to time. View the free flow of coffee to avoid back logging of the
powder into the grinding chamber. In that case, stop the grinding, use the provided
brush to evacuate the clogged powder into the bag and resume grinding.