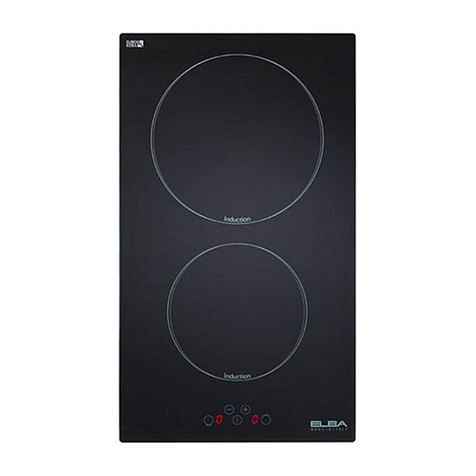
Elba 6222MC User manual

BEFORE YOU CALL FOR SERVICE
Before calling for service, be sure you read the following to avoid
an unnecessary service call.
TROUBLE CAUSE REMEDY
After the ignition knob is
released, the flames are
extinguished.
Although there are ignitions,
the burners do no light on.
Uneven flame
The flames become yellowish.
The flames are extinguished
while the unit is in use.
Abnormal sounds during
combustion.
Smell of gas.
The ignition knob is not turned
on properly.
Air is entrapped in the rubber
gas hose.
The ignition spark device is
dirty or wet.
The rubber hose is bent.
Short of gas supply
The air adjaster is not in a
fixed position.
The slits in the burner caps
are clogged.
The burner caps are not
mounted properly.
Gas leakage from cracks of
rubber hose.
Loose connection of rubber hose.
Turn it counter clockwise.
Open the main valve.
Repeat turning it on
several times.
Replace gas cylinder.
Set it to desired position
properly. See figure#18
Clean the cap.
Mount them in place.
Replace it.
Secure the rubber hose
with the hose clamp.
※ Consult your dealer if you may not solve problem.Be sure to turn off the main cock.
WHEN SERVICE IS REQUIRED
Turn off the gas supply main cock and consult with your dealer for service or
call your nearest authorized service agency.
When calling service,give the following information:
1.Your name,address and phone number.
2.Model name and serial number,and date of purchase.
3.Problem in detail.
4.If you incur any problems,please take the stove to our service
department for repair.
INSTRUCTION MANUAL
CONTENTS
FEATURE DIAGRAM
INSTALLATION INSTRUCTIONS
HOW TO OPERATE
IMPORTANT SAFETY INSTRUCTIONS
ADJUSTMENT OF COMBUSTION
CARE OF YOUR GAS COOKER
BEFORE YOU CALL FOR SERVICE
1
1
2
3~4
5
6
7
GLASS STOVE
READ AND FOLLOW INSTRUCTION MANUAL BEFORE USE.
Ignition pin is far from the ring
cap
Install the battery wrongly
More the ignition pin and
keep 3-5mm from the ring cap
Install the battery correcily.
Clean or dry up.
Install if properly or replace it
7

PRECAUTIONS
USE ONLY THE TYPE OF GAS SPECIFIED ON Sheet 1:
Model No Gas Used Pressure Heat flow Rate
EGH6022 LPG 2800Pa Left:3.4Kw/h
Right:3.4Kw/h
Left:3.4Kw/h
Mid:1.0Kw/h
Right:3.4Kw/h
Do not place the unit near flammable materials. E.g. curtains, draperies, etc.
Be sure to turn off the burners and main cock if the unit is not in use.
Use a heat proof panel to protect walls where as required.
(For further information, refer to INSTALLATION INSTRUCTIONS on page 1)
ENSURE FIRE SAFETY
USE THE UNIT IN A WELL VENTILATED ROOM
Ensure proper ventilation. If the unit is used in a poorly ventilated room the air will be vitiated
and may be harmful to health.
PREVENT GAS LEAKS
Use a rubber gas hose of the approved type only. Do not use a vinyl hose as it
may not resist high temperatures and may be softened by heat.
While using the unit, occasionally check that the burners are lit .
After use, turn off the burners and stop gas flow. With the main cock. Especially make
sure the main cock is off before going to bed or a way from home.
In case of gas leaks, turn off the main cock and ventilate the room immediately
by opening windows and doors. Please contact your dealer of gas company.
WARNING:
In case of gas leaks, DO NOT turn fans or other electrical appliances on or off. DO NOT
light a match or use a lighter.
CAUTION WHEN USING
1.USE THE UNIT FOR COOKING PURPOSES ONLY TO PREVENT FIRE HAZARD
Do not use the unit for purposes other than cooking e.g. To burn charcoal, briquette.
Do not hang up clothes, towels, etc. To dry over the unit.
2. DO NOT USE OVERSIZED HOT PLATE WHICH TOTALLY COVERS THE
BURNER SURFACE
As air supply may be restricted, it will result in poor Combustion. Also the pan supports,
cook top and unit base may be heated abnormally.
3.DO NOT USE A LARGE IRON PLATE TO COVER BURNERS
4. IN CASE OF TROUBLE
If there are any signs of abnormal combustion, including strange sounds when the burners are
lit, turn off the burners and the main cock lit, turn off the burners and the main cock immediately
and contact your dealer.
5.WHEN THE UNIT WILL NOT BE USED FOR LONG TIME
Make sure the main cock is turned off.
If you wish to stow away the unit, you must ask your gas supplier to disconnect it for you,
and to connect it when you wish to use it again.
4
Figure #7
3.TURNING OFF UNIT
a- turn the ignition knob clockwise up to its original
position without pressing it.
b- after use. Make sure to turn off the main clock.
Remark:
When the burner is shut off, it may make a noise,
this normal.
For all the gas stoves with flameout device, it can automatically stop the gas distribution on
purpose of protection in case the flame suddenly gets out.
Make sure to operate the unit carefully as below:
1.Push the gas control knob in and turn towards the MAX position (anti-clockwise) until the
burner has been lit and last about 10 seconds. Then release the gas control knob. If the burner is
off when you release the gas control knob, turn the knob back to OFF and try again until the
burner ignite.
2.When the spilling water, soup or wind cause the unit flameout, the flameout device will
automatically close the gas distribution. For the sake of safety, to make sure turn the gas
control knob to OFF position immediately and to check if there is some dirt like soup, drip
etc on the surface of the flame-checking thermocouple. If so, keep it clean after the unit cool
down to avoid using difficultly next time.
3.Be careful not to impinge against the flame-checking thermocouple by the tough tools.
How to operate the unit with flameout protection
EGH6222 LPG 2800Pa Left:3.4Kw/h
Right:3.4Kw/h
EGH6033 LPG 2800Pa
Left:3.4Kw/h
Mid:1.0Kw/h
Right:3.4Kw/h
EGH6333 LPG 2800Pa
2
9
6
3
1
4
10
7
8
5
2
8
6
3
15
4
7
1.Bottom Base
2.Cook Top
3.Lgnition Knob
4.Gravy Tray
5.Burner Cover
6.Outer Ring Cap
7.Inner Ring Cap
8.Pan Support
9.Smaller Pan Support
10.Pot Stand
1.Be sure to install the unit in a room where no strong air
currents flow.
2.Allow at least 15cm of space from kitchen walls,100cm
from the ceiling and 40cm below the glass stove.
If the kitchen walls and cabinet are made of wood or any
combustible material and the spaces as specified cannot
be maintained, you must install a heat-proof panel on the
kitchen walls so as to prevent possible fire hazard.
1.Open the battery box at the bottom of the glass stove, and
put in the battery according to the sign + and - on
battery box, Then cover the battery box.(Figure #2)
2.Lay the glass stove in the cupboard, put on the pan support
and post stand, and make sure all the parts correct position.
3.Install the rubber hose and connect to the supply line.
Make sure only a rubber hose of approved type and a
length of no more the 2m used. Don t put the gas cylinder
near the glass stove.
'
OPFOR
Figure #2
Ring cap
Burners,
Ring caps,
Pan support
UNIT PARTS MAINTENANCE
Cook top and
Control panel
Rubber hose
Cook top
Check if the slits in the ring caps are
clogged with dirt. Clean them with a
nail, wire brush toothbrush, or the like.
After washing the burner caps, dry them.
Make sure the cap is mounted in place.
(if the ring caps are not mounted properly.
Gas distribution may not be even.)
When they get dirty, use a soft cloth damped with a mild detergent
solution to wipe off dirt. Do not use either thinner or benzine for
cleaning. This may damage plastic parts.
Make sure the rubber hose is tightly secured over gas supply outlet and
secure it with the rubber hose.
If there are cracks in the hose, replace it.
When they get dirty, use a soft cloth to wipe off dirt.
Make sure to wipe off dirt every-time when they get dirty, if they
are kept dirty for a long time (more than one week), they will
become stained or it will become a cause of the stripping of the
coating material.
If the dirt is difficult to wipe off, use a soft cloth damped with a
neutral detergent solution or water.
The coating material is weak against a physical shock or high
temperatures. The following must be kept in mind.
1. Do not use a swab. A polishing powder, a cleanser, a knife,
an alkaline detergent or a bleaching solution to wipe off dirt.
2.Do not give a physical shock to the unit.
3.Do not give excessive heat to the unit by covering the burner
with a large iron plate or a large pot.
It is expcted that the section right below the grill support will be
scratched and a white surface comes out. This will not cause
any problems in your daily use.
705
375

Figure #4
Figure #5
‘
Don t open cupboard door frequently when you are using
the glass stove and provide excess opening.
4.Fit the rubber hose tightly over end of gas supply line
and secure it with a hose clamp. (Figure #3)
CAUTION
CAUTION
DO NOT bent, twist or stretch the hose.
Figure #8
1.Should the flame be: of a yellow colour, burning black, floating flame or deposit carbon
beneath the cooking utensils, this would indicate a misadjustment of the air and gas
mixture. To correct this, you need only to adjust the air regulator in the conduction tube
in the following way:
Move the regulator up or down to allow a greater or lesser flow or air.
Adjust until pale blue flame is achieved.
Hose clip
Gas supply line
Figure #3
Figure #6
2.FLAME CONTROLLER
a-Control the knob between Max and Min to regulate
the flame and cooking power output.
b- Turn the knob counter clockwise to the minimum
flame position to set for lowest cooking output level.
Remark:
When the flame is reduced suddenly it may happen
to turn off the burner. Make sure the burner is ignited.
This manual suits for next models
1
Table of contents
Other Elba Cooktop manuals

Elba
Elba E30-021 Installation and operating instructions

Elba
Elba CG302L Mounting instructions

Elba
Elba 345-003 I Installation and operating instructions

Elba
Elba EIC-G3602STBK User manual

Elba
Elba EIC-G1811BK User manual

Elba
Elba EIC-C2019(BK) User manual

Elba
Elba EIC-A2010S User manual

Elba
Elba PXDO 906 C User manual

Elba
Elba CE302 Mounting instructions

Elba
Elba INDUCTION BUILT-IN COOKTOP Installation and operating instructions