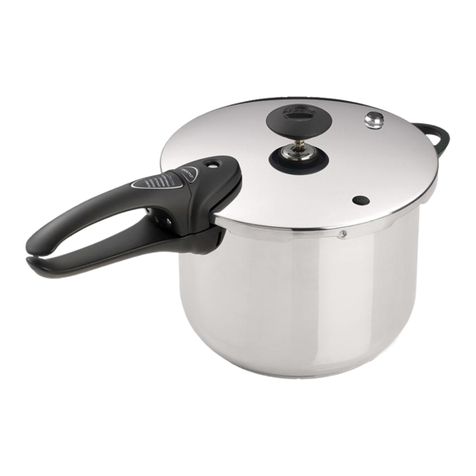
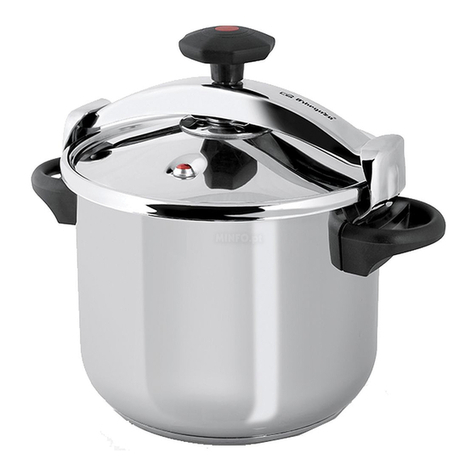
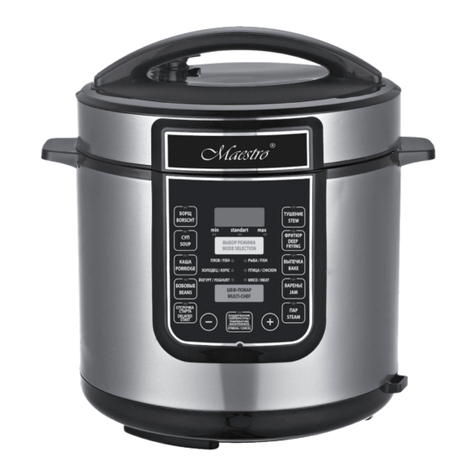
Elechomes CY601 User manual

User Manual
Electric
Pressure Cooker
Model:CY601

Thanks for choosing Elechomes! Please read this user manual carefully and
keep it for future reference.
The figure shown is for illustration purposes only. The actual product may
vary due to design changes.
Contents
1.Safety Precautions........ .............................. 1
2.Product Illustration..................................................................2
3.Before Your First Use..............................................................4
4.Prepare for Cooking................................................................5
5.Connect to Power.……...........................………………...........7
6.Pressure Cooking...................................................................8
7.Memory Function...................................................................12
8.Troubleshooting.……...........................………………............12
9.Cleaning and Maintenance...................................................14
........................... .
Safety Precautions
To avoid personal injury and product damage, please read and abide by the
following safety precautions.
Please follow the instructions in this manual exactly as they are specified.
Improper operation may cause injury or damage to the device.
Do not use unauthorized accessories. If a malfunction occurs while
unauthorized accessories are in use, the warranty will be void.
Make sure the device is free of damage and that all accessories are
included when unboxing the electric pressure cooker.
Keep this device away from children.
Children must have adult supervision to operate this device.
If a problem occurs, unplug the device immediately.
Do not attempt to repair this device yourself as this may lead to injury. All
repairs must be performed by a maintenance center authorized by
Elechomes.
Everything marked with this sign is a prohibited action.
To avoid personal injury and product damage, do not
perform these actions under any circumstances.
Everything marked with this sign must be done as
exactly as the instructions specify. To avoid personal
injury and product damage, read the directions
carefully.
Everything marked with this sign is a potential safety
hazard. To avoid personal injury and product damage,
use with caution when performing these steps.
Warning
Caution
Prohibited
1

The Elechomes Electric
Pressure Cooker is for home use
only. Do not operate the device
outdoors.
Do not operate the device on a
tilted or unstable surface.
Do not expose the electric
components of the device to
water or any other liquid. This
may lead to electrocution. Only
place the washable components
in water.
Do not place the device on or
near hot surfaces like ovens or
stoves.
Do not store foreign items or
materials in the cooker. Only
place ingredients in the device.
To avoid burning and other
potential safety hazards, do not
start the device without water in
the pot.
To avoid electric shock, make
sure the plug and power cord are
damage-free. If the plug or power
cord are damaged, please take
the device to an authorized
maintenance center to have a
replacement installed.
The exhaust valve emits hot
steam when the device is in use.
To avoid scalding, keep your
hands away from the exhaust
valve at all times.
Do not move the pressure cooker
or open the cover while in use.
To move or carry the cooker, hold
the device by the pot handles
instead of the cover handle.
Do not operate the device in
extreme temperature conditions
(both high and low) or expose it
to strong sunlight, strong wind,
or high humidity.
Do not plug the pressure cooker
and other high-powered home
appliances into the same power
outlet simultaneously.
For improved taste, do not open
the cover frequently while the
device is in use.
Make sure the connected power
supply is safe, grounded, and
compatible with the device's
voltage rating.
110V
Product Illustration
Seal Ring
Aluminum
Plate Puller
Aluminum Plate
Seal Ring for Float Valve
Exhaust Pipe
Cover
23

Exhaust Valve
Float Valve
Lever
Pot Scale
Inner Pot
LED Display
Control Panel
Condensation Collector
Exterior Pot
Heating Unit
Pot Handle
Housing
Base
AC Power Inlet
Power Cord Steam Tray Rice Spoon Measuring Cup Steam Rack
Before Your First Use
Remove all packaging material from the pressure cooker.
Remove all accessories from the inner pot.
Clean the accessories thoroughly before use (for detailed cleaning
instructions, refer to the Cleaning and Maintenance section).
Note: Make sure the accessories are completely dry before using them with
the pressure cooker.
Before opening the cover, make sure that the float valve has dropped.
Hold the cover handle and rotate it clockwise until the symbol on the
cover points to the position. Remove the cover.
Prepare for Cooking
Open
The float valve will
drop down when
there is no pressure
in the inner pot.
The float valve rise
when there is
pressure in the
inner pot.
Remove the inner pot before adding ingredients and/or water. Do not turn
on the pressure cooker if the inner pot is empty.
MAX
CUP
4
5
3
5
2
5
1
5
12
10
8
6
4
2
MAX
CUP
4
5
3
5
2
5
1
5
12
10
8
6
4
2
The volume of
ingredients and/or
water should not
exceed the 4/5
indication mark.
The volume of
ingredients that easily
expands when heated
up should not exceed
the 3/5 indication mark.
Add the uncooked ingredients and/or water into the inner pot using the
indication marks as a guide. We recommend using the supplied measuring
cup when adding rice.
Note: Add water to mark 3 for 3 cups of rice. Use the rightmost indication
marks to measure liquid volume.
45

MAX
CUP
4
5
3
5
2
5
1
5
12
10
8
6
4
2
For proper measurements, do not under fill or over fill the measuring cup.
Make sure the ingredients are level with the rim.
Note:
The maximum capacity of the inner pot is 6L / 12 cups.
If the rice is not cooked to your liking, we recommend adjusting the ratio of
uncooked rice and water within the range of 1:1 to 1:2.
To cook porridge, use an ingredient to water ratio within the range of 1:6 to
1:7.
Add the Inner Pot to the Exterior Pot
exterior pot are completely dry before placing the
inner pot into the pressure cooker.
Gently rotate the inner pot back and forth after
insertion to make sure it is in contact with the heating
unit.
Make sure the exterior pot, heating unit, and the
Close the Cover
Make sure the seal ring is mounted on the outer edge of the aluminum
plate.
Rotate the aluminum plate gently to ensure the seal ring even contact with
the plate.
Hold the cover handle and rotate it counterclockwise until the symbol
on the cover points to the position.
Lock
Check the Exhaust Valve
Ensure the direction of the exhaust valve is rotated from to position
and the float valve has dropped (the float valve is dropped when the
cooker is idle.).
Ensure the exhaust valve and exhaust pipe are unclogged.
Connect to Power
Plug in the Power Cord
Insert the small end of the power cord into the female connector of the
pressure cooker and insert the opposite end of the power cord into a wall
outlet.
Make sure the power cord is firmly connected to the pressure cooker and
the wall outlet.
Power on
The device will beep and the LED screen will
display “0000” when successfully connected to
power.
The device is now in standby state. Press the
buttons on the control panel to operate the
pressure cooker (please refer to the following
section for more detailed instructions).
Boost Pressure
Maintain Pressure
Keep Warm
Delay Timer
Soup/
Porridge
Slow
Cook
Bean/
Chili
Cake
Rice/
Multigrain
Meat/
Poultry
Delay
Timer
Keep Warm/
Cancel
Adjustment
Time
Note: Due to its memory function, the cooker may enter the last setting
mode automatically when powered on. Press Keep Warm/Cancel to revert to
standby state.
67

Boost Pressure
Maintain Pressure
Keep Warm
Delay Timer
Soup/
Porridge
Slow
Cook
Bean/
Chili
Cake
Rice/
Multigrain
Meat/
Poultry
Delay
Timer
Keep Warm/
Cancel
Adjustment
Time
Pressure Cooking
1. Menu Setting
Press the Soup/Porridge, Meat/Poultry, Slow
Cook, Yogurt, Steam, Bean/Chili, Cake, and
Multigrain buttons for preprogrammed cooking
settings.
After selecting a preprogrammed setting, the
button's corresponding indicator and the Normal
indicator will glow. The LED screen will display
the default cooking time (please refer to the
Cooking Time Table section for more detailed
information).
Example: After pressing the Rice/Multigrain button, the Rice/Multigrain
indicator and Normal indicator will glow. The LED screen will display “0:12”
indicating a 12 minute cooking time and the flavor intensity will be set to
Normal (see illustration below).
Boost Pressure
Maintain Pressure
Keep Warm
Delay Timer
Soup/
Porridge
Slow
Cook
Bean/
Chili
Cake
Rice/
Multigrain
Meat/
Poultry
Delay
Timer
Keep Warm/
Cancel
Adjustment
Time
Boost Pressure
Maintain Pressure
Keep Warm
Delay Timer
Soup/
Porridge
Slow
Cook
Bean/
Chili
Cake
Rice/
Multigrain
Meat/
Poultry
Delay
Timer
Keep Warm/
Cancel
Adjustment
Time
Boost Pressure
Maintain Pressure
Keep Warm
Delay Timer
Soup/
Porridge
Slow
Cook
Bean/
Chili
Cake
Rice/
Multigrain
Meat/
Poultry
Delay
Timer
Keep Warm/
Cancel
Adjustment
Time
If you would like to customize your cooking,
disregard the next steps.
Once you have selected a preprogrammed
setting, the device will beep after 5 seconds and
the LED screen will display “- - - -“ indicating that
the cooker has begun heating.
Wait until the cooking time is over before
removing ingredients.
Note: Press the Keep Warm/Cancel button to exit the current function and
revert to standby. Press the Keep Warm/Cancel button in standby to enter
keep-warm mode.
2. Customized Settings
Adjust cooking time by pressing the Time Adjustment
button after selecting a preprogrammed setting.
Press the Time Adjustment Button again until the
LED screen displays your preferred time.
Once a time has been selected, the pressure cooker will begin heating
after 5 idle seconds.
Adjustment Flavor Intensity
To adjust flavor intensity, press the
preprogrammed function button until the
indicator light displays your desired intensity
(see diagram below).
Once a flavor intensity has been selected, the
pressure cooker will begin heating after 5 idle
seconds.
Boost Pressure
Maintain Pressure
Keep Warm
Delay Timer
Soup/
Porridge
Slow
Cook
Bean/
Chili
Cake
Rice/
Multigrain
Meat/
Poultry
Delay
Timer
Keep Warm/
Cancel
Adjustment
Time
Adjust Time
3. Delay Start
To delay cooking, press the Delay Timer
button after pressing a preprogrammed
function button. The LED screen will display
the default delay start time.
Press the Delay Timer button again to adjust
delay start time.
Once a delay time had been set, the pressure
cooker will begin heating after 5 idle seconds.
Note: The delay start function can not be used with Cake or Yogurt mode.
Cooking Time Table
Function
Default
Cooking
Time
Time
Adjustment
Flavor
Intensity
(Short-
Normal-
Longer )
Max Delay
Start Time
Soup/Porridge 25 min
5– 60 min (1 min
adjustment per
button press)
Short: 20 min
Normal: 25 min
Longer: 60 min
24 hrs
Meat/Poultry 20 min
5– 60 min (1min
adjustment per
button press)
Short: 15 min
Normal: 20 min
Longer: 60 min 24 hrs
8 9

Slow Cook
90min
24 hrs
Yogurt
8 hrs
/
Steam
15min
24 hrs
Bean/Chili
30min
24 hrs
Cake
35min
/
Rice/
Multigrain
15min
24 hrs
Function Default
Cooking
Time
Time
Adjustment
Flavor
Intensity
(Short-
Normal-
Longer )
Max Delay
Start Time
60– 240 min (30
min adjustment
per button press)
Short: 60 min
Normal: 90 min
Longer: 240 min
6–12 hrs (30 min
adjustment per
button press)
Short: 6 hrs
Normal: 8 hrs
Longer: 12 hrs
5– 60 min (1 min
adjustment per
button press)
5– 60 min (1 min
adjustment per
step)
30– 40min (1min
adjustment per
button press)
5– 20 min (1min
adjustment per
step)
Short: 10 min
Normal: 15 min
Longer: 30 min
Short: 20 min
Normal: 30 min
Longer: 60 min
Short: 30 min
Normal: 35 min
Longer: 40 min
Short: 8 min
Normal: 12 min
Longer: 20 min
4,Heating Completed and Maintain Pressure Mode
Once heating has completed, the cooker will automatically maintain
pressure. The device will beep, the Maintain Pressure indicator will glow,
and the LED screen will display a time of “PX:XX”.
Once the time reaches “P0:00”, the cooker will no longer maintain
pressure and the Maintain Pressure indicator will turn off.
Example: The pressure maintain time for the
Rice/Multigrain function is 12 minutes. The LED screen
will initially display “P0:12” and will gradually decrease
to “P0:00”.
Note: When in Cake or Yogurt mode, the device will
not enter into maintain pressure mode.
Boost Pressure
Maintain Pressure
Keep Warm
Delay Timer
Soup/
Porridge
Slow
Cook
Bean/
Chili
Cake
Rice/
Multigrain
Meat/
Poultry
Delay
Timer
Keep Warm/
Cancel
Adjustment
Time
5. Keep Warm Mode
The pressure cooker will automatically enter keep
warm mode when cooking has completed. The
Keep Warm indicator will glow and the LED screen
will display “00:00”. The device can stay in keep
warm mode for a maximum of 8 hours.
Boost Pressure
Maintain Pressure
Keep Warm
Delay Timer
Soup/
Porridge
Slow
Cook
Bean/
Chili
Cake
Rice/
Multigrain
Meat/
Poultry
Delay
Timer
Keep Warm/
Cancel
Adjustment
Time
Note: When in Yogurt mode, the device will not enter
into keep warm mode.
6. Open the cover
Once cooking has completed, rotate the exhaust valve from
the to the position to release the steam.
Open the cover once the float valve drops.
Unplug the power plug from the wall outlet.
Hold the cover handle and rotate it clockwise until the
symbol on the cover is points to the position. Lift the
cover and set it aside.
Note:
The device will emit steam when the cover is opened. Keep
your face and hands away from the device when opening
the cover.
If the inner pot contains a liquid (such as soups, porridge,
or noodles), do not rotate the exhaust valve immediately
after cooking completes. The liquid may shoot out of the
exhaust valve if it is rotated prematurely. Wait until the inner
pot no longer emits steam before rotating the exhaust
valve.
Open
Place a damp towel over the cover to increase cooling speed.
Do not touch the cover immediately after cooking has completed.
Do not place your hand over the exhaust valve.
10 11

Elechomes electric pressure cooker is designed with memory function to
enable much more convenient use.
Memory function refers to the memory of last working state that is valid
within 2-3 hours when restarted after sudden shutdown in working, timing,
and keeping warm state.
Memory Function
Please refer to the table below if the device malfunctions. If the problem
persists, please contact Elechomes.
Troubleshooting
Problem Possible Reason Solution
The cover is
difficult to
close.
1
Seal ring not installed
properly
Position the seal ring well
The float valve is clogged
by the lever.
Push the lever lightly to
readjust
2
The float valve hasn't
dropped down (even the
steam is fully released).
Press the float valve down
lightly with a slender stick
The cover is
difficult to
open.
3
The seal ring is not
attached to the cover.
Install the seal ring
Steam is
escaping
from the
cover.
The seal ring is damaged. Replace the seal ring
Food debris is attached
to the seal ring.
Clean the seal ring
The cover is not closed
properly.
Open, realign, and close
the cover again
Problem Possible Reason Solution
Steam is
escaping from
the float valve.
4
Food debris is attached
to the seal ring of float
valve.
Clean the seal ring of
float valve
The seal ring for the float
valve is damaged.
Replace the seal ring of
float valve
5
The float valve
doesn't rise.
The exhaust valve is not
positioned at the sealing
position.
Re-position the
exhaust valve
There is not enough food
and/or water in the inner
pot.
Add more ingredients
and/or water according
to the recipe's ratio.
The cover or exhaust
valve is leaking.
Take the device to an
approved maintenance
center to be repaired
6
The LED screen
displays “E01”
and the cooker
beeps 10 times.
The sensor circuit is
open.
Take the device to an
approved maintenance
center to be repaired
The LED screen
displays “E02”
and the cooker
beeps 10 times.
7
The sensor is short
circuiting.
Take the device to an
approved maintenance
center to be repaired
8
The LED screen
displays “E03”
and the cooker
beeps 10 times.
The cooker is
overheating.
Make sure the inner pot
is properly installed.
Make sure there is
enough food and/or
water in the inner pot.
Unplug the cooker and
wait for it to cool
completely.
9
The LED screen
displays “E04”
and the cooker
beeps
intermittently.
The pressure switch is
malfunctioning.
Take the device to an
approved maintenance
center to be repaired
12 13

Cleaning and Maintenance
Note:
Make sure the device has been unplugged and is completely cool before
cleaning.
Dry the device thoroughly after cleaning.
Interior
Exterior Pot
Heating Unit
Seal Ring
Clean the exterior pot with water and
mild dish soap.
Let the interior pot dry completely.
DO NOT immerse the electrical
components in water.
Wipe down the heating unit and
exterior pot with a damp cloth,
making sure all food residue has
been removed.
Use a toothpick or other thin stick to
access hard-to-reach areas.
Remove the seal ring from the cover.
Soak the seal ring in water and wipe
it down with a sponge or soft cloth.
Let the seal ring dry completely.
Reinstall the seal ring onto the cover,
with the side labelled “This side face
forwarding lid while installing” facing
the cover.
Exterior
Wipe down the exterior of the device
with a damp cloth.
Let the exterior of the device dry
completely.
Housing
Dismantle the exhaust valve.
Clean the exhaust valve with water
and mild dish soap.
Use a toothpick or other thin stick to
access hard-to-reach areas.
Let the cover dry completely.
Housing
Dismantle the condensation
collector.
Wipe down the condensation
collector with a damp cloth.
Condensation
Collector
Clean all accessories with water and
mild dish soap.
Let the accessories dry completely.
Accessories
14 15
Table of contents
