Electric Mobility Liteway Balance User manual
El ctric Mobility Euro Limit d, Canal Way, Ilminster , Somerset TA19 9DL
Telephone: 01460 258100 www. l ctricmobility.co.uk Issue 2: 03/11
Lit way Balanc
Lit way Balanc Plus
Scoot rs
Owners Manual & Service Recor
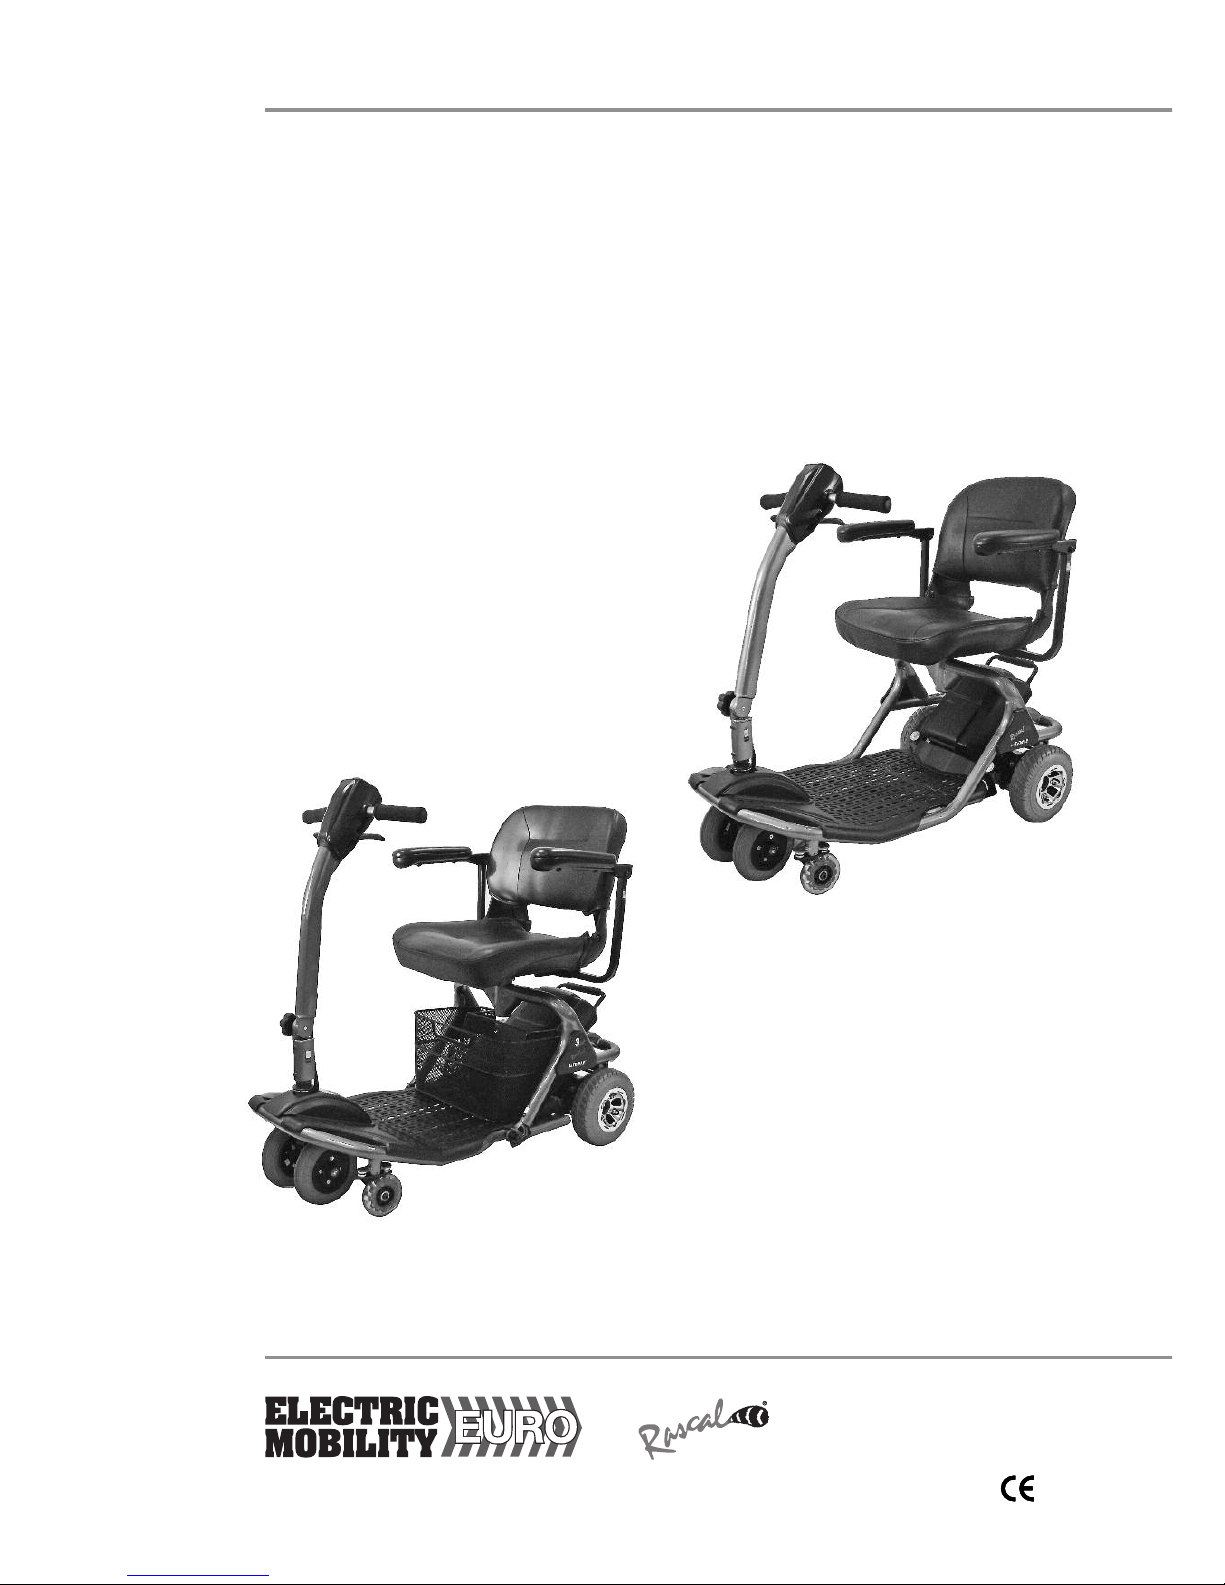
Liteway Balance
Liteway Balance Plus
Electric Mobility Euro Lt offers these lightweight, manoeuvrable scooters for convenient in oor an out oor
use. The Liteway Balance Plus split-frame scooter can be easily an quickly ismantle for transportation in
the boot of a car, whereas the Liteway Balance is a fixe frame unit but similar in all other respects. Provi e
that your scooter is maintaine an operate in accor ance with this manual it shoul last for many years, an
provi e you with free om an in epen ence.
Please rea this manual thoroughly before using this scooter. If you have any oubts about warnings or
instructions, ask your ealer for an explanation. If at any time you feel you may not be able to control the vehicle
safely, o not rive, but consult your ealer for a solution. If you think the scooter may be amage , o not rive
it but contact your ealer for a vice.
We suggest that you keep this manual in a safe place. It contains essential information on the operation of the
scooter an inclu es the maintenance recor s. If at any time you feel you may not be able to control the
vehicle safely, o not rive, but consult your ealer for a solution.
2
2
Notic
All Electric Mobility Vehicles are sol through authorise ealers. Make sure your ealer emonstrates all
the features of the pro uct prior to, or when, it is elivere .
Warning!
This manual contains important safety notices. Please take time to rea an un erstan them. Ignoring
them may en anger you or others.
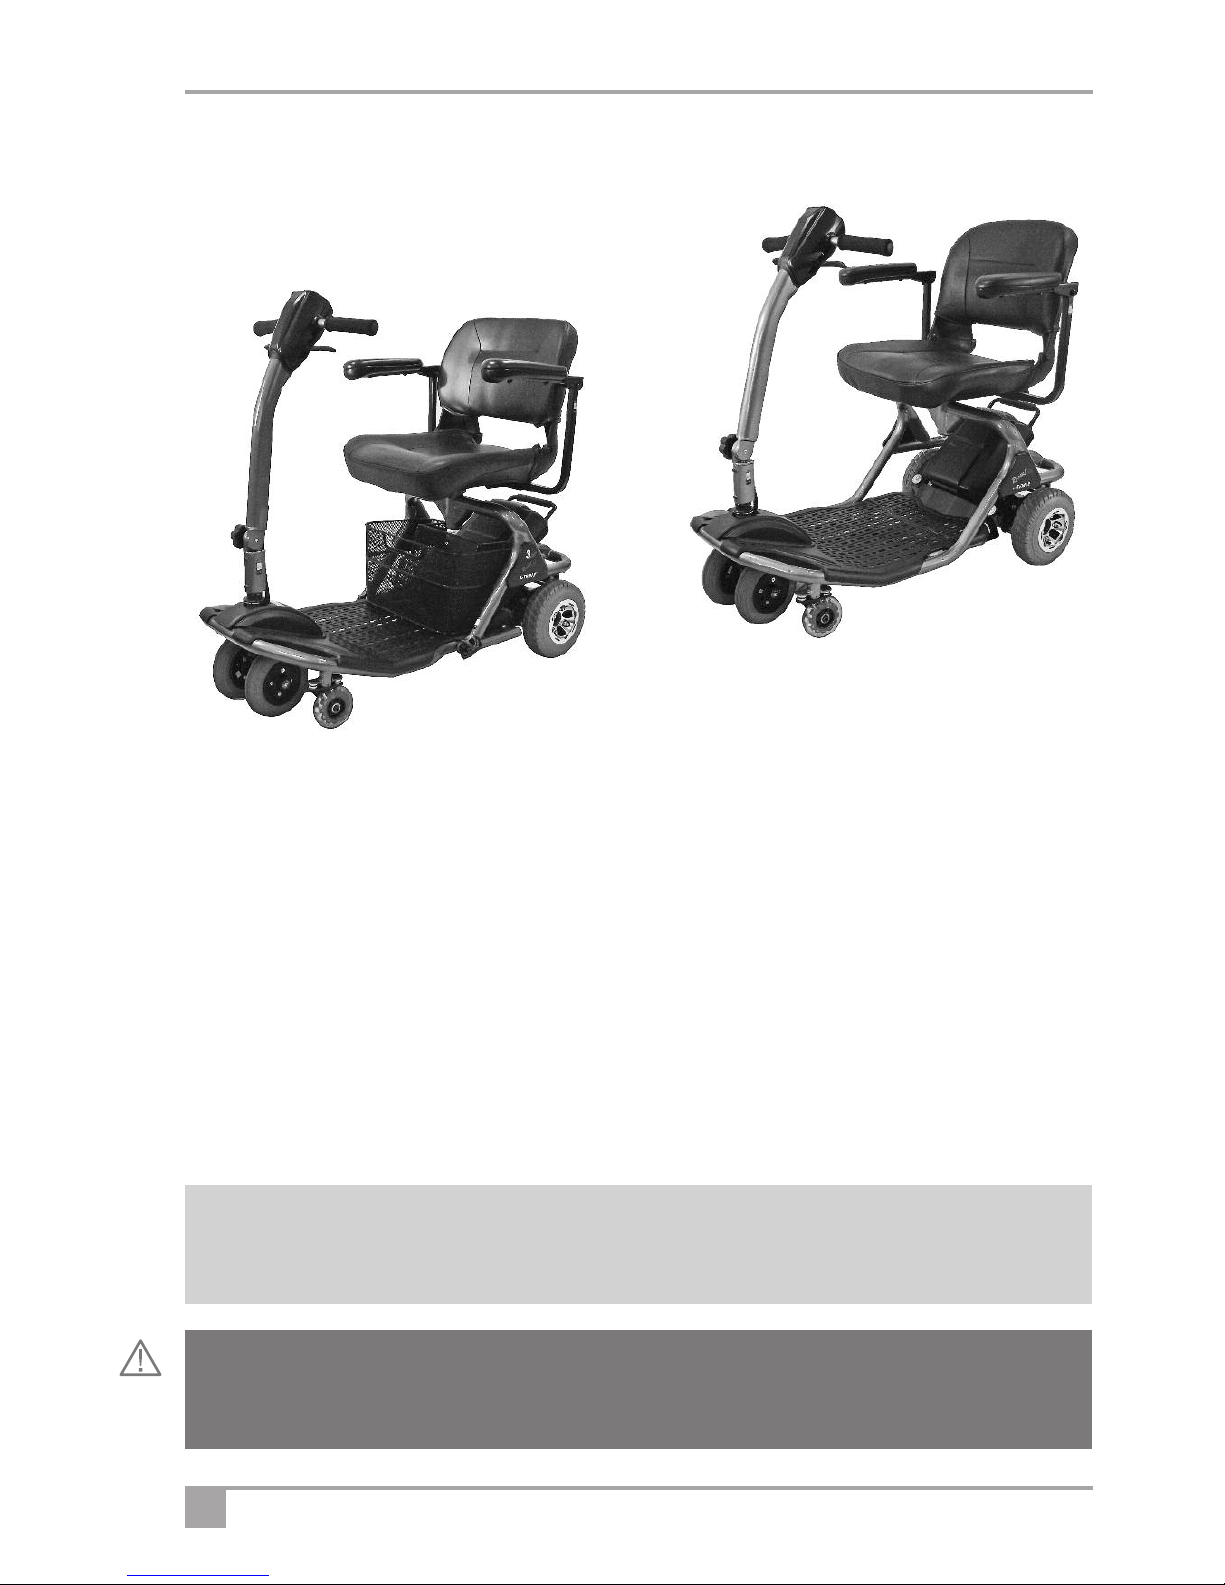
Liteway Balance Plus
Liteway Balance
Liteway Balance & Liteway Balance Plus Scooters Owner's Manual an Service Recor

3
Cont nts Dealer information 4
Features an layout 4
Safety information 5
Inten e use 5
Safety Information 6
Controls 8
Freewheel Device 9
Brakes 9
Armrest a justment 10
Swivel seat (optional) 10
Tiller fol ing 10
Transferring in an out of your scooter. 11
Operation 12
Driving the vehicle 12
Driving the vehicle - hazar s 13
Transporting your scooter 14
Assembling your scooter 16
Battery charging 17
User maintenance 19
Servicing & maintenance 19
Scooter Diagnostic Functions 20
Troubleshooting gui e 21
A itional safety information 21
A itional information 22
Frequently aske questions 22
Engineers checklist 23
Guarantee & Warranty 24
Technical information regar ing EMI 24
Technical specification - Liteway Balance Plus 25
Technical specification - Liteway Balance 26
Brochure request 27
Warranty Car - ealer information 27
Service log 29

4Liteway Balance & Liteway Balance Plus Scooters Owner's Manual an Service Recor
D al r Information
For pro uct information see serial number plate on the seat post un er the seat.
Manufactur r
Electric Mobility Euro Limited
Canal Way, Ilminster, Somerset TA19 9DL
Company Registration in Englan No. 2419231
F atur s and Layout
Photo shows Liteway Balance Plus mo el scooter. The Liteway Balance is a fixe -frame version. See the
specification for the escription of any ifferences.
This is your contact numb r
for s rvic and support
Dealer Stamp
Telephone:
Email:
Pro uct Mo el Number
Serial Number
Date of Purchase
Owner
Fol own backrest
Fol up / a justable
armrests
Freewheel lever
Un er seat
storage basket
Finger control lever
Tiller a justment
Charging cable
Soli tyres
all roun
Magnetic Stabiliser
Wheels™
Battery box
5
Saf ty Information
R ad this manual thoroughly b for driving or op rating th v hicl .
This handbook is applicabl for all mod ls.
If you have any oubt about the content of this manual phone your ealer to resolve the problem. Please rea
this manual, an ensure your scooter is service regularly.
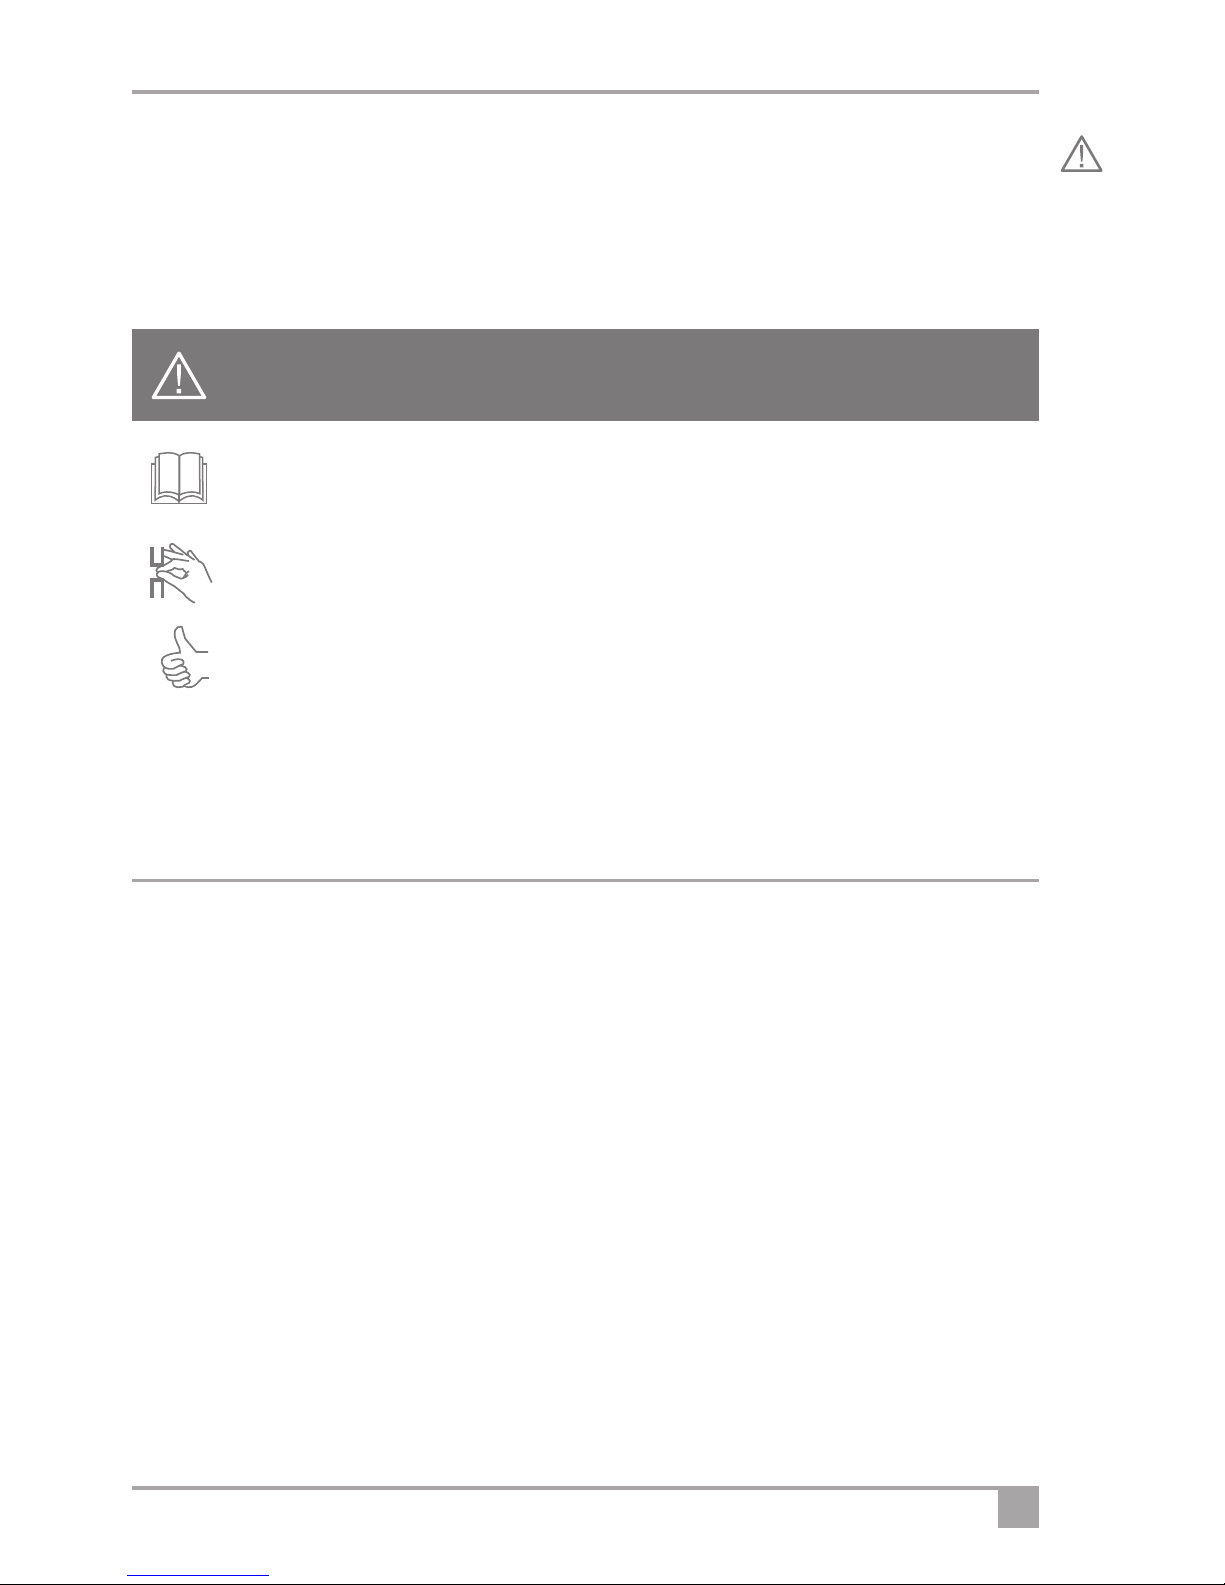
Book symbol: This symbol appears on the pro uct. Please rea this pro uct manual before
assembling or operating the scooter.
Pinchpoint symbol: Wherever you see this sign there is a nearby risk of injury owing to a pinch or
crushing point.
Tip symbol: This sign in icates a vice on how to get the most from your scooter.
© 2011 Electric Mobility Euro Lt .
No liability is assume with respect to the use of any information containe in this publication. While every precaution
has been taken in the preparation of this publication Electric Mobility Euro Lt . assumes no responsibility for errors or
omissions nor is any liability assume for amages resulting from the use of information containe in this publication.
This publication, as well as the operational etails escribe herein, is subject to change without notice.
Int nd d us of th v hicl
This vehicle is esigne for use by a ults with a isability (up to the maximum recommen e weight - see
Technical Specification sheet) who require a robust but lightweight an transportable scooter that is i eal for
both in oor an out oor use as well as shopping an other visits. Liteway Scooters have been specifically
esigne to be isassemble for transportation by car.
These scooters are inten e for use in the home, shopping areas an trips on pave surfaces. Kerbs shoul
be avoi e , but the scooters can mount kerbs an small obstacles up to that specifie in the Technical
Specification sheet.
Users coul en anger themselves an others if they are not capable of riving this scooter safely. Dealers will
a vise on the most suitable vehicle from the Electric Mobility range, but it is up to users to ensure that they
have the manual exterity to rive the vehicle, a equate sight an hearing to perceive anger in time, an can
at all times operate the scooter safely in the expecte con itions. If in oubt we suggest you consult a
healthcare professional or your nearest ealer for a vice on the most suitable scooter for your particular
con ition. Users shoul also regularly assess their ability to operate their vehicle safely.
Liteway Balance an Liteway Balance Plus scooters have small front wheels for goo manoeuvrability
an magnetic stabiliser wheels for enhance cornering stability. Neither scooter shoul be use on uneven,
pothole , rutte or slippery surfaces such as grass.
Within this manual there are important safety notices. They are clearly marke with the sign (left)
Make sure that you un erstan all these notices. If you have any oubt, contact your ealer.

6Liteway Balance & Liteway Balance Plus Scooters Owner's Manual an Service Recor
Saf ty Information
G n ral Warnings
Warning ! The operation of scooters can en anger the life of the river or thir parties. Any river shoul
always be fully capable of operating this vehicle safely.
Warning ! Sitting for long perio s may increase the chance of thromboses or pressure sores. Users prone to
such con itions are a vise to take me ical a vice.
Warning ! The Liteway Balance scooters have been esigne an teste for rivers with weights up to those
in the Technical Specification Sheets. These weights shoul n v r be excee e .
Warning ! Un er-seat Basket. The basket mounte below the seat has a weight limit of 10 lbs or 4.5 kgs. Do
not excee this as it coul affect stability an performance. Do not carry or attach anything to the
han lebars or controls as this coul affect riving safety.
Warning ! Do not excee the specification; o not mo ify this scooter or use it other than as a scooter.
Warning ! Passengers, even chil ren, shoul never be carrie .
Warning ! Electromagnetic interference may affect the riving of this scooter:
• Do not operate evices such as CB ra ios or mobile phones while the vehicle is switche on.
• Avoi getting close to transmitter masts, such as television an ra io stations.
If your vehicle ever starts to operate by itself switch it off an report this to your Dealer.
Warning ! The operation of any scooter may affect sensitive electronic circuits such as alarm systems or
automatic oors in shops.
Driving
B for driving, r f r to ”Driving Your V hicl ” … lat r in this manual
Warning ! Ambi nt Op rating T mp ratur Rang . Do not use your scooter in temperatures outsi e the
range state in the specifications section of this manual. Driving in very hot or very col con itions
can make riving more hazar ous.
Warning ! Fr wh l D vic /Mod . Before getting on the scooter, always check that the freewheel lever is
in the "Drive” position. When the lever is in the Freewheel position there is no braking an the
scooter coul run own a slope an cause injury or even eath.
NEVER SIT ON THE SCOOTER WHEN IN FREEWHEEL MODE.
Warning ! Transf rring On and Off. Do not attempt to get on or off your scooter unless it is switche off, at
rest, an on a stable, level surface. Never get on or off on a hill.
Warning ! Damag . Before riving off check the scooter for amage, particularly that which coul affect the
controls, wheels an /or rive motor.
Warning ! Footr st. Before switching on the scooter, always make sure that your feet are safely on the
footrest areas. If you rive forwar with your feet still on the groun , they coul become trappe
un er the scooter an serious injury may result.
Warning ! Armr sts. Do not use the armrests as a support when getting in or out of the scooter. Make sure
the armrests are lowere an secure before you start off otherwise you may fall out.
Warning ! Entangl m nt. Do not wear clothing or carry items on the scooter that coul become entangle
in wheels or other moving parts whilst operating the scooter. Severe injury may result.

7
Warning ! Batt ry Charg L v l. Before riving off, always check the battery in icator. If you are in any
oubt, ensure all the batteries are fully charge before starting on a journey.
Warning ! Castoring. Be aware that, if you set off when the front wheel is not straight, the initial movement
coul be partially si eways.
Warning ! Pow r. Unless there is an emergency, o not switch the power off when moving. The Scooter may
stop very su enly. Release the forwar / reverse control an the scooter will come to a controlle stop.
Warning ! Slop s. On steep slopes the scooter coul topple over. Always try to avoi crossing a slope. If you
have to cross a slope, take great care to avoi tipping. Never make sharp turns on slopes. Never
rive on slippery or icy slopes. - If you are not comfortable with the hill gra ient, consi er an
alternative route. See “Driving Your Vehicle” – Hazar s for more a vice.
Warning ! K rbs. You shoul always try to avoi riving up or own kerbs as this may cause the scooter to
topple. Use access ramps wherever possible. Never attempt to climb or escen kerbs greater
than that note in the Technical Specification. If you have to climb or escen a low kerb, always
tackle it straight on. See “Driving Your Vehicle” – Hazar s for more a vice.
Warning ! Sp d. Turning at maximum spee might cause the scooter to topple over. Always slow own for
turns. Always slow own when amongst pe estrians an ensure you o not run into them.
Warning ! Stopping. If the scooter stops su enly when turning, it might topple. Try not to brake when
turning. Always take particular care when turning.
Warning ! R v rsing. Always take particular care when reversing the scooter as injury to other people may
occur if safe istances are not maintaine .
Warning ! L aning Ov r. Do not lean si eways, as this coul cause the scooter to topple.
Warning ! Escalators. Never rive the scooter onto an escalator as this coul cause the scooter to topple
an result in severe injury.
Warning ! Roads. This scooter is not esigne or approve for use on public roa s, apart from crossing
roa s at esignate places.
Warning ! Driving in Poor Visibility. Scooters are not easily seen. Your scooter is not inten e for use in
arkness or in poor visibility.
Warning ! Carrying It ms. Do not carry or attach anything to the han lebars or controls as this coul affect
the riving safety.
Warning ! Hot Surfac s. If the scooter is left out in the sun, surfaces coul become extremely hot. Always
try to park the vehicle in the sha e.
Warning ! S ats in V hicl s. This scooter is not suitable for use as a seat for an occupant when in a
motor vehicle.
Warning ! Stabilis r Wh ls. Your scooter has two small stabilising wheels; you shoul avoi using your
scooter in situations where the stabilising wheels contact the groun or obstacles when you are
not turning.
8Liteway Balance & Liteway Balance Plus Scooters Owner's Manual an Service Recor
Controls
Before riving your vehicle it is important to familiarise yourself with the controls. Do not attempt to rive the
vehicle before rea ing the rest of this Han book.
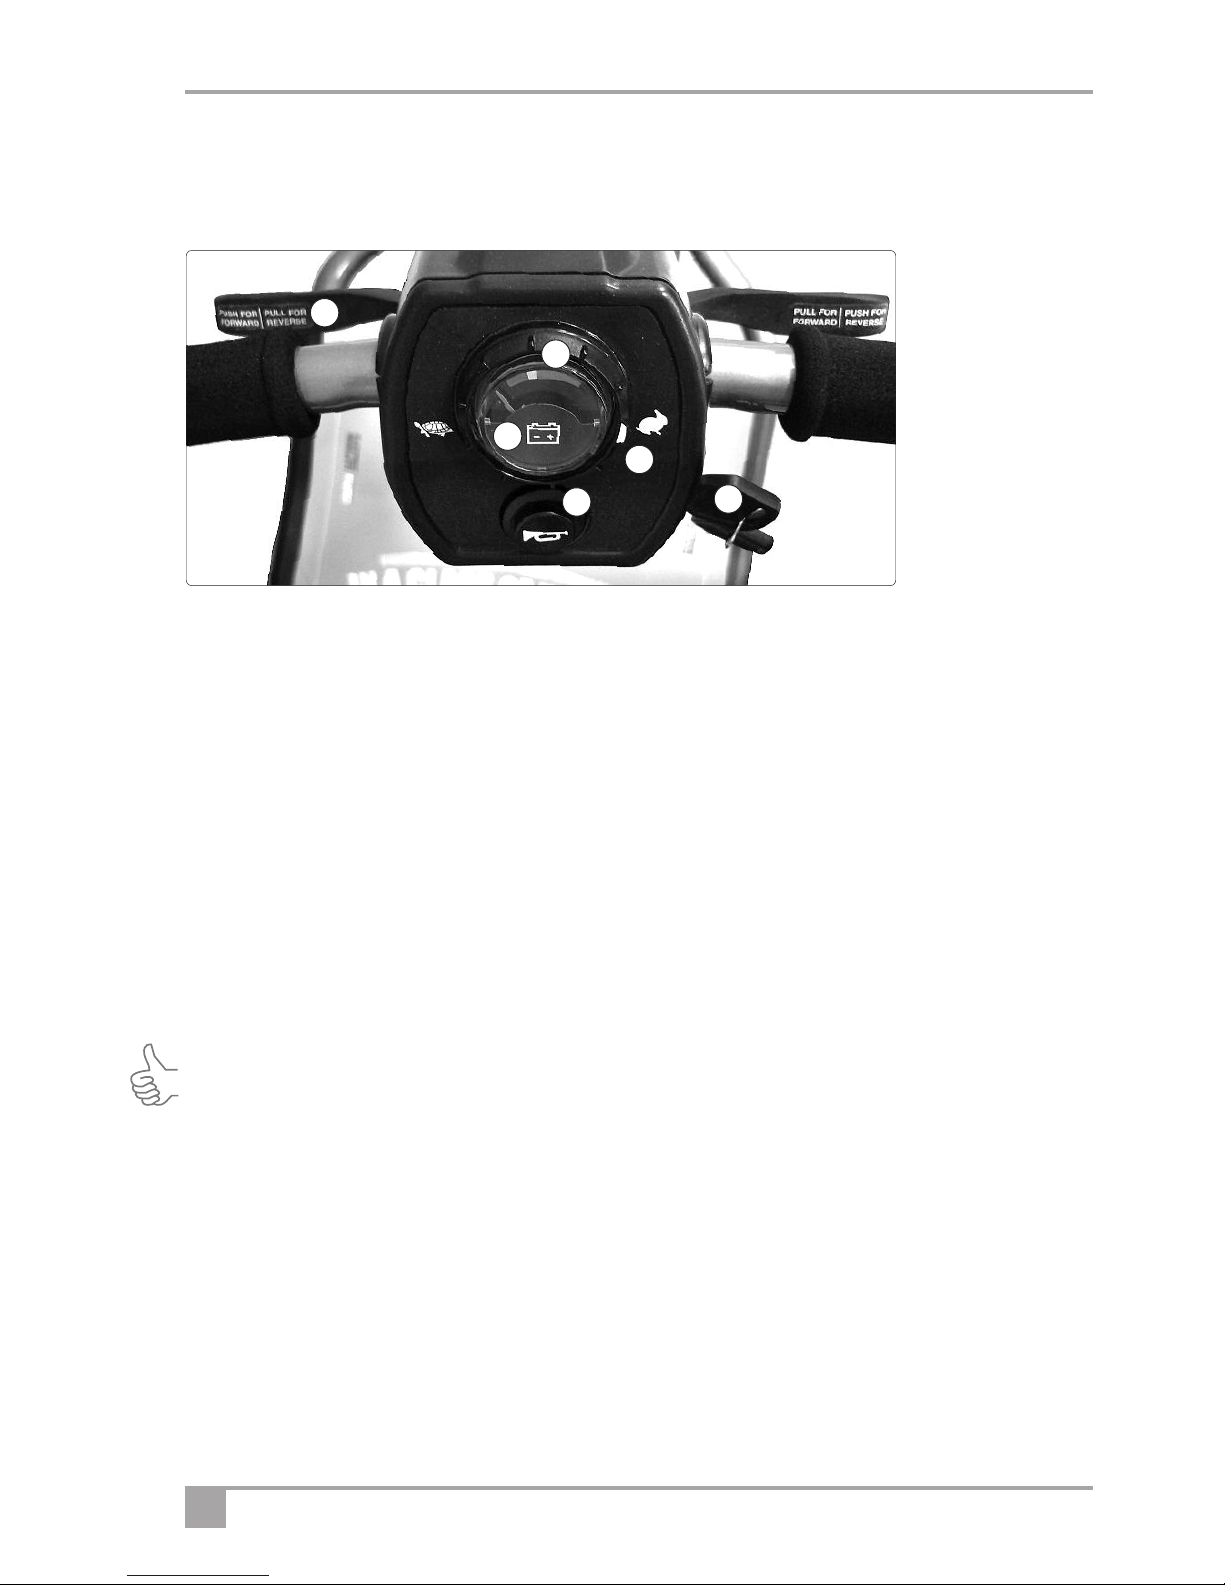
Dashboard D scription
1. Batt ry Indicator: This instrument shows the level of charge in the batteries. When in the green area the
batteries are fully charge . When in the yellow area the batteries nee recharging an when in the re area
the batteries urgently nee recharging. Note: When the vehicle is climbing a steep incline or starting off, the
level may rop momentarily; this is normal.
2. Sp d Control: This controls the top spee of your scooter. When the knob is turne anticlockwise to the
left, this is its slowest spee , marke by a tortoise. As the knob is turne to the right the spee will increase
to a maximum, marke by a hare. Set the spee before you move off. Do not a just the spee control ial
when the vehicle is moving.
3. Pow r On Indicator / Status LED: This in icator shows the status of the scooter – either on or off. A soli
re light in icates that the scooter is on an rea y to use an no light means that the scooter is off or totally
ischarge . Not . The controller has a iagnostic mo e: If the LED flashes, this in icates that the controller
has etecte an error or fault. If this happens refer to the iagnostic table at the back of this manual for a
solution.
Tip: One of the most common “faults” is that the scooter has been switched on with the free-wheel function
enabled– Just turn the power on/off ke to the off position, position the freewheel lever in drive and turn the
ignition ke back to the ON position.
4. Horn: Press the button on the lower left han si e an the horn will soun , if power is on. Release an the
horn will cease.
5. Ignition K y: The ignition key has to be pushe in before you can turn the vehicle on or off. Remember to remove
the key wh n not in us . Do not leave the ignition on when not in use, especially when charging the vehicle.
6. Fing r control: To operate, turn on the ignition. Pull the right han lever towar s you an the machine
moves forwar . The more you pull the lever the faster the scooter goes. To brake, release the lever. Again
the faster the lever is release the quicker you will stop. To reverse, pull the left lever towar s you. Do not
pull both levers at once. Note. The controls can be change for customers with a left-han bias. Please
contact your local ealer for information.
1
2
3
45
6
9
Charging Point: The charging point is situate on the battery box either at the si e or just below the han le at
the rear, epen ing on the type of battery box fitte . (see Battery Charging section for further instructions).
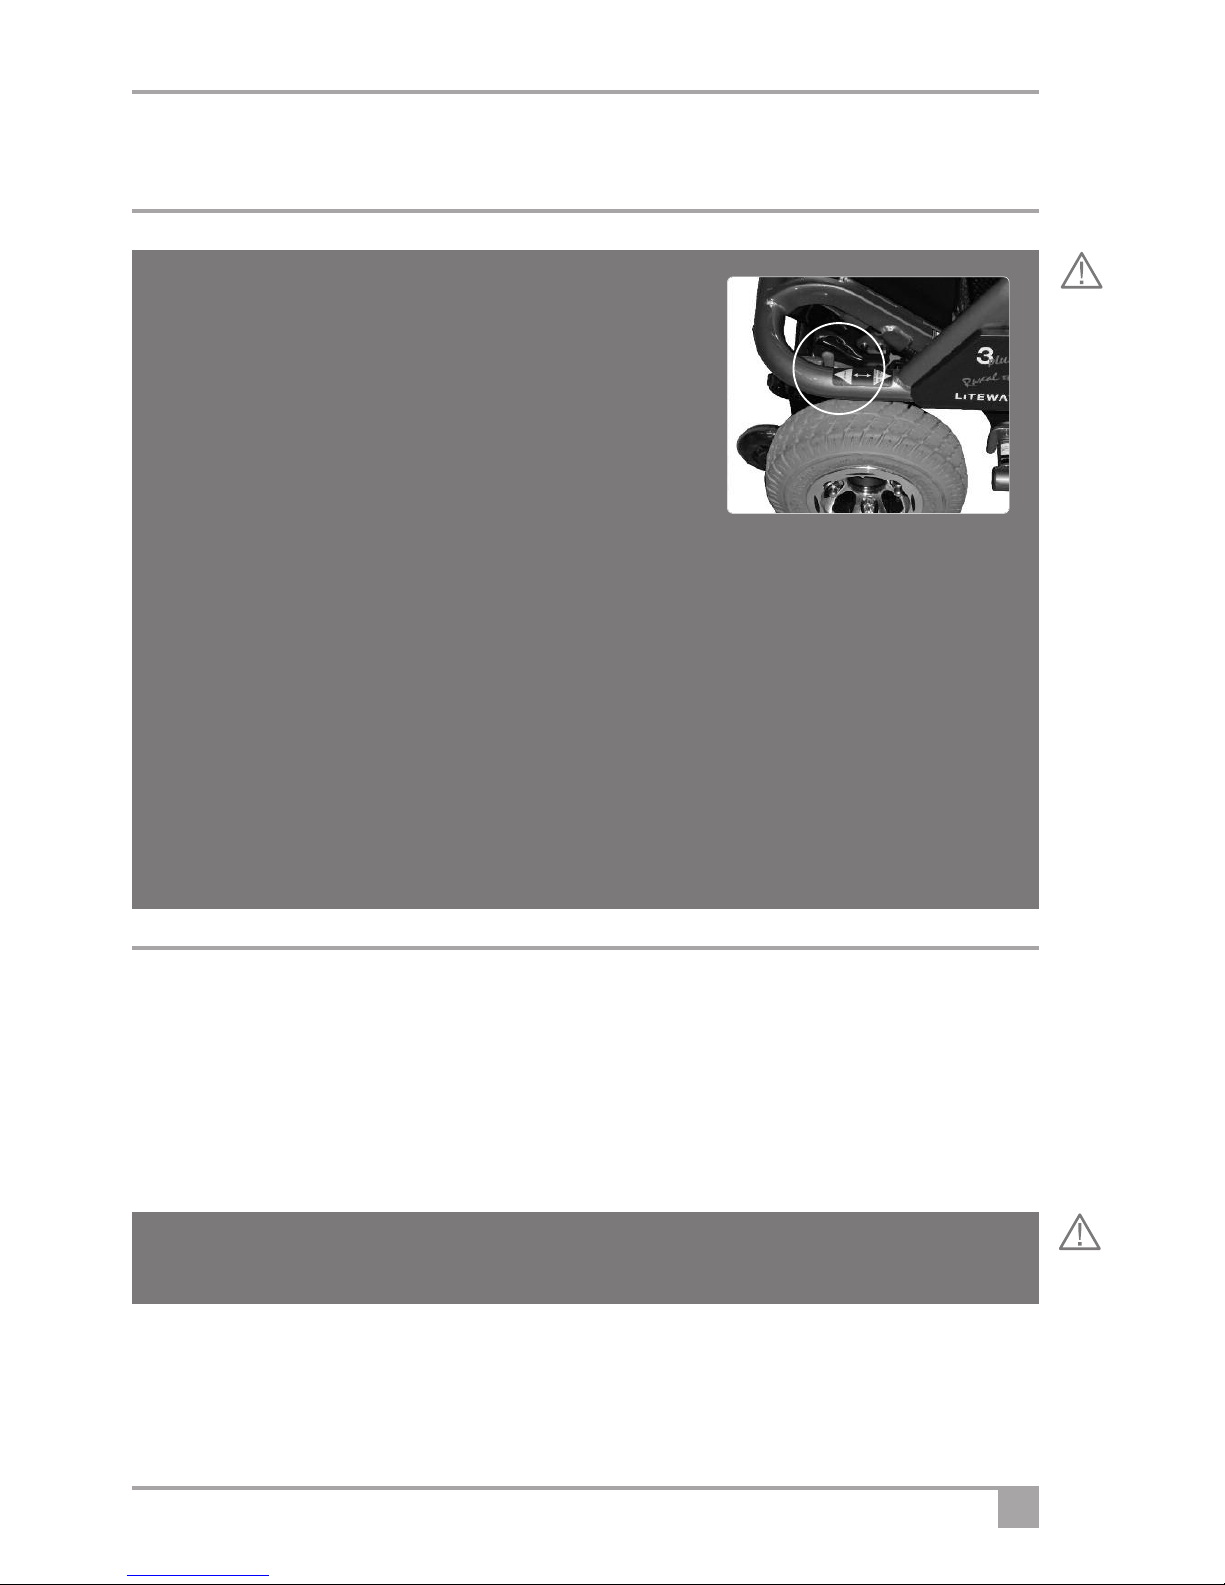
Fr wh l D vic
When the vehicle is switche off the brakes are automatically
engage . This is calle “Failsafe Braking”. Also, if the batteries are
flat, the brakes are applie . There may be occasions where you may
wish to move the vehicle without power. To o this there is a
Freewheel Device fitte .
The Freewheel evice allows the vehicle to be pushe without power.
To activate, first locate the lever. When stan ing behin the scooter, it
is locate on the right han si e of the rear of the vehicle - See Illustration.
• Make sure the ignition is switche off.
• Move the lever FORWARD The vehicle can now be pushe in Freewheel.
• Move the lever BACK to engage rive. The vehicle is now brake . This is the normal operating position.
• IF YOU ARE NOT COMPLETELY SURE OF THIS FEATURE CONTACT
YOUR DEALER BEFORE OPERATING THE SCOOTER.
NOTE: To avoi excessive strain on the tiller / han lebar assembly, never push or pull the scooter in
freewheel mo e if a user is on-boar . Push the lever FORWARDS to engage freewheel mo e. Pull the lever
BACKWARDS to engage Drive mo e.
Warning! If the freewheel evices are in “freewheel” mo e the braking is isable . Never select the
freewheel mo e if the Scooter is on a slope or coul be pushe onto a slope.
Brak s
There are 2 braking systems. The first works with the finger controls. When the finger control is release the
scooter will automatically brake an bring the scooter to a stop. When the scooter stops the automatic
brake will engage. This will stop the vehicle rolling forwar or backwar . When you start the brake will
automatically isengage. If the battery shoul go flat the brakes automatically engage. Note that even when
freewheel is selecte , a secon ary braking system is applie automatically to limit the maximum spee . You
may notice this system when moving the scooter in freewheel.
Warning! If the freewheel evice is in “freewheel” the automatic braking is isable . Never select the
freewheel evice if the scooter is on a slope or coul be pushe onto a slope.

10 Liteway Balance & Liteway Balance Plus Scooters Owner's Manual an Service Recor
Armr st
adjustm nt
When getting seate on the scooter
lift the armrest up. When ri ing
always have the armrest in the own
position. Avoi pinching fingers as
you lower the armrest.
If you require more room in the wi th
of the seat un o the knobs at the rear of the seat. Sli e the armrests in or out to suit. Tighten both knobs to
clamp. To ensure that the user is sitting centrally, the armrests shoul always be a juste to be equi istant from
the centre of the seat.
Warning! Never rive with the armrest up or with the armrest knob loose.
Swiv l s at (optional)
This allows easy access
1. To op rat , locate the release lever un er the seat.
3. Pull th l v r up an the seat will release allowing it to rotate.
4. R l as th l v r an the seat shoul lock automatically, but always
check it has.
Till r Folding
The tiller can be fol e own for transporting. Take care when lowering the tiller not to pinch your fingers at the
base of the tiller.
• Rotat th knurl d knob anti-clockwis sufficiently for the retaining serrations to allow the tiller to move.
• Low r th till r so that it is in its lowest position.
• Rotat th knurl d knob clockwis an ensure that it is tight an the retaining serrations are fully engage .
The tiller can be a juste to achieve a comfortable riving position.
• Rotat th knurl d knob anti-clockwis sufficiently for the retaining
serrations to allow the tiller to move. A just the tiller so that your riving position is safe an comfortable
Warning! Do not use this evice if the vehicle is on a slope. Always check the seat is locke in the
forwar position before riving the vehicle.

11
• Rotat th knurl d knob
clockwis an ensure that it is
tight an the retaining serrations
are fully engage
• Adjust th till r to suit your
driving position, ensuring the
tiller is firmly locke in place
before riving off.
Warning! Before riving, always check that the tiller is securely in the upright position. Safe steering may
be impossible if you o not !
Transf rring In And Out Of Th Scoot r
If you feel at all uncertain about getting in or out of the scooter seek assistance.
Transf rring into th Scoot r from th Front
B for g tting in:
• Mak sur that th scoot r is on a l v l surfac , an it is not in Freewheel mo e.
•Mak sur th brak s ar ngag d - try to push the scooter a little to verify that the brakes are working.
• Ensur that th inition k y is turn d off. (The re LED / lamp on the ashboar will not be lit or flashing)
• Ensur that th handl bar / till r adjustm nt is fully tight n d an that any accessories such as the
shopping basket are properly fitte
• Ensur that th batt ry is fully locat d in its mounting position.
• Th s at should b facing forwards.
• Adjust th handl bars / till r so that the front wheel is facing forwar s.
You ar now r ady to g t in:
• Approach the chair from the si e an step over the centre part of the scooter with one foot. You shoul
now be stra ling the scooter facing forwar s an with the seat behin you. With your back to the seat,
you can stea y yourself using the armrests an then lower yourself gently into the seat.
• Lift each of your feet onto the footrest platform.
G tting out of th Scoot r:
• Before getting out of the scooter, be sure that it is on a level surface an the power key is switche to the
off position. - If you feel uncertain about getting out, seek assistance. Move the han lebars so that the front
wheel is facing irectly forwar s.
• Lift your feet off the footrest platform an stan up using the armrests to provi e you with a itional stability
if require . (Do not put your full weight on the armrests)

12 Liteway Balance & Liteway Balance Plus Scooters Owner's Manual an Service Recor
Op ration
Before using the scooter you shoul make sure that:
• The battery is fully charge . (in icating green on the battery in icator)
• There is no sign of amage to the scooter. All a justment thumb-wheels are fully tightene . Any accessories
such as the shopping basket are properly attache .
• That you are capable of controlling the scooter at all times.
K rbs and Obstacl s: Try to avoi taking the scooter over obstacles or kerbs. Tackle obstacles hea on.
Bad W ath r: We suggest that it is better to stay at home in ba weather. Remember that you can
become wet an col . Suitable clothes shoul always be worn. A high visibility jacket shoul be consi ere if
you are in poor visibility. Remember not to use the scooter in poor light or arkness.
Driving th V hicl
1. B for you s t out, o check the weather forecast. We suggest that you make sure you are wearing
suitable clothing, whether your journey is long or short.
2. Rang . Your scooter has a limite range. Always ensure that your planne journey oes not excee the
maximum range in the Technical Specification Sheets an that your battery is fully charge .
3. If you ar taking m dication check with your octor or physician that your ability to control the vehicle
will not be impaire an o not rink alcohol an rive.
4. Only us th v hicl for th purpos its int nd d for. Do not rive through water or on slippery
surfaces; o not transport more than one person; o not tow other vehicles or carry excess weight.
5. Ch ck that th fr wh l l v r is not in th fr wh l position / mod .
6. Ch ck th batt ry charg r is disconn ct d.
7. Ch ck that th batt ry strap is in position.
8. Ch ck that you ar prop rly s at d with your f t on th footr st platform.
9. Ch ck th backr st is upright.
10. Ch ck that th shopping bask t is prop rly affix d to th v hicl and not lik ly to fall off and
caus an accid nt.
11. Mak sur that your shopping bask t is not ov rload d (See Technical Specification Sheets)
Warning! R ad this b for driving th v hicl ! Whether or not this is your first mobility
vehicle, please rea these gui elines as all vehicles iffer. Failure to o this may cause amage to you,
a thir party or the vehicle.

13
12. Ensur your f t ar s cur ly on th footr st ar as.
13. Ch ck you hav adjust d th s at as instruct d in this manual.
14. Mak sur th way ah ad is cl ar.
15. Switch on th pow r. Check the battery level in icator is in the green area.
16. Sp d Control. Set the spee control to a low setting.
17. G ntly actuat th fing r controls ( ith r forward or r v rs ) and st r in th dir ction r quir d.
The vehicle will now move off. The further you push the pa le (either forwar or reverse) the faster the
vehicle will go.
18. To brak , r turn th paddl s to th n utral position. If you b com unsur or f l unsaf
r l as th paddl s imm diat ly.
19. As you g t accustom d to th pow r you can incr as th sp d.
20. Switch off wh n not in us . To conserve your batteries an prevent the vehicle acci entally moving,
always switch off the power when your Scooter is not in use. (On/Off or ignition key).
Driving th v hicl - hazards
1. G tting on and off th v hicl : When getting on make sure that the vehicle is on level groun , an not
in freewheel mo e. Ensure that the armrests are secure. When getting off, park on level groun , turn off
the ignition an remove the key before leaving your seat. Make sure you get off the vehicle in a safe area.
2. Till r Position: Drive with the tiller in an upright position that feels comfortable with the controls in easy reach.
3. K rbs and Obstacl s: Try to avoi kerbs an obstacles. Never ri e up or own kerbs or obstructions higher
than that in the Technical Specification Sheets. Always tackle obstacles hea on. Use ramps wherever possible
an ensure that all wheels will fit on the ramp. Always try to avoi crossing a slope. If you have to cross a
slope, take great care to avoi tipping. Never make sharp turns on slopes or back own a slope. Note that the
anti-tip rollers at the rear of the scooter may contact the kerb as you escen ; this is normal.
4. Hills & Slop s: Going Up Hill. L an forward wh n going up. Make sure you have enough spee to
climb the slope. Do not stop or turn th v hicl around. If you have to turn while climbing an incline,
keep going until you reach a level area. If you have to start on an incline, lean forwar an apply power
slowly – o not start an stop. If you are not comfortable about tackling a gra ient, consi er an
alternative route. Note: Always check that the battery level is high; going up hill takes a lot of energy. If the
level rops too low the vehicle will cut out leaving you stran e .
Warning! Before riving the scooter you shoul be aware that, un er certain circumstances it coul
become unstable an tip over. Your scooter has been esigne to operate on pave , even surfaces an
shoul not be use on rough or rutte terrain. Do not excee the maximum safe slope recor e in the
Technical Specifications.

14 Liteway Balance & Liteway Balance Plus Scooters Owner's Manual an Service Recor
5. Hills & Slop s: Going Down Hill. L an back in th s at wh n going down, an turn the spee
control ial to low. If you are not comfortable about tackling a gra ient, consi er an alternative route.
Try to avoid crossing slop s – always driv straight up or down th slop .
NEVER BACK DOWN A SLOPE!
6. T rrain: Do not rive your vehicle across eep, soft or slippery terrain ( for example, soft irt, san , or loose
gravel). You coul get stuck. Also avoi rutte , bumpy groun an keep to well prepare paths. Avoi using
your scooter in situations where the stabiliser wheels contact the groun , or obstacles when you are not turning
7. Turning: Always slow down before a turn; turning at spee can cause the scooter to topple. Look in the
irection you are travelling – If there is a blin corner soun the horn.
8. Turning Circl : Practice manoeuvring your scooter so you can ju ge the turning circle. This is important
to avoi tipping off kerbs or for negotiating in tight spaces.
9. Bad W ath r: If it is snowing or icy stay at home! Remember that ice, snow an slippery surfaces such
as manhole covers, wet grass an rains coul affect braking an steering. Use caution at all times.
10. Tyr s: Your vehicle is fitte with soli tyres. Shoul they become amage they shoul be replace by
your ealer. Do not attempt to replace them yourself.
11. Pav m nts: It is illegal to rive at more than 4 m.p.h. on the pavement. Your scooter is limite to that
maximum spee but always slow own in crow e areas an take care not to colli e with pe estrians.
12. Show r Rooms or Washing: Never take your scooter into a shower or steam room, an never hose it
own. Its sensitive electronics coul malfunction if they get wet or amp.
13. Imm rsion: Never enter large pu les or areas of water where the epth an /or current is unknown.
Immersion or partial immersion of the scooter may amage it an coul leave you stran e .
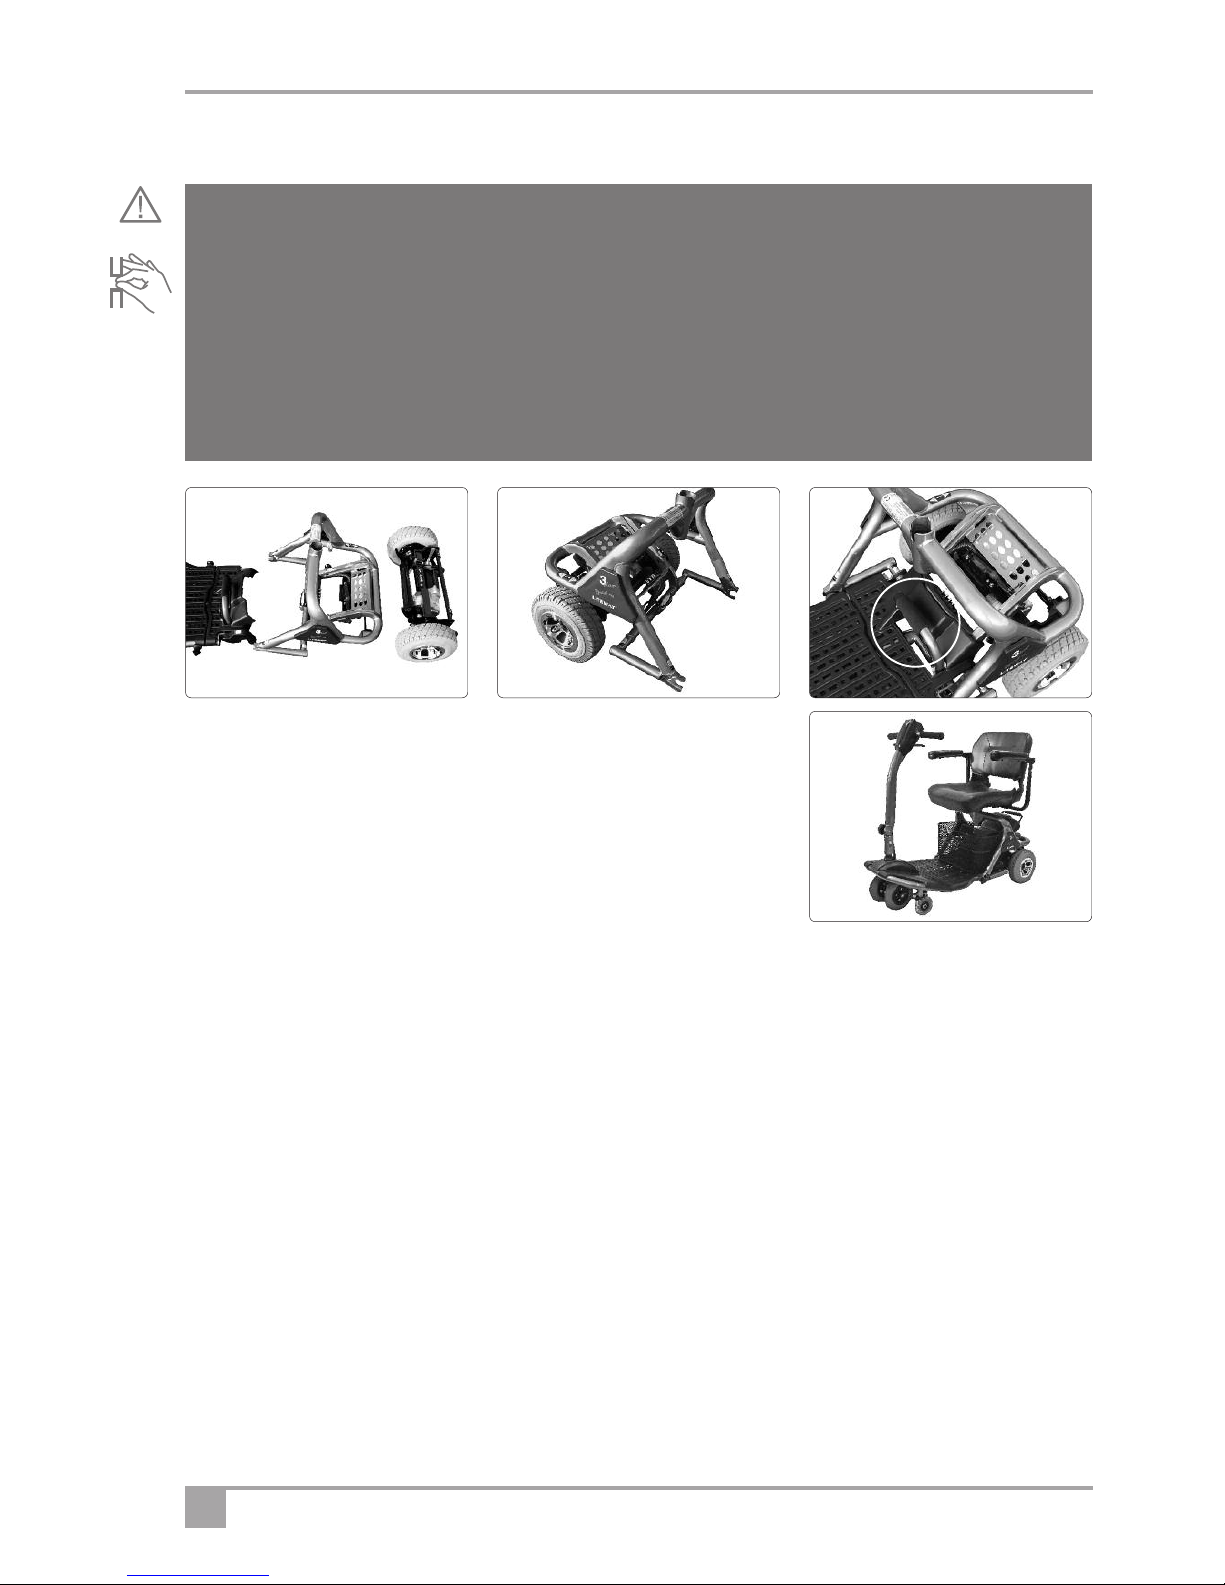
Transporting your Scoot r
Warning! Dismantling the scooter involves lifting an han ling heavy parts. Weights are given in the
Technical Specification; consi er if you nee help in han ling parts before you try to lift them. Your scooter
has been specially esigne to be easily ismantle an stowe in a car. Contact your ealer for a vice on
how best to transport your scooter in your particular vehicle
Warning! Pinching or Crushing. Be careful to avoi being pinche or having your han s crushe when
lifting or han ling parts. Wear gloves whenever possible. Special attention shoul be pai when raising an
lowering armrests, splitting the front an rear parts of the chassis or rotating/han ling the front wheels
when ismantling or uring re-assembly for transportation in a car or similar.
Warning! This vehicle is not suitable for use as a seat for an occupant in a motor vehicle.
Warning! Never stan the scooter up on its rear rests with the battery pack installe .
Warning! Do not lift the chassis with the batteries still fitte - injury may result!

15
4 65
7911
Warning! Do not lift the rear chassis with the batteries an /or transaxle unit still fitte - back injury may result!
To transport your scooter you will nee to ismantle it. Follow these instructions. Do not attempt this unless you are
capable of lifting the heaviest component weight applicable to your mo el (inclu ing accessories) as state in the
Technical Specification Sheets. You are a vise to wear gloves. (Picture numbers correspon to stages liste below).
1. Mov till r into the upright position.
2. Lift th s at off the chassis. Take care this part is heavy.
3. R mov th und r-s at bask t and stow.
4. R mov th batt ry box by sliding it out of th r ar chassis an stow it carefully in the vehicle.
5. Lift th r l as catch below an in front of the seat post.
6. G ntly s parat th front chassis from th r ar. (This is a feature of the Liteway Balance Plus
mo el only)
7. Disconn ct th Transaxl ass mbly from the Rear Chassis Frame by lifting the release bar at the rear.
8. R l as th till r by loosening the tiller knob.
9. Low r th till r to the horizontal position as shown. (Note - image shown has front an rear still connecte ).
10. S cur th till r by attaching the strap provi e to the han lebars, taking care not to trap finger control lever.
11. Stow th chassis front an rear parts into the boot of the vehicle.
12. Stow s at in th v hicl .
13. Ensur that all parts ar s cur so that they cannot move while riving.
16 Liteway Balance & Liteway Balance Plus Scooters Owner's Manual an Service Recor
Ass mbling your Scoot r following Transportation
After removing your scooter from a vehicle an placing it on level groun ,
check it is un amage before starting to assemble it as follows:
1. Undo th knurl d knob, release strap an raise the tiller into the
upright position an secure by tightening the knob.
2. Attach th transaxl ass mbly to th r ar chassis by lifting the
rear chassis, an positioning it over the transaxle ensuring that the
front hooks engage on the rear chassis spigots.
3. Mano uvr th front part to join th r ar chassis, aligning the hooks so that they go over the rear
cross bar an the pivot points are aligne . (This stage only applies to the Liteway Balance Plus).
4. Lock th chassis tog th r by stepping gently onto the foot rest until the chassis clicks into place.
(This stage only applies to the Liteway Balance Plus).
5. R fit th und r-s at bask t, ensuring it is secure.
6. R fit th batt ry box, sli ing it gently own the gui es until it is securely in position.
7. Lift th s at an install on the rear chassis ensuring it is fully engage , an oes not rock or rotate.
8. Till r adjustm nt: A just tiller back into a comfortable position for riving.
Finally check the scooter is not amage an it is properly assemble , checking that the battery in icator shows
the battery is charge , an the finger controls operate correctly. You are now rea y to rive the scooter away.
Warning! Assembling the scooter involves lifting an han ling heavy parts. The Liteway Plus Scooters
have been esigne to be easily assemble . Your ealer shoul a vise you on the best way to assemble
your scooter.
Warning! Pinching or Crushing. Be careful to avoi being pinche or having your han s crushe when
lifting or han ling parts. Wear gloves whenever possible.
Warning! Never unloa your scooter on sloping or uneven groun . It coul run own the slope an
injure someone.

Batt ry Charging
The charging socket is on the upper right han si e of the battery box as
shown or on the rear of the battery box. Rotate the protective cover an push
in the plug. When the vehicle is charge remove the plug, an refit the
protective cover to keep the water out.
The battery charger has a small in icating lamp. When the charger is
connecte an switche on the lamp will show green. When the battery
is being charge it shows re , when the battery is fully charge the lamp
will change to green. Always ensure that the lamp shows green before
switching off an isconnecting the charger at the mains.
Conn ction Instructions
When you receive your vehicle the batteries are only partially charge –
always fully charge them before use preferably over-night. Always fit the full
set of batteries before charging an always use an earthe connection.
1. Plac your machin in an ar a that is dry and w ll v ntilat d.
Make sure a power point is nearby.
17
Warning! When charging batteries NEVER smoke or charge batteries in a place where there are nake
flames such as gas-fire heaters as, un er exceptional circumstances, batteries may give off gases that
coul ignite an explo e. Always make sure that the battery pack is not amage . Never charge the
scooter battery pack outsi e as the charger is not esigne to get wet. If the charger appears amage in
any way o not use it an contact your ealer for a replacement.
Warning! Always charge in a ry, well ventilate area.
Warning! It is strongly recommen e that the mains socket use for charging the scooter is protecte
by a 30 m/A RCD (resi ual current evice). Many buil ings have sockets protecte by a system base
RCD. If you are in oubt as to the level of protection in your charging location then either purchase a plug
in RCD or consult a qualifie electrician to verify that your charging location mains sockets are protecte .
Warning! If batteries are amage or frozen they coul heat up uring charging an in an extreme case,
explo e.
Warning! Do not attempt to open the battery box/enclosure, there are no user serviceable parts insi e.
Warning! Never use a ifferent battery charger to that supplie by your ealer. Damage or injury may
occur if you o!
Warning! When charging batteries NEVER connect or isconnect the charger from the battery pack
while it is still connecte to the mains. - Remove the charger mains plug from the wall socket having first
switche the mains socket off if a switch is provi e .
Warning! Do not rop your battery pack as amage may occur. Battery packs are heavy - be careful
when lifting them.

18 Liteway Balance & Liteway Balance Plus Scooters Owner's Manual an Service Recor
2. Ch ck th v hicl is switch d off and th k y r mov d.
3. Ch ck th mains switch is off. Never connect or isconnect the charger with the mains on.
4. Conn ct th charg r to th charging point on th batt ry box as abov . Note that the battery can
also be charge when remove from the scooter.
5. Conn ct th mains plug and switch on.
6. Th lamp illuminat s gr n wh n th charg r is pow r d up, then re when it is charging. The
charger lamp changes to green when the battery is fully charge .
7. Switch off th mains and r mov th plug from th batt ry wh n fully charg d. Do not leave the
charger plugge in with the power off. This will gra ually ischarge your battery.
The batteries are the lifebloo of your vehicle. Their characteristics can change epen ing on charging,
temperature, usage an other factors. Liste below are gui elines to prolong battery life.
1. Aft r using your v hicl always charg it at th nd of th day even after a short journey.
2. If you do not us your v hicl for a prolong d p riod, plac it on charg onc a w k, ov rnight.
3. Always us th corr ct charg r with th corr ct batt ri s as recommen e by Electric Mobility (Euro) Lt
4. If th batt ri s hav b n flat for a long tim (about 2 months) it is recommen e you contact your
ealer before charging
5. Do not charg th v hicl in th op n / out of doors – it may rain an the battery charger is not
waterproof.
6. K p th v hicl in a w ll-v ntilat d ar a and away from any nak d flam .
7. Do not part charg th batt ri s. Allow the charger to complete its cycle for every battery fitte .
Note: Avoi storing your scooter in col / amp places. This will shorten battery life an may cause
eterioration in the structure. Batteries are expensive to replace – it is wise to look after them. Batteries are
heavy – make sure you always lift them correctly.
Warning! Never isconnect a battery or the charger while the charger is connecte to the mains
Warning! If one or both batteries are amage they coul heat up when charging an , in an extreme
case, explo e.
Notic Return your unserviceable batteries to your supplier or ensure they are ispose of in accor ance
with the environmental regulations applicable at the time.

19
Us r Maint nanc
It is important for safety that you carry out the following checks before use.
1. Visually ch ck th machin for amage.
2. Visually ch ck th tyr s for amage.
3. Ch ck th st ring mov s fr ly.
4. Ch ck that th till r is s cur and that th till r rotation knob is tight.
5. Ch ck th front chassis is s cur ly attach d to th r ar chassis an to the transaxle.
6. Ch ck that th s at is locat d corr ctly an locke .
7. Ch ck th armr sts ar s cur
8. Th batt ry should b fully charg d.
9. Ensur th front bask t is s cur (if fitte ).
10. K p your v hicl cl an by using a damp cloth and soapy wat r – never use a hose.
11. Ch ck th stabilis r wh ls ar both for and aft, an that they are not contaminate by ebris.
Important – Possibl faults
As you get use to your vehicle you will get a feel for how it behaves. If something feels unusual, for instance
the vehicle oes not accelerate or brake smoothly; the brakes are not hol ing on a slope or the steering feels
ifferent, contact your ealer imme iately an explain to the engineer exactly what the problem is.
Disposal
Contact your ealer for a vice before you consi er isposing of your scooter. They will be aware of the
environmental regulations in force at the time an will assist you to meet the applicable environmental legislation.
S rvicing and Maint nanc
1. This v hicl is d sign d for minimum maint nanc . However it is recommen e that your vehicle is
service at least once a year, by an approve Electric Mobility Dealer. If the vehicle is use constantly we
recommen a twice yearly maintenance.
2. Ensur th ngin r stamps th S rvic Log (page 27) on completion of all servicing. Keep all receipts
for servicing an repairs with this han book. This may a value when selling the vehicle.
3. Wh n th v hicl is du for its annual s rvic mak sur you r port any conc rns you hav ,
preferably when you book the service (See points to look out for below).
4. On compl tion of th s rvic , always t st th v hicl before the engineer leaves an make sure you
are satisfie with the work carrie out.
Points to look out for:
• Are there any strange noises from the wheels or oes the frame creak when going over rough groun ?
• Is the battery charge up correctly – is the “full” charge green light on after charging?
• Is the steering tight or is it loose when turning? Is there any play in the steering?
• Are the brakes effective ?
• Is there any amage to spigots or parts relate to isassembly ?
• Has anything come loose?
• Does the vehicle perform as well as it i when it was new?
• Are there noises or rattles that were not there before?
• Are there any signs of amage, corrosion or cracking?

20 Liteway Balance & Liteway Balance Plus Scooters Owner's Manual an Service Recor
Scoot r Diagnostic Functions
Your Scooter Controller provi es iagnostic information in the form of flash-co es. The lamp on the battery
in icator flashes to in icate a problem has been etecte . On switching on, the controller con ucts a
iagnostic test. While this test is in progress the lamp will flash an , if no fault is etecte it will remain on.
If there is a fault, the lamp will flash a sequence of flashes to in icate what the fault is.
So for instance if the lamp flashes twice in short succession an then again twice in short succession, this
in icates a ba motor connection. If the lamp flashes 8 times there is a problem with the controller.
Numb r of Flash s Indicat d fault and Corr ctiv Action
1• Battery nee s recharging or ba connection with batteries.
Check connections, an recharge batteries.
2• Ba motor connection. Request assistance from ealer who will check all
connections between controller an motor.
3• Short circuit between motor an battery connection. Contact ealer.
4 & 5 • Not use
6• Controller inhibite from operation. Disconnect battery charger an check if
this resolves the problem. Otherwise contact ealer.
7• Throttle fault. Finger control levers must be in neutral (centre ) position
before key is turne on. Switch scooter off, centre levers, an switch back
on. If fault persists, contact ealer.
8• Controller fault. Inform ealer who will check connections & controller.
9• Scooter left in freewheel or has a ba parking brake connection. Engage
rive, an switch scooter of an on. If this fails to cure the problem, check
parking brake an ensure it stops the vehicle. Inform ealer who will check
brake an motor connections.
10 • Excessive voltage etecte at controller. Check battery connections.
If in oubt switch off an switch on – if this oes not cure the fault contact your ealer. Your ealer is there to
help you but they can only o this if you give them as much information as possible. Remember correct
information will get the problem fixe quicker an save you money. Phone the ealer an explain exactly what
the problem is, recounting as much etail as possible. Tell them about the flash co e; this will help the engineer
to i entify the problem before he calls to fix it. Your ealer is there to help you.
Notic
If the Lamp continues to flash then the controller has entere the Sleep mo e an nee s to be woken up.
Turn key off an then back to the on position to reset.
This manual suits for next models
1
Table of contents
Other Electric Mobility Scooter manuals

Electric Mobility
Electric Mobility EM 140F User manual

Electric Mobility
Electric Mobility Rascal 309 User manual

Electric Mobility
Electric Mobility Eco 4 User manual

Electric Mobility
Electric Mobility Ultralite 380 User manual

Electric Mobility
Electric Mobility Rascal Veo User manual

Electric Mobility
Electric Mobility Rascal Mobility Vippi User manual

Electric Mobility
Electric Mobility Ultralite 355 User manual

Electric Mobility
Electric Mobility Rascal 600F User manual


