manuals.online logo
Brands
  1. Home
  2. •
  3. Brands
  4. •
  5. Electrolux
  6. •
  7. Cooktop
  8. •
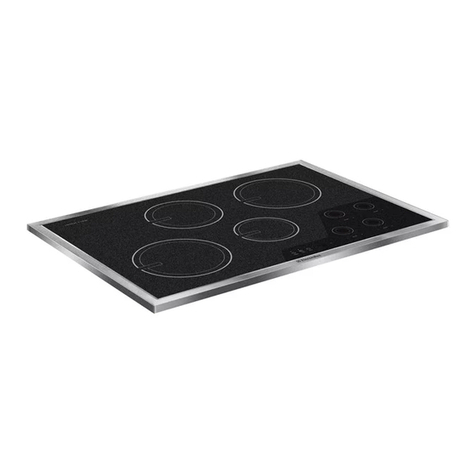
  9. Electrolux E36EC75DSS2 User manual

Electrolux E36EC75DSS2 User manual

This manual suits for next models

1

Other Electrolux Cooktop manuals

Electrolux ETD29KC User manual

Electrolux

Electrolux ETD29KC User manual

Electrolux ICON Designer E30EC65ESS User manual

Electrolux

Electrolux ICON Designer E30EC65ESS User manual

Electrolux WHS642SC Operating manual

Electrolux

Electrolux WHS642SC Operating manual

Electrolux EHI321BEA Instruction Manual

Electrolux

Electrolux EHI321BEA Instruction Manual

Electrolux E36EC75DSS User manual

Electrolux

Electrolux E36EC75DSS User manual

Electrolux Electric Cooktop User manual

Electrolux

Electrolux Electric Cooktop User manual

Electrolux 318 200 687 User manual

Electrolux

Electrolux 318 200 687 User manual

Electrolux EW36CC55GB - 36 Inch Hybrid Induction... User manual

Electrolux

Electrolux EW36CC55GB - 36 Inch Hybrid Induction... User manual

Electrolux ICON Designer E30EC70FSS User manual

Electrolux

Electrolux ICON Designer E30EC70FSS User manual

Electrolux EW36CC55GW User manual

Electrolux

Electrolux EW36CC55GW User manual

Electrolux WLGWAFOOOO User manual

Electrolux

Electrolux WLGWAFOOOO User manual

Electrolux E36GC75GSS - Icon 36 Inch Slide-In Gas... User manual

Electrolux

Electrolux E36GC75GSS - Icon 36 Inch Slide-In Gas... User manual

Electrolux E46GC66ESS User manual

Electrolux

Electrolux E46GC66ESS User manual

Electrolux EI36EC45KS User guide

Electrolux

Electrolux EI36EC45KS User guide
Electrolux GHC607S Operating manual

Electrolux

Electrolux GHC607S Operating manual

Electrolux E36EC75DSS User manual

Electrolux

Electrolux E36EC75DSS User manual

Electrolux EW30GC55G S User manual

Electrolux

Electrolux EW30GC55G S User manual

Electrolux EW30GC55G S User manual

Electrolux

Electrolux EW30GC55G S User manual

Electrolux EW30GC60IS Installation instructions

Electrolux

Electrolux EW30GC60IS Installation instructions

Electrolux EW36CC55GS Quick start guide

Electrolux

Electrolux EW36CC55GS Quick start guide

Electrolux GC1G21A1B User manual

Electrolux

Electrolux GC1G21A1B User manual
Electrolux ICON E30IC80ISS User manual

Electrolux

Electrolux ICON E30IC80ISS User manual

Electrolux E30IC75FSS1 User manual

Electrolux

Electrolux E30IC75FSS1 User manual

Electrolux EW36EC55GB - 36" Smoothtop Electric Cooktop Quick start guide

Electrolux

Electrolux EW36EC55GB - 36" Smoothtop Electric Cooktop Quick start guide

Popular Cooktop manuals by other brands

Fisher & Paykel CE302CBX2 manual

Fisher & Paykel

Fisher & Paykel CE302CBX2 manual

Whirlpool GJC3634RB00 parts list

Whirlpool

Whirlpool GJC3634RB00 parts list

Whirlpool ACH7324/BLV Use, care and installation guide

Whirlpool

Whirlpool ACH7324/BLV Use, care and installation guide

Frigidaire Professional FPDF4085KF Important safety instructions

Frigidaire

Frigidaire Professional FPDF4085KF Important safety instructions

Bonnet OPTIMUM 700 Technical instructions

Bonnet

Bonnet OPTIMUM 700 Technical instructions

Jenn-Air JGCP430 installation instructions

Jenn-Air

Jenn-Air JGCP430 installation instructions

Bompani BO374AA/E User instructions

Bompani

Bompani BO374AA/E User instructions

Kleenmaid cooking GCTK9011 Instructions for use and warranty details

Kleenmaid

Kleenmaid cooking GCTK9011 Instructions for use and warranty details

Waldorf RN8603E-B Technical data sheet

Waldorf

Waldorf RN8603E-B Technical data sheet

Whirlpool SMP658CNEIXL quick guide

Whirlpool

Whirlpool SMP658CNEIXL quick guide

Wolf CI243C/B Use and care guide

Wolf

Wolf CI243C/B Use and care guide

Fulgor Milano F5PGK305S1 installation instructions

Fulgor Milano

Fulgor Milano F5PGK305S1 installation instructions

Wells WV-2HFG owner's manual

Wells

Wells WV-2HFG owner's manual

Samsung NA36N9755 installation manual

Samsung

Samsung NA36N9755 installation manual

Miele KM 404 operating instructions

Miele

Miele KM 404 operating instructions

Lacor 69562 Instructions for use and maintenance

Lacor

Lacor 69562 Instructions for use and maintenance

Keating Of Chicago MG-2 manual

Keating Of Chicago

Keating Of Chicago MG-2 manual

Jenn-Air CCE1400 Use and care guide

Jenn-Air

Jenn-Air CCE1400 Use and care guide

manuals.online logo
manuals.online logoBrands
  • About & Mission
  • Contact us
  • Privacy Policy
  • Terms and Conditions

Copyright 2025 Manuals.Online. All Rights Reserved.

Finding Information
.... '!!,-i,I,I:_,:::i::lI, I I,_1 I ,1_1 I,1,1,1,
Brand
Purchase Date
Model Number
Serial Number
•••••••••••••••
For toll-free telephone support in the US. and Canada:
1-877-4ELECTROLUX (1-877-435-3287)
For online support and intemet product information:
www.electrolux.com
02003 Electrolux Home Products, Inc.
Post Office Box 212378, Augusta, Georgia 30917, USA
All rights reserved. Pdnted in the USA
riilUiily ii llU! i i idtlUl !
,I, II ,I I:,i:
FindingInform_ion...........................................2
MakeaRecordfor Futureuse ..........................2
Questions?........................................................2
Safety...................................................................4
ImportantSafetyinstructions..............................4
SettingSurfaceControls ...................................7
AbouttheCeramicGlassCooktop......................7
AbouttheRadiantSurfaceElements..................7
LocationsoftheRadiantSurfaceElements.........8
SurfaceCockingSettings...................................8
OperatingtheSingleSurfaceRadiantElements. 9
OperatingtheDualSurfaceRadiantElements.,10
OperatingtheBddgeSurfaceRadiantElement,11
HotSurfaceIndicatorLights..............................11
SurfaceCookingutensils..................................12
UsingtheGriddle.............................................12
GeneralCare& Cleaning..................................13
Care&CleaningTable....................................13
CooktopCleaningandMaintenance................14
CleaningRecommendationsforthe
CeramicGlassCooktop..............................14-15
Care&CleaningofStainlessSteel...................15
Solutionsto Common Problems.....................16
EntireCooktopDoesNotOperate....................16
SurfaceElementDoesNotHeat ......................16
SurfaceElementTooHoforNofHotEnough,.. 16
FoodNotHeatingEvenly................................17
ScratchesorAbrasionsonCeramic
GlassCooktopSurface....................................17
MetalMarksonCeramicGlass
CocktopSurface..............................................17
BrownStreaksandSpecksonCeramicGlass
CocktopSurface..............................................17
AreasofDiecoiorationonCeramic
GlassCocktopSurface....................................18
Notes..................................................................19
WarrantyInformation .......................................20
Safety
I1¸,¸¸¸¸¸¸¸1¸,1¸_,J,I, ,I,_11i;_i,:_!i:,,l_I!_i :i¸¸III,_II ,_ II_,_1I,_
••••••••••••••••••••••
Please read all safety instructionsbefore using your new Electrolux cooktop.
•Remove all tape and packaging wrap before using the appliance. Destroy the
carton and plastic bags after unpacking the appliance. Never allow children to play
with packaging material.
•Proper Installation. Be sure your appliance is properly installed and grounded by
a qualified technician in accordance with the National Electrical Code No. 70 -
latest edition in the United States, or CSA C22.1, Part 1 in Canada, and local code
requirements. Install only per installationinstructionsprovided inthe literature package
for thisappliance.
Ask your dealer to recommend a qualified technician and an authorized repair service. Know
how to disconnect the electrical power to the appliance at the circuit breaker or fuse box in
case of an emergency.
•User Servicing. Do not repair or replace any part of the appliance unless specifically
recommended in the manuals. All other servicing should be done only by a qualified
technician to reduce the risk of personal injuryand damage to the appliance.
•Never modify or alter the construction ofan appliance such as removal of panels, wire
covers or any other permanent part of the appliance.
•Storage on Appliance. Flammable materials should not be stored near surface units.
This includes paper, plastic and cloth items, such as cookbooks, plasticware and towels, as
well as flammable liquids. Do not store explosives, such as aerosol cans, on or near the
appliance. Flammable materials may explode and result in fire or property damage.
•Do not leave children alone. Children should not be left alone or unattended in the
area where an appliance is in use. They should never be allowed to sit or stand on any part
ofthe appliance.
Safety
•DO NOT TOUCH SURFACE UNITS OR AREAS NEAR THESE UNITS. Surface unitsmay
be hot even though they are dark in color. Areas near surface units may become hot
enough to cause burns. During and after use, do not touch, or let clothing or other
flammable materials touch these areas until they have had sufficient time to cool. Among
these areas are the cooktop and areas facing the cooktop.
• Wear Proper Apparel, Loose-fitting or hanging garments should never be worn
while using the appliance, Do not let clothing or other flammable materials contact hot
surfaces.
•Do Not Use Water or Flour on Grease Fires. Smother the fire with a pan lid, or use
baking soda, a dry chemical or foam-type extinguisher.
• When heating fat or grease, watch it closely, Fat or grease may catch fire if allowed to
become too hot.
• Use Only Dry Pot holders, Moist or damp pot holders on hot surfaces may result in
burns from steam, Do not let the pot holders touch hot surface units. Do not use a towel or
other bulky cloth instead of apot holder.
•Do Not Heat Unopened Food Containers. Buildup of pressure rnay cause the container
to burst and result in injury.
IMPORTANT. Do not attempt to operate the cooktop during a power failure. If the power
fails, always turn offthe cooktop. Ifthe cooktop isnotturned offand the power resumes, the
cooktop will begin to operate again. Food leftunattended could catch fire or spoil.
IMPORTANT SAFETY INSTRUCTIONS FOR USING YOUR COOKTOP
•Knowwhich knob controls each surface unit.
•Clean the appliance regularly to keep all parts free of grease that could catch fire.
Exhaust fan ventilation hoods and grease filters should be kept clean. Do notallowgrease to
accumulate on hood or filter. Greasy deposits inthe fan could catch fire. When flaming food
under the hood, turnfan on. Refer to hood manufacturer's instructionsfor cleaning.
• Use Proper Pan Size. This appliance isequipped with one or more surface units ofdifferent
sizes. Select utensils having flat bottoms large enough to cover the surface unit. The use of
undersized utensils will expose aportion of the surface heating unitto direct contact and may
result in ignition of clothing. Proper relationship of utensil to element will also improve
efficiency.
Safety
•Utensil Handles Should Be Turned Inward and Not Extend Over Adjacent Surface
Units. To reduce the risk of burns, ignition of flammable materials, and spillage due to
unintentional contact with the utensil.
•Never Leave Surface Units Unattended. Boilovers cause smoking and greasy spillovers
that may ignite, or apan that has boiled dry may melt.
•Protective Liners. Do not use aluminum foil to line any part of the appliance. Only use
aluminum foil as recommended for baking ifused as a cover placedon the food. Any other use
of protective liners or aluminum foil may result in arisk of electric shock or fire or short circuit.
• Glazed Cooking Utensils. Only certain types of glass, glass/ceramic, ceramic,
earthenware, or other glazed utensils are suitable for range top service without breaking due
to the sudden change in temperature. Check the manufacturer's recommendations for
cooktop use.
•Do Not Use Decorative Surface Element Covers. If an element isaccidentally turned on,
the decorative cover will become hot and possibly melt. Burns will occu r if the hot covers are
touched. Damage may also be done to the appliance.
•Ventilating hood. The ventilating hoed above your cooking surface should be cleaned
frequently, so the grease from cooking vapors does not accumulate on the hood or filter.
FOR CERAMIC-GLASS COOKTOP ONLY
•Do NotCleanorOperateaBrokenCooktop, lfcooktop should break, cleaning solutions
and spillovers may penetrate the broken cooktop and create a risk of electric shock. Contact
a qualified technician immediately.
•Clean Cooktop with Caution, If a wet sponge or cloth is used to wipe spills on a hot cooking
area, be careful to avoid a steam burn. Some cleaners can produce harmful fumes if applied
to a hot surface.
• Do Not Place Hot Cookware on Cold Cooktop Glass, This could cause glass to break.
• Do not slide pan across the cooktop surface, They may scratch the cooktop surface.
• Do Not Let Pans Boil Dry. This may cause permanent damage in the form of breakage,
fusion, or marking that can affect the ceramic-glass cooktop. (This type of damage is not
covered byyourwarranty).
Setti.gsurf Controms
1711 :i,I
The ceramic coektop has radiant surface elements located below the r-
surface of the glass. The design of the ceramic cooktop outlines the _ /
area of the surface element underneath. Make sure the diameter of the _k,J _.
pan matches the diameter of the element outline on the cooktop (See _ I_
Figure). i I /f"- "*_
Heat is transferred up through the surface of the cooktop to the _ .,)) _.
cookware. Only flat-bottom cookware should be used. The type and : _ _"
size of cookware, the number of surface elements in use and their _o_oo_op Appearance
settings, are all factors that will affect the amount of heat that will
spread to areas beyond the surface elements. The areas surrounding
the elements may become hot enough to cause burns.
,ll ....t[11,I:::1;,I::_1Ii= I =_ I_F,]_,]i::_:11:],]] _i
I••II•lI••I•l••••mII• •
The element temperature rises gradually and evenly. As the temperature dses, the element
will glow red. To maintain the selected setting, the element will cycle on and off. The heating
element retains enough heat to provide a uniform and consistent heat during the off cycle.
Forefficient cooking, turn offthe element several minutes before cooking is complete. This
will allow residual heat to complete the cooking process.
Setting Surface Controls
II ,I I...... .... ' 'L,' i''
Your appliance isequipped with radiant surface burners with 4
different wattage ratings. The ability to heat food quicker and in
larger volumes increases as the element wattage increases.
The radiant surface elements are located on the cooktop as
follows(See Figure):
- 2 smaller 6 inch radiant elements located at the right and left
rear positions;
- 2 dual 6 or 9 inch radiant elements located at the right and
left front positions;
- 2 7 inch radiant elements located at both the center front
and rear position;
- one Bridge radiant element located between center front and
rear elements.
Use the chart to determine the correct setting for the kind of food you are preparing. The
Simmer settings are used to simmer and keep larger quantities of foods warm such as
stews and soups. The lower Simmer settings are ideal for delicate foods and melting
chocolate or butter.
Note: The size and type of cookware used will influence the setting needed for best cooking
results.
Setting
HIGH(HI)
MEDIUM HIGH(8-10)
MEDIUM (6_
MEDIUM LOW (2-4)
Type of Cooking
Start most foods, bring water to a boil. pan broiling
Continue a rapid boil. fry, deep fat fry
Maintain a slow boil thicken sauces and grawes, steam
vegetables
Keep foods cooking, poach, stew
LOW (LO) Keep warm. melt. simmer
i_!iiii!!!ii!
...._ _7_, _ :i!ii;ii!i_!l_i_i _i_:i!ii;l:!_!li_!ii!_:i_,,:_ii_ ¸¸2¸¸_,_._,_, _ _,:_ _
•••••••••••••••••••••
The cooktop has single radiant surface elements at 3 locations; the right, center and left
rear (Figure 1) element positions.
To Operate the Single Surface Element
1. Place correctly sized cookware on the radiant surface element.
2. Push in and turn the surface control knob in either direction to the
desired setting (Figure 2). Turn the knob to adjust the setting if
desired. Start most cooking operations on a higher setting and then
turn to a lower setting to finish cooking. Each surface element provides
aconstant amount of heat at each setting. A glowing red surface
heating area extending beyond the bottom edge of the ceokware
indicates the cookware is too small for the surface heating area.
3. When cooking has completed, turn the surface control knob to OFF
before removing the ceokware. Note: The Hot Surface Indicator light
will come on when the control knob is turned on and will continue to
glow until the glass ceoktop has cooled down to a moderate level. The
light may remain on even though the controls are turned OFF.
Righ Rear.CenerRearand
LeftRearE]ernents
Figure1
Figure2
Setting Surface Controls
,,,......... I_v,I, ..... .... !l_v_,_,:,l_,!l_v,
The cooktop isequipped with dual radiant surface element located at the right & left front
(See Figure 1 or 3) positions. Symbols on the knob are used to indicate which coil ofthe
dual radiant element will heat. The • symbol indicates that only the inner coil will heat
(Figure 1). The ® symbol indicates that both inner and outer coils will heat (Figure 3). You
may switch from either coil setting at any time during cooking.
To Operate the Dual Surface Element:
Figure2 EJgure4
1. Place correctly sized cookware on the dual surface
element.
2. Push in and turn the control knob counterclockwise
(See Figure 2) for smaller cookware or clockwise
(See Figu re 4) for larger cookware.
3. Turn the knob to adjust the setting if needed. Start
most cooking operations on a higher setting and
then turn to a lower setting to finish cooking. Each
surface element provides a constant amount of heat
at each setting. A glowing red surface heating area
extending beyond the bottom edge of the cookware
indicates the cookware is too small for the surface
heating area.
4. When cooking has completed, turn the surface
control knob to OFF before removing the cookware.
Note: The Surface Indicator light will come on when
the control knob is turned on and will continue to
glow until the glass cooktop has cooled down to a
moderate level. The light may remain on even though
the controls are turned OFF.