Electron WHEEL User manual

ELECTRON WHEEL™
Copyright Electron Wheel™ 2017. All rights reserved.
User Manual & Assembly Instructions
ENGLISH
700c & 26”
Last Update: 10/23/17
SKU: WHE7002 / WHE2602

CONTENTS
1. INTRODUCTION
2. SAFETY INFORMATION
3. INTENDED USE
4. COMPONENTS OF THE ELECTRON WHEEL SYSTEM
5. ASSEMBLING AND QUICK START GUIDE
a. Using Quick Releases
6. APP INSTRUCTIONS
7. ASSISTANCE MODES
a. Range
8. RIDING AN E BIKE
a. Safety Check Before Ride
b. Legal Regulations
9. NOTES ON ELECTRICAL AND ELECTRONIC COMPONENTS
a. Charger and Pedal Sensor Charger
b. Battery
c. Charging Procedures
10. MAINTENANCE
a. Storing
b. Transportation
11. WEAR AND WARRANTY
12. DISPOSAL
13. RETURN & WARRANTY POLICY
14. SPECIFICATIONS
2

1. INTRODUCTION
Dear Customer,
Congratulations on purchasing your new Electron Wheel™! We’re excited to welcome you to our
growing community of riders getting around smarter, faster, and in style with Electron.
Please take the necessary time to read through this instruction manual and familiarize yourself
with your new wheel. Your safety and enjoyment of the Electron Wheel™is our top priority, so
please be sure to get in touch if you have any further questions or comments.
Important information can be found at https://electronwheel.com/ .
It is assumed that users of this product have a basic and sucient knowledge of how to use
bicycles.
Everyone that uses, repairs or services, cleans, or disposes of this product has to understand and
take note of the content and purpose of this operating manual. If you have any further questions
or have not understood certain points, you should contact a specialist bicycle retailer
for your own safety.
All information contained in this operating manual relates to the design, technology as well as care
and maintenance of your product. Please take note of this information. Much of it is relevant to
safety. Failure to consider this information can cause accidents, falls and damage to property.
As modern bicycle and E bike technology is highly complex, we have chosen to only describe the
most important points.
In addition, this operating manual only applies to the product with which it was supplied.
Please carefully read all warnings and notes in this operating manual before using the product.
While using the Electron Wheel™, your traditional bike is classied as an E bike. We recommend
keeping the manual close to your bike so that it is always at hand. Before operating an E bike for
the rst time, it is highly recommended that you carefully read through the enclosed instructions
about the electric motor and components.
If you lend your E bike to a third party, please give them this operating manual with the bike.
3

This operating manual contains dierent types of warnings;
- One providing important information about your new wheel and how to use it.
- A second referring to possible damage to property and the environment.
- And a third type warning against falls and serious damage, including physical injury.
These warnings ask you to comply with the correct torque settings in order to prevent components
from coming loose or breaking. If you see a warning symbol, there is always a risk that the danger
described can occur!
The text which the warning covers always has a grey background.
The warnings break down as follows:
2. SAFETY INFORMATION
Danger: This symbol indicates possible dangers to your
health and life that could arise if specic actions are not
taken or corresponding regulations adhered too.
Warning: This symbol is aimed at warning you against
improper use that could result in damage to property or
the environment.
Information: This symbol provides information about how
to use the product or highlights specic parts of the
operating manual that are particularly important.
4

Modern bicycle and E Bike technology is high tech. Working on bicycle and E Bike parts therefore requires
special knowledge, experience and specialist tools. Please do not attempt to work on the bike yourself.
Give your bike to a specialist retailer for repair, servicing and maintenance. Contact us directly for repair,
servicing, and maintenence of your Electron Wheel™.
Check that all quick releases are safe and secure every time you ride after your bike was unused,
even for a short period of time! Regularly check that all bolts and components are secure. Never
ride with your hands o the handlebars.
Electron Wheel™ recommends use on bicycles only that meet all legally applicable standards including
Consumer Product Safety Commission Standards (found at 16 CFR Part 1512) and/or ISO 4210:2014.
Before installing the Electron Wheel™system, check to see whether your bicycle is suitable for it. In
particular, there must be sucient stability provided for. Consult your bicycle specialist for advice
when in doubt.
ENSURE CORRECT INSTALLATION
Follow all steps listed in this manual and in the assembly video provided on the mobile app and online.
Failure to follow these instructions or skipping any steps could result in operational failure, wheel damage,
voiding of the warranty, or rider injury.
BICYCLE FORK
Installing and using the Electron Wheel™on a bicycle fork that has been previously damaged may result in
failure, resulting in injury or death. If you believe that your bike fork may have been previously damaged from
an accident or misuse, consult your local bike shop before installing the Electron Wheel™.
The Electron Wheel™ can only be used with metal frames. Bamboo, carbon ber and other frame
materials have not been tested for use with the Electron Wheel™.
CHECK YOUR BRAKES
It is critical that the rider maintains front and rear brakes to optimal condition. Failure to do so, or improper
installation, can lead to serious injury or death.
It is recommended that the rider tests all brake mechanisms before turning on the Electron Wheel™. Ensure
that all cables have been reconnected and brake pads contact the rim.
5

6
CHILDREN AND E BIKES
No person under the age of 16 should ride an E Bike. Should you allow a child to ride an E Bike, nd out
whether the child is of the required age and has the required permit for the location you intend to ride.
Note for parents and legal guardians:
As your child’s legal guardian, you are responsible for your child’s actions and safety. This includes
responsibility for the technical condition of your child’s bike and adjusting it to t your child’s body
size.
Please inform yourself of what you and your child must pay attention to.
Before riding any bike, you should ensure that your child has mastered skills required to use the
bike safely. The child should know how to use the bike properly and responsibly in the environ-
ment in which it will be used and ALWAYS wear appropriate safety equipment.
In no event shall Electron Wheel™., it’s subsidiaries or aliates, be liable for any direct, indirect, punitive,
incidental, special consequential damages, to property or life, whatsoever arising out of or connected with
the use or misuse of our products. Riding an electric bike is an activity that may expose the user to the risk
of personal injury or death. Electron Wheel™ is not a toy and shall only be used by persons 16 years of age
or older.
It is the riders responsibility to follow all relevant bicycle and electric bicycle laws in their local jurisdiction.
Always wear a helmet and ensure proper visibility!

7
3. INTENDED USE
The Electron Wheel™ is designed and optimized for on-road conditions. The intended use is on
paved roads and bike paths only.
Using the bike and Electron Wheel™ as intended also means adhering to the operating,
maintenance and upkeep conditions described in this manual.
Before getting started, carefully read these operating instructions and the general bicycle
manual. Electron Wheel™ accepts no liability for damages resulting from non-compliance with
these instructions. Your bicycle, which is now an E Bike, must only be used in accordance with its
intended use. You can nd this in the bicycle`s user manual.

Electron Wheel™
Pedal Sensor Charger
Wheel Charger
Rubber Adapter
Pedal Sensor
Cable Tie
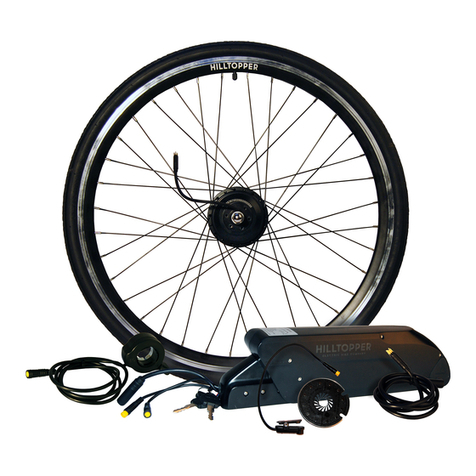
1x Electron Wheel™
1x Pedal Sensor Charger
1x Standard Charger
1x Crank Rubber Adapter
(For use with round cranks)
1x Pedal Sensor
1x Rubber Mounting Unit
2x Nylon Cable Tie
(To secure rubber adapter)
1x Washer
4. COMPONENTS
INSTALLATION VIDEO
For quick and easy installation instructions, download the Electron Wheel™ app from the App or
Google Play Store. Navigate to the settings tab and watch our installation video tutorial. You can
also access the video at the bottom of the page on www.electronwheel.com/technical-specs.
8

Loosen your front brakes
Carefully release your rim brakes. This process may dier from
bicycle to bicycle. Refer to your bicycle’s user manual. If you are
unsure on the safe operation of your brakes, please consult
with your local bike shop or professional.
1.
Remove existing front wheel
Carefully remove your existing front wheel. For most riders
this will be possible via a quick release. Loosen the lever 180
degrees, and twist counter clockwise until loose. A wrench may
be required for bikes without a quick release.
2.
5. ASSEMBLY & QUICK START GUIDE
We strongly recommend the Electron Wheel™ be installed professionally. Installation of the Electron Wheel™
can require special tools and mechanical abilities. Every installation can be dierent. If you are not absolutely
sure you possess these abilities, you should bring your bike to a professional bicycle shop.
9

10
a. Using quick releases
Quick releases are systems installed on the bike in
place of bolted connections. They consist of two
parts: the clamping lever, which provides the neces-
sary clamping force, and the locking nut, which allows
you to regulate the clamping force. You can change
the setup of your quick release when the clamping
lever is open.
A good guage for measuring if the wheel is safely
clamped is if you can only close the clamping lever
with the balls of your hands when the resistance in-
creases after closing the lever about half way.
QUICK RELEASE
Check that all quick releases are properly fastened before
every ride.
• Make sure that all quick releases are properly in
place, even if the bike was only left unattended for
a short period.
• When it is closed, the quick release lever should
be at against the frame or fork!
• When it is closed, the end of the quick release
lever should always point backwards. This ensures
that it cannot be opened by contact during riding.
If you are unsure on the safe operation of your quick release,
please consult with your local bike shop or professional bike
mechanic.

11
Loosen Electron’s quick release
This is located on the same side as the wheel’s charger port.
Open the lever 180 degrees and twist counter clockwise. Be
careful not to loosen too much.
3.
Locate & position T-lever
On the opposite side of your wheel, locate the T-lever. Ensure
that the torque lever is on the same side as your bike’s chain,
and is pointing towards the ground.
b.
a.

Lower fork onto Electron Wheel
With the T-lever pointing downwards, carefully lower the bike’s
front dropouts into place on your Electron Wheel’s axle.
4.
TORQUE LEVER
The torque arm and T-Lever are important parts of the Electron Wheel™. Wrong or improper installation of
the torque arm or the T-Lever can result in a fall, injury or death for the rider or damage to your bike or the
Electron Wheel. Wrong or improper torque arm and T-Lever installation may damage your bike`s frame.
Touch T-Lever to fork
Rotate the t-lever so that it is in full contact with the front fork.
5.
12

Re-connect front brakes
Carefully re-connect your front brakes. If you are unsure on
the safe operation of your brakes, please consult with your
local bike shop or professional.
13
Tighten quick release
Once wheel and T-lever are securley in place, tighten the
wheel’s quick release, and rmly close the lever 180 degrees
using your full grip strength.
6.
TEST BRAKES
Make sure that the front brake works safely. The brake pads must meet the rim. If you are unsure on the
safe operation of your brakes, please consult with your local bike shop or professional bike mechanic.
7.

Attach pedal sensor
Attach the pedal sensor to the crank opposite your bike’s chain.
The sensor should be placed as close to the base of the crank
as possible (i.e. as far away from the pedal as possible). Be sure
both velcro straps are tight. The recommended orientation is
so that the sensor faces inward. Rotate the crank. If there are
obstructions, you can place the device on the outside of the
crank.
8.
14
Recommended orientation
is so that the sensor faces
inwards as close to the crank
base as possible
If there are obstructions,
the sensor can be placed
facing outwards (opposite
to picture shown)
PEDAL SENSOR ORIENTATION
You’ll need to indicate which orientation you’ve chosen on the Electron app (see step 12).

15
The pedal sensor must be turned on and functioning in order to use your Electron Wheel™. If
the pedal sensor is installed incorrectly, your wheel could malfunction, powering on and o at
unexpected times, leading to injury. It is critical you take care in ensuring proper installation.
Below is a guide to your pedal sensor’s LED indicator light.
GREEN:
1 minute constant, then blinking Battery full
GREEN:
3 second constant, then blinking Battery low
GREEN:
3 second constant, then o Battery empty
YELLOW Battery charging
RED:
Blinking every 10 seconds Battery needs charging
RED:
Blinking every 5 seconds Battery low warning
RED:
Blinking every 1 second Battery low urgent
LED INDICATOR GUIDE

16
Download the Electron App
For iOS: Open the
App Store
, search for “Electron Wheel”, press
the “Get” to download.
For Android: Open the
Google Play Store,
search for “Electron
Wheel”, press “Install” to download.
9.
Power the wheel & sensor on
Be sure the wheel and pedal sensor are fully charged, then
take your bike outside. Power the wheel and pedal sensor on.
10.

17
Connect
Ensure bluetooth is enabled on your mobile device. Open the
Electron app and navigate to the settings tab (gear wheel on
lower menu bar). Push “connect” to sync your phone to your
wheel.
11.
Indicate whether the pedal sensor is located on the inside or
outside of your pedal crank.
Select pedal sensor orientation
12.

18
Push “calibrate” and follow the on-screen prompts. Ride the
bike approximately 200 yards, and return to your starting
position. It’s important to maintain a constant speed and to
continue pedaling throughout the 200 yards.
Calibrate
12.
If you’re on a decline, lightly compress the brake while
continuing to pedal. Once you’ve returned to your starting
position, calibration is complete and you’re ready to enjoy.
CALIBRATION FREQUENCY
Calibration is only required when installing the wheel for the rst time on a bike.

19
6. APP INSTRUCTIONS
The Electron Wheel™ app is designed to enhance the functionality and ease of use of your new
Electron Wheel™. We’ve learned some users love this connectivity, while there are other users who
will prefer to ride without it. That’s why we’ve engineered a system that lets you choose whether
or not to use its functionality. The App is required for initial calibration, after which you can choose
to track and record your rides, view ride history, monitor your speed, distance, and time ridden, as
well as toggle between power assist levels.
Push to
connect to
an Electron
Wheel™
Calibrate the wheel the
rst time you install it
on a new bike
Select the orientation of
the pedal sensor
Set the power assist
level of the wheel
View full assembly
video within the app.
Indicates successful
connection to an
Electron Wheel™
Battery level
indicator
Total distance
during a recorded
ride
Total time during a
recorded ride Ride speed
Battery level
indicator
Select the power assist
level of the wheel
View recorded ride
history.
Record rides and view
ride map

20
Power Mode Description
O The wheel will not provide any assist and will enter sleep mode
Low Electron Wheel™ will assist lightly up inclines
Normal Electron Wheel™ will assist up inclines, during normal pedaling, and
during initial take o
High Electron Wheel™ will assist at full power up inclines, during normal
pedaling, and during initial take o
7. ASSISTANCE MODES
Your Electron Wheel™ delivers four diferent assistance modes.
Start your rst ride using LOW mode.
a. Range
The range of your Electron Wheel™ bike is up to 50 miles. The higher the
assistance level, the more support the motor provides. High motor power is also
associated with high power consumption. The lowest support level provides the
least force but has the largest range.
RANGE & TEMPERATURE
Take note that the range of your battery is reduced at lower temperatures, like when you
ride your E bike in winter. You can counteract this by storing the bike in a warm room and
only taking your E Bike outdoors immediately before starting your ride.
This manual suits for next models
2
Table of contents
