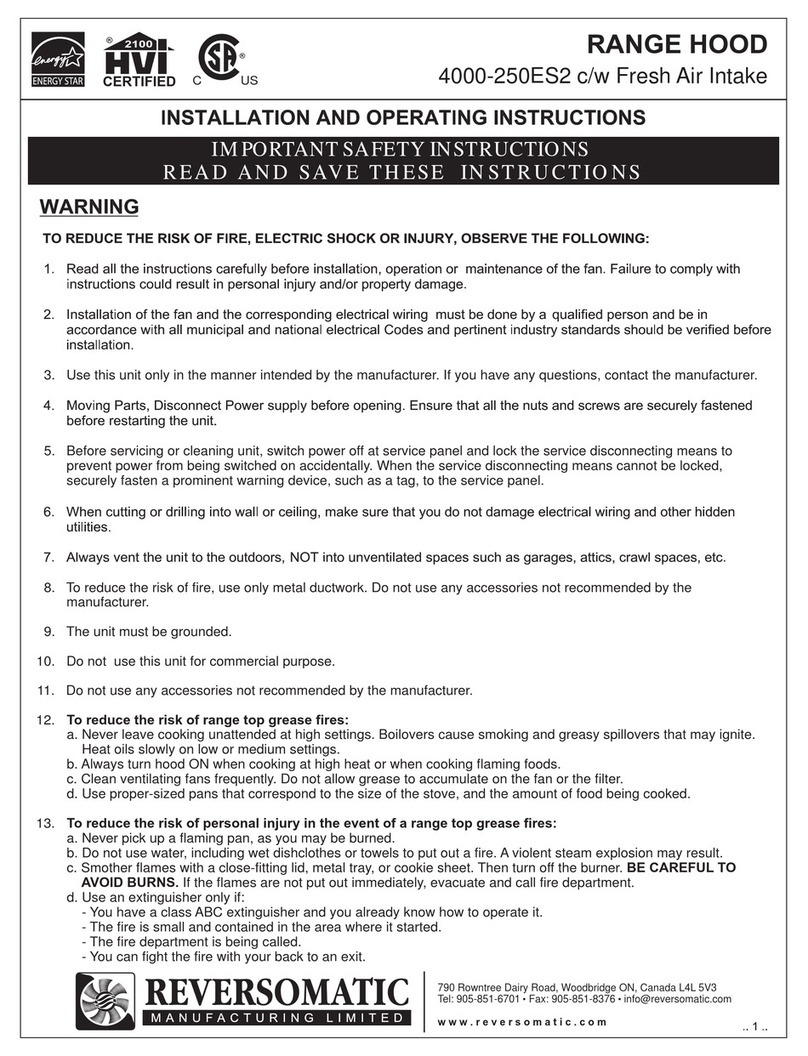
Electrum CGH611LX User manual

Instruction Manual
Handleiding
Mode d’emploi
MODEL / MODELE: CGH611LX/CGH911LX
Lees deze gebruiksaanwijzing aandachtig door voordat u het apparaat installeert en in
gebruik neemt. U vindt hierin aanwijzingen m.b.t. de veiligheid, praktische informatie,
informatie m.b.t. het milieu en tips. Als u het apparaat volgens de aanwijzingen gebruikt,
zal het naar volle tevredenheid werken.
NOTICE: Before installing or using your new device, please register, here below, the serial
number of your appliance. This will be required for troubleshooting.
OPGEPAST: Gelieve voor gebruik of installatie van uw toestel, hier onder het serie nummer van
uw toestel te noteren. Dit nummer zal u gevraagd worden bij een aanvraag herstelling.
ATTENTION: Avant toute installation ou utilisation de votre appareil, veuillez inscrire
ci-dessous le numéro de série de votre appareil. Celui-ci vous sera demandé en cas de
dépannage.
Serial number / Serie nummer / Numéro de
série :…………………………………………………………………………………………………
Nous vous prions de conserver soigneusement ces consignes d'utilisation et, le cas éc
de les remettre au nouvel acquéreur de l'appareil si le dernier est cédé à une tierce
personne. Ce mode d'emploi est valable pour plusieurs appareils, des différences sont par
conséquent possibles.
Before placing your new appliance into operation please read these operating instructions
carefully. They contain important information for safe use, for installation and for care of
the appliance. Please keep these operating instructions for future reference. Pass them on
to possible new owners of the appliance.

Read carefully the important safety information regarding installation and maintenance
instructions. Keep this booklet accessible for further consultations.
1. SAFETY INSTRUCTIONS:
- This appliance is intended to be used in household and similar applications such
as:
staff kitchen areas in shops, offices and other working environments
farm houses;
by clients in hotels, motels and other residential type environments;
bed and breakfast type environments
- There shall be adequate ventilation of the room when the range hood is used at the
same time as appliances burning gas or other fuels.
- There is a fire risk if cleaning is not carried out in accordance with the instructions.
- CAUTION: Accessible parts may become hot when used with cooking appliances.
- The air must not be discharged into a flue that is used for exhausting fumes from
appliances burning gas or other fuels.
- This appliance is not intended for use by persons (including children) with
reduced physical, sensory or mental capabilities or lack of experience and
knowledge, unless they have been given supervision or instruction concerning use
of the appliance by a person responsible for their safety. Children should be
supervised to ensure that they do not play with the appliance.
- If the supply cord is damaged, it must be replaced by the manufacturer, its service
agent or similarly qualified persons in order to avoid a hazard.
The air must not be discharged into a flue that is used for exhausting fumes from
appliances burning gas or other fuels.
- The minimum distance between the supporting surface for the cooking vessels on
the hob and the lowest part of the range hood. (When the range hood is located
above a gas appliance, this distance shall be at least 65 cm).
- Regulations concerning the discharge of air have to be fulfilled.
- Do not use with a programmer, timer, separate remote-control system or any other
device that switches on automatically.

2. WARNING
In certain circumstances electrical appliances may be a danger hazard.
A) Do not check the status of the filters while the cooker hood is operating
B) Accessible parts may become hot when used with cooking appliances
C) Do not touch the light bulbs during or immediately after use.
D) Do not flame under the cooker hood.
E) Avoid free flame, as it damages the filters and may cause fire hazard
F) Constantly check food frying to avoid that the overheated oil may became a
fire hazard
G) Disconnect the electrical plug prior to any maintenance.
3. PRECAUTIONS
- Take care when the cooker hood is operating simultaneously with an open
fireplace or burner that depend on the environment and are supplied by other than
electrical energy, as the cooker hood removes the air from the environment which
a burner or fireplace need for combustion.
- The negative pressure in the environment must not exceed 4 Pa (4*10-5 bar).
- There is a fire risk if cleaning is not carried out in accordance with the
instructions.
4. MODE OF OPERATION:
The appliance has been designed as either an air extractor (The air is drawn in
and cleaned by the aluminum filter and directed outside through exhausted pipe
with 150mm diameter (not included in the product). or as an air re-circulator
(The air is drawn in and cleaned by a carbon filter (not included in the product).
- To work as an air extractor; your cooker hood can be installed as below picture
- To work as an air re-circulator; your cooker hood can be installed as below
picture

-
ATTENTION: Exhaust pipe and carbon filter are not supplied together with the
product and you can contact your local distributor for further information.
5. INSTALLATION INSTRUCTIONS
The cooker hoods must be placed at a distance of 65cm above the cooking surface
of a hob.
Before installation; turn the unit off and unplug it from outlet.
a) Installed as an air extractor
i. Position the hood on the wall (make sure the minimum distance should be 65cm
above the cooking surface of an electric hob or 75cm above the cooking
surface of a gas or dual fuel hob.)
ii. Install the hook on a suitable place once the installation height is fixed, and keep
it in line. The fixed position of the inside chimney bracket is the place of
chimney.
iii. Drill (A,B,C,D,E) holes on marked points by using a Φ8mm drill bit. Push the
plastic wall plugs into the drilled holes. Put the Wall Bracket on the holes A,
B, C. Using the supplied 4x40mm screws; screw Wall Bracket into A,B.C
holes.
Screw
(4mm x 40mm)
Wall plug
Wall bracket
A
B
C

iv. Screw the Outer Chimney to Plate ”I”by screwing 2pcs of 4X8mm screws
through the mounting holes at the top of Outer Chimney as shown in below
picture.
v. Screw the Inner Chimney to Plate II by screwing 2pcs of 4X8mm screws through
the mounting holes at the top of Outer Chimney as shown in below picture

Note: Don’t fix the screws too tight so that it will be easy for you to slide
the inner chimney and out chimney to adjust the height.
vi. Hanging the hood on the two hooks (F,G) on Wall Bracket. .Using the supplied
4X30mm screws; screw the hood in to Φ8mm wall plug (D, E) fixed in the
wall. Ensure the hood is level and then fully tighten all the screws.
vii. Mount the exhaust pipe (not supplied) onto the air outlet as shown below.
viii. Place the Outer Chimney over the Inner Chimney and over the hood body. Adjust
the height you want for the Inner Chimney. Mark the positions “H” “I” “J” “K”
as shown. Drill all four holes on the marked points by using Φ8mm drill bit.
Screw Outer Chimney into Φ8mm wall plugs (H,I) fixed in the wall. Screw Inner
Chimney into Φ8mm wall plugs (J,K) fixed in the wall.

ix. Fix the glass by the screws (4 x 25mm), glass ring, rubber cushion.(60cm no
needed.)
x. Ensure the protective coverings have been removed prior to use.
b) Installed as an air re-circulator
If you do not have an outlet to the outside, don’t
install the exhaust pipe onto the air outlet (step vii).
All other installation is the same as shown in
“Installed as an air extractor”. After step ix; please install the carbon filters (not
supplied) as shown below.

6. CONTROL PANEL
Press “ ” button, and the motor will stop.
Press “ ” button and the motor runs at low speed.
Press “ ” button and the motor runs at middle speed.
Press “ ” button and the motor runs at high speed.
Press “ ” button and lights will be on. Press it again
and the light will be off.
7. CHANGE LAMPS
CAUTION: Do not touch bulbs with your bare hands.
8. Cleaning
- Unplug the appliance from the mains and let it cool down before commencing any
cleaning.
- To prevent causing a fire hazard, it is necessary to clean the filters at least
every 2 months, as follows: Remove the filters from the extractor hood and clean them
with water and neutral detergent, leaving the dirt to soften. Rinse with plenty of
lukewarm water and leave to dry.
First remove the grille by pulling down on it. Undo the side
catches.
You can now clean the anti-grease filter grilles.
Soak them for about one hour in hot water with a grease-loosening
detergent then rinse off thoroughly with hot water.
- Clean the appliance with a damp cloth impregnated with a few
drops or detergent and dries it afterwards.
- Do not use solvents or products with an acidic ph value to clean the appliance, or
bleach or abrasive products.
- Do not submerge the appliance in water or any other liquid or place it under a
running tap.
- Repeat the process if needed.
- Re-fit the grease grilles when dry.
Use the screw driver loosen the ST4*8MM self tapping screws from the lighting
panel, take out the lighting fixtur e. Open the terminal box that connected with
the wire, disconnect the wire connector and replace the lamp.
Note:Light replacement should carried out by qualified service personnel only.
• ILCOS D code for this lamp is: DBS-2/65-H-120/33
– LED modules –rectangle lamp
– Max wattage: 2 W
– Voltage range: AC 110-240V

PROTECTI
collection po
accordance w
Importer :
Verbeken
Humaniteit
1620 Droge
Belgium.
Your applian
2014
2014
2011
PACKAGE
Packaging m
Nation Envi
Do not dispo
packaging m
ION OF TH
In order to p
electronic e
implication
can symbol
disposed of
oint performi
with the dire
tslaan 241B
enbos
nce meets th
4/35/EU L
4/30/EU E
1/65/EU R
E INFORMA
materials of th
ronment Reg
ose of the pa
material colle
HE ENVIRO
preserve our
equipment sh
of both supp
(seen above
fas unsorted
ing waste rec
ectives.
e essential re
Low Voltage
Electro Magn
RoHS direct
ATION
he product a
gulations.
acking materi
ection points
ONMENT –
environmen
hould be disp
pliers and us
e) on the ratin
municipal w
covery by m
equirements
e directives (
netic Compa
ives
are manufactu
ials together
designated b
DIRECTIV
nt and protect
posed of in ac
ers. For this
ng label or on
waste. The us
means of reuse
as described
(LVD)
atibility direc
ured from re
with the dom
by the local a
VE 2012/19/E
t human heal
ccordance wi
reason, as in
n the packin
ser has the rig
e, recycling o
d in following
ctives (EMC)
cyclable mat
mestic or oth
authorities.
EU
lth, the waste
ith specific r
ndicated by th
g, your appli
ght to bring i
or use for oth
g directives:
)
terials in acc
her wastes. T
e electrical a
rules with the
he crossed-o
iance should
it to a munic
her applicati
cordance with
ake them to
and
e
out trash
d not be
ipal
ons in
h our
the

ADVIEZEN EN SUGGESTIES
Deze gebruiksaanwijzing geldt voor verschillende uitvoeringen van toestellen. Het is
mogelijk dat er een aantal kenmerken worden beschreven die niet van toepassing zijn op uw
toestel.
INSTALLATIE
De fabrikant aanvaardt geen enkele aansprakelijkheid voor schade die voortkomt uit
onjuiste of niet in overeenstemming met de regels der kunst uitgevoerde installaties.
De minimale veiligheidsafstand tussen de kookplaat en de wasemkap bedraagt 650
mm voor een elektrische kookplaat en 750 mm voor een gaskookplaat.
Controleer of de netspanning correspondeert met de spanning die aangegeven is op
het plaatje aan de binnenkant van de wasemkap.
Voor apparaten van klasse I dient u zich ervan te verzekeren dat het elektriciteitsnet in
uw huis over een goede aarding beschikt.
Verbind de wasemkap met de luchtuitlaat door middel van een leiding. De leiding
moet een zo kort mogelijke route afleggen.
Sluit de wasemkap niet aan op afvoerpijpen van rook die geproduceerd is door
verbranding (verwarmingsketels, open haarden etc.).
Als er in het vertrek zowel de wasemkap als apparaten die niet op elektriciteit werken
(bijvoorbeeld gasapparaten) worden gebruikt, moet ervoor worden gezorgd dat het
vertrek voldoende geventileerd wordt. Indien de keuken geen gat in de buitenmuur
heeft om de aanvoer van schone lucht te garanderen, dient dit gemaakt te worden.
GEBRUIK
De wasemkap is uitsluitend ontworpen voor huishoudelijk gebruik, voor het
elimineren van kookgeuren. Gebruik de kap nooit op oneigenlijke wijze.
Laat geen hoog brandende branders onbedekt onder de wasemkap terwijl deze in
werking is.
Regel de vlammen altijd zo dat ze niet langs de pannen omhoogkomen.
Controleer frituurpannen tijdens het gebruik: de oververhitte olie zou vlam kunnen
vatten.
Er mag niet onder de afzuigkap geflambeerd worden; brandgevaar
Dit toestel mag niet worden gebruikt door personen (inclusief kinderen) met beperkte
psychische, sensorische en geestelijke vermogens, of door personen zonder ervaring
en kennis, tenzij ze onder toezicht staan of worden geïnstrueerd over het gebruik van
het toestel door personen die verantwoordelijk zijn voor hun veiligheid.
Kinderen moeten worden gecontroleerd om er zeker van te zijn dat ze niet met het
toestel spelen.
Controleer nooit de status van de filters van de afzuigkap op het moment dat deze in
gebruik is.
Raak nooit de lampen aan direct nadat u het toestel gebruikt heeft.
Koken met een open vlam is verboden onder de afzuigkap.

Vermijd vrijkomende vlammen, omdat het de filters beschadigt en brandgevaar
veroorzaakt.
Controleer voortdurend het voedsel dat u braadt of bakt om te vermijden dat de
oververhitte olie een brandgevaar veroorzaakt.
Verwijder altijd de stekker voordat u onderhoud pleegt.
Indien het stroomsnoer is beschadigd, moet het vervangen worden door de fabrikant
of door een gelijkwaardig onderhoudsbedrijf om een gevaar te vermijden.
Houd elektrische toestellen buiten het bereik van kinderen of labiele personen. Laat
hen zonder toezicht niet de apparaten gebruiken.
Gebruik het toestel alleen binnenshuis.
Gooi elektrische toestellen niet weg met het huisafval, maar gebruik uw plaatselijke
inzamelpunt voor het weggooien van de apparaten.
Neem contact op met uw gemeente voor informatie over de beschikbare
inzamelsystemen bij u in de buurt.
Indien elektrische toestellen worden weggegooid op de stort -of schroothoop, kunnen
gevaarlijke onderdelen in het grondwater lekken en in de voedselketen belanden, wat
uw gezondheid en gestel kan beschadigen.
Verwijder het toestel, wanneer het niet in gebruik is en voordat u het gaat
schoonmaken, uit het stopcontact.
ONDERHOUD
Alvorens onderhoudswerkzaamheden uit te voeren, moet de wasemkap uitgeschakeld
worden door de stekker uit het stopcontact te halen of de hoofdschakelaar om te
zetten.
Voer het onderhoud van de filters altijd tijdig en nauwgezet uit, volgens de
aanbevolen intervallen.
Om de oppervlakken van de kap schoon te maken is het voldoende een vochtige doek
en een neutraal reinigingsmiddel te gebruiken.
INSTALLATIE
Uw toestel kan op 2 manieren geïnstalleerd worden:
1. Met lucht uitlaat. 2. Zonder lucht uiitlaat
OPGEPAST : de toebehoren zijn niet met het toestel verkocht. Gelieve deze in de
winkel aan te kopen.

1. Install atie met lucht uitlaat.
Trek de volgende lijnen op de wand:
•Een verticale lijn tot aan het plafond, in het midden van de zone waar u de
wasemkap wilt installeren;
•Een horizontale lijn boven op 650 mm
voor een elektrische kookplaat en 750
mm voor een gaskookplaat.
•Plaats, zoals aangegeven, de
bovenste beugel helemaal boven.
•Teken de middelpunten van de gaten
in de beugel af.
•Plaats, zoals aangegeven, de onder
de eerste beugel
•Teken de middelpunten van de gaten in de beugel af.
•Teken, zoals aangegeven, een referentiepunt af van de verticale referentielijn
en boven de horizontale referentielijn.
•Herhaal deze handeling aan de andere kant.
•Boor op de afgetekende punten gaten van ø 8 mm.
•Schuif de pluggen in de gaten.
•Bevestig de onderste beugel.
•Bevestig de bovenste beugel.
•Schroef 2 van de schroeven in de gaten voor bevestiging van de wasemkap en
laat hierbij een ruimte tussen de wand en de kop van de schroef.
Screw
Wall
Wall
A
B
C

•Alvorens de wasemkap vast te
haken, de 2 schroeven die zich op
de bevestigingspunten (inner
chimney) van de wasemkap
bevinden, aanhalen. Zie figuur
hieronder (II)
•Haak de wasemkap vast aan de
schroeven.
•De dragende schroeven definitief
aanhalen.
•Draai aan de schroeven om de
wasemkap recht te hangen.
•Plaats dan ook de uitlaatbuis vast.
•Een keer dat alles bevestigd is, moet u het glas bevestigen.
Aansluiting
•Bij installatie in afzuigversie, moet u de wasemkap met de uitlaatleiding
verbinden door middel van een starre of buigzame
•Zet de leiding vast met geschikt leidingklemmen. Het benodigde materiaal
wordt niet bij de wasemkap geleverd.

Montage van de schouw
Bovenstuk van de schouw
•De twee zijplaten enigszins openen, ze
vasthaken achter de beugels en ze weer zo
ver mogelijk sluiten.
•Aan de zijkant aan de beugel bevestigen
met de schroeven.
•Verzekert u ervan dat de uitlaat van de
verlengstukken van het verbindingsstuk
correspondeert met de mondstukken van de
schouw.
Onderstuk van de schouw
•De twee zijplaten van de schouw enigszins
openen, ze vasthaken tussen het bovenstuk
van de schouw en de wand en ze weer zo
ver mogelijk sluiten.
•Bevestig het onderstuk aan de zijkanten aan de wasemkap met schroeven.
3. Installatie zonder lucht uitlaat
•In plaats van de uitlaatbuis te plaatsen, plaats de koolstoffilters in het toestel zoals
figuur hieronder.
UTILISATION
•“ ” lampen: laat ze branden of niet.
•“ ” schakelt het toestel uit.
•“ ” Laagste snelheid.
•“ ” Middelste snelheid, normaal gebruik.
•“ ” Hoogste snelheid.

LAMP VERVANGEN
Alvorens de lamp te vervangen dient u de stekker uit het stopcontact te trekken.
Duw de lamp van binnen naar buiten (deze zit vast met clips). Open de aansluitblok en ontkoppel.
Koppel de nieuwe lamp voor voer de bovenstaand stappen in omgekeerde richting uit.
ILCOS D code voor deze lamp is :
AANDACHT : raak de lamp niet aan met blote handen.
•DBS-2/65-H-120/33
•
•
•
LED module – rechthoekig
Max Wattage: 2 W
Voltage : AC 110-240V
ONDERHOUD
REINIGING VAN DE METALEN VETFILTERS
•De filters moeten eens in de 2 maanden of, bij
bijzonder intensief gebruik, vaker gereinigd
worden, en kunnen ook in de vaatwasmachine
worden gewassen.
•Verwijder de filters één voor één door ze naar de
achterkant van de groep te duwen en ze
tegelijkertijd omlaag te trekken.
•Was de filters en vermijd hierbij ze te buigen, en
laat ze drogen alvorens ze terug te plaatsen.
•Plaats de vetfilters terug en let er hierbij op dat
de handgreep zichtbaar blijft.
VERVANGING FILTER MET ACTIEVE KOOLSTOF
•De filter kan niet gewassen en niet geregenereerd worden en moet minstens
eens in de 4 maanden worden vervangen, of, bij bijzonder intensief gebruik,
zelfs nog vaker.
•Verwijder de metalen vetfilters.
•Verwijder de verzadigde geurfilter met actieve koolstof door de bevestigingen
los te maken.
•Monteer de nieuwe filter door het op zijn plaats vast te drukken.
•Plaats de metalen vetfilters terug.

MILIEUB
weggegooid
van geschei
gerecycleer
Invoerder :
Verbeken
Humaniteit
1620 Droge
België.
Uw toestel
201
201
201
VERPAKK
De verpakki
Nationale M
Breng deze n
autoriteiten.
ESCHERM
Om ons mi
elektronisc
Dit vergt z
uw apparaa
van een do
d worden. D
iden inzame
rd of voor a
tslaan 241B
enbos
voldoet aan
4/35/EU L
4/30/EU E
1/65/EU R
KINGSINFO
ing van dit to
Milieuvoorsch
naar de inzam
MING – RI
ilieu en onz
ch apparatuu
zowel de inz
at, zoals op
oorkruiste vu
De gebruike
eling te bren
andere doele
n de essentië
Low Voltag
Electro Mag
RoHS direc
ORMATIE
oestel werden
hriften. Voer
melingspunte
ICHTLIJN
ze gezondhe
ur in overee
zet van de le
het typepla
uilnisbak (z
er heeft het r
ngen waar h
einden gebru
ële eisen be
ge directive
gnetic Com
ctives
n gemaakt va
rhet verpakk
en voor verp
NEN 2012/1
eid te besch
enstemming
everanciers
aatje of op d
zoals hierbo
recht het to
het overeenk
uikt zal wor
eschreven in
s (LVD)
mpatibility di
an recycleerb
kingsmateriaa
pakkingsmate
9/EU
ermen, moe
g met welbe
als van de g
de verpakkin
oven), niet m
estel gratis
komstig de
rden.
n onderstaan
irectives (E
bare material
al niet af met
eriaal zoals a
et afgedankt
epaalde rege
gebruikers.
ng aangegev
met het gew
naar een ge
richtlijnen
nde richtlijn
EMC)
len in overee
t huishoudeli
aangegeven d
t elektrisch
els worden w
Om deze re
ven door he
wone huisvui
emeentelijk
hergebruikt
nen:
enstemming m
ijk of ander a
door de plaat
en
weggegooid
eden mag
et symbool
il
centrum
t,
met onze
afval.
tselijke
d.

CONSEILS ET SUGGESTIONS
La présente notice d'emploi vaut pour plusieurs versions de l'appareil. Elle peut contenir
des descriptions d'accessoires ne figurant pas dans votre appareil.
INSTALLATION
Le fabricant décline toute responsabilité en cas de dommage dû à une installation non
correcte ou non conforme aux règles de l’art.
Cet appareil a été conçu pour un usage domestique uniquement.
La distance minimale de sécurité entre le plan de cuisson et la hotte doit être de 650 mm
au moins d’un plan électrique et 750mm d’un plan gaz.
Vérifier que la tension du secteur correspond à la valeur qui figure sur la plaquette
apposée à l’intérieur de la hotte.
Pour les Appareils appartenant à l’Ière Classe, veiller à ce que la mise à la terre de
l’installation électrique domestique ait été effectuée conformément aux normes en
vigueur.
Connecter la hotte à la sortie d’air aspiré à l’aide d’une tuyauterie. Le parcours de la
tuyauterie doit être le plus court possible.
Ne pas connecter la hotte à des conduites d’évacuation de fumées issues d’une
combustion tel que (Chaudière, cheminée, etc…).
Si vous utilisez des appareils qui ne fonctionnent pas à l’électricité dans la pièce ou est
installée la hotte (par exemple: des appareils fonctionnant au gaz), vous devez prévoir une
aération suffisante du milieu. Si la cuisine en est dépourvue, pratiquez une ouverture qui
communique avec l’extérieur pour garantir l’infiltration de l’air pur.
UTILISATION
La hotte a été conçue exclusivement pour l’usage domestique, dans le but d’éliminer les
odeurs de la cuisine.
Ne jamais utiliser abusivement la hotte.
Ne pas laisser les flammes libres à forte intensité quand la hotte est en service.
Toujours régler les flammes de manière à éviter toute sortie latérale de ces dernières par
rapport au fond des marmites.
Contrôler les friteuses lors de l’utilisation car l’huile surchauffée pourrait s’enflammer.
Ne pas préparer d’aliments flambés sous la hotte de cuisine : risque d’incendie
Cet appareil ne doit pas être utilisé par des personnes (y compris les enfants) ayant des
capacités psychiques, sensorielles ou mentales réduites, ni par des personnes n’ayant pas
l’expérience et la connaissance de ce type d’appareils, à moins d'être sous le contrôle et la
formation de personnes responsables de leur sécurité.
Les enfants doivent être surveillés pour s'assurer qu'ils ne jouent pas avec l'appareil.
Ne vérifiez pas l'état des filtres pendant que la hotte fonctionne.
Ne touchez pas les ampoules après avoir éteint la hotte.

Toute cuisson à la flamme est interdite sous la hotte.
Évitez toute flamme libre sous la hotte pour ne pas endommager les filtres ni risquer un
incendie.
Soyez très prudent avec les fritures. L'huile étant surchauffée, les risques d'incendie sont
beaucoup plus grands.
Débranchez la hotte du secteur avant toute opération d'entretien.
Si vous devez remplacer le cordon d'alimentation, adressez-vous au constructeur, à son
centre de service ou à une personne qualifiée pour éviter tout risque d'électrocution.
Gardez cet appareil hors de portée des enfants et des personnes handicapées. Ne les
laissez utiliser cet appareil que sous la surveillance d'une personne adulte responsable.
Cet appareil est réservé à un usage intérieur uniquement.
Ne jetez pas vos appareils électriques usés avec vos ordures ménagères. Déposez-les
auprès d'installations pour recyclage.
Pour toute information sur ces installations, adressez-vous à vos autorités locales
compétentes.
Si vous déposez simplement vos appareils électriques dans un terrain vague ou une
décharge, les substances chimiques des composants électriques risquent de s'échapper, de
s'infiltrer dans le sol et de contaminer alors toute une chaîne alimentaire, avec toutes les
conséquences désastreuses pour votre santé et votre bien-être.
Débranchez la hotte du secteur lorsque vous ne l'utilisez plus et avant de la nettoyer.
ENTRETIEN
• Avant de procéder à toute opération d’entretien, retirer la hotte en retirant la fiche ou en
actionnant l’interrupteur général.
• Effectuer un entretien scrupuleux et en temps dû des Filtres, à la cadence conseillée.
• Pour le nettoyage des surfaces de la hotte, il suffit d’utiliser un chiffon humide et détersif
liquide neutre.
INSTALLATION
La hotte peut s’installer des 2 façons suivantes :
1. Extraction d’air avec une sortie prévue. 2. Recirculation d’air sans sortie.
ATTENTION : les accessoires ne sont pas fournis avec les appareils. Veuillez les
acheter en magasin.

1. Installer votre appareil avec une sortie d’air prévue
•Tracer sur la paroi une ligne verticale allant jusqu’au plafond ou à la limite
supérieure, au centre de la zone prévue pour le montage de la hotte;
•une ligne horizontale à 650 mm min. au-dessus du plan de cuisson.
•Marquer les centres des trous rainurés de la bride.
•Poser comme indiqué la bride sous la
première bride (X = hauteur cheminée
supérieure fournie), en alignant son
centre (découpes) sur la ligne verticale
de repère.
•Marquer les centres des trous rainurés
de la bride.
•Marquer comme indiqué, un point de
référence de la ligne verticale de repère, et au-dessus de la ligne horizontale de
repère.
•Répéter cette opération sur le côté opposé.
•Percer de ø 8 mm tous les points marqués.
•Insérer les chevilles dans les trous.
•Fixer la bride inférieure.
•Fixer ensemble la bride supérieure et le support
•Visser les vis dans les trous de fixation du corps de la hotte, en laissant un espace
de entre le mur et la tête de la vis.
Screw
(4mm x
Wall
Wall
A
B
C

•Avant d’accrocher la hotte, fixez
(sans trop serrer) les deux vis
situées sur les points
d’accrochage de la cheminée
intérieure (inner chimney). Voir II
sur la figure ci-dessous.
•Accrocher le la hotte aux vis
prévues à cet effet.
•Serrer définitivement les vis de
support.
•Agir sur les vis pour niveler le
corps hotte.
•Ensuite fixez le tuyau d’extraction à l’emplacement prévu.
•Une fois la hotte bien fixée, fixez le verre décoratif sur la hotte.
This manual suits for next models
1
Table of contents
Languages:
Other Electrum Ventilation Hood manuals