elero Combio-868 LI Specification sheet
18 111.0703_EN_0321
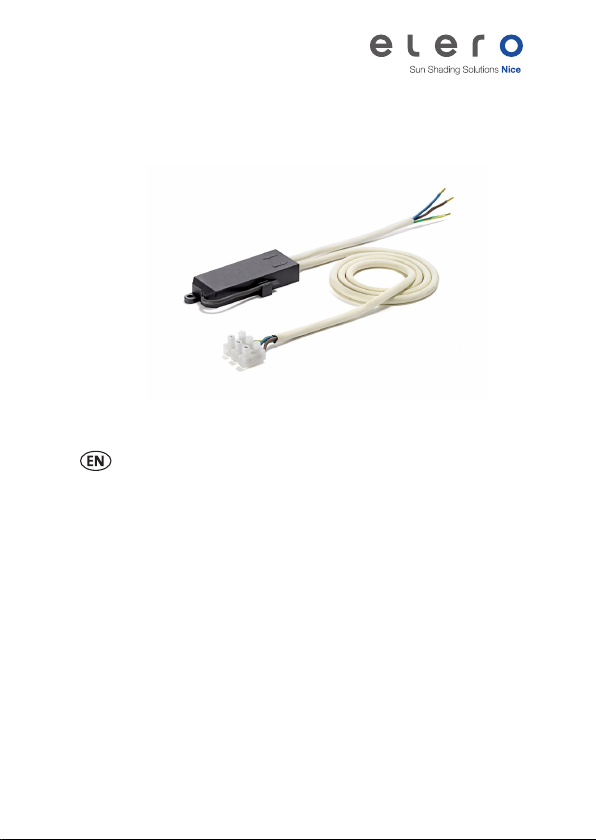
Combio-868 LI
28 563.0006
Information for use
Keep for future use.

Ⓒelero GmbH EN | 32 | EN Ⓒelero GmbH
Translation from the original German version.
All other documents in dierent languages are transla-
tions of the original version.
All rights reserved in the event case of patent, utility
model or design registrations.
Contents
1 Introduction 4
1.1 Manufacturer contact details 4
1.2 Symbols and warnings 5
2 Safety instructions 5
2.1 Target group 5
2.2 Intended use 5
2.3 Warranty 6
3 System description 6
3.1 Application area 6
3.2 Terminal connection diagram 6
4 Technical data 7
5 Preparation 9
5.1 Product contents 9
5.2 Packaging 9
5.3 Settings 9
5.4 Connection and installation 9
5.5 Commissioning 11
5.6 Diagram of programming mode 11
5.7 Asynchronous programming mode (standard) 12
5.8 Synchronous programming mode 14
6 General control options 17
6.1 Adapting an illuminant 18
6.2 Deleting the programmed handheld /
wall-mounted transmitter 20
7 Servicing 21
7.1 Cleaning 21
7.2 Maintenance 21
7.3 General notes on troubleshooting 21
7.4 Repairs 23
8 Decommissioning and disposal 23
8.1 Disassembly 23
8.2 Disposal 23
9 Certication and imprint 24
9.1 EU Declaration of Conformity 24
9.2 Legal Disclosure 24

Ⓒelero GmbH EN | 5 4 | EN Ⓒelero GmbH
1 Introduction
This user manual describes the functions and features
of the Combio-868 LI system. Combio-868 LI enables
appropriate illuminants to switched and dimmed. Appro-
priate illuminants are as follows:
• standard light bulbs
• high-voltage halogen light bulbs
• low-voltage light bulbs with electronic transformer
• LED light bulbs with a suitable electronic dimmer
(ECG, electronic control gear)
An elero handheld/wall-mounted transmitter (at least 1)
is also required. The Combio-868 LI can be controlled
by several transmitters.
Follow the instructions in these manuals to ensure
proper and safe use.
Retain for future use.
1.1 Manufacturer contact details
elero GmbH
Maybachstr. 30
73278 Schlierbach - Germany
Telephone: +49 (0)7021 9539-0
Website: www.elero.de
1.2 Symbols and warnings
This user manual uses the following illustrations to
display important warnings:
WARNING
Danger with a medium level of risk, possibly
resulting in death or serious injury.
ATTENTION
Danger, possibly resulting in damage to property.
2 Safety instructions
2.1 Target group
This document is primarily intended for use by electrici-
ans, technicians and engineers with experience in the
design, installation, commissioning and maintenance of
building technology.
2.2 Intended use
This product is for private use only. It is intended only for
the switching and/or dimming of suitable illuminants for
use in dry rooms.
The Combio-868 LI is designed for installation in dry
cavities in buildings. Do not perform any modications to
the device. The manufacturer will not assume liability for
damage caused by the above.
Do not operate a programmed transmitter inadvertently
or carelessly.

Ⓒelero GmbH EN | 76 | EN Ⓒelero GmbH
2.3 Warranty
• The warranty period for Combio-868 LI is in
accordance with the legal regulations. Damages
caused due to improper use are excluded.
• Never open the device without authorisation. Opening
the housing renders the warranty null and void.
• No warranty claims may be made for damage caused
to the Combio-868 LI due to improper operation resul-
ting from non-observance of the operating instructions
or due to a disregard of these instructions.
• No liability shall be accepted for consequential damages.
3 System description
3.1 Application area
Combio-868 LI enables the switching and dimming of
suitable illuminants in combination with elero hand-held/
wall-mounted transmitters.
3.2 Terminal connection diagram
Connection diagram with/without ballast
Combio-868 LI
antenna
green-
yellow
blue (N)
brown L
PE
N power grid
blue (N)
green-
yellow
ECG
electronic
control gear
brown L
Combio-868 LI
antenna
green-
yellow
blue (N)
brown L
PE
N power grid
blue (N)
green-
yellow
brown L
R, C
Connection diagram with/without ballast
Combio-868 LI
antenna
green-
yellow
blue (N)
brown L
PE
N power grid
blue (N)
green-
yellow
ECG
electronic
control gear
brown L
Combio-868 LI
antenna
green-
yellow
blue (N)
brown L
PE
N power grid
blue (N)
green-
yellow
brown L
R, C
The Combio-868 LI is supplied with 230V AC via
spring clips.
Designation Assignment
L Exterior conductor (brown)
N Neutral conductor (blue)
PE Protective conductor
(yellow/green)
The illuminants that are connected are powered
and activated via suitable clips by means of
same-coloured connections.
4 Technical data
Technical data
Power supply 230V ~, 50Hz
Voltage output (phase section) 230V ~, 50Hz
Power (load designation R = ohmic
load, C = capacitive load)
max. 100 W
Stand-by power consumption < 0.5 W
Nominal current of lighting clamps max. 0.5 A
Combio-868 LI
antenna
green-
yellow
blue (N)
brown L
PE
N power grid
blue (N)
green-
yellow
ECG
electronic
control gear
brown L
Combio-868 LI
antenna
green-
yellow
blue (N)
brown L
PE
N power grid
blue (N)
green-
yellow
brown L
R, C

Ⓒelero GmbH EN | 98 | EN Ⓒelero GmbH
Technical data
Ingress protection IP 56
Protection class II
Software class A
Operating temperature -20 to 65 °C
Relative air humidity 0 to 95%
Max. usage altitude 2000 m over NHN
Network cable length 3 m
Number of maximum transmitters 16
Radio frequency 868 MHz (band)
Transmitting power ≤ 500 mW | ≤ 10 dBm
Resistance to short-circuiting guaranteed
Soft start maximum 1 s
Dimming time maximum 5 s
Dimensions of housing (L x W x H) 98 x 41 x 16 mm
Weight with cable approx. 350 g
Type of mounting Screws / glued
Conformity CE (FCC / IC)
Item number 28 563.0006
5 Preparation
5.1 Product contents
Designation Fig.
Combio-868 LI
Article no. 28 563.0006
User manual
Article no. 18 111.0703
Retain for future use.
5.2 Packaging
Packaging is designed for protection of the Combio-868
LI during transport. After unpacking, please check all
components delivered for completeness or damage.
5.3 Settings
The equipment is set via the elero handheld/wall-moun-
ted transmitter following the electrical connection.
5.4 Connection and installation
WARNING
Risk of injury, damage to the Combio-868 LI
and its surrounding area due to improper
electrical connections.
Ⓒelero GmbH EN | 1110 | EN Ⓒelero GmbH
WARNING
• The electrical connection may only be conducted by
qualied personnel.
• Only perform work on the electrical connection if it
has been disconnected from the power supply.
• Note the technical data for the device.
• Take care to ensure correct, securely axed
connections.
• Screw the Combio-868 LI to the surface by means
of the ring lug using a suitable screw.
• Ax the Combio-868 LI using a self-adherent
foam strip.
• Do not kink, shorten or extend the external antenna of
the Combio-868 LI, route it as free from obstruction as
possible. Do not lay it against metal. Realign it in case
of poor reception.
ATTENTION
Replacing components of the Combio-868 LI with
third party components may damage these com-
ponents or other connected systems.
• Exchange components between dierent systems
only after consultation with the manufacturer or
your supplier.
• When replacing a component, check whether the
type description of the new component matches
the one being replaced.
5.5 Commissioning
The elero handheld/wall-mounted transmitter has to be
programmed to the Combio-868 LI radio receiver.
The functions of the Combio-868 LI are controlled
using the buttons [OPEN ▲], [STOP ■], [DOWN ▼],
programming button [P] and the slider of the handheld/
wall-mounted transmitter.
The + sign in the text indicates pressing the buttons
simultaneously.
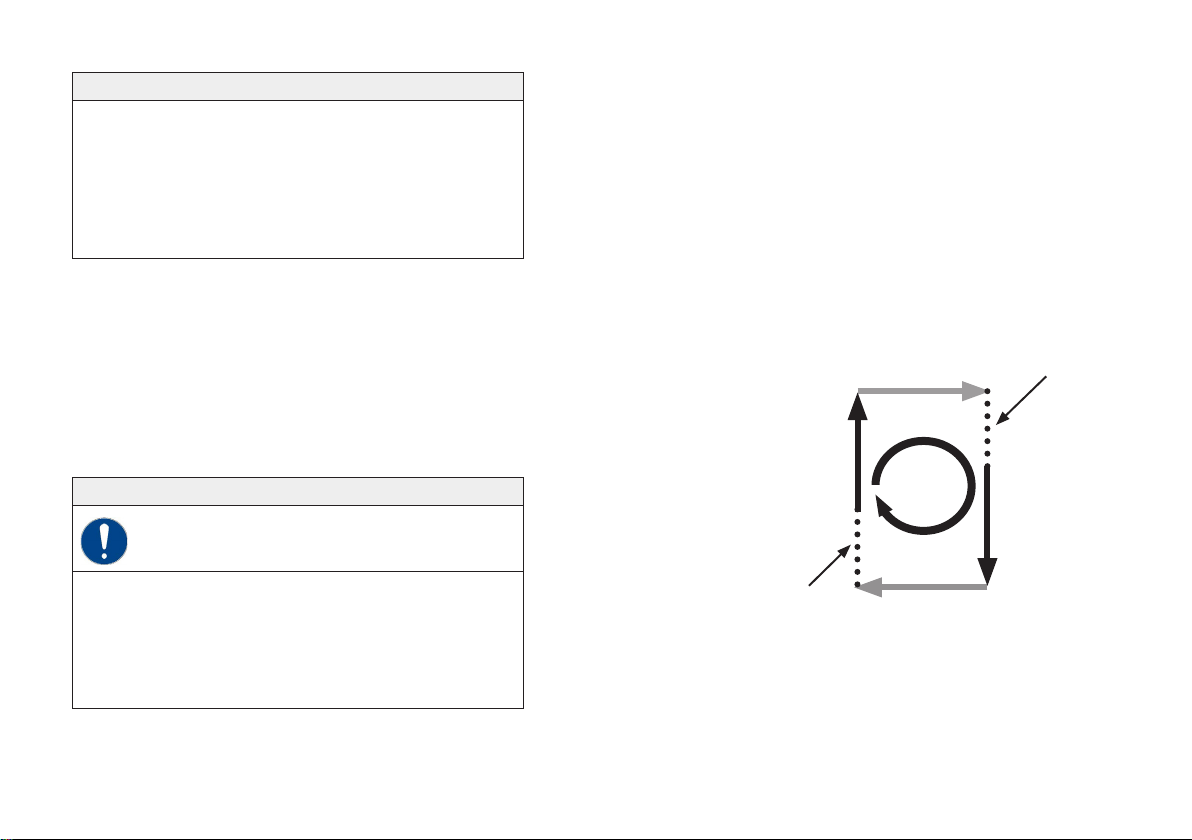
5.6 Diagram of programming mode
During the program-
ming phase, press the
[DOWN ▼] button
Light OFF
(random duration)
Light OFF
(random duration)
Light ON 30%
(3 s)
Light ON 100%
(3 s)
Light ON 30%
2 s = programming
phase
Light ON 100%
2 s = programming
phase
During the programming
phase, press the
[OPEN ▲] button
Duration
2 min.

Ⓒelero GmbH EN | 1312 | EN Ⓒelero GmbH
5.7 Asynchronous programming mode
(standard)
Asynchronous programming mode is the standard pro-
gramming mode. In asynchronous programming mode,
the switch-on duration of the ON times vary in case of
several receivers. After a few ON/OFF cycles, the illu-
minants of the receivers will no longer light up synchro-
nously. This will enable the hits for a certain receiver to
be set better.
Asynchronous programming mode is suitable for
• programming the rst transmitter
• programming an additional transmitter
• programming individual receivers in case of several
receivers ready for programming (e.g. several
receivers using one fuse).
Asynchronous programming mode (standard)
Operating procedure Result
1 Activate asynchronous
programming standby:
Switch the mains voltage
o and on again or press
the buttons [OPEN ▲] +
[DOWN ▼] + [P] simul-
taneously and hold them
down for 3 seconds on a
transmitter that has already
been programmed.
The receiver changes to
asynchronous program-
ming standby for 5 minu-
tes. Ready to receive the
programming button [P].
Asynchronous programming mode (standard)
2 Start programming mode:
Press the [P] programming
button for approx. 1 second.
Combio-868 LI changes
to asynchronous program-
ming mode and the light
source begins to change
intensity (between 100%
and 30%) periodically.
3Set rst hit:
Immediately after the light
source lights up, push
the [OPEN ▲] button or
[DOWN ▼].
• If luminous intensity is
high (100%) press the
[OPEN ▲] button.
• If luminous intensity is
low (30%) press the
[DOWN ▼] button.
Hit successful:
The light source goes out
briey.
Hit failed:
The light source does not
go out. → repeat action
"Set rst hit"!
4 Set second hit:
Prerequisite:
First hit has been set.
Immediately after the light
source with the opposin-
gintensity lights up, push
the [OPEN ▲] button or
[DOWN ▼].
• If luminous intensity is
high (100%) press the
[OPEN ▲] button.
• If luminous intensity is
low (30%) press the
[DOWN ▼] button.
Hit successful:
The light source goes out
permanently and indica-
tes that the programming
procedure is over.
Hit failed:
The light source does not
go out. → repeat action in
"Set second hit"!

Ⓒelero GmbH EN | 15 14 | EN Ⓒelero GmbH
• Programming can only ever be performed in one
selected channel.
• When programming is complete or after 5 minutes has
passed, the receiver will revert to normal operation.
• Programming mode can be stopped by pressing the
[STOP ■] button for at least 6 seconds.
• Up to 16 transmitters can be programmed.
• Several receivers can be programmed to one channel.
• If more than 10 receivers at once are in programming
mode, the transmitter changes to group program-
ming mode. Once programming is complete, group
programming mode has to be terminated manually in
the transmitter by pressing the [STOP ■] button for at
least 6 seconds.
5.8 Synchronous programming mode
Synchronous programming mode is a special program-
ming mode. In synchronous programming mode, the
switch-on duration of the ON times will be constant with
several receivers. Even after a few ON/OFF cycles, the
illuminants of the receivers will light up synchronously.
As a result, the hits for all participating receivers can be
set simultaneously.
Synchronous programming mode is suitable for
• programming an additional transmitter
• programming several receivers simultaneously to one
transmitter or one channel.
Synchronous programming mode
Operating procedure Result
1 Activate synchronous pro-
gramming standby:
Press the buttons
[DOWN ▼] + [P] simulta-
neously on a transmitter
that has already been pro-
grammed and hold them
down for 3 seconds.
The receiver changes to
synchronous programming
standby for 5 minutes.
Ready to receive the
programming button [P].
2 Start programming mode:
Press the [P] programming
button for approx. 1 second.
Combio-868 LI changes to
synchronous programming
mode and the light source
begins to change intensity
(between 100% and 30%)
periodically.
3Set rst hit:
Immediately after the light
source lights up, push
the [OPEN ▲] button or
[DOWN ▼].
• If luminous intensity is
high (100%), press the
button [OPEN ▲].
• If luminous intensity is
low (30%), press the
button [DOWN ▼].
Hit successful:
The light source goes
out briey.
Hit failed:
The light source does not
go out. → repeat action
"Set rst hit"!

Ⓒelero GmbH EN | 1716 | EN Ⓒelero GmbH
Synchronous programming mode
4 Set second hit:
Prerequisite:
First hit has been set.
Immediately after the light
source with the opposin-
gintensity lights up, push
the [OPEN ▲] button or
[DOWN ▼].
• If luminous intensity is
high (100%) press the
[OPEN ▲] button.
• If luminous intensity is
low (30%) press the
[DOWN ▼] button.
Hit successful:
The light source goes out
permanently and indica-
tes that the programming
procedure is over.
Hit failed:
The light source does not
go out. → repeat action in
"Set second hit"!
• Programming can only ever be performed in one
selected channel.
• When programming is complete or after 5 minutes has
passed, the receiver will revert to normal operation.
• Programming mode can be stopped by pressing the
[STOP ■] button for at least 6 seconds.
• Up to 16 transmitters can be programmed.
• Several receivers can be programmed to one channel.
• If more than 10 receivers at once are in programming
mode, the transmitter changes to group program-
ming mode. Once programming is complete, group
programming mode has to be terminated manually in
the transmitter by pressing the [STOP ■] button for at
least 6 seconds.
6 General control options
General control options
Key(s) Press Action
[OPEN ▲]
Short
Light source is o:
Set the last brightness
value
Light source is on:
Reduce dimming slightly
[OPEN ▲] Long Reduce dimming
[OPEN ▲]
2 x short
Set maximum user-dened
brightness value
(Standard: 100%)
[DOWN ▼]
Short
Light source is o:
Set the last brightness
value.
Light source is on:
Increase dimming slightly.
[DOWN ▼] Long Increase dimming
[DOWN ▼] 2 x short Set lowest user-dened
brightness value
(Standard: 10%)
[STOP ■] Short Switch o light source
[UP ▲] + [STOP ■]
Short
Save current brightness
value as the maximum
user-dened brightness
value
[UP ▲] + [STOP ■] Longer
than 6
seconds
Delete maximum user-de-
ned brightness value and
restore standard value
Ⓒelero GmbH EN | 1918 | EN Ⓒelero GmbH
General control options
[DOWN ▼] +
[STOP ■]
Short
Save current brightness
value as the lowest
user-dened brightness
value
[DOWN ▼] +
[STOP ■]
Longer
than 6 se-
conds
Lowest maximum user-
dened brightness value
and standard value
Operation with MonoCom Slide / VarioCom Slide
Slider Action
Swipe up and hold Reduce dimming
Swipe down and hold Increase dimming
Let go of slider Dimming stops
6.1 Adapting an illuminant
The factory setting of the Combio-868 LI allows a power
setting between 10% and 100%. The power cannot be
set below 10%. Some illuminants require more than
10% of the power at the lowest operating limit. This
could lead to the illuminant not lighting up yet a low level
of current owing regardless. In such cases the absolute
lower dimming limit should be adapted to the illuminant.
When adapting an illuminant, the absolute lower
dimming limit can be set or this can be reset to the
factory setting (10%).
In addition the Combio-868 LI can also be congured as
a light switch.
Requirement for adapting an illuminant
Operating procedure
Result
Activate adaptation
of illuminant:
Switch the mains voltage o
and on again or press the
buttons [STOP ■] + [OPEN ▲]
+ [P] and hold them down for
6 seconds on a transmitter that
has already been programmed.
Combio-868 LI changes to
illuminant adaptation mode
for 5 minutes. Within this
time, settings can be made
for the absolute lower
dimming limit.
Setting the absolute lower dimming limit
Operating procedure
Result
1 Set lowest user-dened
brightness value:
Using the [OPEN ▲] +
[DOWN ▼] buttons, set
the desired brightness
value and then briey press
the [DOWN ▼] buttons +
[STOP ■] button.
The set brightness value
is saved as the lowest
user-dened brightness
value.
2 Set absolute lower
dimming limit:
Press the buttons [OPEN ▲]
+ [DOWN ▼] briey.
The illuminant goes out.
The lowest user-dened
brightness value is set
as the absolute lower
dimming limit.

Ⓒelero GmbH EN | 2120 | EN Ⓒelero GmbH
Conguring the Combio-868 LI as a light switch
Operating procedure
Result
Press the buttons
[OPEN ▲] + [DOWN ▼] for
3 seconds.
The illuminant lights up. The
absolute lower dimming limit
is set to 100%. Combio-868 LI
now functions as a light switch.
Dimming will no longer work.
Restoring the absolute lower dimming limit
Operating procedure Result
Press the buttons
[OPEN ▲] + [DOWN ▼]
for 6 seconds.
The illuminant goes out. The
absolute lower dimming limit
of 10% is restored.
6.2 Deleting the programmed handheld/
wall-mounted transmitter
Deleting a transmitter does not eect the brightness
values set. Deleting a transmitter will cause the factory
setting to be restored.
Deleting the handheld/wall-mounted transmitter
Operating procedure Result
Press the [STOP ■] + [P]
buttons for at least
6seconds until the
status LED lights up red.
On the transmitter:
The selected channels are
deleted entirely.
On the receiver:
The individual transmitter
only is deleted from the
Combio-868 LI.
Deleting the handheld/wall-mounted transmitter
Operating procedure Result
Press the[OPEN ▲] +
[DOWN ▼] + [STOP ■]
+ [P] buttons for at least
6seconds until the status
LED lights up red.
On the transmitter:
The selected channels are
deleted entirely.
On the receiver:
All transmitters are deleted
from the Combio-868 LI.
7 Servicing
7.1 Cleaning
The components of the Combio-868 LI do not require
any special cleaning providing they are protected inside
an installation box against dirt.
7.2 Maintenance
The Combio-868 LI is maintenance-free.
7.3 General notes on troubleshooting
Fault Possible cause Possible solution
Receiver not
responding and
status indicator
of transmitter
ashing orange
No transmitter
programmed
Program the
transmitter
Receiver cannot
be programmed
Transmitter and
receiver systems
are congured dif-
ferently (ProLine1
or ProLine 2)
Adapt the system
conguration
Ⓒelero GmbH EN | 2322 | EN Ⓒelero GmbH
Fault Possible cause Possible solution
Receiver not
responding
and status LED
of transmitter
ashing red
1. No power
supply
2. Outside the
radio range
3. Radio receiver
defective
1. Check mains
voltage.
2. Change unfa-
vourable position
of receiver.
Change the
position of the
receiver's aerial
3. Replace receiver.
Receiver not
responding and
status LED of
transmitter not
lighting up
Battery in trans-
mitter is used up
Replace batteries in
transmitter
Receiver
reacting only
intermittently
1. Poor radio
reception
2. Inuence
from faulty or
non-approved
radio systems
1. Change the trans-
mitter's position.
Change the positi-
on of the receiver's
aerial
2. Localise the
source of the
interference and
rectify malfunction.
Programming lo-
gic of [OPEN ▲]
and [DOWN ▼]
buttons is in-
terchanged
[OPEN ▲]
and [DOWN ▼]
buttons incorrectly
programmed
Delete transmitter and
program correctly
7.4 Repairs
Damaged Combio-868 LI components may only be
repaired by the manufacturer. If necessary, contact
your supplier.
8 Decommissioning and disposal
8.1 Disassembly
WARNING
Risk of injury and damage due to unconnected
electrical cables.
• The electrical connection may only be modied by
qualied personnel.
• Only perform work on the electrical connection if it
has been disconnected from the power supply.
• Ensure that any connecting cables that have been
removed are not left unprotected (insulate).
If intending to remove the Combio-868 LI, proceed
as follows:
1. Switch o the power supply.
2. If the components have been installed in an installation
box, remove them.
3. Disconnect all connected cables.
8.2 Disposal
The Combio-868 LI must be disposed of in accordance
with the legal regulations for electronic devices.
The packaging must be disposed of separately in
accordance with the applicable rules for cardboard
and plastic.

www.elero.de
9 Certication and imprint
9.1 EU Declaration of Conformity
elero GmbH hereby declares that the Combio-868 LI is
in compliance with Directive 2014/53/EU. The full text
of the EU Declaration of Conformity is available at the
following Internet address:
www.elero.com/downloads-service/downloads
9.2 Legal Disclosure
elero GmbH
Maybachstr. 30
73278 Schlierbach - Germany
Telephone: +49 (0)7021 9539-0
Website: www.elero.de
WEEE-Reg.-No. DE 26410414
© elero GmbH 2021
All rights reserved. All copyrighted names and
trademarks mentioned (such as product names,
logos, business names) are protected for the
respective right owners.
Other manuals for Combio-868 LI
1
This manual suits for next models
1
Table of contents


