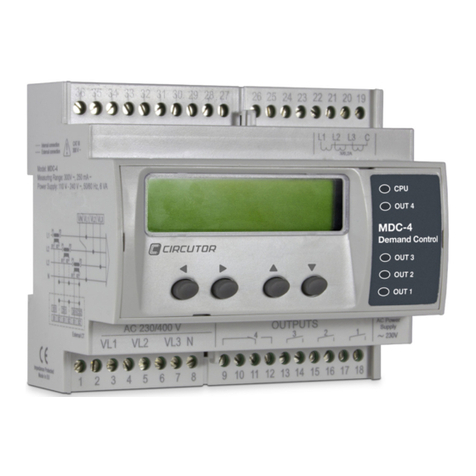
Elettronica ZETABi CP 400 User manual

Color duplex Quad
~-- User's Manual
Color duplex Quad

I,Technical Specifications
II, Connection
CI
VCR VCR MONITOR
NOUT OUT ACIDe
12V
o
---
Function
Quad display Quad. PIP,two plctme
Alarll1 Motlonalarll1,Videoloss alarm
BNC 1.0Vp-p 4 channels
Video input lCH playback video IIlput
BNCI.OVp-p Output recorder , output monitor
2CH Video output
System PAUNTSC
Refresh the picture 4X25 frame PAL 4X30 frame NTSC
Dwell time 0-99 seconds
Adjust Bnghtness, contrasL saturation , sharpness
Mirroring LeftlRlght
Alann time adjustable
Power consumption 8W
Gross weight lAkg
Net weight O 73kg
Dimension 194X132X39(mm)
OperationTemp -JO'C-+50'C

III, Function
l. Front Panel
EE nEl! llQOC ENTER
oo o o o o o o
Color QUADSystem 00000000
~oo ~ ~ ~ . T ~ ~
~ ~ ck ~ ~ ~ ~ ~
8The functions of front panel :
CD B3/MENUQuad/Menu
@ FREEZE/AUTO Freeze / Auto switch
@ ZOOM/MODE mode buttonlzoom button
@ ENTERJYCR Menu enter/playback
@ffi/ .. Picture l choose buttoniMove upward
@~ /.. Picture2 choosebuttoniMovedownward
(j) ~ /.. Picture3choosebutton/Moveto the left
@SiI / .. Picture4 choosebuttonIMoveto theright
2. Rear pane)
VCR VCR WONITOR
IN OUT OUT AClDC
12V
0000 000
L- VIDEOIN J ~
o
5

eThe functions of rear panel :
CD VIDEO IN Video input
(~ VCR IN playback input (connect the output of a recorder)
@ VCR OUT Playback output (connect the input of a recorder)
@ MONITOR OUT Monitor output (connect the monitor)
C§) Power input
IV, Operation.
I, Press "m/MENU" button, in any picture mode (except playback mode) it
can show quad mode. Press it for 3 ~econdsto enter menu mode.
2, Press" FREEZE/AUTO "button, in any picture mode, it can freeze the picture,
press it for anothertime to release.Press it for 3 seconds in any mode ,
except zoom and playback mode, it can enter auto switch. Press any key to
release.
3, Press "MODE/ZOOM" button, in any mode (except zoom and playback
mode)
( I) Pressthis button, it willdisplay:
8Pictures-PIP->2 pictures in picture->2 pictures l
(2) Press ENTERlVCR button to enter the setup of Main and sub-picture.
Press or~ to choose the picture. Press. orT to set the picture. Press
ENTER/VCR button to withdraw.
(3) Press MODE /ZOOM button, display PIP, repeat step (2), and set the
picture.
(4) Press MODE/ZOOM button again, display 2 pictures in picture mode.
Repeat step (2) set the positions of pictures.
(5) Press MODE/ZOOM button for 3 seconds to enter the zoom mode.
Press , ~, ~, T button to set the zoom position. Press VCR/ENTER
button to enter the zoom mode and press ZOOM/MODE button for 3
seconds to withdraw.

4, Press ENTER/VC R button to enter and press it for 3 seconds lo enter the
playback mode. Press ~,~, ~, ~ to choose the zoom picture. Press
ENTER /VCR button for 3 seconds IOwithdraw.
5, Press ffi ~ ,~ ,~ button to choose the picture.
V, Menu setup
l, Press"MENU"button for 3 secondsto entertheMain menu.Pressli. , T,
, ~ button to enter the sub-menu setup.
SETUP MAIN MENU
SYSTEM DISPLAY AlITO
SETUP SETUP SEQUENCE
CAMERA MOTION EVENT EVENT
SETUP SETUP SETUP REPORT
SELECT IENTER Il MENU IEXIT
~~~~
Note:
Date, Time, syslem (PAUNTSC)
Alarm time, Key lock, Reset MOTION
SETUP Motion alann set
SYSTEM
SETUP
DISPLAY
-SETUP
AUTO
SEQUENCE
CAMERA
SETUP
Title, Date, Time Plclure
Dosilion. Quadwireposition
AUlosequence lime set (0-99 seconds)
EVENT Alarm eventseI
SETUP
EVENT
REPORT Alarmrecord, seI
Title, Brightness, Comrast, Saturation,
Hue, Sharpness, Mirroring seI

2, Sub-Menu setup
(l) SYSTEMSETUP
SYSTEM SETUP
DATE: YY-MM-DD
04 -01 -01
TIME: HH: MM: SS
12: 00 : 00
SYSTEM FORMAT: PAL
SYSTEM IO NUMBER: 01
KEY LOCK: OFF
FACTORY RESET: NO
(2 )PACTORY RESET
FACTORY RESET
WARNING!
THIS SYSTEM GETS TO LOSE
THE CURRENT SETTING VALUE
ANO WILL BE INITIALIZED
WITH FACTORY RESET MODE
ARE YOU SURE?
y~S . NO
li] [!] SELECTIENTERI

./
(3) DISPLA Y SETUP
,.
DISPLAY ON SCREEN
@TITLE @DATE @TIME
SCREEN POSITION x: o
Y: o
BORDER COLOR
o BLACK
O GRAYI
O GRAY2
O WHITE
o OFF
l!] [!] ~ [gSELECT IENTERI DISABLEI MENU IEXIT
(4) AUTO SEQUENCE
AUTO SEQUENCETIME
QUAD : I SEC
CAMERA I : I SEC
CAMERA2 : I SEC
CAMERA3 :l SEC
CAMERA4 I SEC
I!J[!] SELECT ~[g ADJUST IMENU IEXIT

(5) CAMERA SETUP
CAMERA, I
CAMERA SETUP
TlTLE: CAMERA 01
BRJGHTNESS: O
CONTRAST: O
SATURATlON: O
HUE: O
SHARPNESS: O
MlRRORJNG: OFF
~~ SELECT~][E ADJUST IMENU IEXIT
D
(6) MOTION SETUP
MOTION SETUP
CAMERA
DETECTION TIME
ALWAYS OFF
ON Il, 00. 00
OFF : 12: 00: 00
SENSITIVITY : O
VELOCITY : O
MASKING AREA
[X, V]: (O, O)
~~SELECTBJIB ADJUST! MENU I EXIT
D

(7) EVENT SETUP
EVENT SETUP
BUZZERIREPORT G'lCONTROL
BUZZER HOLD TlME :05 SEC
REPORT HOLD TlME :60 SEC
ALARM POLARlTY : LOW
[!J[Y]~ [B SELECT IENTER IDrSABLE IMENU IEXIT
(8) EVENT REPORT
EVENT REPORT I OF 6 PAGE
LlST CLEAR NO
~~ SELECT ~[8 SELECT PAGE IMENU IEXIT
CHANNEL I 234
ALARM O O O O
LOSS G'I G'I G'I G'I
MOTlON O O O O
NO YY-MM-DD HH: MM: SS CH EVENT
l04-07-25 06, 44: 23 I LOSS
204-07-25 07: 33: 25 2 ALARM
304-07.26 _ 09, 49, 03 3 MOTION
.0.-O7-7 Il 56: 58 .LOSS
504-07-27 12, 54, 03 5 ALARM
6 04-07-28 17: 38, 43 6MOTrON
704-07-28 17, 56, 23 7 LOSS
804-07-29 \8: 26: 33 8MOTION
904-07-29 18: 52: 33 I LOSS
IO 04-07.30 19, 56, 03 2 ALARM

VI, Accessories
User's manual
Inputvoltage 220V 50Hz, output 12Vadaptor 51J
Inputvoltage IIOV60Hz, output 12Vadaptor D
vn, Warning
1, Please employ the professional person to install in order to
avoidunnecessary loss.
2, To prevent electrical shock, do not open the cover, no
user-serviceableparts inside.
3, Refer servicing to qualified service personnel. This item
guarantee for one year. Nature disaster and man-made 10ssare
not inc1uded.
Table of contents


