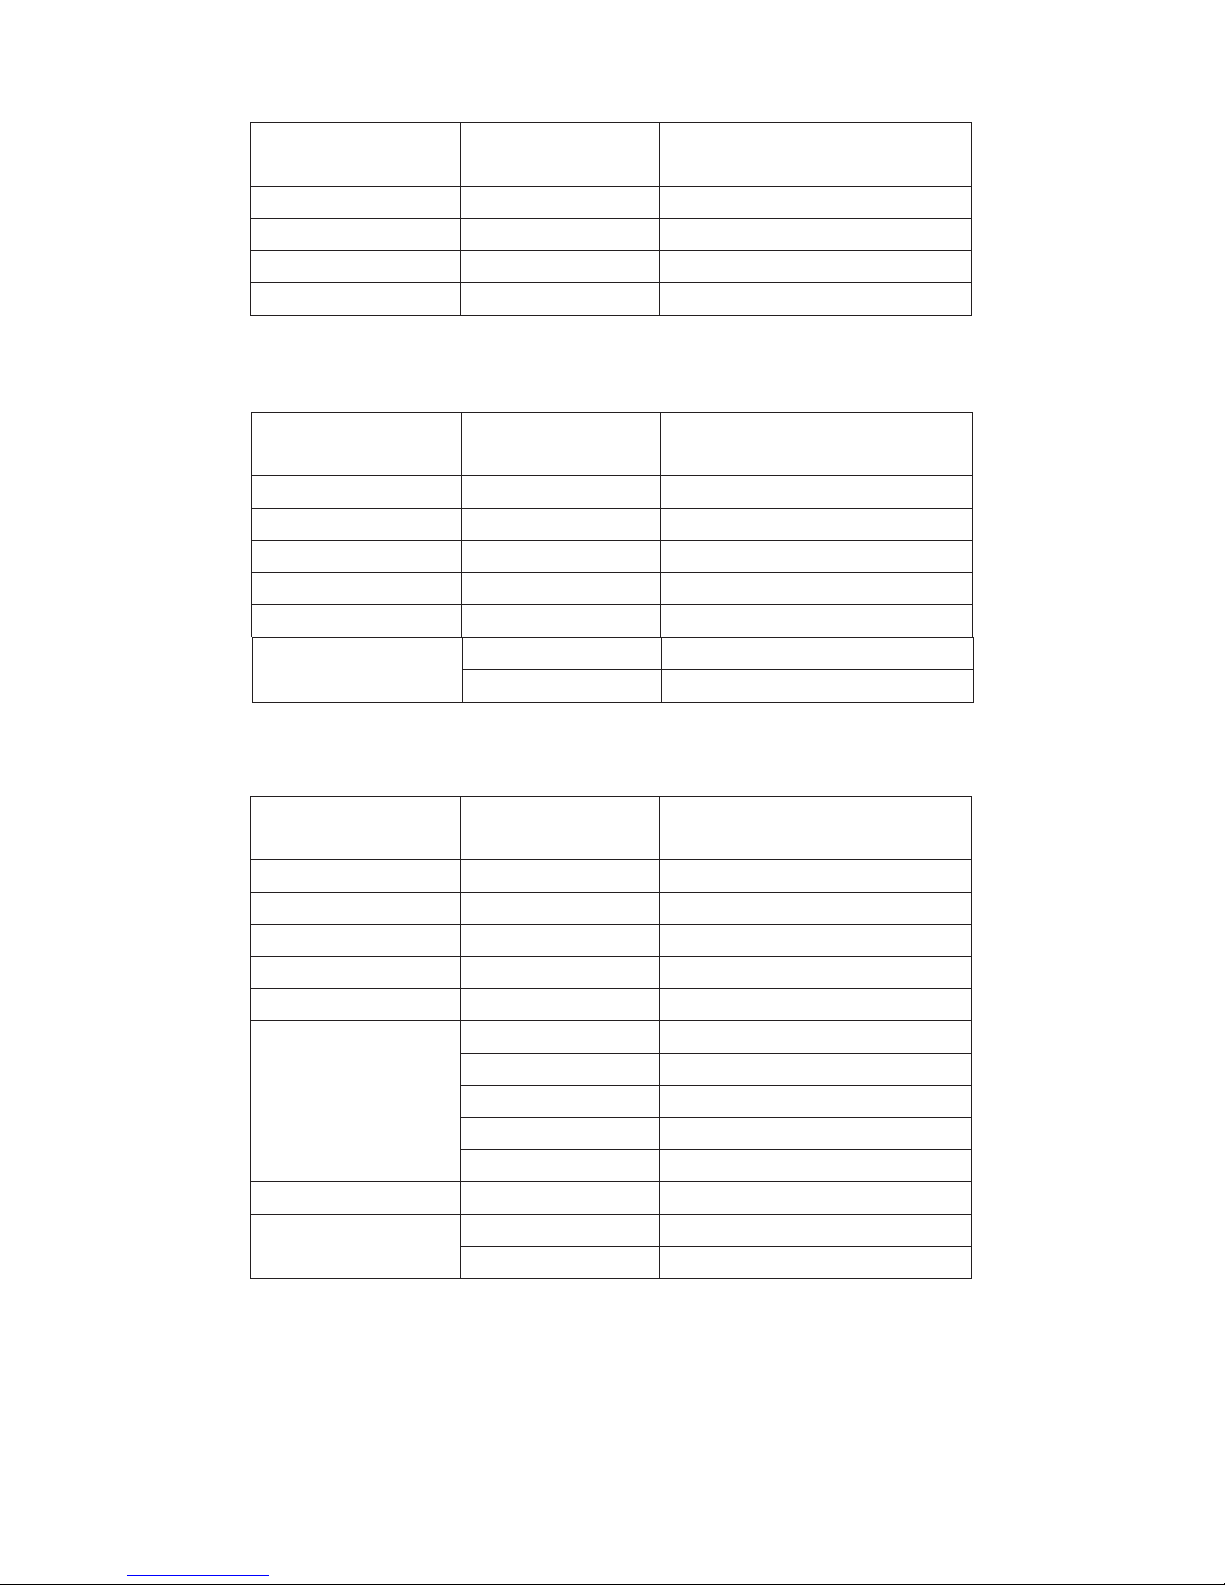
DMX Mode:
Operating through a DMX controller givesthe user the freedom to create their own programs tailored to their
own individual needs. The Mini Par UVW LED has 3 DMX channel modes; 4/6/8 channels. See the chart
below for the DMX traits and values.
1. This function will allow you to control each individual fixture’s traits with a standard DMX 512 controller.
2. To run your fixture in DMX mode press the MENU or UP and DOWN buttons until “Addr” is displayed and
press ENTER. “A.XXX” will now be displayed. “XXX” represents the current displayed address. Use the UP
or DOWN buttons to select your desired DMX address.
3. Press ENTER again to select your desired DMX channel mode. Use the UP and DOWN buttons to find
your desired DMX channel mode.
4. After you have chosen your desired DMX address and DMX channel mode, press ENTER and plug in the
fixture via the XLR connections to any standard DMX controller.
Jump Change Mode:
1. Plug the fixture in and press the MENU or UP and DOWN buttons until “ASC -” is displayed.
2. Press the ENTER button to adjust the Jump speed. Use the UP and DOWN buttons to adjust the speed.
The speed can be adjusted between “AS.00” (slowest) to “AS.12” (fastest).
3. After you have adjusted the program speed you can activate strobing by pressing the MENU button until
“FLAS” is displayed and press ENTER. The Flash can be adjusted between “FL.00” (flash off) to “FL.12”
(fastest flash).
Pulse Change Mode:
1. Plug the fixture in and press the MENU or UP and DOWN buttons until “ACC -” is displayed.
2. Press the ENTER button to adjust the Pulse speed. Use the UP and DOWN buttons to adjust the speed.
The speed can be adjusted between “AC.00” (slowest) to “AC.12” (fastest).
3. After you have adjusted the pulse speed you can activate strobing by pressing the MENU button until
“FLAS” is displayed and press ENTER. The Flash can be adjusted between “FL.00” (flash off) to “FL.12”
(fastest flash).
Fade Mode:
1. Plug the fixture in and press the MENU or UP and DOWN buttons until “FAde” is displayed.
2. Press the ENTER button to adjust the Fade speed. Use the UP and DOWN buttons to adjust the speed.
The speed can be adjusted between “FA.00” (slowest) to “FA.12” (fastest).
3. After you have adjusted the program speed you can activate strobing by pressing the MENU button until
“FLAS” is displayed and press ENTER. The Flash can be adjusted between “FL.00” (flash off) to “FL.12”
(fastest flash).
Sound Active Pulse Mode:
1. Plug the fixture in and press the MENU or UP and DOWN buttons until “SOUF” is displayed.
2. Press the ENTER button to adjust the sound sensitivity. Use the UP and DOWN buttons to adjust the
sensitivity. The sensitivity can be adjusted between “SF.00” (least sensitive) to “SF.12” (most sensitive).
3. After you have adjusted the sensitivity you can activate strobing by pressing the MENU button until
“FLAS” is displayed and press ENTER. The Flash can be adjusted between “FL.00” (flash off) to “FL.12”
(fastest flash).
UV Dimmer Mode:
1. Plug the fixture in and press the MENU or UP and DOWN buttons until “rL”, “gL”, “bL”, or “uL” is
displayed, and press ENTER.
2. Use the UP and DOWN buttons to adjust the output intensity. When you are finished adjjusting press
ENTER.
3. After you have adjusted the colors you can activate strobing by pressing the MENU button until “FLAS”
is displayed and press ENTER. The Flash can be adjusted between “FL.00” (flash off) to “FL.12”
(fastest flash).
©Eliminator® Los Angeles, CA. - www.EliminatorLighting.com