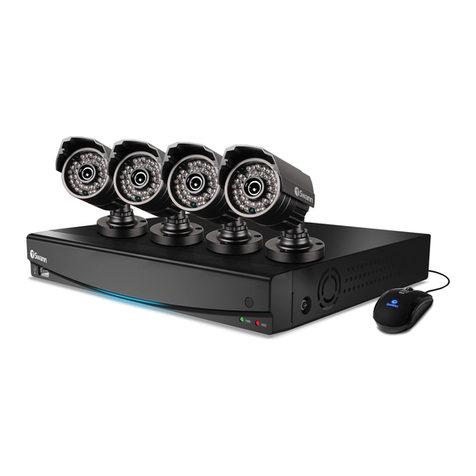
Elinz CCTDVR4CH-CCTBULx4 User manual

www.elinz.com.au
1300 881 773
Page | 1
Digital Video Recorder System
User Manual
4CH/8CH AHD DVR KITS
Welcome
Thank you for purchasing Elinz CCTV DVR Kit!
This user manual is designed to be a reference tool for the installation and
operation of your DVR system. Here you can find information about the DVR’s
features and functions. This user manual may contain inaccurate content due to
hardware and software upgrade. It is subject to change without prior notice.

www.elinz.com.au
1300 881 773
Page | 2
Important Safeguards and Warnings
1.Electrical Safety
All installation and operation should conform to your local electrical safety codes.
We assume no liability or responsibility for any fires or electrical shock caused by
improper handling or installation.
2.Installation
Please check carefully if all items are included in the package.
Make sure to turn off power to the DVR and cameras before completing
installation.
Use only the included power supply with the product to prevent damage.
Do not place objects on top of the DVR.
3.Repair Professionals
Please feel free to contact us if you need any assistance. All the examination and
repair work should be done by qualified service engineers.
We are not liable for any problems caused by unauthorized modifications or user-
attempted repair.
4.Environment
The DVR should be installed and kept in a cool, dry place away from direct
sunlight, flammable materials, explosive substances, etc.
This product should be transported, stored, and used only in the specified
environments as stated above.
5. Accessories
Before installation, please open the package and check to ensure that all the
components are present.
Contact the retailer that you purchased from, or Elinz directly if anything is
broken or missing in the package.

www.elinz.com.au
1300 881 773
Page | 3
Overview
Elinz DVR System is an excellent digital surveillance designed to increase the
security of your home, business, and family. Our DVR use a Linux based OS to
maintain reliable operation. It’s easy to use and can be set up in a relatively small
amount of time. It has various functions such as face recognition, 24/7 recording,
playback, and monitoring functionality.
Our DVR system adopts a high-quality design to achieve high levels of reliability
and security and can be configured to work locally, as well as on a network. With
the use of its built-in tools and OS, this device can also help monitor remotely via
mobile application and web browser.
By using industry standard cables and other functionality, our DVRs can be used
with a variety of different cameras and supports AHD, TVI, CVI, CVBS and IP
Cameras. It works with most standard security system cable setups. This product
can be used in a variety of locations such as banks, residential homes, factories,
warehouses and more.

www.elinz.com.au
1300 881 773
Page | 4
Features
Face Recognition
Our DVR provide a real time face detection and intelligent playback retrieval. Improves security
wherein you can assign one camera in your front door or office to detect faces and capture video
footage for fast and accurate playback retrieval.
Real-time Monitoring
Our DVRs provide an analog output port, VGA port and an HDMI port. You can use a variety of
monitors to display the DVR’s interface.
Storage Functionality
The DVR can support one hard drive up to 6 Terabyte to record multiple video and playback. Some
models are pre-installed with 1TB hard drive, so you can enjoy 24/7 day and night surveillance.
Compression Format
By utilizing advanced high efficiency video coding or H.265, the DVR can support multiple channels of
video and audio depending on your camera. Saving space on your hard drive with efficient coding by
encoding video at the lowest possible bit rate while maintaining a high image quality level
Backup Function
The DVR supports backup of recorded media and settings via internal HDD. With built-in USB port
gives you option of backing up and transferring your recorded video footage with a USB flash drive or
external hard drive.
Advanced Playback Function
Our DVRs support independent real-time recording for each channel and can support search, fast
forwarded playback, recorded searches, and downloading of videos and screenshots. The DVR can
also playback in slow motion, backwards, and frame by frame as needed. When recording, the DVR
shows a date/time overlay to ensure accurate viewing of events when they occurred
Remote Access
Our DVRs have built-in tools to allow for remote real-time app monitoring, remote recording of
searches, and remote PTZ control if you are using PTZ camera
Advanced Network Protocol Support
The DVR is DDNS compatible and includes functionality for use with DDNS protocols to allow remote
and local connection.

www.elinz.com.au
1300 881 773
Page | 5
What’s in the box?
We do everything we can to ensure that your order arrives in a complete and
undamaged condition. Please check all products and accessories according to this
packing list. Any missing or damaged items please contact us.
CCTDVR4CH-CCTBULx4
CCTDVR8CH-CCTBULx8
CCTDVR8CH-CCTBUx4-CCTDOx4
1x DVR
1x DVR
1x DVR
4x Bullet Camera
8x Bullet Camera
4x Bullet Camera
1x USB Mouse
1x USB Mouse
4x Dome Camera
1x 12V2A Power Supply
1x USB Mouse
1x 12V5A Power Supply
2x 12V5A Power Supply
1x 12V2A Power Supply
1x User Manual
1x User Manual
2x 12V5A Power Supply
4x BNC Video Cable 60ft
8x BNC Video Cable 60ft
1x User Manual
1x 1-4 Splitter Cable
2x 1-4 Splitter Cable
8x BNC Video Cable 60ft
2x 1-4 Splitter Cable

www.elinz.com.au
1300 881 773
Page | 6
Hard Drive Installation and Removal
*Please note that hard disk drive (HDD) are pre-installed for some packages. Skip this step if you purchase DVR
system with HDD.
1. Turn off then unplug your DVR
from power supply, unscrew
and remove the top cover.
2. Disconnect/Connect the HDD
power and data cables from
DVR to the corresponding
ports on you HDD.
3. Align the HDD to the chassis
baseplate and fasten using the
screws included.
4. Put the cover back and tighten
the screws
Back Panel Interface
1. Video In
2. Audio Out
3. HDMI Port
4. VGA Port
5. Audio In
6. Ethernet Port
7. USB Port
8. Power Input


www.elinz.com.au
1300 881 773
Page | 8
System Setup
Power On
After you finish connecting the system. Connect the included AC power cord to
the power adapter and plug into an electrical outlet. The power supply indicator
light will turn on and you will hear "Beep" sound and the DVR will turn on after
self-test.
Power Off
There are two methods to turn off the DVR. One is soft closedown. Right click to
pop-up menu bar, click the power button marked to shut down the system; the
other is hardware power off: plug off the power supply to shut down the device.
Admin Password Setting
After you finish connecting the system and powering on your device you will see
the setup wizard window. To set a new password, you just need to leave the
password for Admin blank and set up new password. Click Next to continue.
Notes:
To ensure the safety of your device, please store your admin login password in a safe place.
To ensure that your DVR works constantly and properly, it's recommended to use an UPS, Uninterruptible Power Supply,
for continuously operation.

www.elinz.com.au
1300 881 773
Page | 9
After the device power on, pls set your password before operation and
configuration, system will follow the corresponding commands according to the
user authorization, there are 2 users as default, one is admin and the other is
guest. Password is Null for admin.
For your system security, pls modify your password after first login and in the
future, it won’t have this prompt message again. After you set the password, pls
enter the password to login.
Click "Next" to enter P2P cloud service by scan the following QR codes. You need
to download and install PS6Pro app first and scan the UID QR code to add the
device.
Download your App
Scan below QR code to download P6Spro App for both Android and IOS.
P6Spro App is compatible with Android 4.1 and up. iOS 9.0 or later. Also
compatible with iPhone, iPad, and iPod touch.
P6SPro App is a video transmission software based on P2P technology, which
supports multiple types of devices such as IPC/NVR/DVR. The main functions
include device management, video preview, video playback, etc. Available for
Android and iOS devices.

www.elinz.com.au
1300 881 773
Page | 10
Register for an Account
1. Click P6SPro icon to run app and select Sign Up.
2. Tap to select your region.
3. Select Oceana.
4. Select Australia.
5. Click next.
6. Enter your email address and set a password then click Register.
7. Login to your account and click the icon to add your device.
8. Select QR code and scan the QR code to get the DVR UID.

www.elinz.com.au
1300 881 773
Page | 11
After adding your device, click "Next" enter the interface for configuring network.
We have set DHCP Enable to get an IP address automatically (router should have
DHCP service) Click "save" to finish the whole Wizard configuration.
Record Video
Before recording please make sure to format your Hard Disk when first log in by
[Main menu] > [HDD Manage] > [Setup]. After formatting, pls set the hard disk as
read-write hard disk via [read-write hard disk setting]
Click [Main menu]> [Record]> [Schedule] to set recording.
Chose the corresponding channel to set the channel. Choose all options to set the
entire channels.

www.elinz.com.au
1300 881 773
Page | 12
[Record Mode] Click when preview to set video status: there're 3 status:
Schedule, manual or stop.
Schedule: Record according to video type or time section
Manual: After changing to manual the corresponding channel will be recorded
the whole day 24 hours.
Stop: The corresponding channel will stop recording
After you choose the configuration mode, you can set the recording type and
time section.
If your system is without hard drive or install hard drive unsuccessfully, it cannot
be able to record and playback video. The equipment supports 500GB to 6TB
hard drive; Size requirements are presented as follows: SATA, 3.5”
Face Detection
Main Menu > Channel Configuration > Smart > Face
•Check “Enable” to activate face detection.

www.elinz.com.au
1300 881 773
Page | 13
•Click “settings” to set the face region
•Blue frame for setting the minimum detecting region; green frame for the maximum detecting
region.

www.elinz.com.au
1300 881 773
Page | 14
•Click “detect active all day” and select “customized detect schedule”
•Click “settings” and pop up a window to set the schedule

www.elinz.com.au
1300 881 773
Page | 15
Notification settings of face detection as below:
1. Full screen of face detection
2. Buzzer of face detection
3. Snapshot of face detection
4. Alarm out of face detection
5. PTZ of face detection
6. Email notification of face detection

www.elinz.com.au
1300 881 773
Page | 16
Face list
1. Enter preview interface, right click for the short-cut menu as below:
2. Click “Face list” option on the short-cut list as below:

www.elinz.com.au
1300 881 773
Page | 17
Or directly click “face list” button on the toolbar as below:
Face list shows all alarm details of face detecting from any channel, including alarm type,
channel no., trigger time and so on. Double click any clip for playback of alarm event.

www.elinz.com.au
1300 881 773
Page | 18
Line Crossing detection
Main menu > channel configuration > smart > line crossing
•Enable “line crossing” function
•Click “Settings” button

www.elinz.com.au
1300 881 773
Page | 19
Line Crossing setting menu includes line No., Sensitivity, direction, clear the line, clear all lines and so on. Check the
below picture:
For example, select Line Crossing 1, Sensitivity 80, Direction A<->B, click 2 points to draw the line and save, then exit
as below:
After save, preview interface shows the crossing line as below:
Notes:
1. Can set max. 4 crossing lines simultaneously
2. Trigger sensitivity can be adjusted between 0-100
3.Can set more directions to trigger line-crossing:
A ->B means trigger from A to B direction only;
A < - >B means trigger from either A or B direction;
B -> means trigger from B to A direction only.
4. Click “clear” to clear any single line or “clear all” to clear all lines.

www.elinz.com.au
1300 881 773
Page | 20
Trigger line crossing
The object is going to enter the detecting region. At this time the alarm is not triggered:
Once the object touch the crossing line, the alarm is triggered:
When the object is over the crossing line, the alarm notification continues:
Now you can see line crossing trigger and linked smart record icons at the top right corner
This manual suits for next models
2
Table of contents
Other Elinz DVR manuals
Popular DVR manuals by other brands

Ildvr Digital Technology USA
Ildvr Digital Technology USA IL7104HV-A user manual

Security Camera King
Security Camera King HD-CVI Mini Series quick start guide

Novus
Novus NVR-6316-H1-II user manual

Vista
Vista Optio OPNVR Series user guide

Motorola
Motorola DCT3080 user guide

HIK VISION
HIK VISION DS-8100HFI-ST Series quick guide